Have you ever wanted to automate your home?
How about a bit of robot or maybe just create a media center for all of your content.
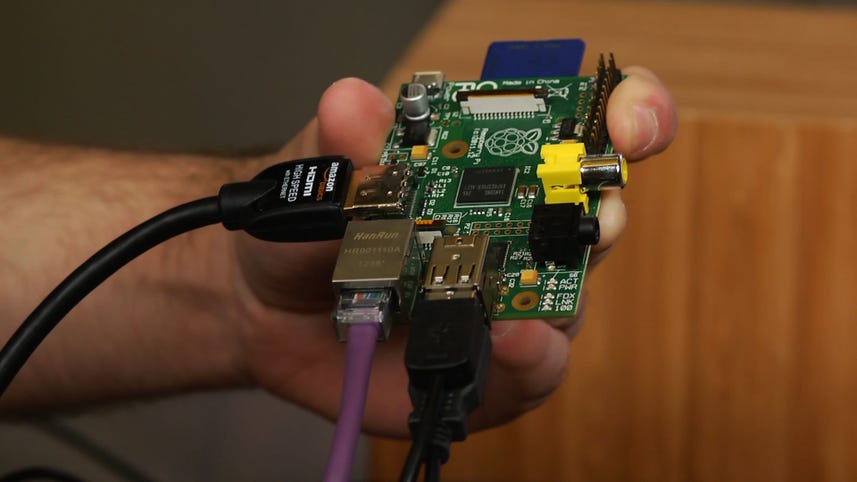
All of these projects start with this $35 microcomputer known as the Raspberry Pi.
Originally design to teach students about computer science.
This single-board computer has become one of the hottest items for tech hobbyist and is now powering a number of
DIY projects.
The first think you'll notice is the size.
The Raspberry Pi is slightly larger than a credit card.
It ships as is and does include a case, a power supply or even a hard drive.
The device is equipped with a single-core 700 MHz processor and has 512 megabytes of RAM.
It also includes an HDMI port and analog composite output for older TVs, a 3.5 mm headphone jack, two USB ports and SD card slot and Ethernet port.
Our cheaper model is available for $25 that removes one of the USB ports, the Ethernet port and cuts the RAM in half.
For $10 extra, I highly recommend going with the $35 model B, that's what we have here.
To minimize the risk of damaging the device with electrostatic discharge, it's best it hutched a grounded piece of metal before hand with the Raspberry Pi.
You should also avoid handling it while it's powered on.
Different projects required different components.
But the basic
requirements include 48 by class 4 SD card or better for storage and a power supply capable of producing 700 mAh at 5 volts.
In most cases, the smartphone or tablet charger should get the job done but make sure to check the output on the charger first.
Other items you'll need include a USB keyboard and the mouse and Ethernet cable or USB wireless adapter, a monitor and HDMI cable and if your computer doesn't have one, you'll also need an SD card reader.
I also recommend using a
USB hub in case you will connect more components like a flash drive or external hardrive.
But a word of caution, the more items you have connected, the device will need more power.
For more information about the Raspberry Pi and to learn how to install an operating system on the device, be sure to watch my next video and check out my article on howto.cnet.com.
Like always, feel free to reach out to me on Twitter with questions or comments.
I'm Dan Graziano for CNET, thanks for watching.