Tablets and laptops can be great for browsing the web and playing games on the go, but nothing will replace a desktop computer for the ultimate gaming experience.
You can walk into your local Best Buy and purchase a computer from companies like Dell, HP, and Lenovo for around 300 bucks.
But if you want a truly high-powered machine and aren't afraid of getting your hands dirty, nothing beats building your own.
I'm Dan Graziano and today I'm gonna teach you how to build your own computer.
Here you have all your components, the motherboard, CPU, graphics card, RAM, hard drive, DVD drive, and power supply.
The motherboard is the heart and soul of your system.
It pumps commands to every component while the central processing unit acts as the brains.
The graphics processing unit controls 2D and 3D graphics.
RAM is your computer's memory.
The hard drive stores all your files, and the power supply powers the entire thing.
For a complete
rundown of these components, visit my 3-part guide in building your own computer.
Now that you have the basic understanding of each component, let's get started.
There are numerous ways to build a computer, but we're going to opt for an external process.
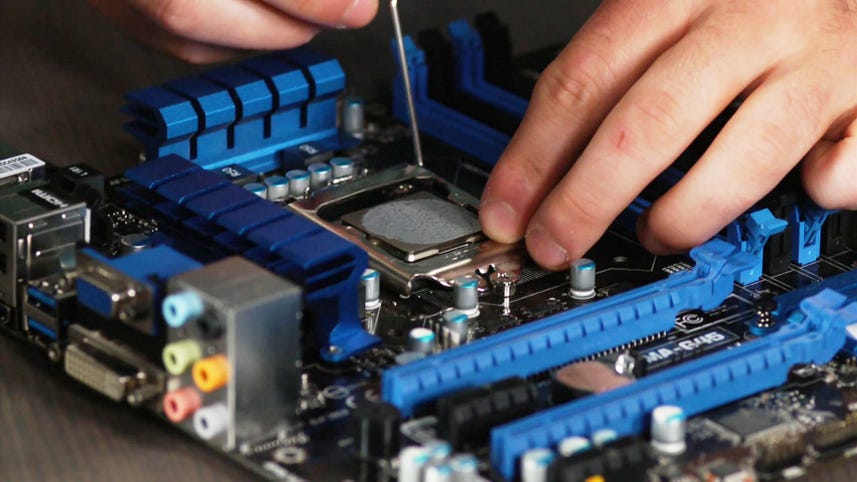
Take your motherboard and place it on a non-conductive surface such as a wooden table.
Lift the LGA socket, remove the protective cover and gently place the processor inside without applying any pressure.
A large fan comes with the CPU.
This is called a heat sink.
To attach it simply find the power connector, rotate it accordingly
and push down the pins.
Next pull back the clips on the RAM slot and place your cards inside.
Push down until you hear a click, but make sure the RAM cards aren't located next to each other but rather in slots with the same color.
Set the motherboard aside for a little as we move on to the case.
Take the power supply and line it up with the corresponding screw sockets at the back of the case and secure it in place.
There are 2 types of power supplies, modular, which has removable cords and non-modular with attached cords like so which is why you want a modular model.
Next up
is the motherboard.
Line it up and screw it into place.
Then pull back the PCI clips and click the graphics card into place.
Both the hard drive and DVD drive slide into place and can be secured with screws.
Once everything is installed it's time to bring the system to life.
Your power supply will come with either a 24-pin or a 20+4 pin adaptor.
This plugs into the motherboard along with a 4-pin
connector which can be found in the CPU.
Plug 2 of the 6-pin PCI connectors into the back of the graphics card.
Each drive must also be connected to a SATA power cord with the smaller cord being plugged into the motherboard and each fan must be connected to a 4-pin Molex adapter.
The power button and LED light will either be a 1- or 2-pin connector and they'll plug into the first 8-pin header on the motherboard while the 8-pin front-facing ports plug into their corresponding sockets.
Close the system up, plug
it in and if everything is installed properly it should power on once you hit the button.
For more in-depth guide on building your own computer including detailed steps for installing an operating system, be sure to check out my 3-part article on howto.cnet.com.
For CNET, I'm Dan Graziano.