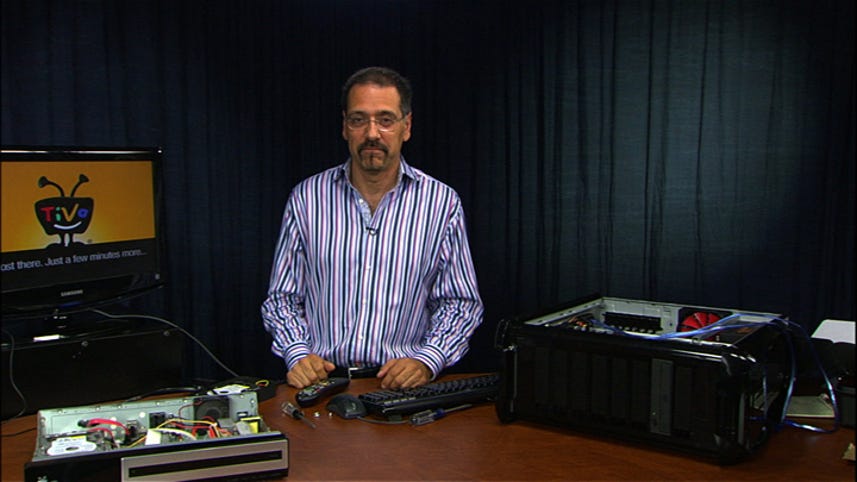
>> [Brian Cooley:] Sure, you can easily add capacity to your HD TiVo with the approved external hard drive [cash register sound], but what if you don't want the man dictating that you must use the Western Digital MyDVR expander? I'm Brian Cooley. In this hack we'll show you how to use just about any external SATA drive to add major space to your HD TiVo.
^M00:00:20
[ MUSIC ]
^M00:00:29
Now first thing I want you to do is take your TiVo, disconnect it from your television, and disconnect it from power. Then you're going to remove the screws on the back. It's a Torx driver that does that. Torx is this little funny star-shaped bit that looks like a Philips that has too many little flanges on it. T 10 is the size. Now when you're opening up anything like this, it isn't just the fact that it's not plugged in, but the fact that it has capacitors that make it dangerous. So don't touch any of these power caps, these big things on the power supply, they're still full of juice and can knock you on your butt. Now I want to get this drive out of here, because we have to marry this to the external drive that we're going to be adding. So again being careful with your Torx 10 tool, get in there and unscrew that carrier that it sits on. You might want to magnetize this thing also to get that screw out of there. Give it a good whack on the side of a marble counter or a piece of concrete sidewalk. And here's your combo SATA connector, which is both power on the left, data on the back, that whole thing comes off of there like so. And there's your drive. You can leave this little sled that it lives on attached to it. Now the next thing to do is to take your external SATA drive and take the bare drive out of the case. I'm taking off these lids, and as you can see, I'm going to void the warranty. Bear that in mind. So there goes that, and now I'm going to crack the case on this side as well. And again it'll vary with every drive that you use, but that's going to be how I get to my bare drive. And I've marked this one, in fact, with a Sharpie or a pen or something as your external just so you don't mix these two up. Now my two drives are over here. They both have to be connected to data and power while the PC is off, and then we're going to get in there and we're going to work on them. So take these two SATA data cables and connect those. They only go one way because SATA data cables are keyed. One there -- and there goes one right there. Okay, now the power. I've got one SATA power over here. Again it's keyed so you can't put it on wrong. And the other one I'll put up here. Be careful when you're laying a drive on your computer like I'm doing. Don't short things out. So I'm going to get a piece of paper or a piece of cardboard to set on here so I don't have metal touching metal. Now notice I haven't disconnected my system drive because the machine still has to boot. I just added these two drives to two unused SATA ports. Now I've already installed WinMFS on here, which is our utility; it's going to do several drive operations within Windows to get these guys to see each other. Now go to file, select "drive." Also click "show mounted drive" over here on the bottom right to show every drive that is mounted. And now you can see we've got two drives to choose from. What I want to do here is go to the first drive and make sure it says that the A drive is my TiVo drive. It says right there, format TiVo. Good, and check the capacity. It should match what's on the drive, and I look over there and I see that it does. Now down here in the B drive. Select that because that says you're going to be adding a drive to the system, which in this case is going to be our 750 gig that does not say it's TiVo-formatted. Okay, that's good. Now we'll hit "select." Now go to tools, "MFS add," and say "yes," and cross your fingers, 'cause that kind of warning's always nervous, but you're doing the right thing. Okay, now I'm going to close out of WinMFS. I'm going to shut down my system, and I'm going to pull these drives and put them back into the TiVo. Starting with my old internal drive, I want to put that back in the TiVo chassis first. Then reconnect your multi-adapter here that does power and data. Now take the external drive off of here. I'm going to put it back into the external enclosure enough to hook it up and test it. Okay, now we're booting up our TiVo with everything connected and powered up. When it's done you'll go to your settings screen. You'll see all the specs there, and you'll see the new added capacity of the two drives. We had 160 in there. We just added 750. You don't get the full capacity because there's formatting losses in there, but still we're somewhere in the vicinity of 900 gig on this guy. That's an enormous jump for an inexpensive external drive addition and what, maybe an hour of our time? Here's a note though: you've got to keep this external drive powered up and connected forever to this TiVo or you'll lose any new recordings made since the upgrade, so be aware of that. Okay, that's how you're going to hack your TiVo to add just about any external E-SATA drive you want. Do it for a very efficient price, and just a little bit of elbow grease. Hope you enjoyed it. Go do it to yours.
^M00:05:06
[ MUSIC ]