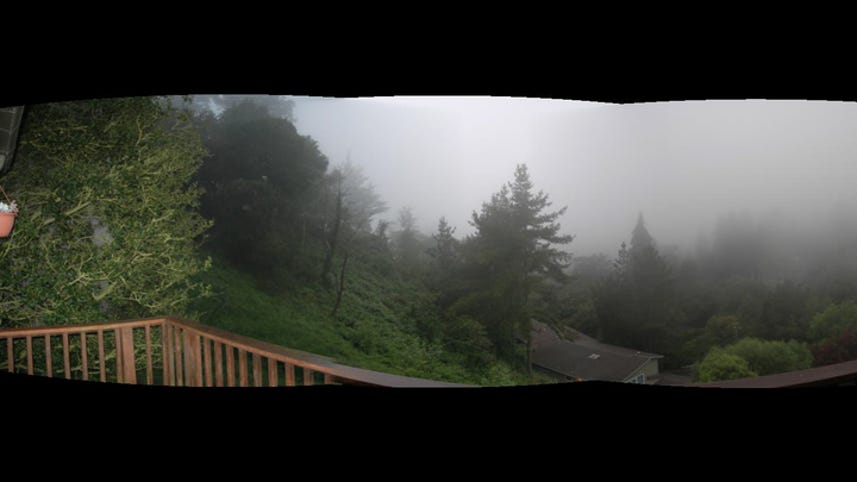
Hi, I'm Molly Wood from CNET.com, and I�ve got some great tips today for taking and stitching
together panoramic photos � without dropping several hundred dollars on Photoshop.
Even if you�re using Photoshop, though, let�s start with some tips for taking a great panoramic
photo. Now, some digital cameras actually have onboard panoramic modes � on Canons, for
example, it�s called Stitch Assist. But you can�t always trust these photos to come out right, and
sometimes you�ll take a great series of images but find visible stitch marks between them. Most
photographers recommend that you only use the panorama mode if it ALSO stores each photo
separately, so that you can stitch it together yourself, later.
First, the shooting tips. Make sure your shooting settings are consistent. Manual exposure will
keep the camera from auto-adjusting white balance and color settings between shots. Or, set
your camera to another automatic setting, like �Twilight� or �Daytime,� so that it will at least
do consistent light balancing.
Obviously, you don�t want to change your zoom or anything like that.
Find the element that you want to be the center of the image, and use it to get the focus and
zoom right. Then, pan over and start shooting. Stay in the same place, and pivot, keeping your
arms and the camera steady.
For a horizontal panorama, shoot left to right, in a steady row, and try not to tilt the camera �
that�ll make it harder to adjust later. For a vertical one, shoot top to bottom.
Look for what are called �anchor points� as you shoot � specific elements that are in focus and
easy for stitching software to pick out.
Overlap each shot you take � and overlap a little more than you think you need to, maybe as
much as 30 percent. This will also make editing easier, because if you have fuzziness around the
edges or other unwanted items, you have some flexibility.
Watch for moving objects, like birds, cars, people, or other elements of the scene that could
change, and try to minimize them if you want a consistent image.
Ok, now you should have a series of photos that you�re ready to start stitching. Now, if you do
have Photoshop CS or even Photoshop Elements, which you can find for about 80 dollars, a
feature called Photomerge does a pretty impressive job of stitching photos and correcting color
discrepancies.
But there are also some free programs that do a pretty good job. For Windows only,
unfortunately, the simplest thing to use is Autostitch. You can find it at Autostitch.com. Once
you download the free, demo version, you literally just double-click the .exe file to open the
app, click File, then Open, and then select a series of photos. And just like that � it stitches
them together. If you�ve done a good job with your photo-taking, you�re pretty much done. At
minimum, you�ve got a stitched-together image that you can save and work on in a free image
editor like the Gimp or Google�s Picasa.
If you�re on a Mac, or want a Windows alternative, you can use Hugin. No, I don�t know if that�s
how you pronounce it. Hugin is a little more complicated to use, but it lets you get very
granular in terms of creating control points, and if you play with it long enough, you can get
pretty good results.
There are a lot of pretty easy-to-follow tutorials at the Hugin site and also at Lifehacker.com.
And if you�re looking for something Web-based, Windows Live Photo Gallery does simple
stitching, again for Windows users, and so does MagToo.com, for anyone.
And no, none of these will create photos as cool as the Gigapan Imager that David Bergman
used to create the one-thousand-four-hundred-seventy-four megapixel panorama of the Obama
inauguration. But you�ll get there.
And that�s it for this CNET TV How-To! I'm Molly Wood, and you�re welcome.