[MUSIC]
Sometimes the most thoughtful gift is one you make yourself.
For a gift that anyone will enjoy but takes a bit of nerdy electronic skills to make.
I'm gonna show you how to make your own candle flicker LED tilt lamp.
This is based off of David Backers design for the dry lampae.
For my version we're gonna use a glass jar, some copper wire, some stranded wire, a candle flicker LED, CR2032 watch battery, watch battery holder.
And a tilt switch.
This is the real secret ingredient here.
These things are a lot of fun to use.
So for around 20 bucks you can get enough of these supplies to make about three or four of these lamps.
To start things off, we're gonna take a length of copper wire, and we're gonna mold it around into a U shape around the back of the battery holder here.
And the next step is we're gonna solder the battery holder.
Onto the wire.
[MUSIC]
Finally, we're gonna flip it over, and that negative terminal that's on the other side, we're gonna solder some stranded wire to that, and then just leave it alone.
[UNKNOWN]
Give it a little tug.
Make sure it's nice and secure.
All right.
That looks good.
So that's gonna get our power everywhere it needs to go.
Next up, we got the tilt switch.
My favorite little switch.
We're gonna take one leg.
We're gonna bend it down.
We're gonna wire this end so that the circuit will turn on.
When the jar is turned upside down.
Find the place midway up on one of the copper wires and give it a snip.
Now, solder one of the two feet to the bottom of the clip section.
Then take the other foot, and solder it to the length of copper that you just clipped off.
[MUSIC]
Alright.
It's working.
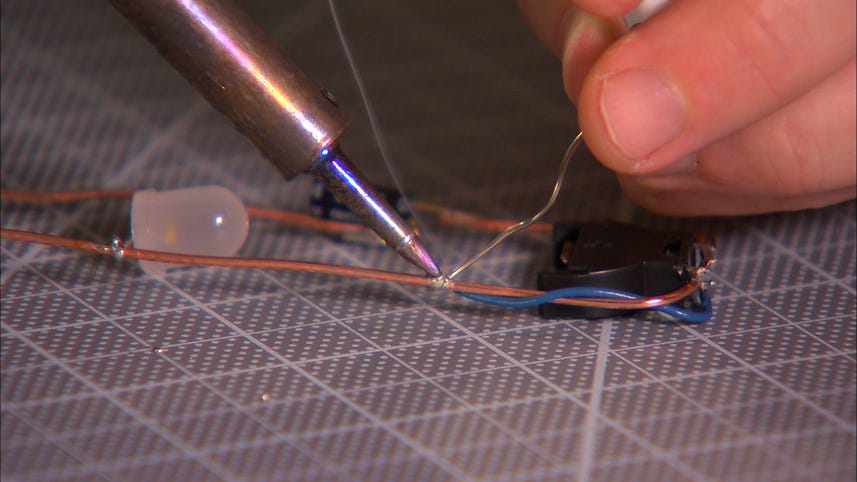
Now we can sawder on the LED.
Take the longer of the two leads from the LED and wrap it around the copper wire coming from the tilt switch.
That's going to be our positive side.
Then wrap the other lead around the opposite side.
Sawder both of them in place.
And clip off the extra wire.
Now that the LED is there to hold the shape, I'll go back up to the battery holder and take the stranded wire from the negative terminal, and use the exposed bit to wrap around the copper that's opposite from the [UNKNOWN] switch, and then fodder that down.
[MUSIC]
With that done, clip away that copper that connects the negative side to the positive terminal, and now you have a complete circuit.
[MUSIC]
Now, for the very last step, we're going to mount it inside the jar.
To do that we're gonna superglue it down to the jar lid.
Now, we're gonna use a big heaping glob of superglue, not just cuz it's gonna hold it in place better, but cuz it's going to act as an insulator and keep the circuit from interacting with the metal of the lid.
All right.
Now that we've got everything glued in place, you notice we have this extra length of copper here on the bottom.
We can either just clip that off so it'll fit in the jar or you can have some fun with it.
You can bend them around, make some interesting designs.
Just make sure the ends of those copper pieces don't touch each other.
All right.
Now, let's give it a test.
Let's pop in a watch battery.
Pay close attention to which side's positive and which side's negative.
All right.
Let's **** this into the jar and give it a test.
Boom.
So there you go.
Now you've made your very own LED tilt lamp.
A very simple design, easy project for beginners.
I really like that it's got that candle flicker LED in there to give it a cool vibe.
Nice gift for kids, too.
Makes a great night light.
Or make a bunch of them to have around the house.
They're inexpensive to make.
Have fun with it.
[NOISE]