[ Music ]
^M00:00:09
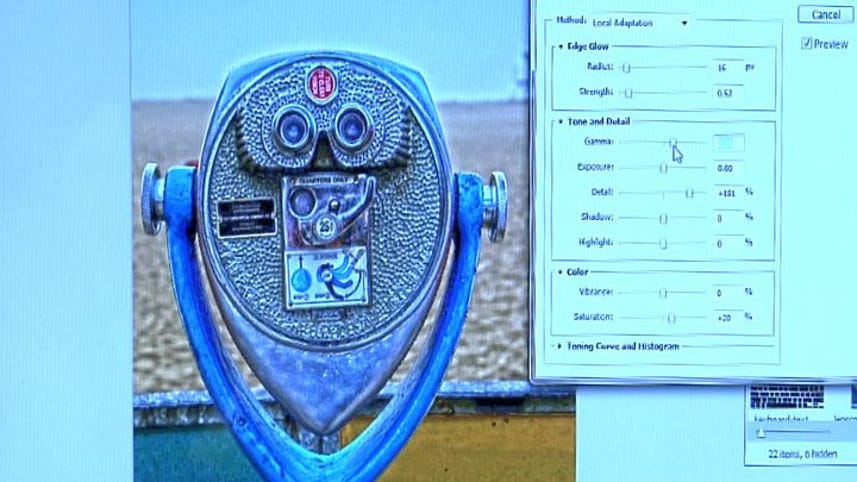
>> High dynamic range imaging is a fun but potentially complicated way to create a constrasty vibrant photo. And the new Photoshop CS5 offers two tools for bringing HDR to your picks. I am Seth Rosenblatt for CNET.com, and in this how-to video, I'll be showing you some of the basics in Photoshop CS5's two HDR tools -- the enhanced HDR merging tool and the new HDR toning tool. For the traditional HDR merge, you need to have three photos in raw of the same scene with three different exposures. However, in the new version you can actually use far more than just three images, as long as the exposures are different. For proper HDR exposure times, go to this link for more information. Once you've got your images, go to the mini bridge in CS5, click on your three images, and then choose Tools, Photoshop. Merge to HDR Pro from the top right of the content pod. Choose the default entry from the presets menu in the Merge to HDR Pro dialogue box. This adjusts the settings in the feature to provide a neutral result and sets the mode to 16 bit to provide you with the greatest array of processing controls. There are many preset options and below them the sliders to control the look of your image. Some of these are self-explanatory, such as highlights and shadow controlling the intensity of the highlights and the darkness of the shadows. A few that are important to know more about include the detail slider, which is a good place to start because it will increase the sharpness and the contrast. The edge glow section at the top will help you control the haloing effect via radius and strength. The gamma will affect mid-tone range, and in the color section the bottom, the vibrance affects the muted colors first, while the saturation hits the entire image. One of the best new features in the tool is the ability to remove image artifacts by selecting the Remove Ghost setting. It chooses the most balanced image in your merge set and uses it as the default base. If you don't like the one it goes for, you can choose which source file is used as the reference for the deghosting by clicking on its thumbnail. The reference image is marked with a green outline. The HDR toning tool is a way to give a single image, HDR's blown-out tones, without requiring multiple exposures of the same shot. The sliders are the same as the HDR Pro tool as well as the presets. There's no deghosting option, but there is an in-tool pane for adjusting the curves of your image. There's definitely a lot going on in Photoshop CS5's new HDR tools, but there's no doubt that Adobe's made it significantly easier to bring HDR to your images. Now that you know how to create both real HDR and that pseudo HDR tone, you just need to get a better camera, right? Right. For CNET, I'm Seth Rosenblatt.