When you get your new TV out of the box, it probably won't look quite right in your living room.
Fixing that can be as simple as using a calibration setup disc or as expensive as paying someone to do it.
Right now, we'll do neither.
Instead also you had to set up your TV by eye so that you can quickly tune it up at home without anyone's help.
Start with the contrast.
For this one, you wanna find footage with lots of bright areas like this scene by the ocean.
Contrast controls the intensity of the brightness for the lightest areas of the picture.
That might sound confusing but as I adjust it, you'll see what I mean.
Turn it up until you start losing details in the brighter areas like the sky here or the sand.
Then turn it down until you start seeing that detail again.
The correct setting is within a few notches of that point.
Next step, brightness.
For this step, find a dark scene like one from an action movie.
Contrary to what you might have heard.
Brightness adjusts the intensity of the black levels.
So a TV that's too bright will make blacks look washed out or even grayish.
Turn down the brightness until everything appears way too dark.
Then turn it back up to the point where things in the scene that are supposed to be black are the blackest level your TV will allow.
This is the hardest setting to adjust
by eye.
So be patient and adjust the brightness as you switch between different types of programming.
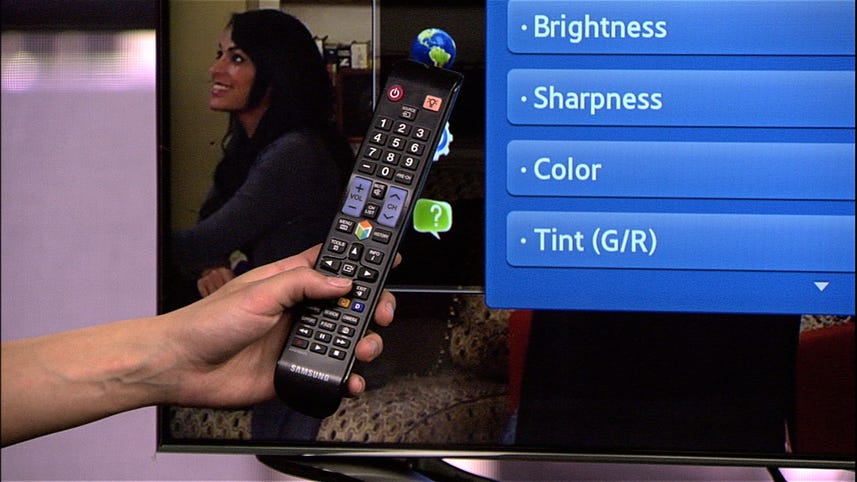
Color.
Not to be confused with color temperature.
It's usually a-okay right out of the box.
Usually that means right in the middle of the scale.
If you do want to adjust the color, find a well-scene featuring a person's face.
To better understand the color setting, think of it as saturation.
If you're to bring it all the way down, the image would start to look grayish.
Find a level where their flesh looks natural without
being too orange.
There are two more important settings to adjust here.
Let's look at sharpness.
For this one almost any image will do so let stick with rose here.
The sweet spot for sharpness is somewhere near the bottom of the scale.
It should be low but not so low the things like wrinkles on faces disappear.
You'll know it's not too high if there's highlighting around the edges of objects like her face.
Fine the level just above the point where details begin to disappear.
Finally, color temperature.
Again, use a scene where you can clearly see a face like this.
The funny thing about color temperature is that to a certain extent, no matter how it set, it'll look correct to you.
So be careful with this one.
On our TV, we have color tone presets instead of color temperature.
But it's the same idea.
Right now, it set to cool.
But the color temperature is way too blue which is causing this blue tint on her face.
Turn it up too high and her face will be too warm.
Pick one that feels right
to you.
If your TV has the setting like white balance, you can have much more control over color temperature.
But that's almost impossible to adjust by eye.
Once you've gone through these settings, you should find yourself watching a much more accurate picture and while an expert might not call it perfect, all that really matter is that the picture looks good to you.
For the full-written guide, visit howto.cnet.com and if you wanna chat about it, hit me up on Twitter.
For CNET, I'm Sharon Vaknin.