What's up I'm Brian Tong and welcome to the Apple Byte for all the good and bad inside the world of Apple.
Now CNET has shut down its offices but we still wanna give you guys something instead of nothing so we've decided to put together an episode with some of the best tips and tricks from our show all in one place.
Now it's the season for gift giving but we also know that sharing is caring.
Check out how to share purchased apps
with your friends.
Everyone with an iPhone or iPod Touch can't get enough apps, but is there way a to share them with others?
Well, if there wasn't I wouldn't be here right now.
I'm Brian Tong with CNET.com and I'll show you how to share your purchased apps on multiple devices.
Now first thing you have to do is buy an app from the iTunes store.
No surprise there.
And then you'll see I have a whole bunch of apps and games here on my computer.
But what if a friend or family member sees a game like Rolando.
And says, man
I wish I had that app.
Just like a music track you can drag and drop the app from iTunes and copy it onto your desktop.
It will be a file with the extension ipa.
Now, send that specific app to the person who wants to use it on their iPhone or iPod, if it's small enough you can email it or put it on a flash drive and copy it on to their computer's desktop.
Now when they have the file they can either drag it into iTunes and it will copy the app or double clicking the file should do the same thing.
It should now show up as one of their apps in the iTunes
collection.
Next up, go to the Menu bar in iTunes to store and select authorized computer.
The person who gave you the app will need to enter in their iTunes' username and password and this will give your computer the ability to use media that they bought from the iTunes store.
It could be music, TV shows and yes even iPhone applications.
The trick here is just like music you're limited to only authorizing five computers total so that's pretty much yourself and four other important people in your life that can use the app.
Once their computer
is authorized, sync up their iPhone or iPod touch to iTunes and the new app or game will show up on their device and if it's a game you can bet they'll be playing it.
-Dude this is pretty cool man.
- I told you it was a cool app.
- I like it.
- Hey do you wanna go catch a flick or something?
- Oh man, I'm really busy man.
But thanks for the ask though.
- What?
- I'm Brian Tong for CNET.com and that's how you share purchased apps and games on iTunes.
Use it wisely.
That's really sweet.
I'd like to be friends with that guy.
Now, our next tip might prevent you from getting into some trouble.
You might find yourself in a situation where an embarrassing or a compromising text message shows up when you don't want it to.
We're gonna show you to hide your text messages on an iPhone or Android phone if you wanna keep those messages private.
On an iPhone go to your Settings then Messages, and you'll see an option for Show Preview.
Turn that
off and from then on you won't see previews of your text messages.
It will still show the name of the person who sent it so if you wanna be as secretive as James Bond you can change that person's name and no one will know who it came from.
Now, on an Android phone when you receive a message it shows up in your notification status bar but if you don't like that, open up the Messsaging App, go to your Settings and under Notification Settings remove the checked mark to display the messages.
You won't be notified when you get a message but no one else will either.
A lot of
Android users also have apps that display a pop-up window whenever they receive a text message so you can go into the settings of an app like SMS pop-up or Hand Sent and turn it off when you don't want your messages to be seen.
Sure this sounds a little shady and some people might use this if they're up to no good but this also helps keep the messages you want private to stay private.
I'm Brian Tong with CNET.com with you text message how-to, use it wisely.
Ahh, that's the method that I used to juggle
the constant flow of coming at me.
Now since we're on the topic of phones there's one thing we all love and it's free ring tones.
Brian Tong here with CNET.com and the release of iTunes 10 Apple has removed the ability for you to make custom ring tones for 99 cents from your purchased music.
But there's no need to stress because you can still make ring tones for free using just iTunes 10 for the Mac and PC.
Now first thing, this will not work with older music purchase from the iTunes store with DRM on them but it will work
with MP3s, AIFF files and non-protected AAC files like music purchased from the iTunes store today.
Now if you're not sure what type of music files you have, right click on this bar and select Kind and a column will appear to show you.
So, let's find a song like this one that I wanna turn into a ring tone.
Right click on the song and select Get Info.
A window will appear with track information and you'll want to select the Options Tab and look for the Start Time and Stop Time settings.
Click it on the boxes next to those settings for now.
I already know
where I want my ring tone to start and for this song I'll start it at the beginning and go until the 30 second mark.
There's a 40 seconds max duration for iTunes ring tones.
Now once you've set the time press Okay then go to Advanced on the Main Menu bar and select Create AAC version.
iTunes will create the shorter version of your song below the original track and you wanna drag and drop that version onto your desktop to make a copy.
Now there's a little housekeeping we need to take care of if the option to create AAC version is not available
go on to your Preferences and in the General Tab find the section that says when you insert a CD click on the Import Settings [unk] and then select to Import using ACC encoder and the Option should appear now.
You'll also wanna go back to the original music file in iTunes and then check the Start and Stop Time so that it plays normally from now on.
Back to our music file on the desktop, we're going to change the extension name on the file from M4A to M4R.
You'll be asked to confirm the changes and will use M4R.
For Windows users you'll need to go to your Control Panel then choose Appearance and Personalization, select the Folder Options and in the View Tab make sure you have unchecked the box to hide extensions for known file types.
That will allow you to see and change the file type as well.
Okay guys, we're almost there but before you bring your ring tone back into iTunes you have to delete the 30 second version that we initially created and if you don't do this iTunes will not accept the ring tone so this is an important and crucial step.
Now drag and drop the renamed M4R
file into the Source column of iTunes and the word library should highlight.
It will copy the file into iTunes and voila you have a new ring tone.
Plug your phone into your computer, make sure you set it up to sync ring tones in the appropriate section, sync your phone and you'll be doing the (??) in no time.
I'm Brian Tong with your how-to for creating ring tones with iTunes 10, use it wisely.
Oh, oh yeah.
That's right.
I picked up a few more moves after that shoot.
Hey, now I'll stop that but we also know everyone who watched the Apple Byte doesn't necessarily have an iPhone but you can still sync your media from iTunes to an Android or Palm Pre.
Check it out.
Palm Pre owners have the luxury of syncing their phones to their iTunes collection until Apple recently released an update to block them from doing that.
I'm Brian Tong with CNET.com.
And I'll show you how to sync your Pre and other devices to gain access to your iTunes content.
So, first up let's
check out an application called Double Twist.
It's free, and it works for both PC and Mac.
You wanna go to the website at doubletwist.com to download the software.
Create an account with them, it's really simple but once you've done that you'll have the ability to connect a variety of devices like the Palm Pre, other popular cellphones, MP3 players and even the Sony PSP and then move your media onto them.
So, what we'll do is let's launch the app and you'll see it shows up your music, movies and photo collection stored in iTunes and also on your computer.
Then we'll connect our Pre
it will show up in the device column and from there all you have to do is just drag and drop the content you want from your computer onto the Pre.
It also supports video and podcast files and does all the file format conversion for you when you drag it over.
So once you're done eject your device and now you'll have access to the songs and media from your iTunes collection.
I'm Brian Tong from CNET.com and that's how you sync third party devices to your iTunes collection for free, use it wisely.
And for our last tip, it might be sacrilegious for some of you
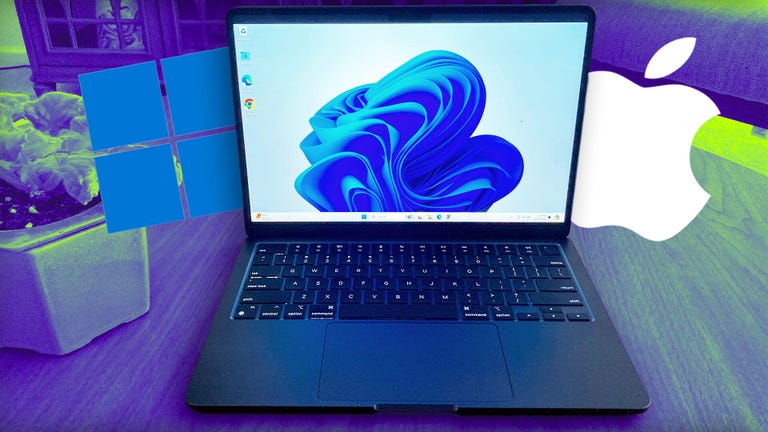
but how about some love for Windows 7 on a Mac.
Windows 7 is on everyone's minds and not only can you install it on your PC but you can put it on your Mac with Boot Camp.
I'm Brian Tong with CNET.com and we've done similar videos like this before but we'll show you how it's done with Windows 7.
Now first thing you'll obviously need is a Mac sporting an Intel Core 2 Duo and legal copies of both Windows 7 and Leopard or Snow Leopard.
Windows 7 is not supported in Boot Camp at the moment but
it does work.
Now Apple will be offering official support sometime next year but if you have a Mac that's from 2006 or earlier you'll probably have problems installing Windows 7.
First up on your Mac, let's go to the applications folder then you Utilities and open the Boot Camp Assistant.
This is the tool that will allow you to create a Windows partition on your hard drive so you can dual boot.
Select the partition size you want or use the options offered and Boot Camp will do the rest.
You'll then be asked to pop-in your Windows 7 disc and start the installation.
Go through the prompts and choose the installation
type that you want then make sure you pick the Boot Camp partition for where you want to install Windows.
I ran into an issue where it wouldn't let me advance until I formatted the Boot Camp partition.
So make sure to click on the drive options, you'll see Advanced in parenthesis and select Format.
Hit Next and Windows 7 will start the installation.
Now after your computer restarts and boots up you'll need to select a few more options to finish the process but you'll still need to install the drivers for the Mac hardware.
We're here on the Windows 7 desktop,
go to the Start Menu then Computer and eject the Windows 7 disc.
Now pop in your Mac OS10 disc and the automatic prompt should let you launch the Boot Camp installer to add all the hardware drivers you'll need.
You are now ready to use Windows 7 on your Mac and here's a couple tips.
The Apple command key is now the Windows key and if you wanna right click make sure you have two fingers on the track pad and then click the mouse [unk] for additional options.
Whenever you guys wanna switch between booting into your Windows 7 or Mac OS10 partition just
hold the Option key right after you hear the start up chime sound and you'll be able to choose.
I'm Brian Tong from CNET.com with your how-to for installing Windows 7 on your Mac, use it wisely.
All right thanks for hanging with us.
We will be back after the break.
Send your emails to the applebyte@cnet.com and we'll catch you next time for another bite of the apple.