How to root your Samsung Galaxy S2
If you want to install a custom ROM on your Galaxy S2, you'll need to root it first. We show you how to do that in seven easy-to-follow steps.


One of Android's biggest strengths is that it's an open source operating system, which means that anyone with programming talent can potentially tinker with the code and make it even better. With that in mind, we've complied this handy guide for gaining root access on what is arguably our favourite Android handset: the Samsung Galaxy S2.
Read through our guide below, or watch the handy video above that shows you how it's done.
A large number of custom operating systems -- referred to by seasoned hackers as 'ROMs' -- have been created which not only remove unwanted bloatware installed by hardware manufacturers, but also speed up your handset and boast awesome new features.
However, all Android phones come locked-down by default, which means you can only install firmware updates that have been officially sanctioned by the manufacturer or your network provider. To tap into the wonderful world of Android customsation, you'll need to gain root access to your phone.
While it all sounds a bit clandestine and spooky, getting root access is just like having admin privileges on a computer. It allows you to change settings and tinker with elements of your phone's software that are usually out of bounds. A very simple example is being able to alter the boot-up animation that comes pre-loaded on your device.
Although it's not quite as difficult as playing a game of Angry Birds blindfolded, rooting your phone isn't for the weak-willed.
Before we proceed, it's important that we outline the risks involved here. Although in the case of the Galaxy S2 the rooting process is usually reversible, messing about with the inner-workings of your phone's software immediately invalidates your warranty. It may break your phone completely. CNET UK takes no responsibility for any harm that may befall your beloved handset as a consequence of you acting on the steps we've outlined below.
Step 1: Grab everything you need
Before you do anything, make sure you've downloaded and installed Samsung's Kies application, as it contains the necessary drivers for allowing your phone to communicate with your computer. You can grab the installation file from Samsung's website.
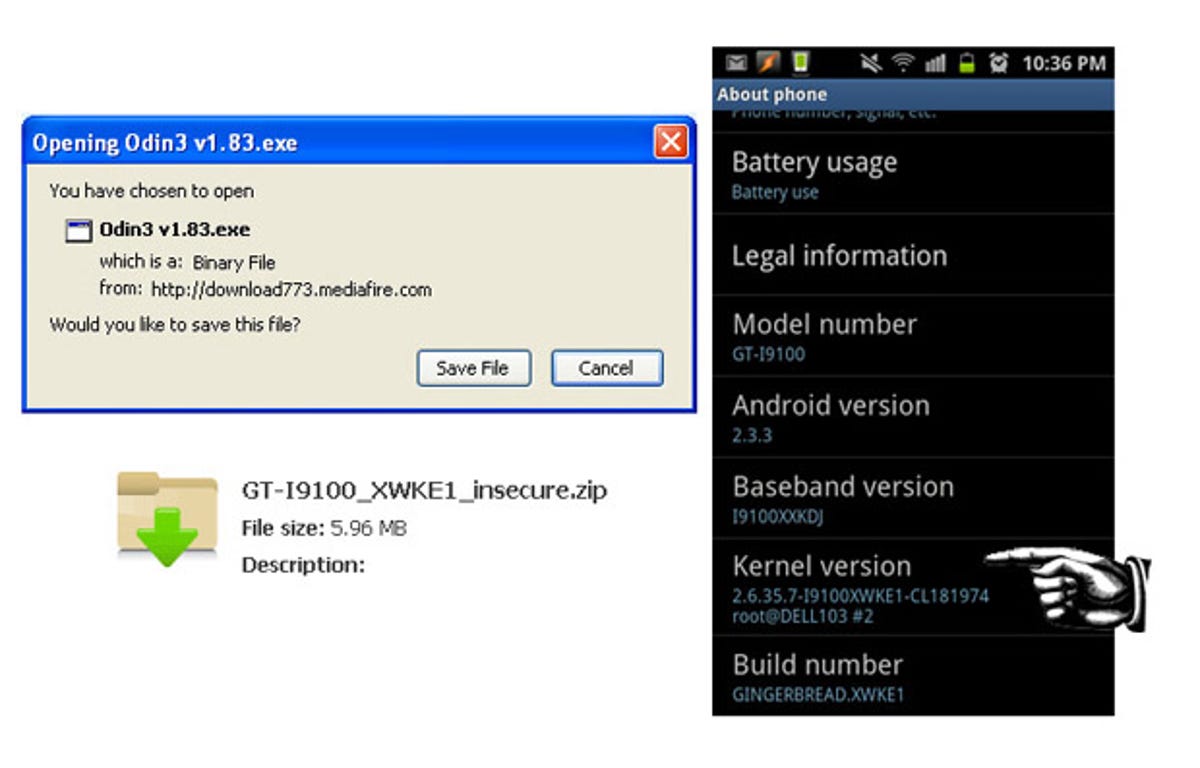
Next up is Odin3, which can be downloaded from here.
You'll also need an insecure kernel, which can you get from here. Although it's recommended that you pick a kernel with a code as close as possible to the one your phone has already (to check this, go to Settings > Applications > About Phone, and you'll see it under Kernel Version), it's not strictly required as you can reload a secure kernel once the whole rooting procedure is done and dusted.
Finally, you need the piece of software that does the magic: S2 Root. Grab it from here. Are you all sitting comfortably? Let's roll.
Step 2: Enable USB debugging
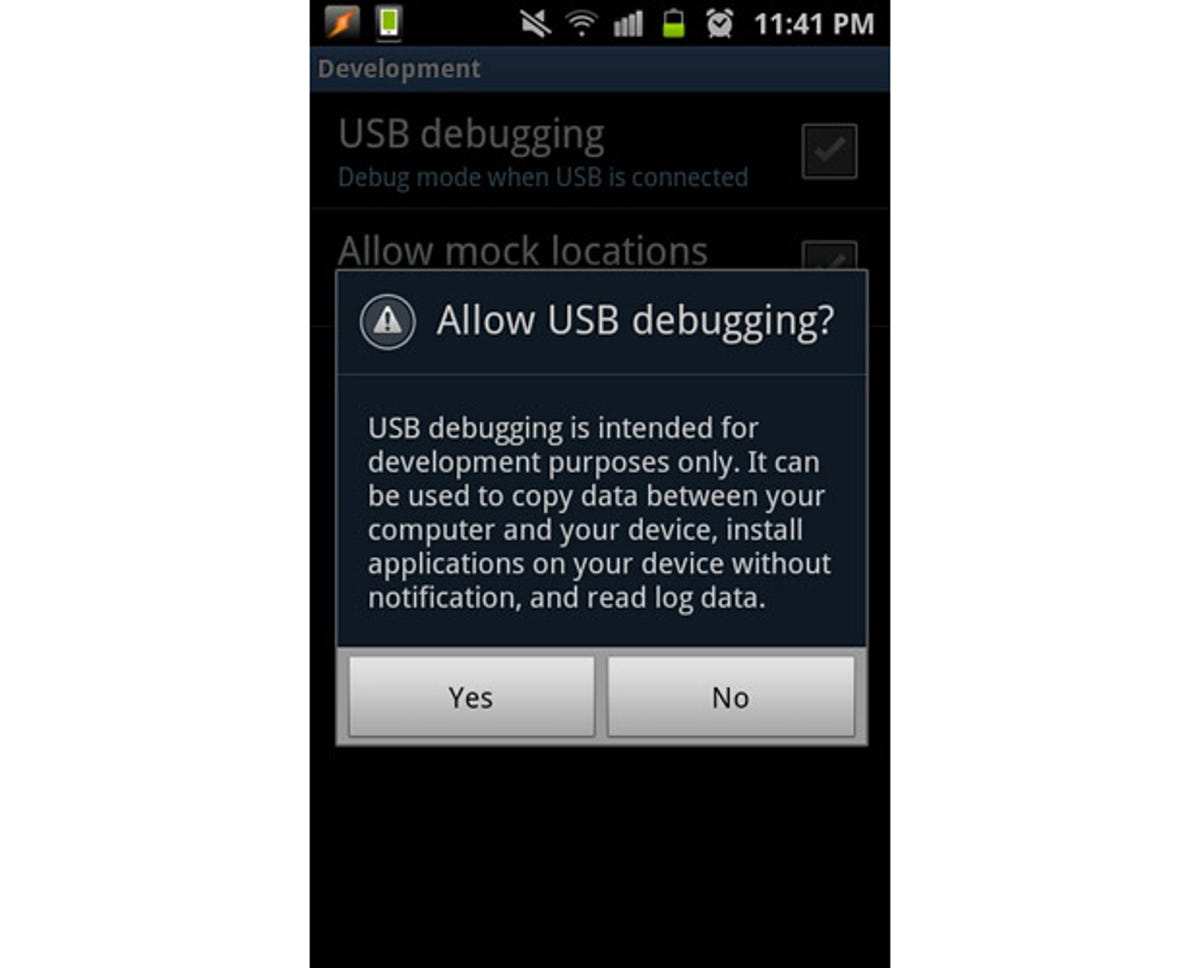
This is important. Unless this feature is enabled on your handset, you won't be able to proceed. Go to Settings > Applications > Development, and make sure the 'Enable USB Debugging' box is ticked. Once this is done, give yourself a pat on the back and move onto Step 3.
Step 3: Put the phone into Download Mode
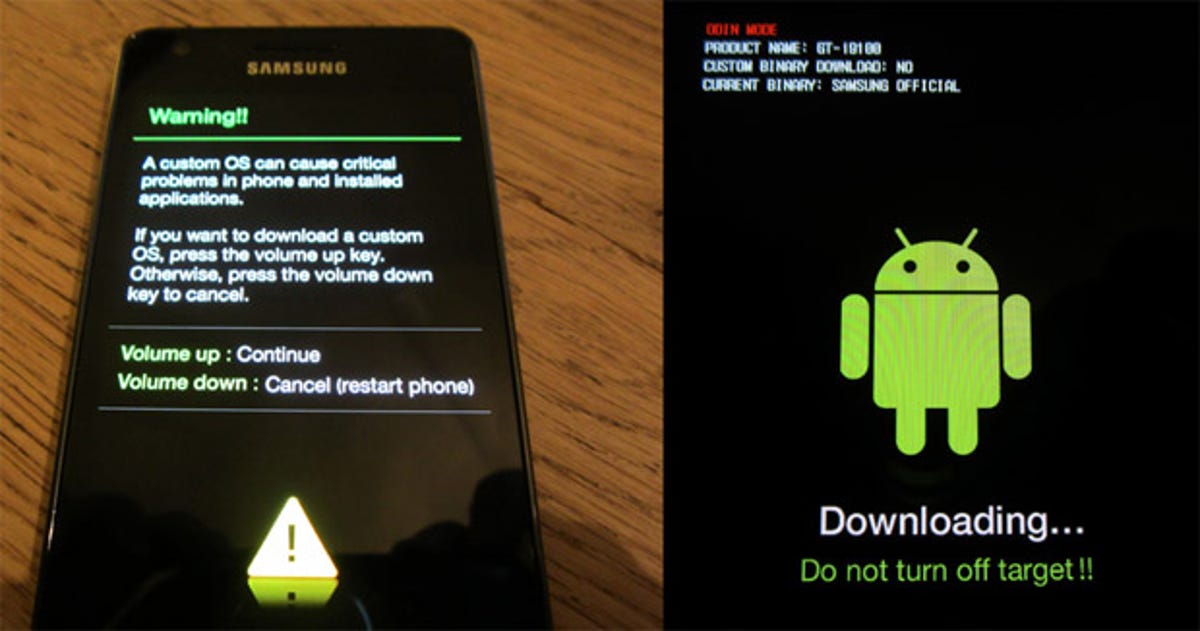
Turn off your phone. Hold down the Volume down button, Home button and Power button. The phone will reboot and you should see a screen warning of the dangers of installing custom OS software. If you are happy to proceed at your own risk, press the volume up key to place the phone in Download Mode and you'll be presented with Andy the Android, in all his luminous green splendor.
Step 4: Load up the insecure kernel using Odin3
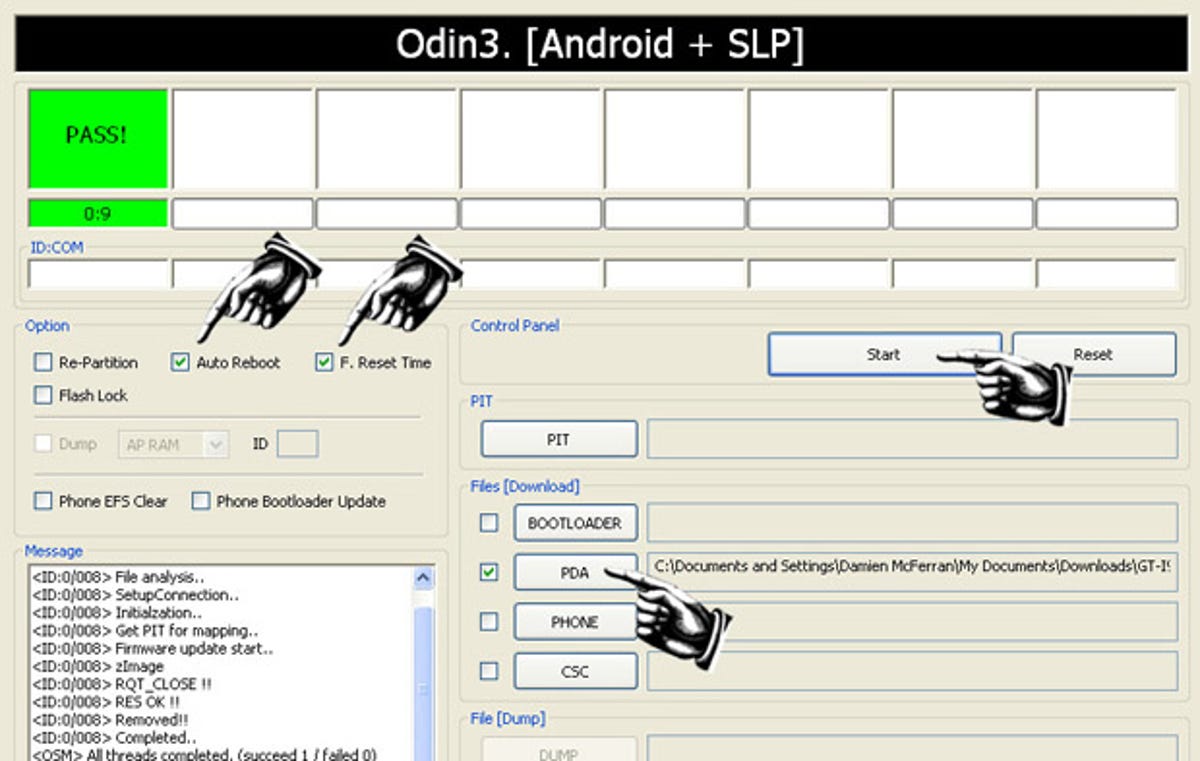
Use your USB cable to connect your Galaxy S2 to your PC. Run the freshly-downloaded Odin3 application on your computer. You should notice that the box in the top left of the Odin interface is yellow, which means your phone has been successfully recognised. You should now check that only the 'Auto Reboot' and 'F. Reset Time' check boxes are ticked in Odin's settings.
Press the PDA button in Odin3 and then select the kernel you obtained earlier. Take a deep breath and click the 'Start' button. Once the process is complete your phone will switch itself off and Odin3 should display a green 'PASS' notification on your computer's screen.

Your phone may reboot itself, but if it displays the battery charging icon you will need to manually switch it back on. When the standard Galaxy S2 boot screen appears, you should have a yellow triangle with an exclamation mark at the bottom of the display, indicating that you are running an insecure kernel (which you already know).
Step 5: Root using S2 Root
Keep your phone connected and wait for it to properly reboot itself. Once it has, start up S2 Root. You'll get a little warning message asking if you have flashed an insecure kernel and enabled USB debugging -- which, if you've been awake during this guide, you will already have done. Click OK.
If you're running Windows XP then you may find that you're missing some Microsoft .net Framework files that are required to run S2 Root. Fear not, however -- you can grab them from here.
S2 Root boasts a mercifully simple interface with nice, friendly buttons that say things like 'ROOT' and 'UNROOT', making it pretty easy to use. No prizes for guessing which one you need to click on now.

Once the phone has fully rebooted, you will find that you now have root access and the all-important Superuser app (which allows you to give other applications root privilages) has been installed. You can spot it in your app drawer -- it's the one with the Android-style skull and crossbones icon. If it hasn't appeared, try repeating this step a second time.
Step 6: Reload a secure kernel (optional)
Because you're still running an insecure kernel, you'll keep getting that annoying warning triangle every time you boot the phone up. It's not actually detrimental to your phone's functionality, but if you'd rather remove it you can grab a secure kernel from here and load it up using the instructions outlined previously in Step 4.
Congratulations! You are now the proud owner of a rooted Samsung Galaxy S2. If you're feeling particularly brave then you should download ROM Manager Premium, which allows you to load up new operating systems, backup your existing ROM and much more - but that's a whole different guide entirely.
Step 7: Changing your mind
Should you for some reason wish to rescind root access then all you need do is follow Step 4 to re-load the insecure kernel and click the 'Unroot' button in the S2 Root application.