 Why You Can Trust CNET
 Get better sound from your AV receiver using your smartphone
Want to get better sound out of your system without having to buy a new receiver or speakers? Try a manual calibration.


- Ty was nominated for Best New Journalist at the Australian IT Journalism awards, but he has only ever won one thing. As a youth, he was awarded a free session for the photography studio at a local supermarket.

If you own a home theater receiver, you can improve its performance by taking some time to set it up properly. Most AV receivers have manual and auto speaker setup or calibration features, and even if you've already used an automated system you can make your system sound even better with manual tweaks.
But is a manual calibration for you? What if it sounds pretty good already? Armed with just your phone and a tape measure we walk you through the process of determining if your audio-visual pride and joy can indeed be improved upon or whether it's just dandy as it is.
Here's a look at a Yamaha manual setup menu.
Automatic versus manual calibration
Auto setup systems use a microphone and a series of test tones to determine various things about your system -- from the size of your speakers , the distance of each speaker, to the listening position and the optimal volume level of each. Most auto setup systems also use equalization to balance the frequency response of all the speakers and the subwoofer.
There are a number of different calibration routines available and the most popular ones are:
- Audyssey -- Denon and Marantz
- AccuEQ -- Onkyo (previously used Audyssey)
- MCACC (Multichannel Acoustic Calibration) -- Pioneer
- DCAC (Digital Cinema Auto Calibration) -- Sony
- YPAO (Yamaha Parametric Room Acoustic Optimizer) -- Yamaha
While auto setup programs can sometimes work wonders, our confidence in their results is pretty low. Too often they misjudge crucial things like speaker size (which determines crossover points), relative volume levels of subs, or apply heavy-handed equalization. If your receiver has Dolby Atmos or DTS:X with front or rear height channel speakers, auto setup programs don't always set their volume correctly. You, and a smartphone, can do better.
Can you improve on an auto calibration?
If you already used your receiver's auto setup, start by listening to your system with and without the effect switched on. Every brand of receiver has a different name for its setup/equalization suite, but Denon and Marantz receivers use Audyssey, which we're using for our example today.
In your receiver's setup menu, look out for these settings under "Audyssey" -- MultEQ XT, Dynamic EQ and Dynamic Volume -- and experiment with turning them on and off.
To help, try listening to familiar movies and music and see if the automated settings improve the sound or not. If the sound is better with the EQs turned on, great! Go no further, put on your favorite movie and microwave your popcorn! There is no right or wrong here.
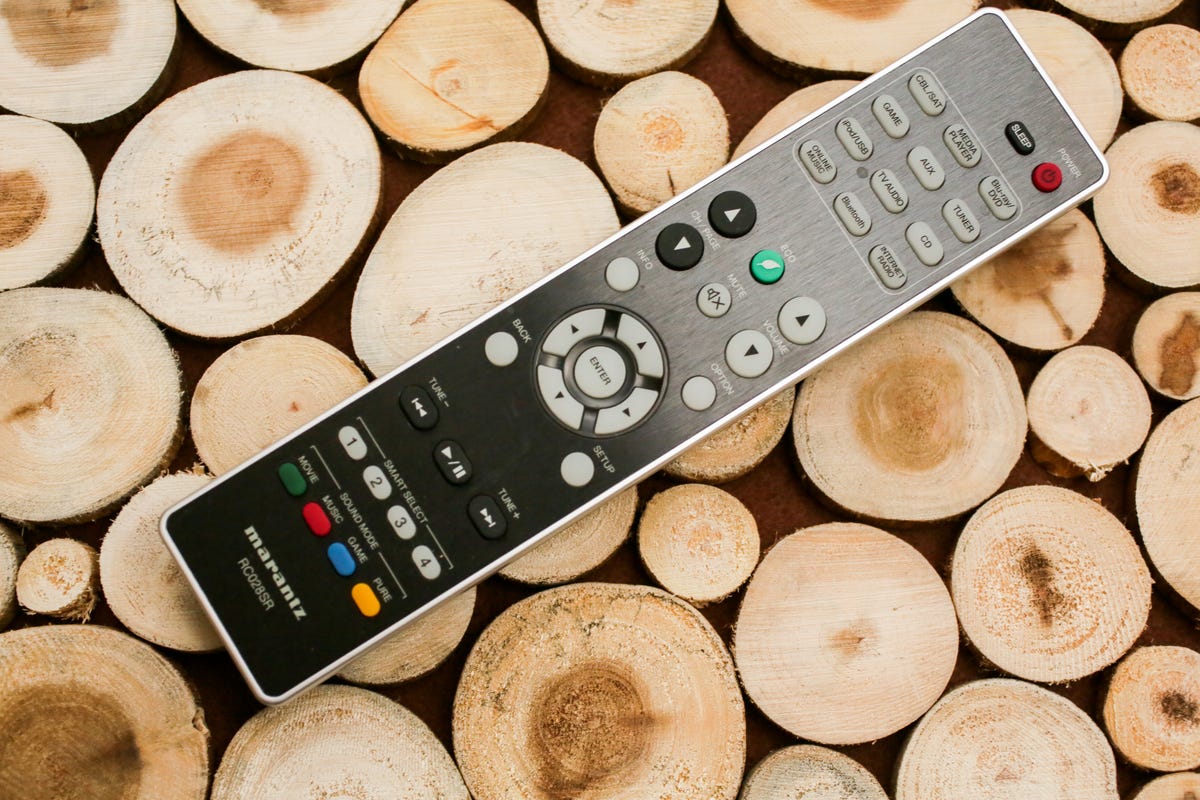
Your remote will come in handy when tweaking your system's sound.
Onkyo's AccuEQ, Pioneer's MCACC, Sony's DCAC and Yamaha's YPAO can also apply equalization schemes, so try listening with their EQs turned off. You may need to live with the EQs turned off for a day or two, then turn the EQs back on. If you can't tell the difference, leave the EQs off and go to the next step: manual speaker setup.
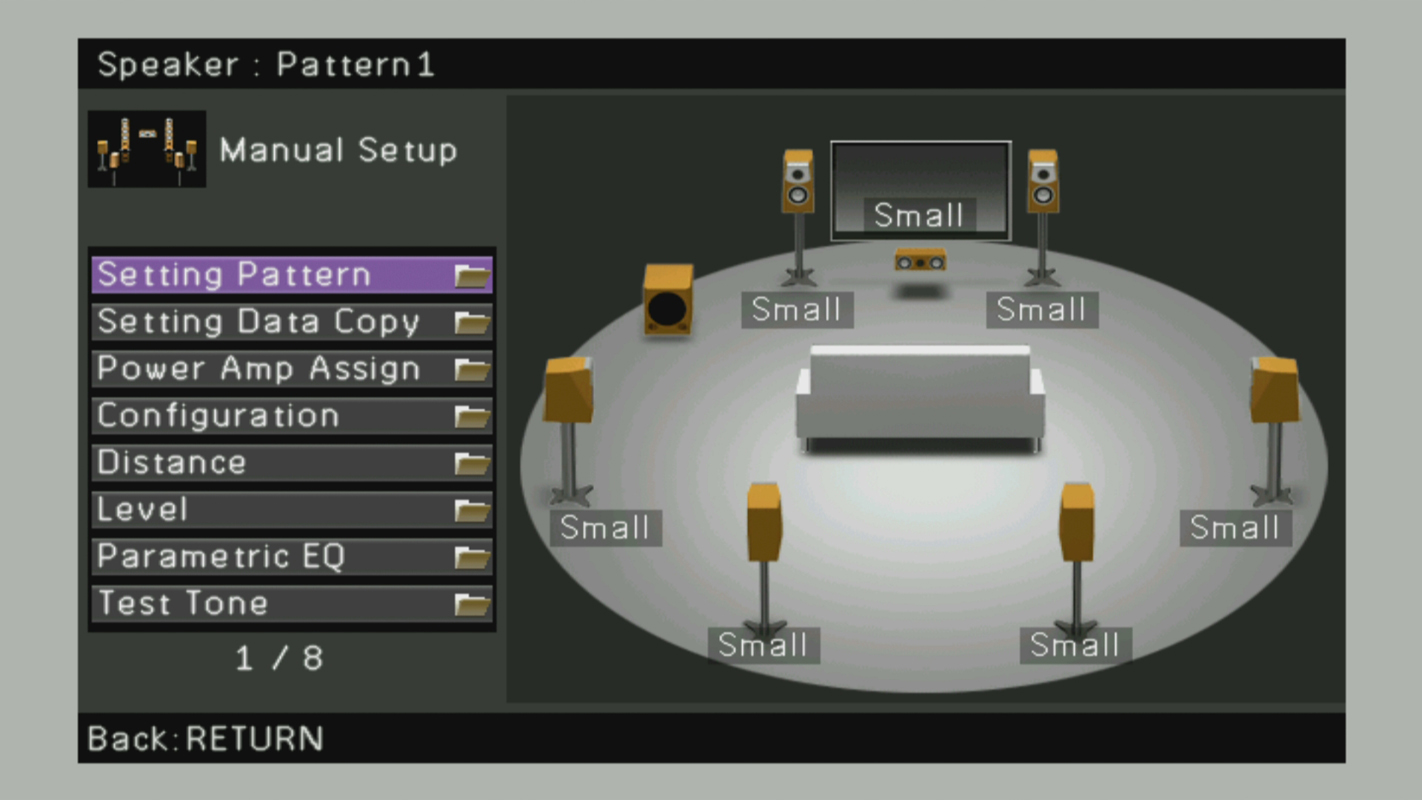
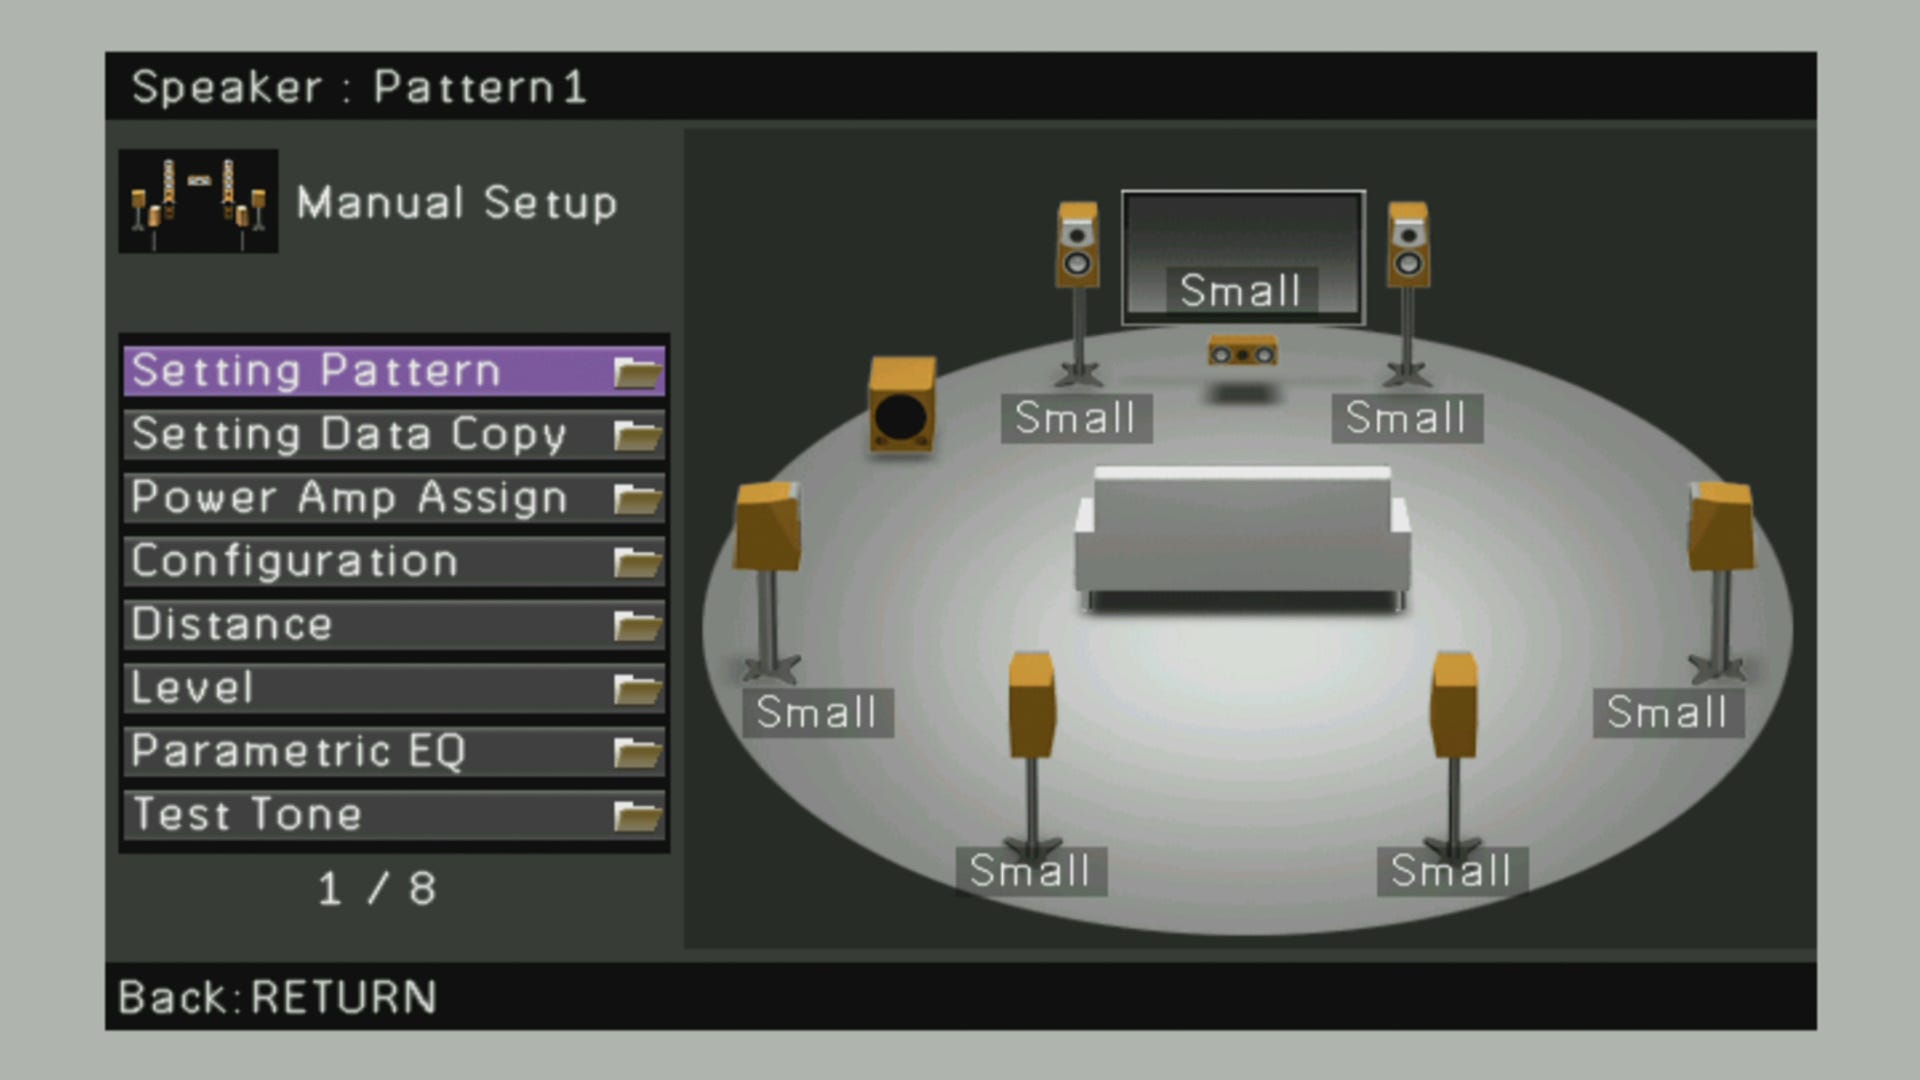
Familiarize yourself with your receiver's speaker setup menus
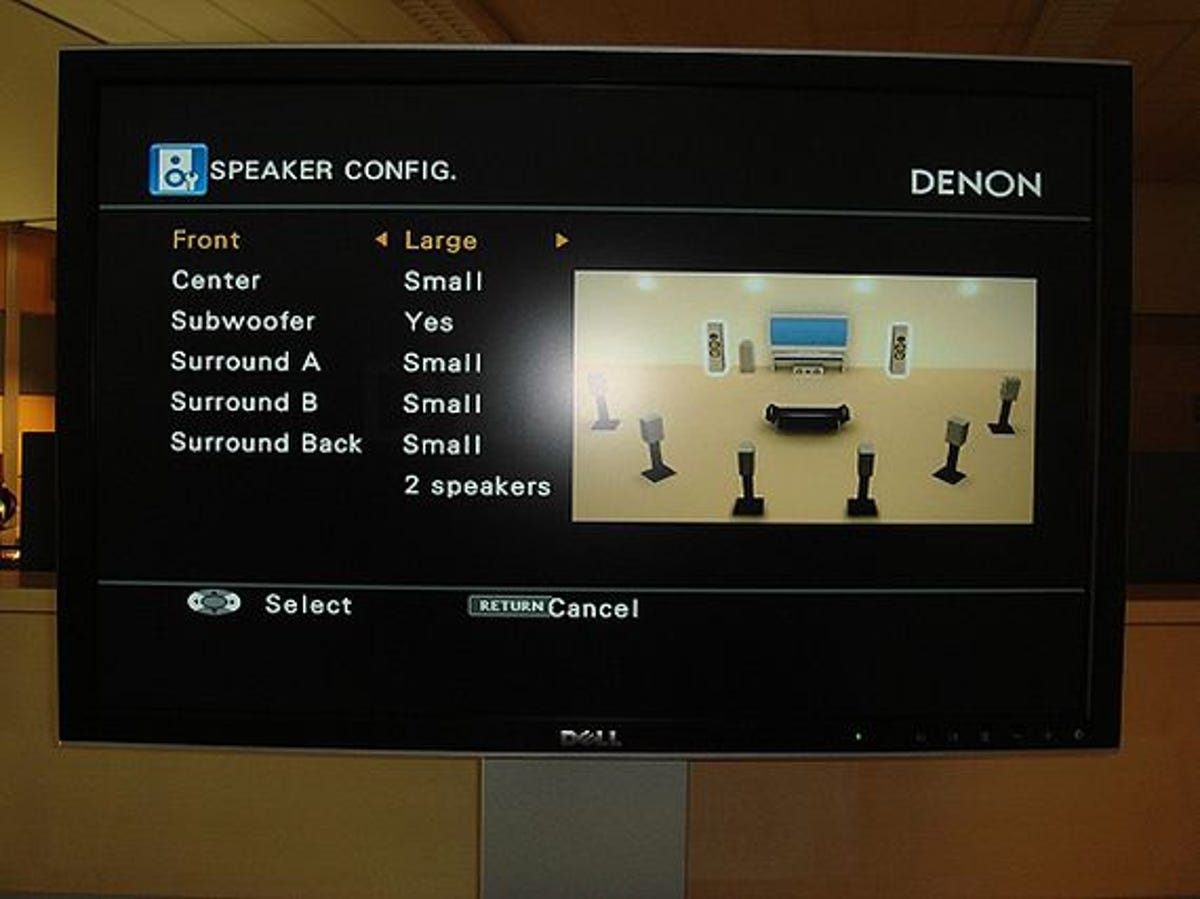
The Channel Config screen lets you adjust the size and level of each speaker: the basis of a manual calibration.
The next order of business is selecting the number of speakers in your home theater system, sometimes referred to as Speaker Configuration. If you have five speakers, plus a subwoofer, that's 5.1. Those systems typically have three front speakers, left, center and right, and two surround channel speakers, plus the sub. Seven channel (7.1) systems have three front speakers, left, center, right, four surround channel speakers, plus the sub.
Dolby Atmos or DTS:X systems have a different layout, they might have five front speakers, left, center and right, two height channel front speakers, and two side or rear surround channel speakers, plus the sub. You'll see this listed as 7.1.2, for example, where the last digit is the number of height speakers.

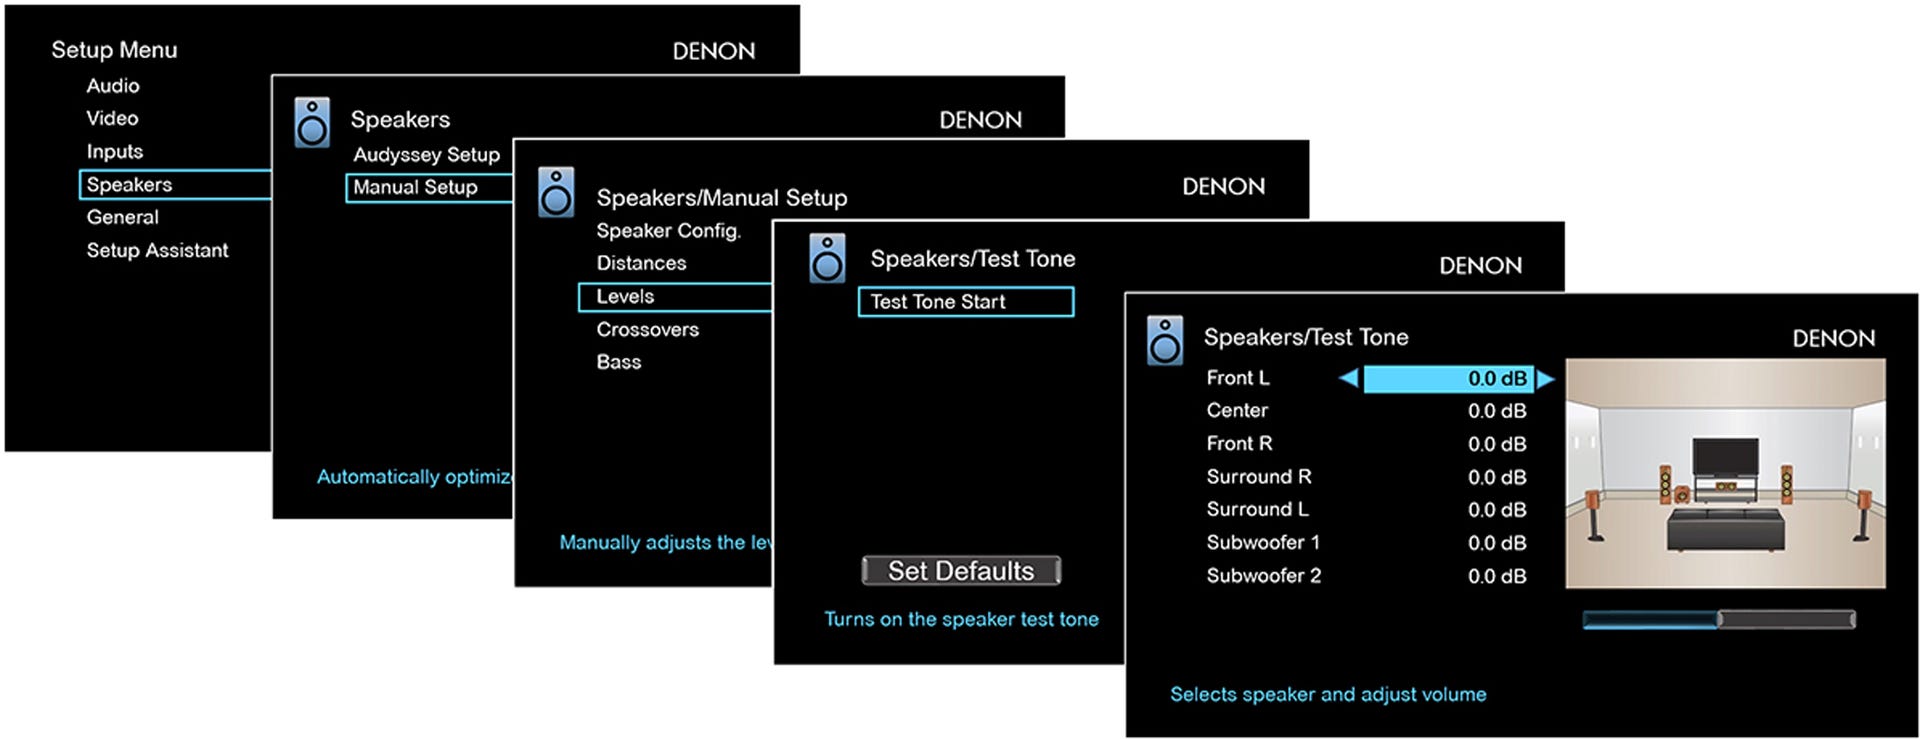
Denon's manual speaker setup menus.
All speakers big and small
Once you've selected the number of speakers you have, next select the size, large or small, of each speaker in the system. Floor standing tower speakers or big bookshelf speakers are large, all other speakers should be configured as small. When in doubt about size, opt for small. Next, look for the crossover setting option on the speaker setup menu. If your speakers have 4-inch or smaller woofers use a 100 Hertz crossover, and any speakers with larger woofers than that can use an 80 Hertz crossover. If you're not sure about your speaker's woofer sizes, use a 100 Hertz crossover setting. Large speakers typically don't need crossover settings.
Next grab a tape measure and measure the distance from each speaker and the subwoofer to the main listening position, aka the "sweet spot." Input those measurements in the "Speaker Distance" menu.
Set each speaker's volume level
Next, we need to balance the "channel level" of each speaker in the system so they're all equally loud. Look for the "Test Tone" setting on the speaker setup menu, which runs tones through one speaker at a time. To balance the volume level you'll need either a physical sound pressure meter like the Parts Express Mini Digital Sound Level Meter, or the free Sound Analyzer app for Android phones , or the free Sound Level Analyzer Lite app for iPhones. These meters all have settings of their own, select "C" weighting and "Slow" response. Sit in the sweet spot, and hold the mic or the smartphone up near your face, and hold still during calibration.
Now start the receiver's test tone sequence running through one speaker at a time at a medium loud level on the meter -- we'd suggest 75 decibels (dB). Adjust the receiver's master volume control to get the tone level up or down to the same 75 dB. When running the test tones (which sound like a whooshing noise or beeps), the room should be as quiet as possible, so turn off your air conditioner, and shut all the windows and doors.
Here are some typical settings for each speaker compared to the reference level (75 dB):
- Left and right channel +0dB
- Center channel +3dB
- Rear channels -3dB
- Dolby Atmos height channels +3db
- Subwoofer -10dB
With the test tones running make the "Channel Level" adjustments on the receiver's setup menu for each speaker to be as close to your reference as possible using the D-Pad on your remote to go +/- in volume. Take your time and repeat the sequence a few times, fine-tuning the level of each speaker with each pass of the test tones.
When using your system, if you find you have difficulty hearing movie dialogue go ahead and raise the center channel volume to 78 dB. That way the dialogue will stand out a little more clearly in the mix, but feel free to add a few more dB if it's still not clear enough. Don't worry, no harm will come to the speaker! In the same vein, raising the level of height speakers 3 dB above "level" can help with immersion.
Setting up a subwoofer
While speakers are pretty straightforward, a subwoofer takes a couple of extra steps. This is mainly because unlike the other speakers it's a powered unit and comes with its own volume control. First, set the subwoofer's volume knob halfway up, and then set the sub's volume level with test tone as you did for the speakers, and the meter reading 75 dB.
That's just a starting point. Sound meter accuracy with bass readings (in manual or auto setup) can be hit or miss, so you may have to raise or lower the sub's volume later on. You can do so with either the receiver speaker setup menu, or with the sub's volume knob, whichever is easier. Getting the subwoofer volume perfectly dialed-in may take some time. As you watch movies or listen to music, you may feel a need to tweak the sub level up or down to find just the right setting. One of the best indications the sub volume level is optimal is when you aren't aware the sub is working; its bass seems to come from your main speakers.
Finishing up
Each receiver's menus are different, so our descriptions may not exactly apply to your receiver. So before you make any changes, bring up the setup menu and see what's there. It's also a good idea to write down or take a picture of the menu settings as they are before you make any changes, just in case you accidentally mess something up.
While a manual calibration takes a little bit more elbow grease than an automated routine, there's a reason we use them solely in the CNET office -- they work. Your own ears are usually much more sensitive than a microphone, and doing it yourself can help you get the system to where you want it to be.