String light Jack-o-lantern: A creative twist without candles
Windy nights, toddlers and fire hazards can make lighting your Jack-o-lantern with candles seem like a bad idea. You can purchase LED lights to put inside your pumpkin, but there's a more creative solution: a string light pumpkin. This type of Jack-o-lantern puts a bright spin on the traditional carved pumpkin and will wow the neighborhood trick-or-treaters.


Grab some supplies
What you'll need to create a LED string light jack-o'-lantern is a permanent marker, cordless drill and bits, a wooden spoon, a bowl, a serrated knife, a string or two of battery powered outdoor LED string lights, clear spray paint, safety glasses and a small plastic bowl that will fit inside of your pumpkin. The number of lights you will need will depend on the complexity of your design and the size of your pumpkin. Also, lay some newspaper down over your work surface to make cleanup easier.

Draw your design
First, you'll want to decide on your design and draw it on your pumpkin using the permanent marker. The design should be simple. Do an image search of Halloween or autumn cookie cutters for inspiration.

Make a diagram for the lights
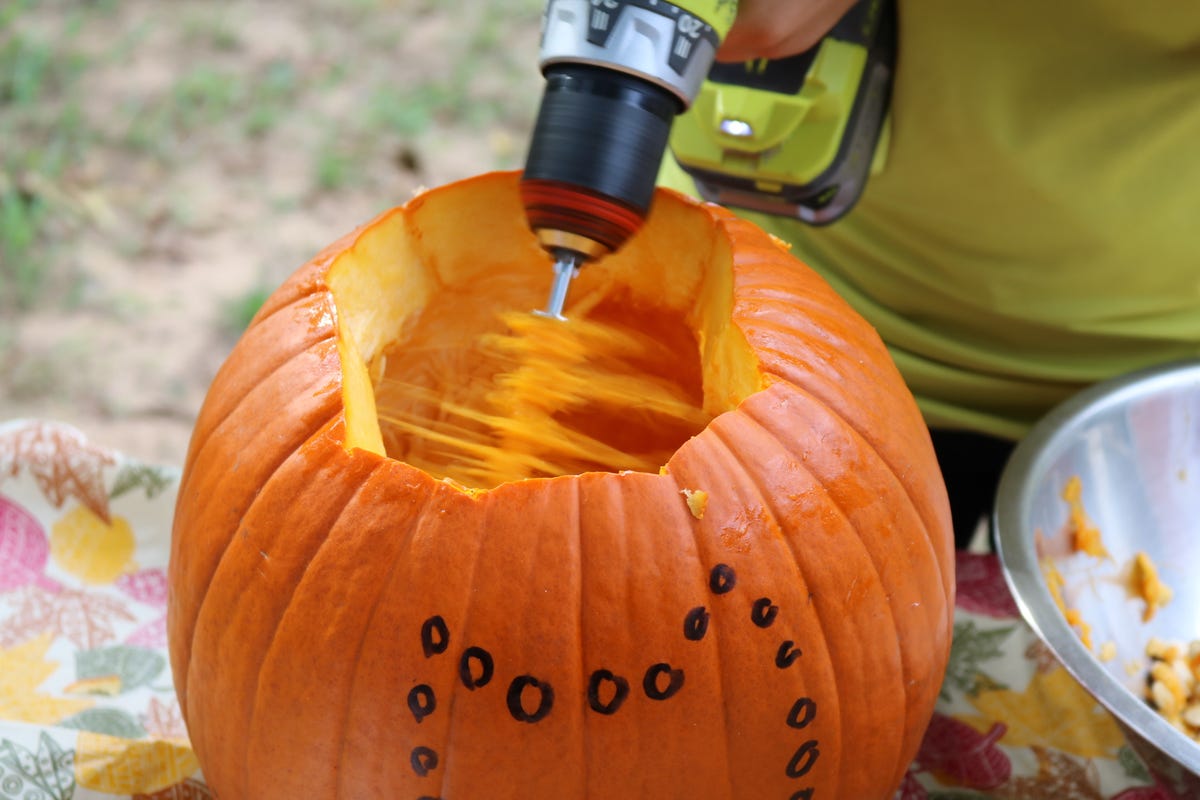
Next, draw circles on top of your drawing. This will be where each bulb will go. To make things easy, grab one of the extra bulbs that came with your twinkle lights and trace around it to make your circles on your drawing. You want each circle to be around 1/4 inch (.63 centimeter) apart, though it doesn't need to be exact.
Clean out your pumpkin
Cut the lid off your pumpkin and clean out the inside. I recommend using this method for cleaning out your pumpkin quickly using your drill.

Drill your holes
Now to make use of those circles you drew earlier. Choose a drill bit that is about the same size as the circles and secure it in your drill. Then, place the bit on one of the circles and press straight down while drilling. Keep drilling until all of the circles become holes.

Spray your pumpkin
Cover your pumpkin with a coat of clear spray paint inside and out. This will help prevent rotting and bug infestation. Let the paint dry before going to the next step. It should take around 10 to 30 minutes.
Make a safe place for the battery pack
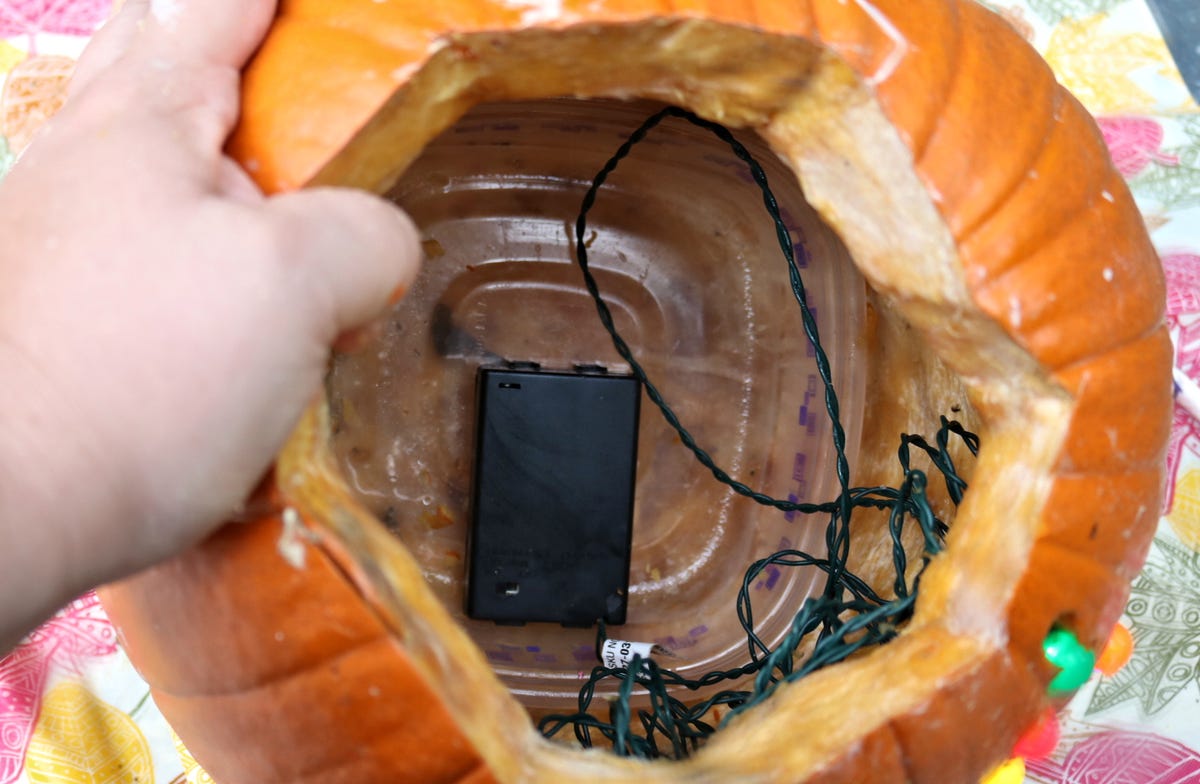
Place your small plastic bowl inside of the pumpkin and lay the twinkle lights' battery pack inside. The inside of a pumpkin are mushy. The bowl will keep the battery pack dry, preventing shorts and corrosion.

Add the lights
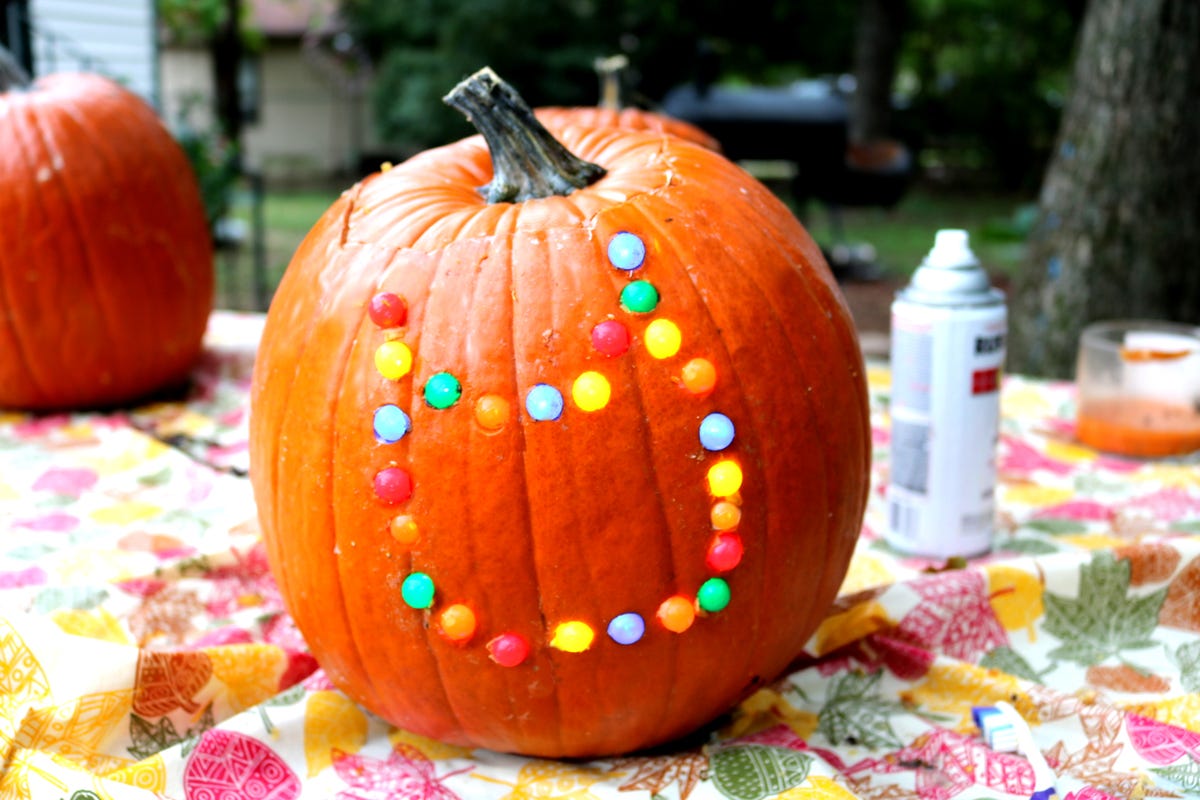
Now all you need to do is push the lights through the holes. I chose round, multicolored lights that look like Halloween candy, but just about any type of twinkle light will do.

More Galleries

My Favorite Shots From the Galaxy S24 Ultra's Camera
20 Photos
Honor's Magic V2 Foldable Is Lighter Than Samsung's Galaxy S24 Ultra
10 Photos
The Samsung Galaxy S24 and S24 Plus Looks Sweet in Aluminum
23 Photos
Samsung's Galaxy S24 Ultra Now Has a Titanium Design
23 Photos
I Took 600+ Photos With the iPhone 15 Pro and Pro Max. Look at My Favorites
34 Photos
