SimpliSafe's smart lock is about as easy to install as it gets
Here's a step-by-step look at the setup process for the SimpliSafe Smart Lock. You'll need a screwdriver and about 10 minutes, tops.


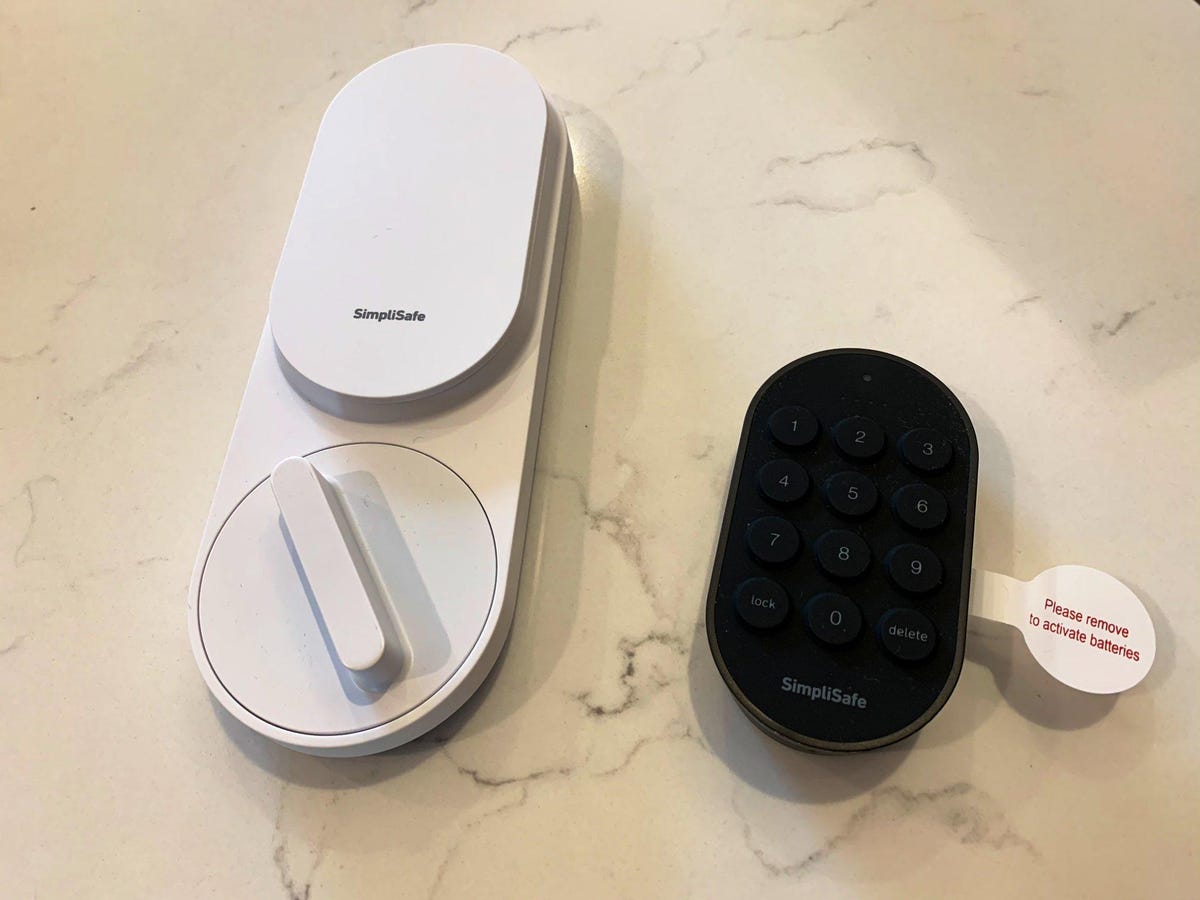
SimpliSafe Smart Lock
Here's a look at SimpliSafe's new smart lock. Available in three colors (white, black, and white with a bronze thumbturn) it's one of the slimmest locks of its kind, and at $99, the price is pretty lean, too (at least, if you're an existing SimpliSafe user -- for now, it only works if you have a SimpliSafe system to pair it with).
SimpliSafe's lock runs on four AA batteries and features one of the easiest installations of any smart lock I've ever tested. Scroll through this gallery for a step-by-step look at the process.
What you get
SimpliSafe's $99 smart lock includes a motorized thumbturn for the inside of your door and a wireless keypad that you stick up outside for quick, coded entry.
Need an existing system
It's important to know that you need to have an existing SimpliSafe security system with a keypad and an interactive monitoring plan in order to use this lock. That plan costs $25 per month, so the lock is really only worth it if you're interested in the security system, too.
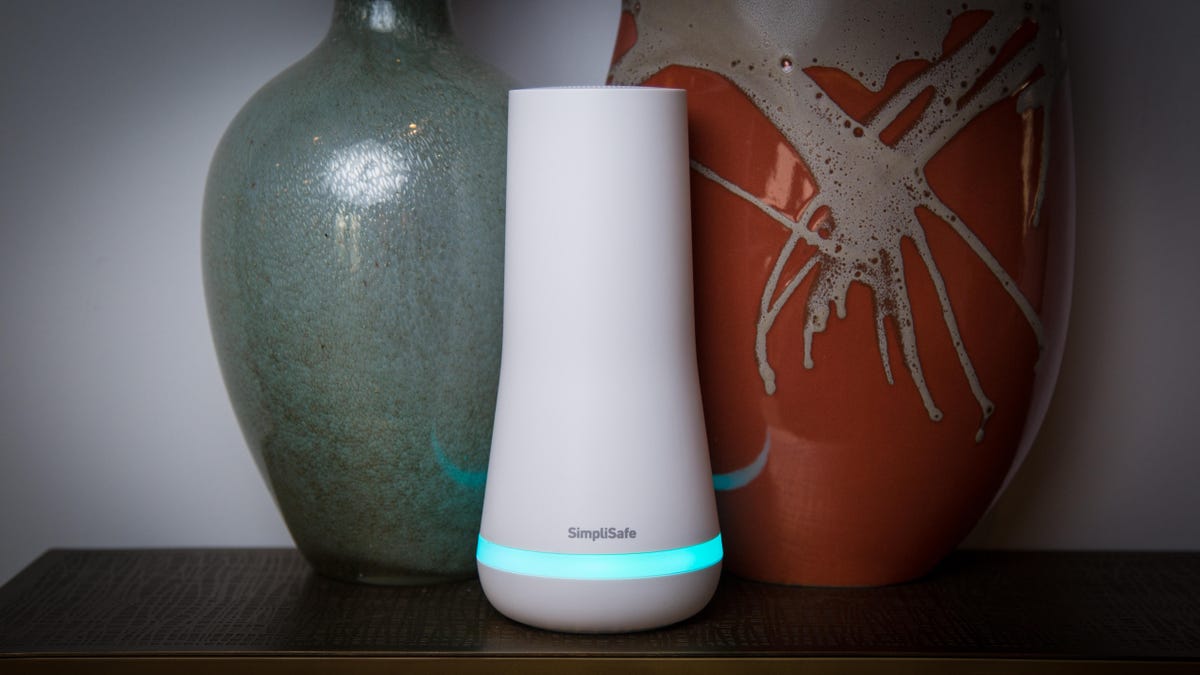
Base station
You'll also need the SimpliSafe base station plugged in somewhere in your home.
Let's get started
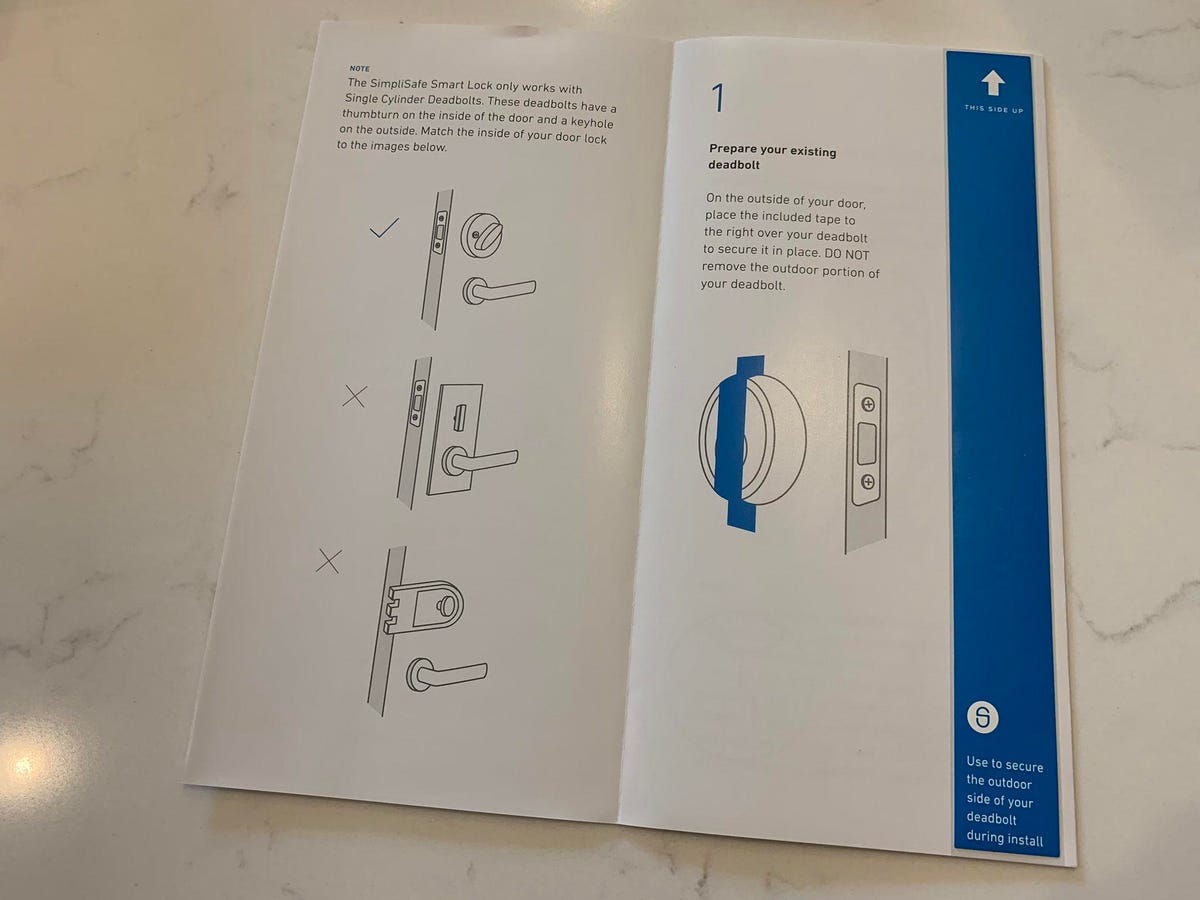
Next, you should know that the SimpliSafe Smart Lock is designed to work with standard, single cylinder deadbolts. If your door uses a mortise lock or an apartment-style lock like the one pictured there in the instructions, then this lock isn't for you.
SimpliSafe's lock is actually just a motorized thumbturn that works with your existing deadbolt and replaces the existing thumbturn on the inside of your door. So, to start with the install, you'll stick this piece of blue tape over the exterior of your deadbolt to hold it in place while you remove the interior.

Taped in place
There we go. With the exterior taped in place, we're ready to remove the interior of the lock.

See ya later, thumbturn
Removing that interior thumbturn is pretty easy. Just grab a Phillips-head screwdriver and unscrew the two screws that bolt it to the exterior of the lock through the deadbolt in the center (and note that if you hadn't taped the exterior of the lock in place, it might have clunked to the ground at this point).
Hang onto those screws, by the way -- we'll be putting them right back in just a minute.
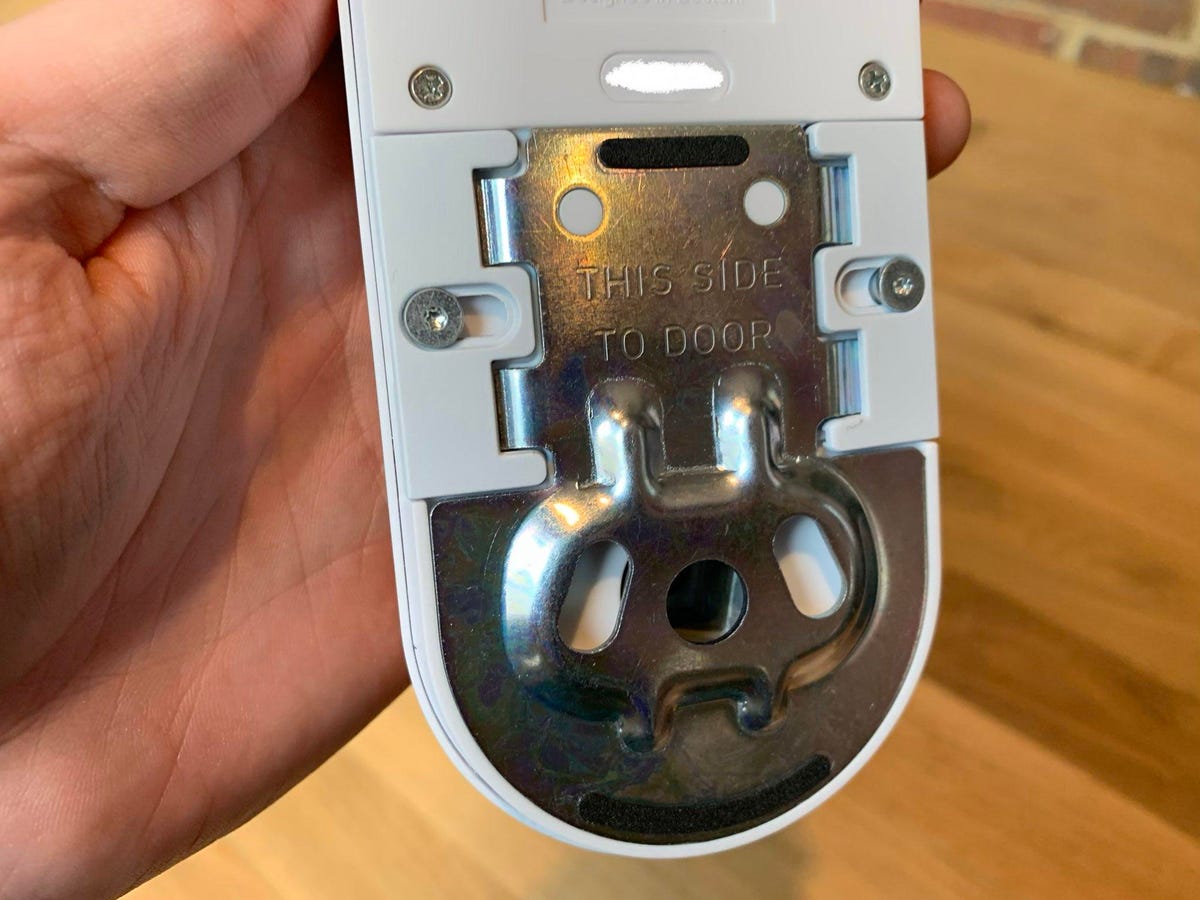
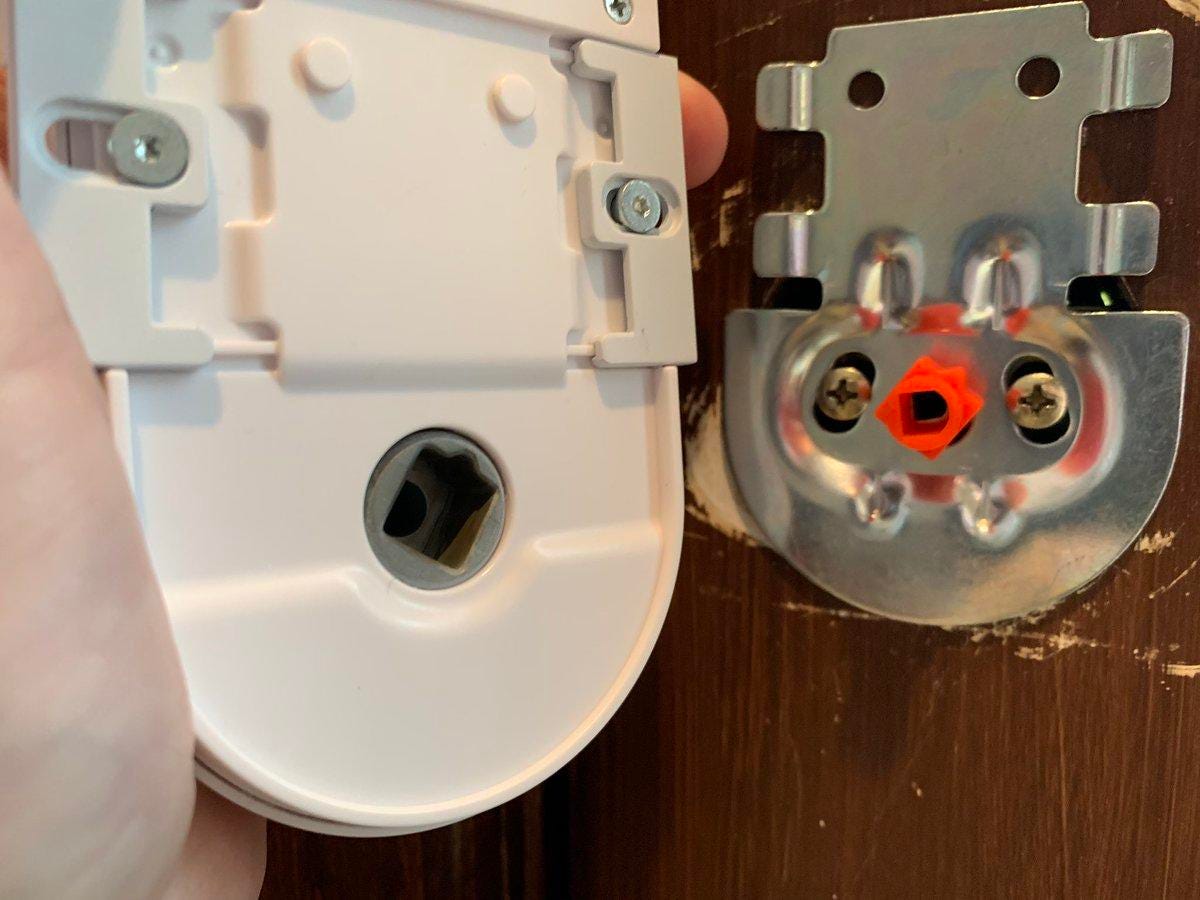
Mounting Plate
Specifically, we'll use those screws to fix this metal mounting plate against the door in place of the old thumbturn. You'll find it ready to go on the back of the SimpliSafe thumbturn, and you'll need to remove it.
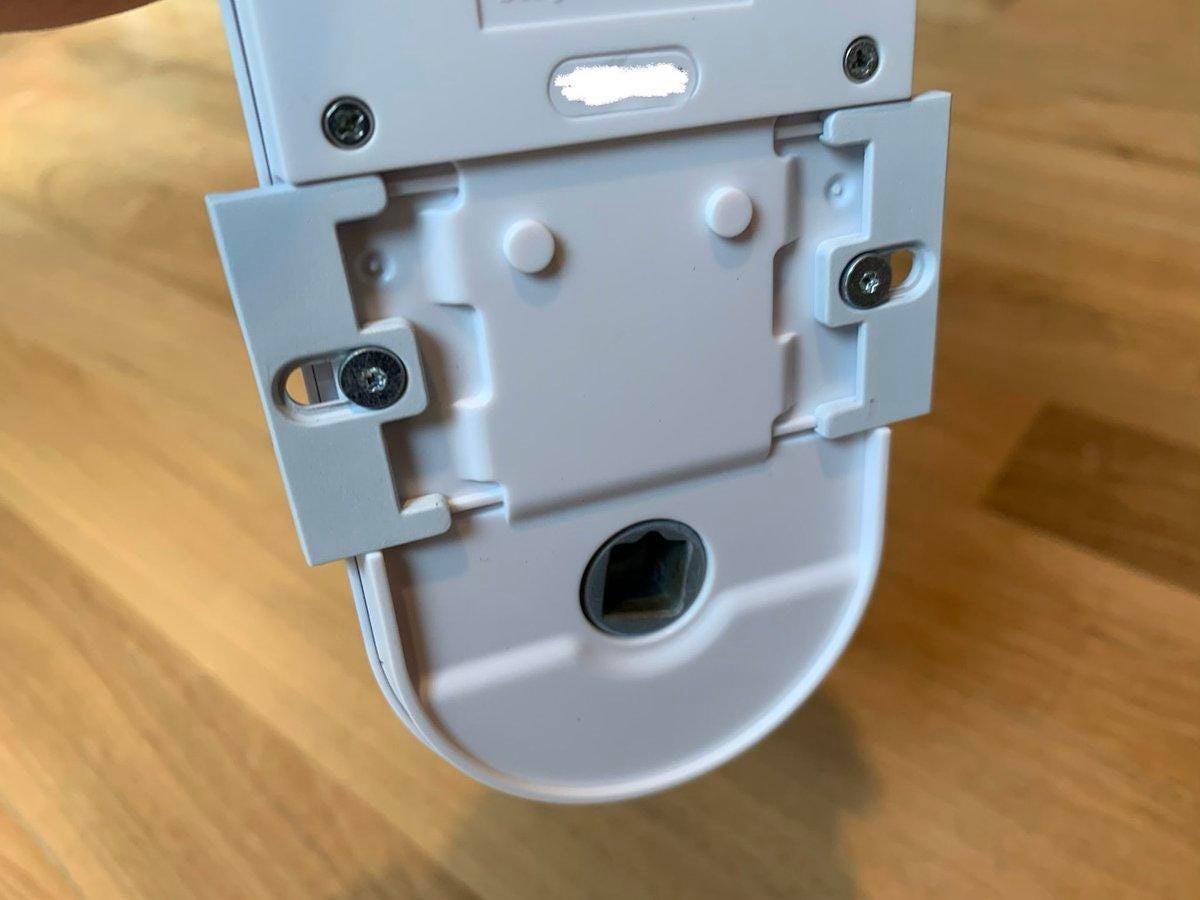
Tabs Open
Fortunately, that's really easy -- just extend those two wing-like tabs on the side of the lock, and the mounting plate will fall right out.
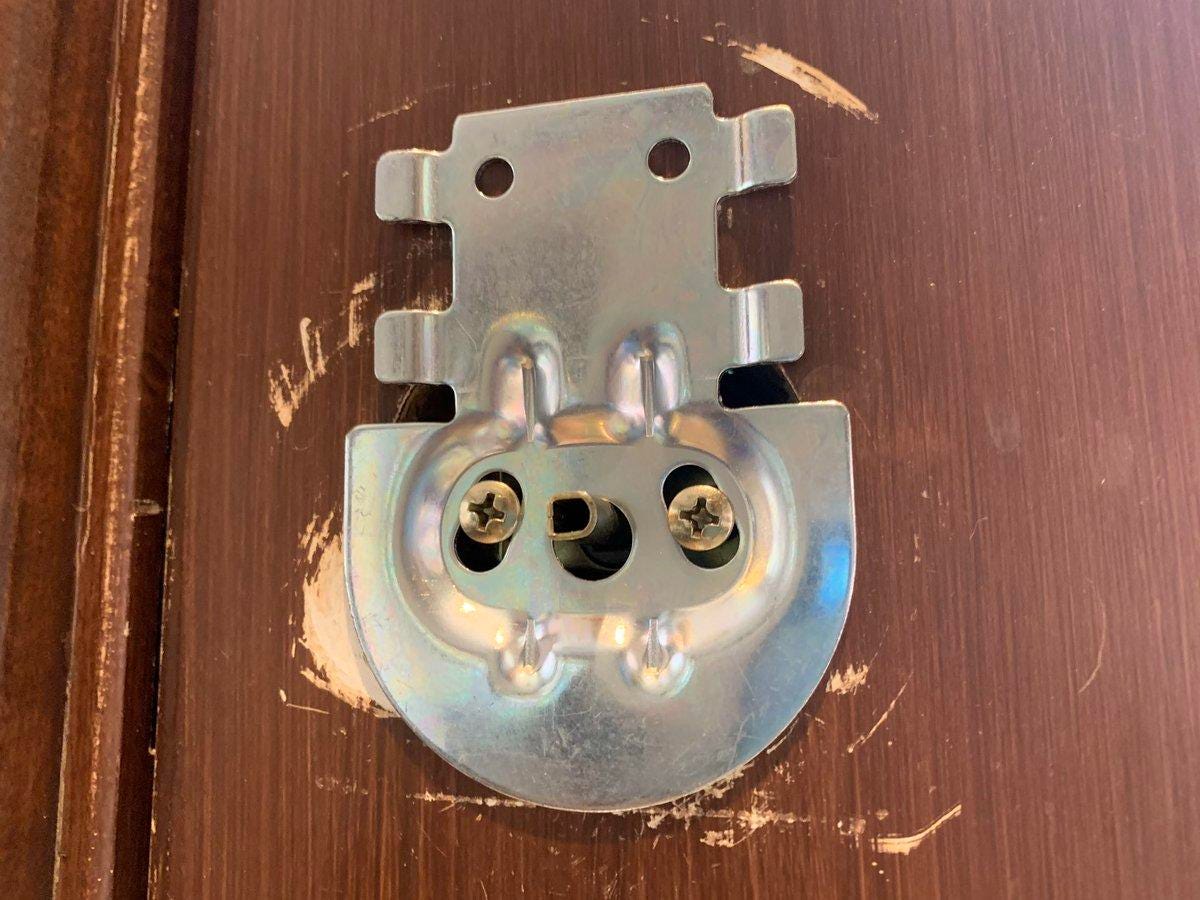
Mounting plate in place
From there, take those two screws and screw them back in, bolting the mounting plate against the door like this (and make sure to put the side that says "THIS SIDE TO DOOR," you know, against the door).
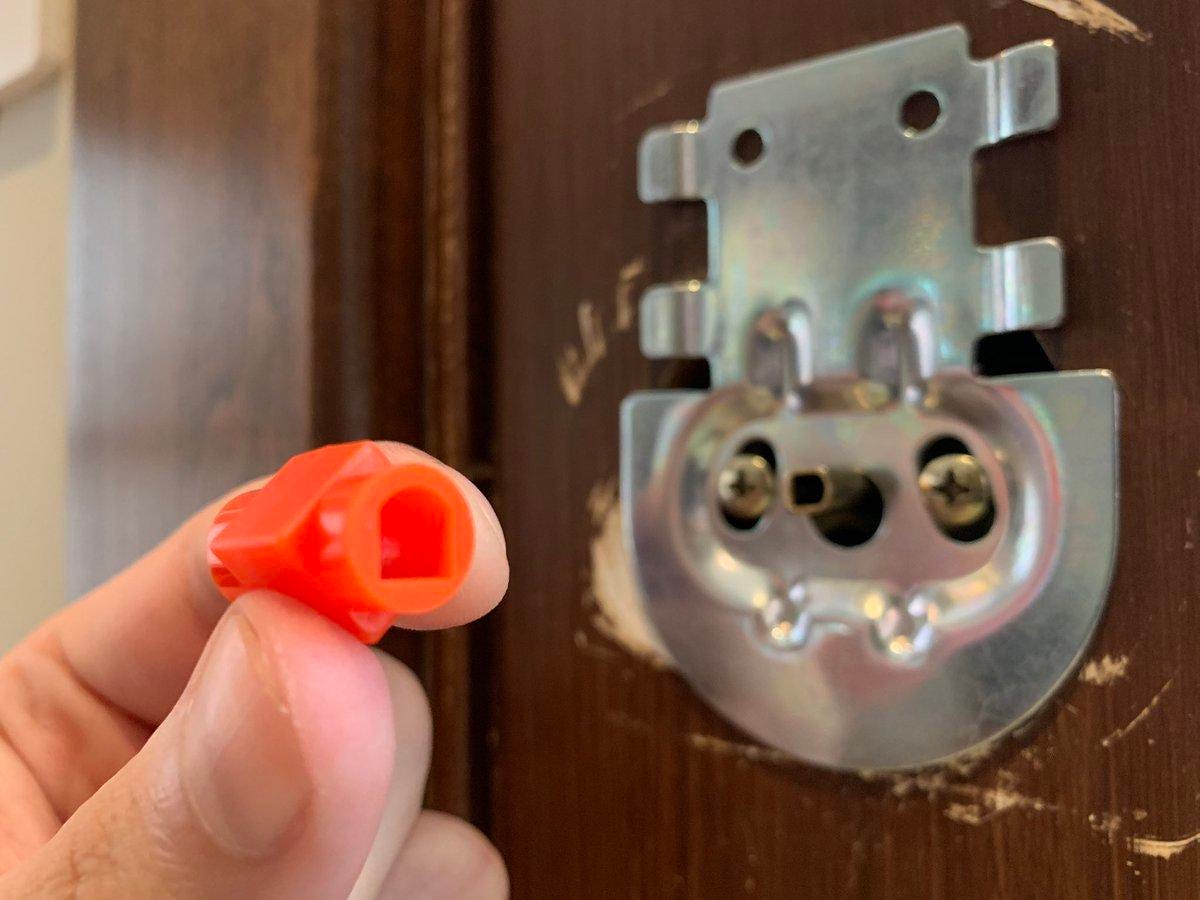
Adapter
Next, you'll need to place a plastic adapter over your deadbolt's tailpiece (that little part that sticks out in the center and actually turns the deadbolt).

Different options
If your lock's tailpiece looks a little different than ours, don't worry -- SimpliSafe includes multiple adapters. Just match the one that fits the shape of your lock's tailpiece (in our case, red).
Almost done
With the adapter in place, the next step is just to fix the new, motorized thumbturn to the mounting plate. Doing so is easy -- just make sure those little slide tabs are open, and pop it in place.
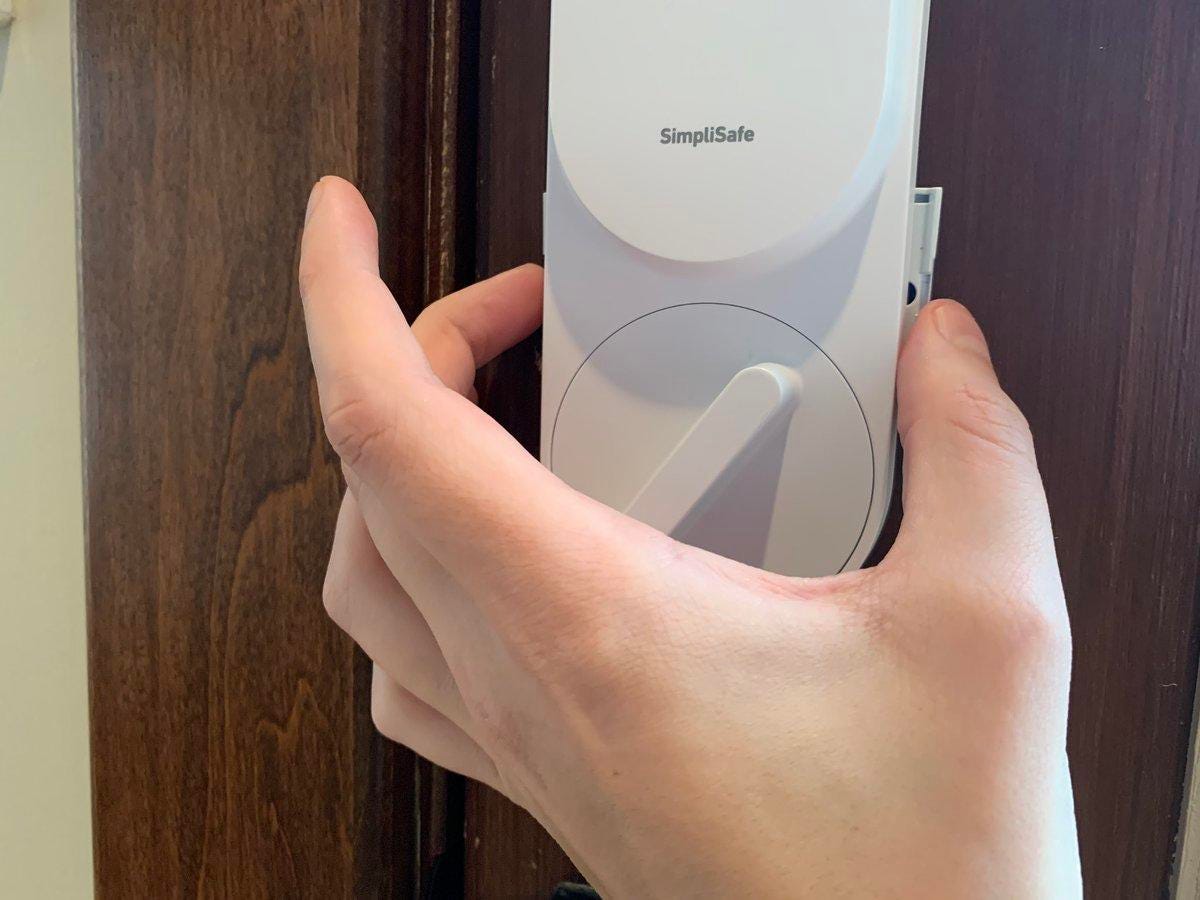
Pinch shut to lock
To affix it to the mounting plate, just pinch those tabs back shut. You don't even need to screw anything in.
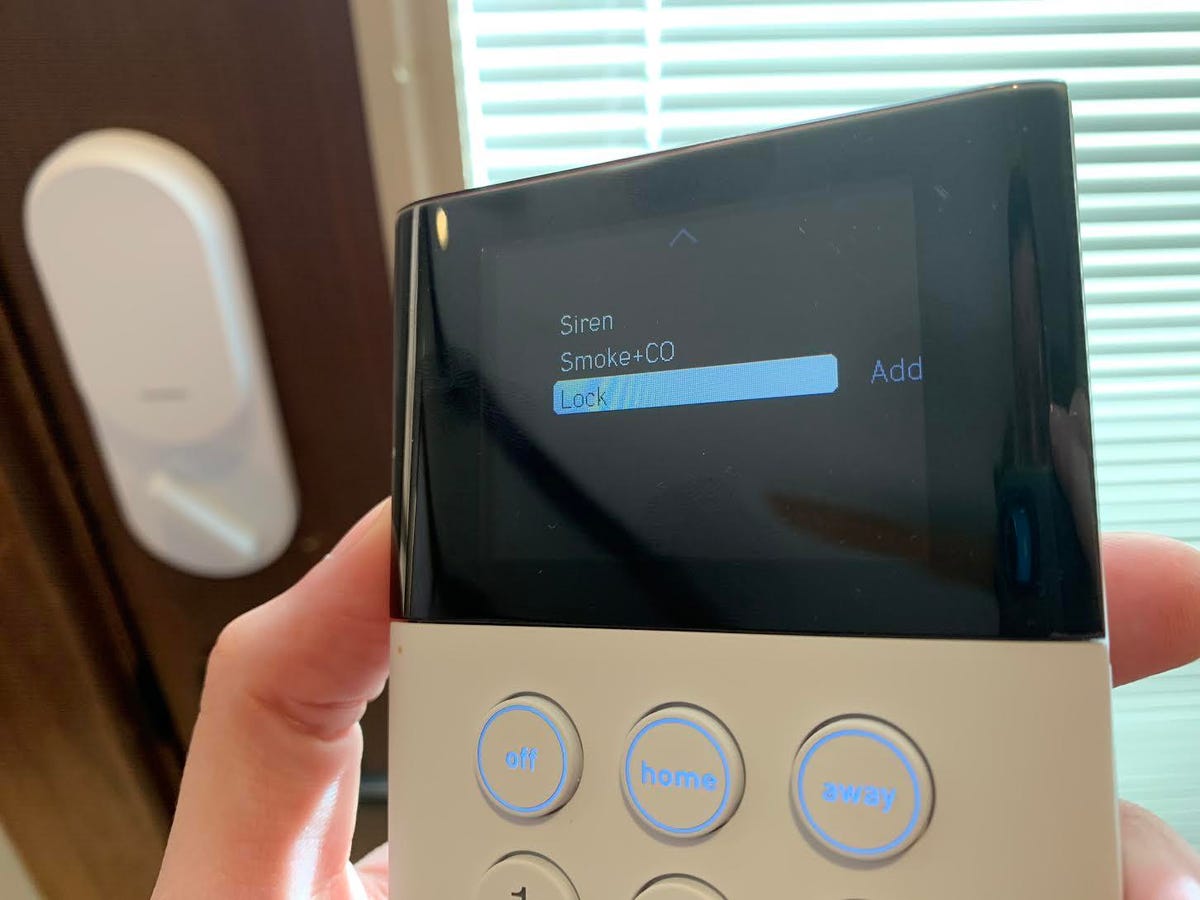
Grab the base station
You can pair the lock to your existing SimpliSafe system using the system's keypad. Just make sure you've updated it to the latest firmware, then look for "Lock" in the section adding new devices. Follow the instructions from there and you'll be all set.

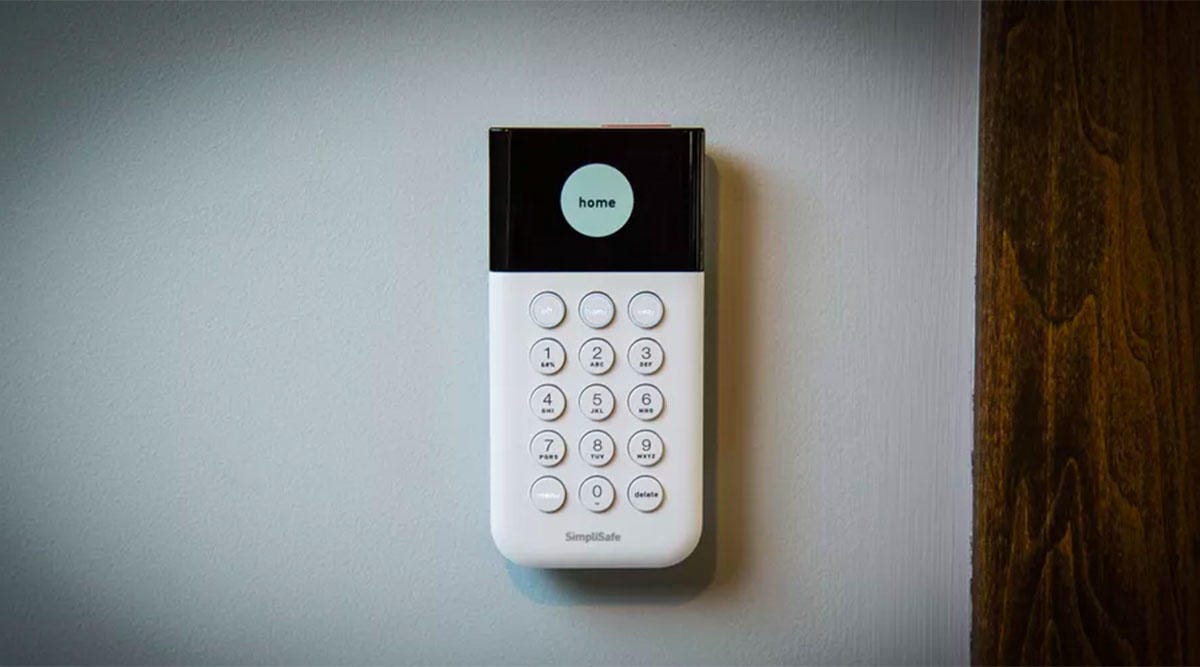
Keypad
Next, go ahead and take the tape off of the exterior of the deadbolt and find a spot for the keypad. It has a peel-off backing that lets you stick it wherever you like, and it also comes with mounting screws if you'd prefer a sturdier approach. To activate it, just pull a little tab out of the side to activate the battery.
From there, you'll be able to use your normal SimpliSafe system code to simultaneously unlock the lock and disarm the alarm.

SimpliSafe app
You'll be able to control the lock via the SimpliSafe app. Just tap the little icon next to the name you've given it to lock or unlock the door. You can also tell the system how you want the lock to behave when you switch between modes, or set it to lock automatically after set period of time.

Code management
In addition to the Master PIN, you can also choose a duress PIN that deactivates the system but silently tells the police that you need help, a nice feature for nightmare scenarios where someone might be forcing you to unlock the door or turn off the alarm against your will. You can also assign up to four person-specific codes for friends and family members. You'll be able to use those to track who's coming in from the app's timeline.

Works with Alexa and Google
SimpliSafe systems work with Alexa and Google Assistant. You can't use those integrations to lock the SimpliSafe lock on its own, but you can ask your assistant of choice to arm the system. If you've set the deadbolt to lock when the system is armed, then it'll lock when you arm the system with your voice, too.
More Galleries

My Favorite Shots From the Galaxy S24 Ultra's Camera
20 Photos
Honor's Magic V2 Foldable Is Lighter Than Samsung's Galaxy S24 Ultra
10 Photos
The Samsung Galaxy S24 and S24 Plus Looks Sweet in Aluminum
23 Photos
Samsung's Galaxy S24 Ultra Now Has a Titanium Design
23 Photos
I Took 600+ Photos With the iPhone 15 Pro and Pro Max. Look at My Favorites
34 Photos
