The Nikon Coolpix P500 improves on its predecessor's features and shooting performance, but its photos and video quality still aren't as good as the rest of the package.
Joshua Goldman
Managing Editor Josh Goldman is a laptop expert and has been writing about and reviewing them since built-in Wi-Fi was an optional feature. He also covers almost anything connected to a PC, including keyboards, mice, USB-C docks and PC gaming accessories. In addition, he writes about cameras, including action cams and drones. And while he doesn't consider himself a gamer, he spends entirely too much time playing them.
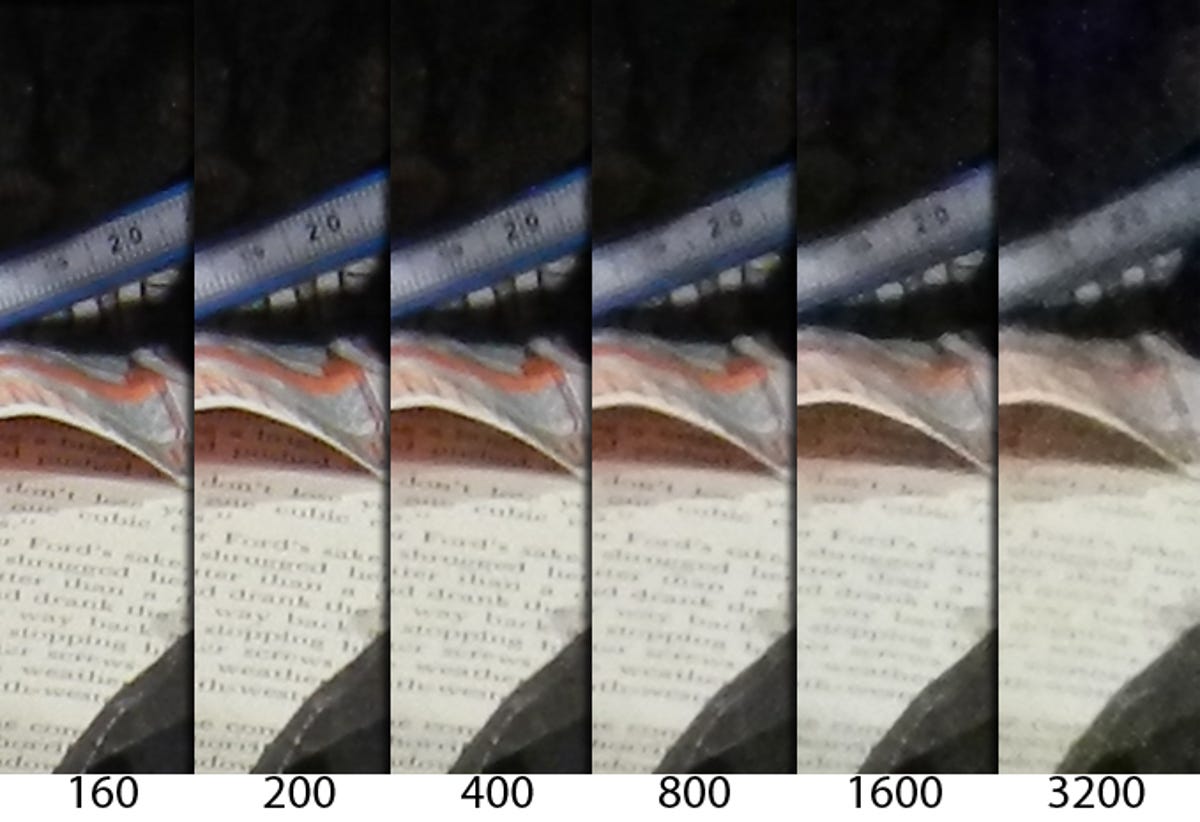
Put simply, the P500's photo quality, though decent for a point-and-shoot camera, is no doubt going to let down anyone expecting higher-caliber photos because of its price and features. The lowest ISO is 160, and things aren't sharp there; start adding in more noise reduction as you go up in ISO and subjects only get softer. Photos are OK at ISO 400, but colors get somewhat muddy and desaturated. The P500 can be locked to use ISO 160 to 200 or ISO 160 to 400; I strongly recommend using the former when you're in bright conditions. The results above ISO 400 just aren't good for much beyond small prints and Web use, if anything.
Every user is different, though, and seeing what this camera is capable of, some people will just be thrilled with what they are able to capture and more forgiving of the results.
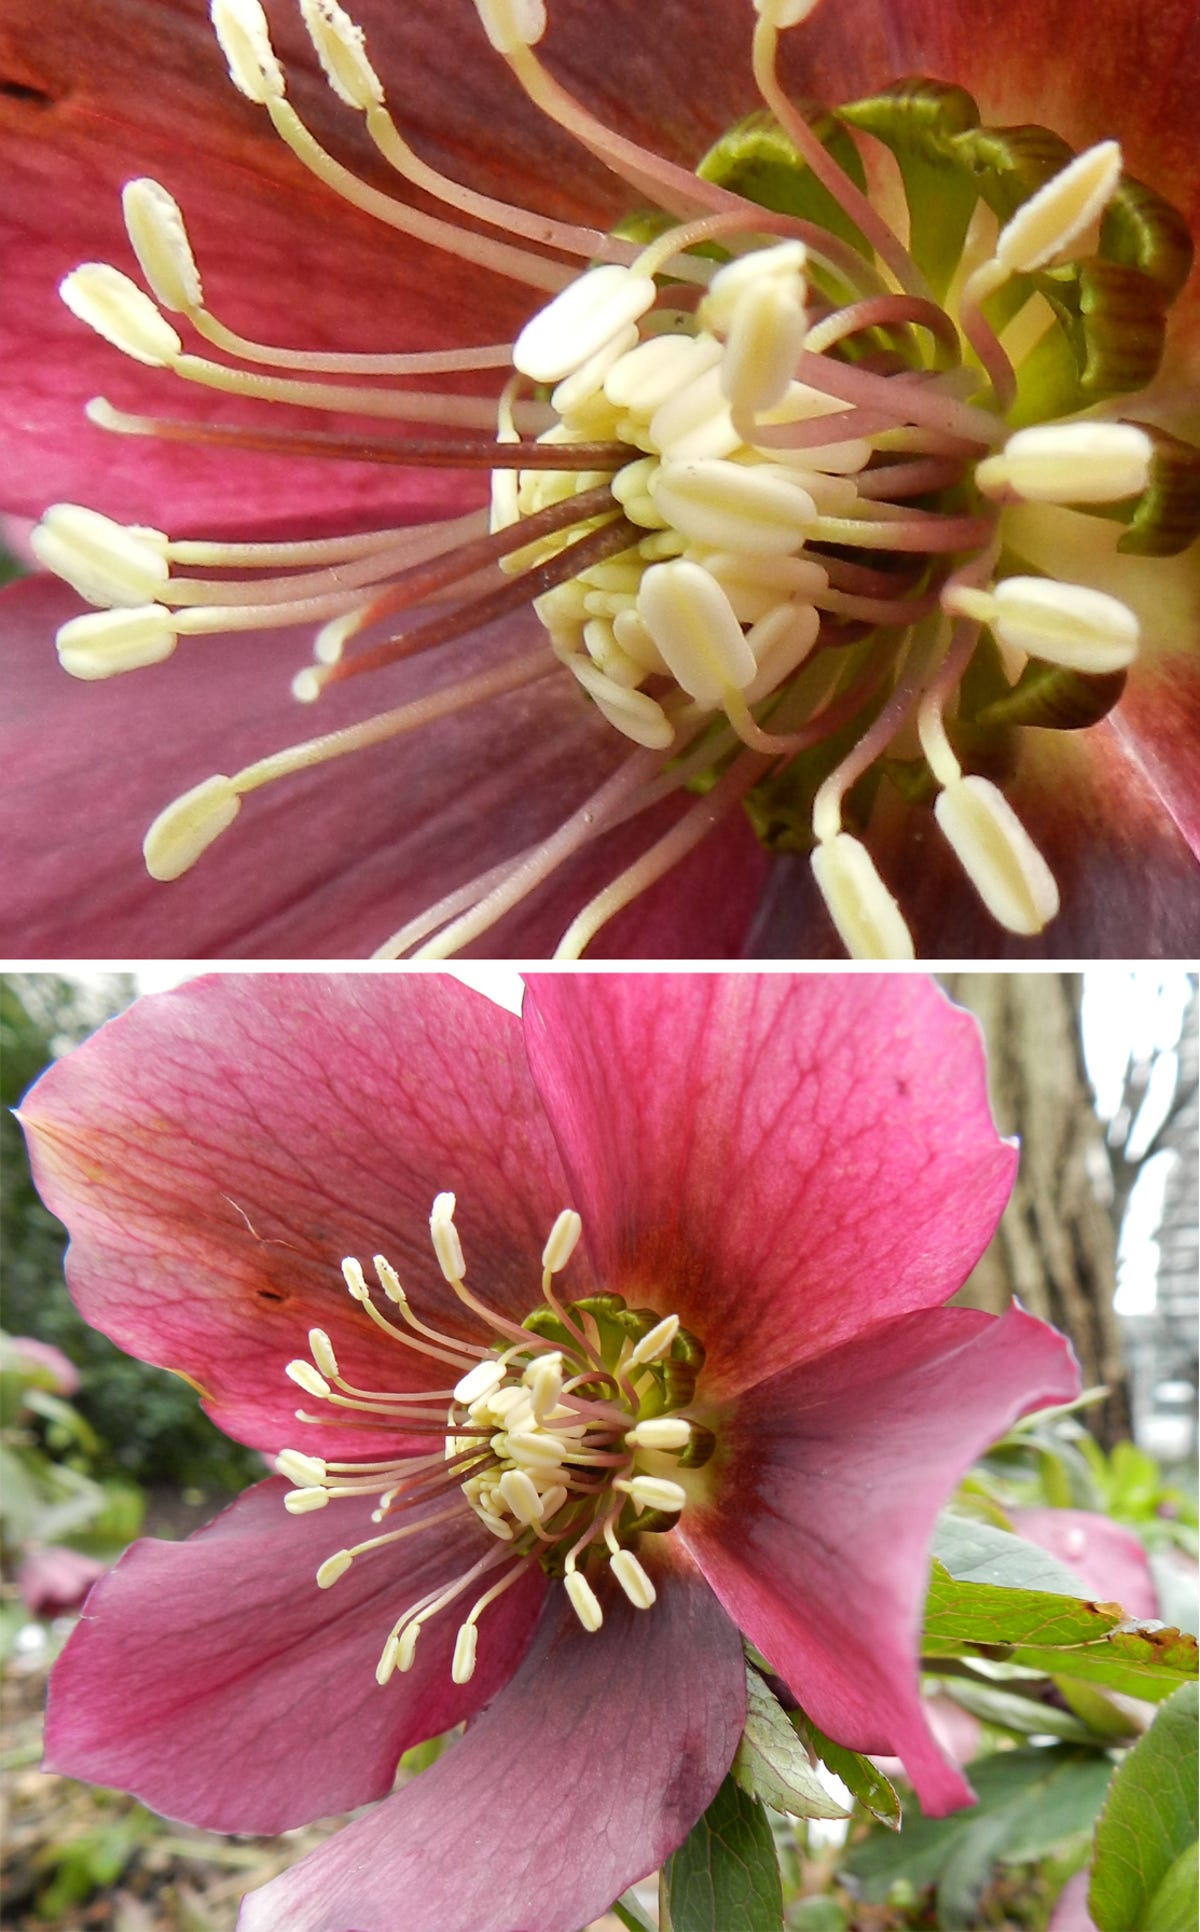
Like a lot of megazooms, the P500 is at its sharpest in Macro mode (the top photo is a 100 percent crop of the bottom). At its widest position, the lens is able to focus as close as 4 inches from a subject. With some help from the zoom it can get as close as 0.4 inch.
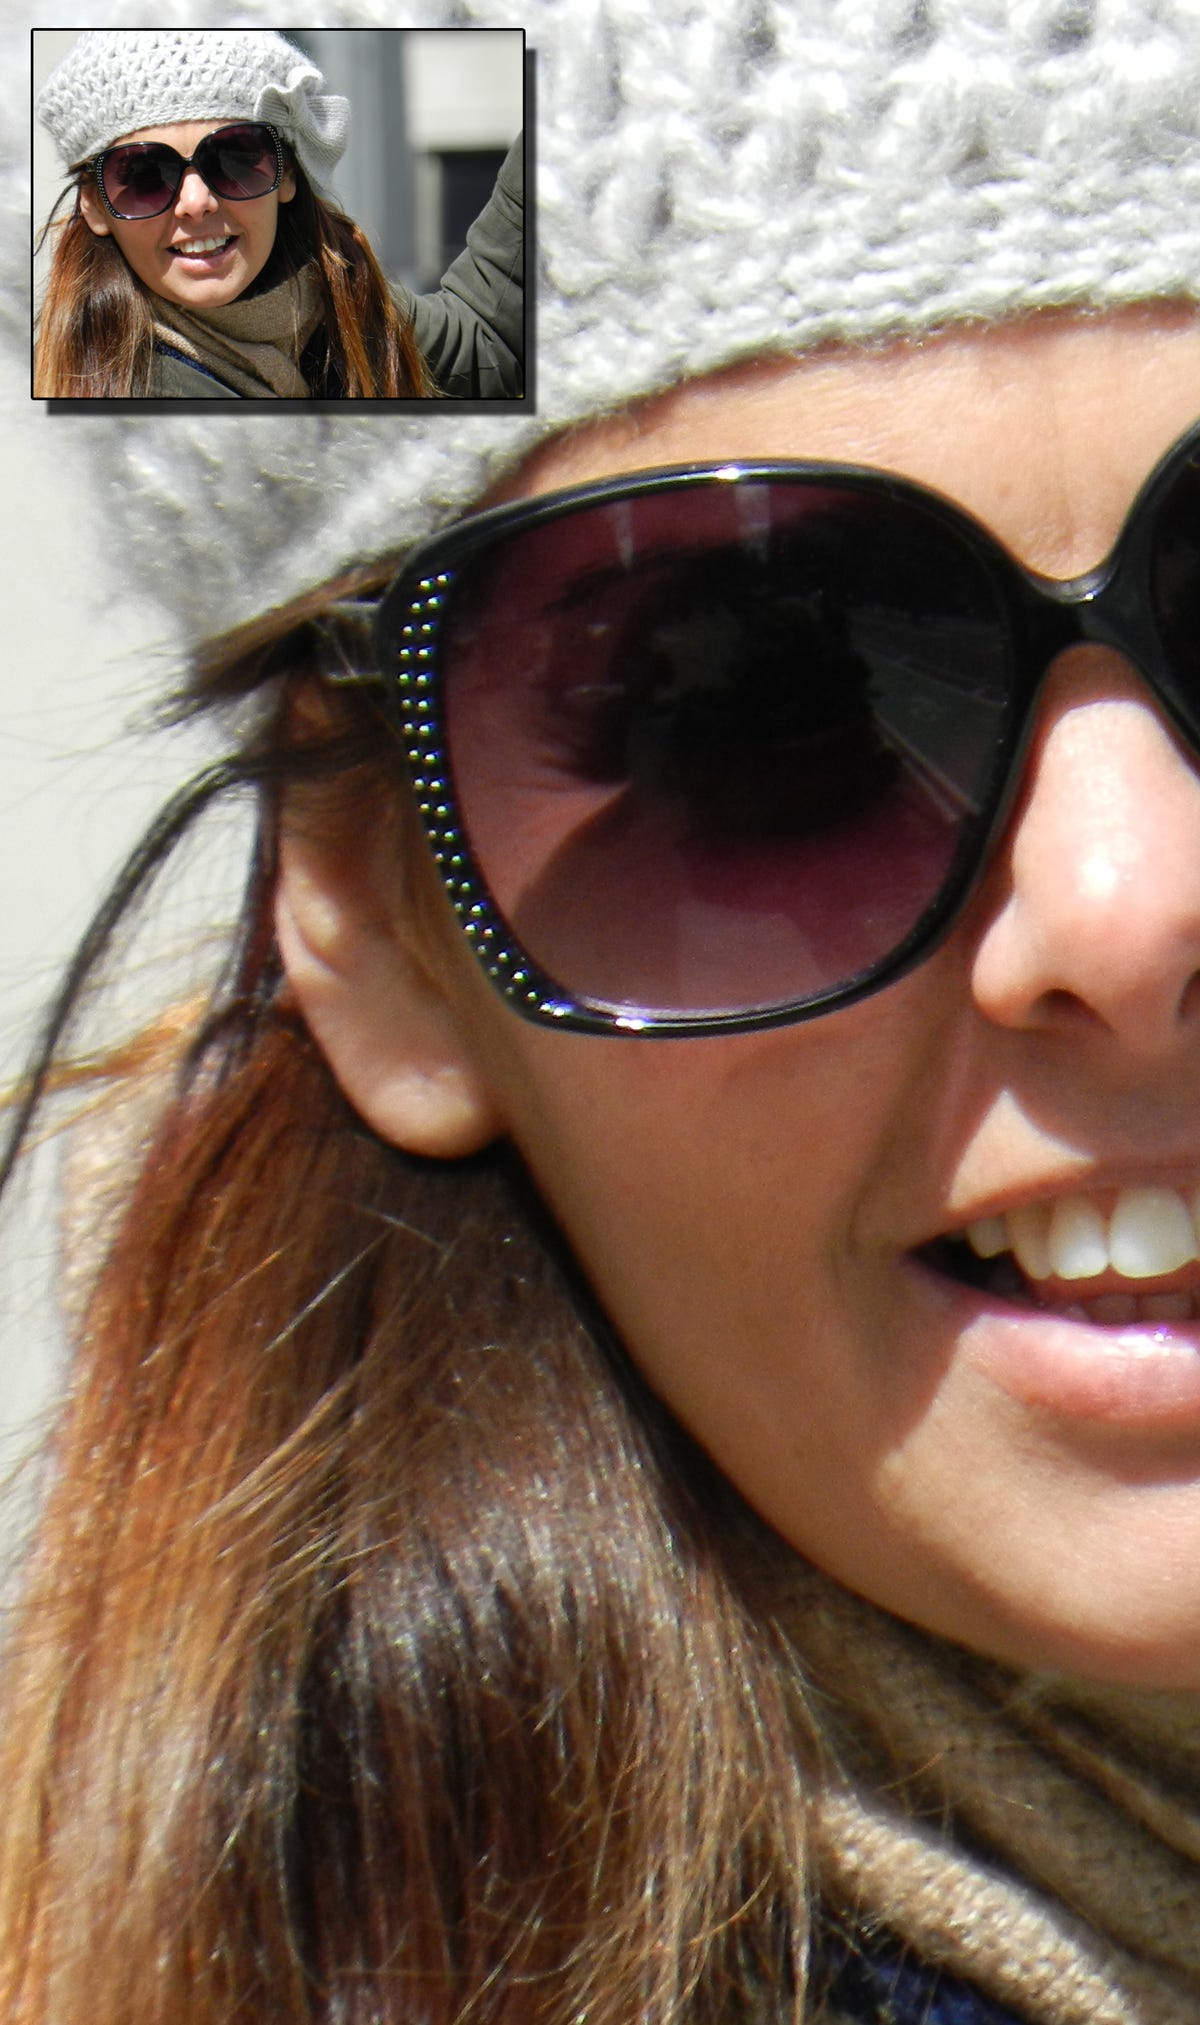
This is really the best-case scenario for sharpness with the lens fully extended. It's a 100 percent crop from the inset image and although it's soft, it's usable. Shots come out of the camera at 300ppi for prints at 13x10. At that size it's easy to see how soft and smeary her hat and hair look, but it otherwise holds up. Enlarging or cropping and printing at that size is probably not a good idea. But at small sizes, the photos are fine.
4 of 12 Joshua Goldman/CNET
Semimanual and manual controls
The P500's shooting modes are mostly for point-and-shoot users, but you do get PSAM options and a spot for a set of custom settings on the mode dial. Sadly, the largest aperture is f3.4 (top); the P100 started at f2.8. The smallest aperture is f8 (bottom). Shutter speeds go from 1/1,500 second to 8 seconds.
5 of 12 Joshua Goldman/CNET
Zoom range
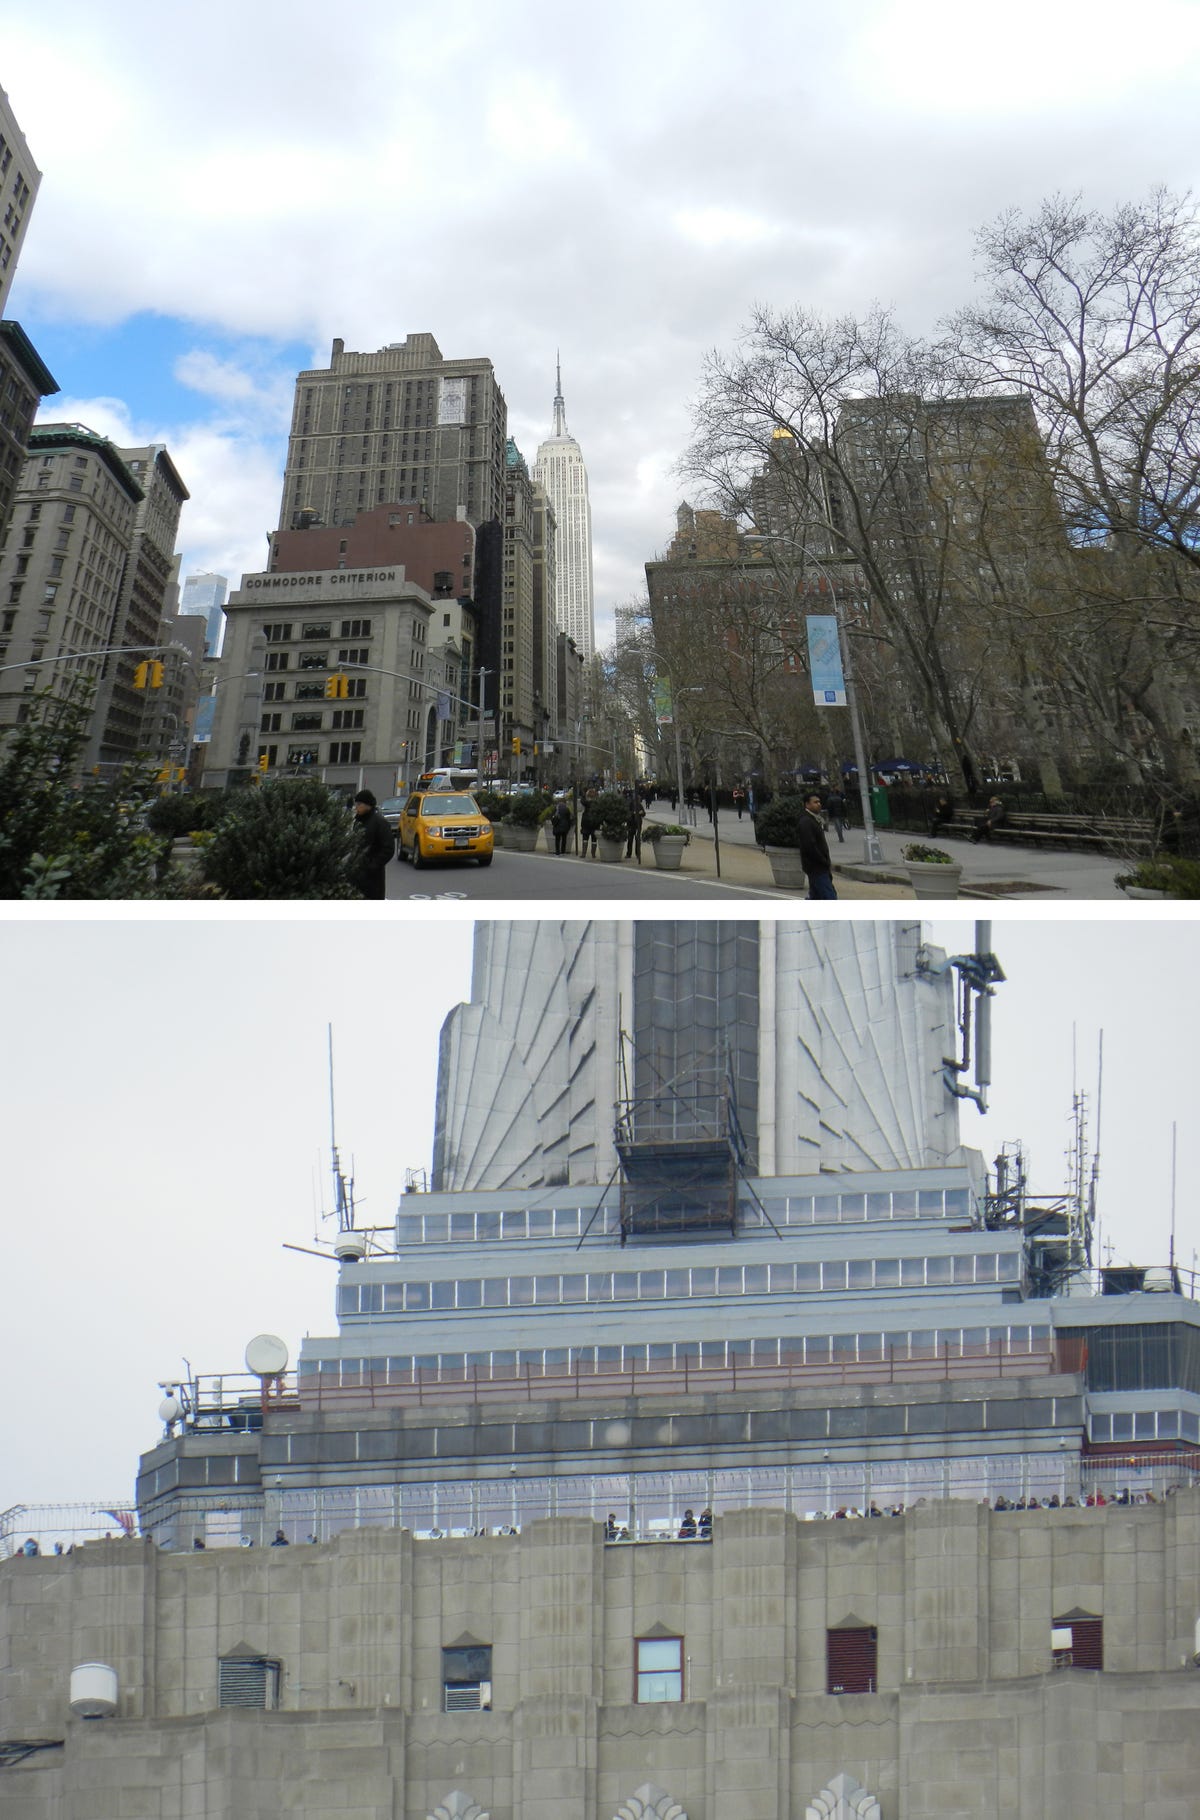
There's no denying that the zoom range on the P500 is incredible for its size and price.
6 of 12 Joshua Goldman/CNET
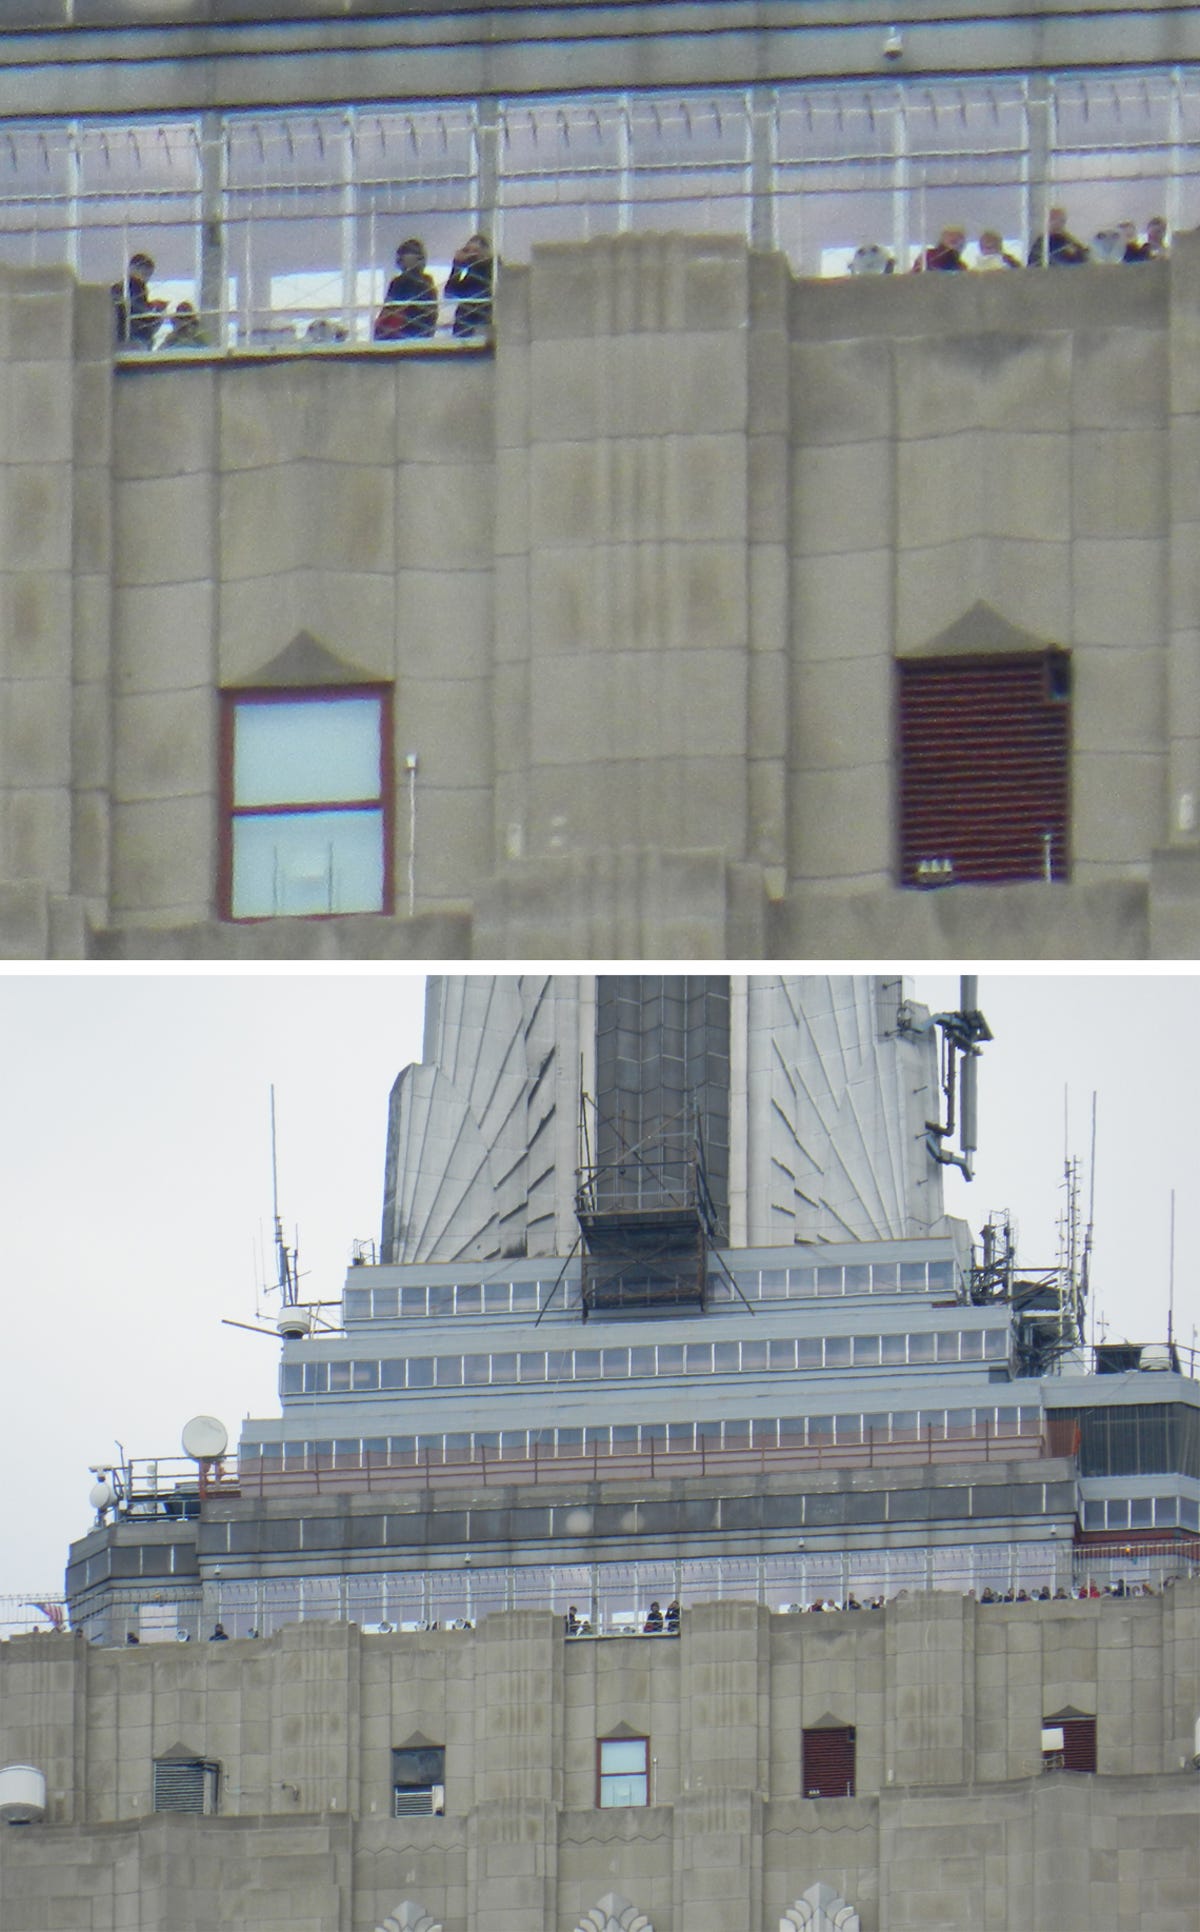
810mm at 100 percent, take two
Just in case you were wondering what that shot of the Empire State Building observation deck from the previous looked like at 100 percent, here you go. The top photo is a 100 percent crop from the bottom photo.
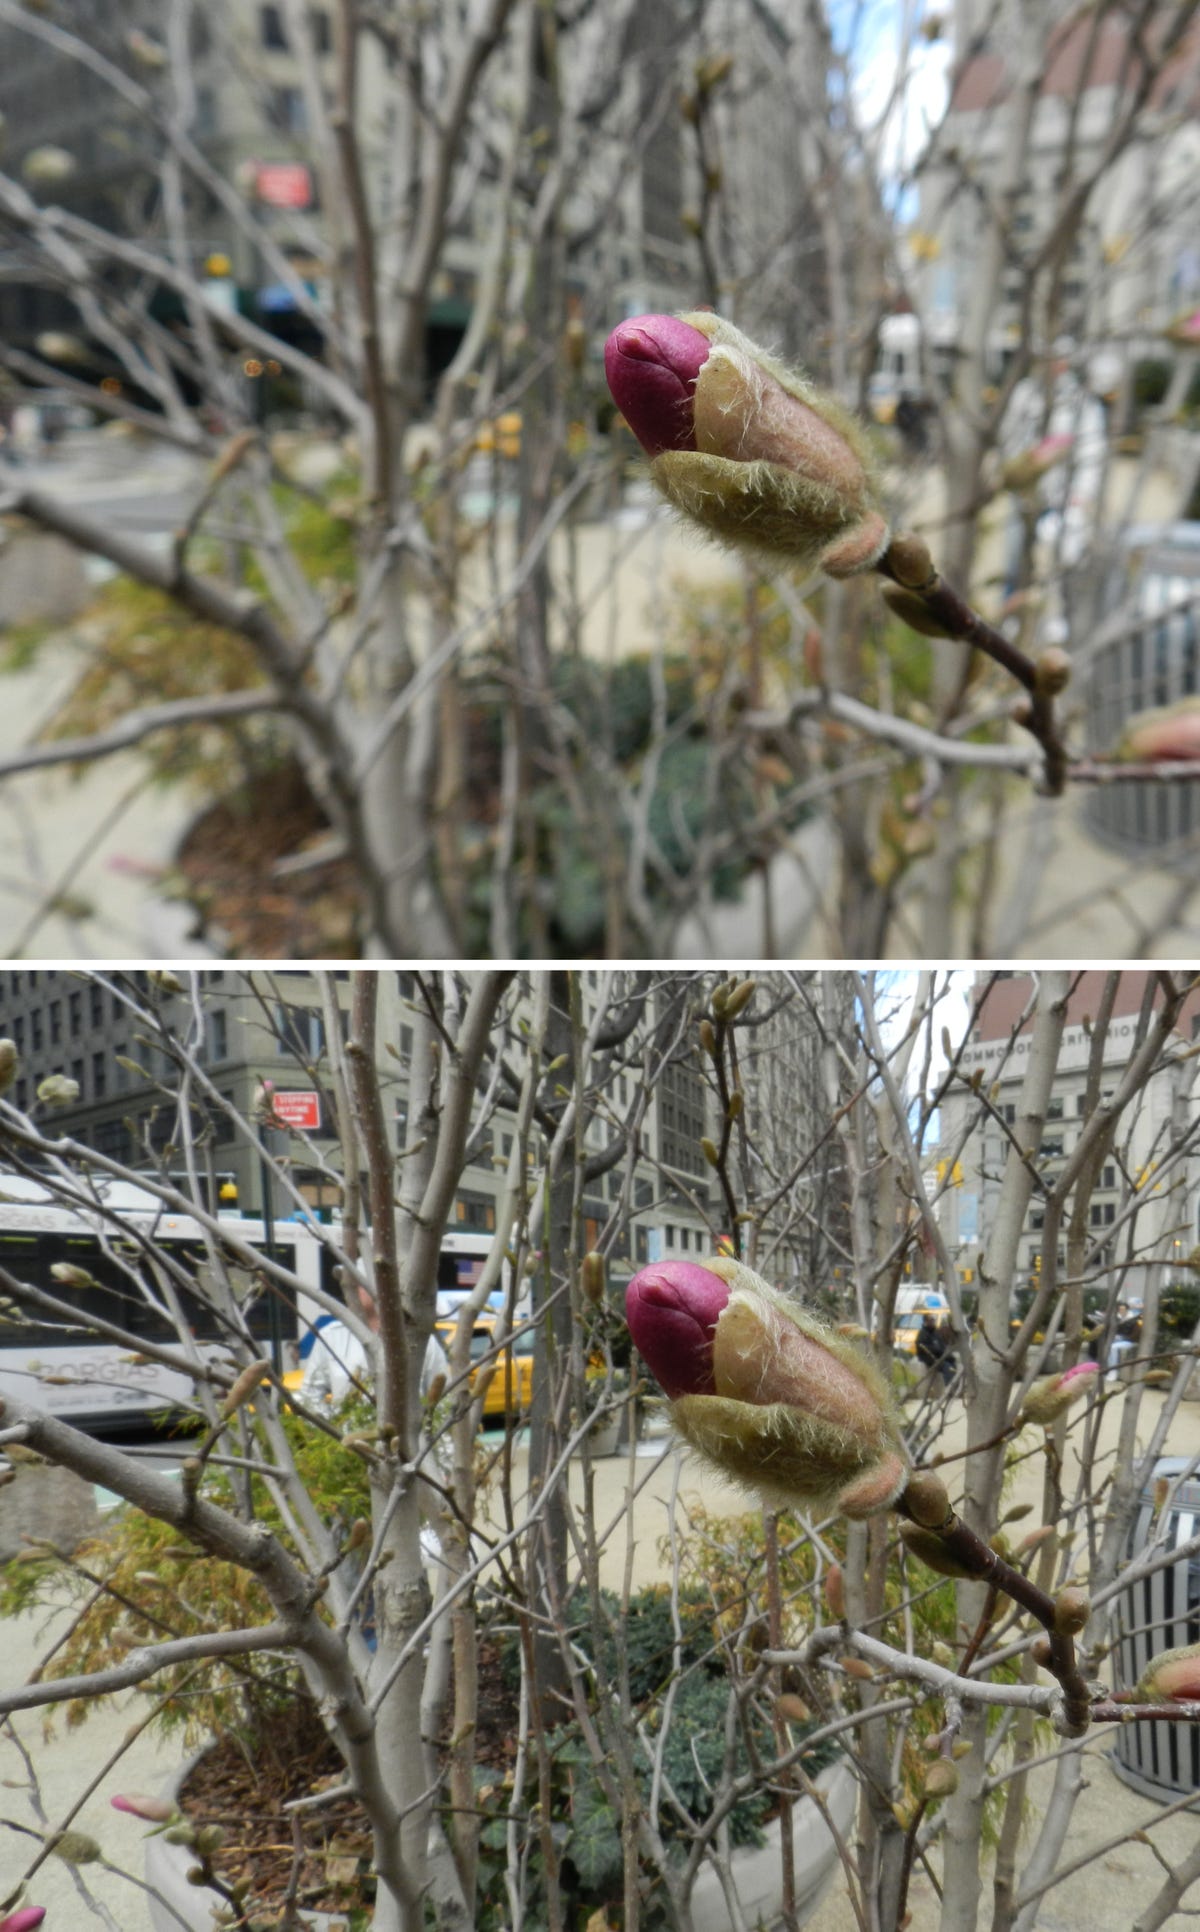
Nikon does a great job correcting for lens distortion at both ends. There's no sign of barrel distortion (top) or pincushioning (bottom). The lens isn't sharp in the center, but it is consistent from side to side with just some slight softening at the edges and in the corners.
8 of 12 Joshua Goldman/CNET
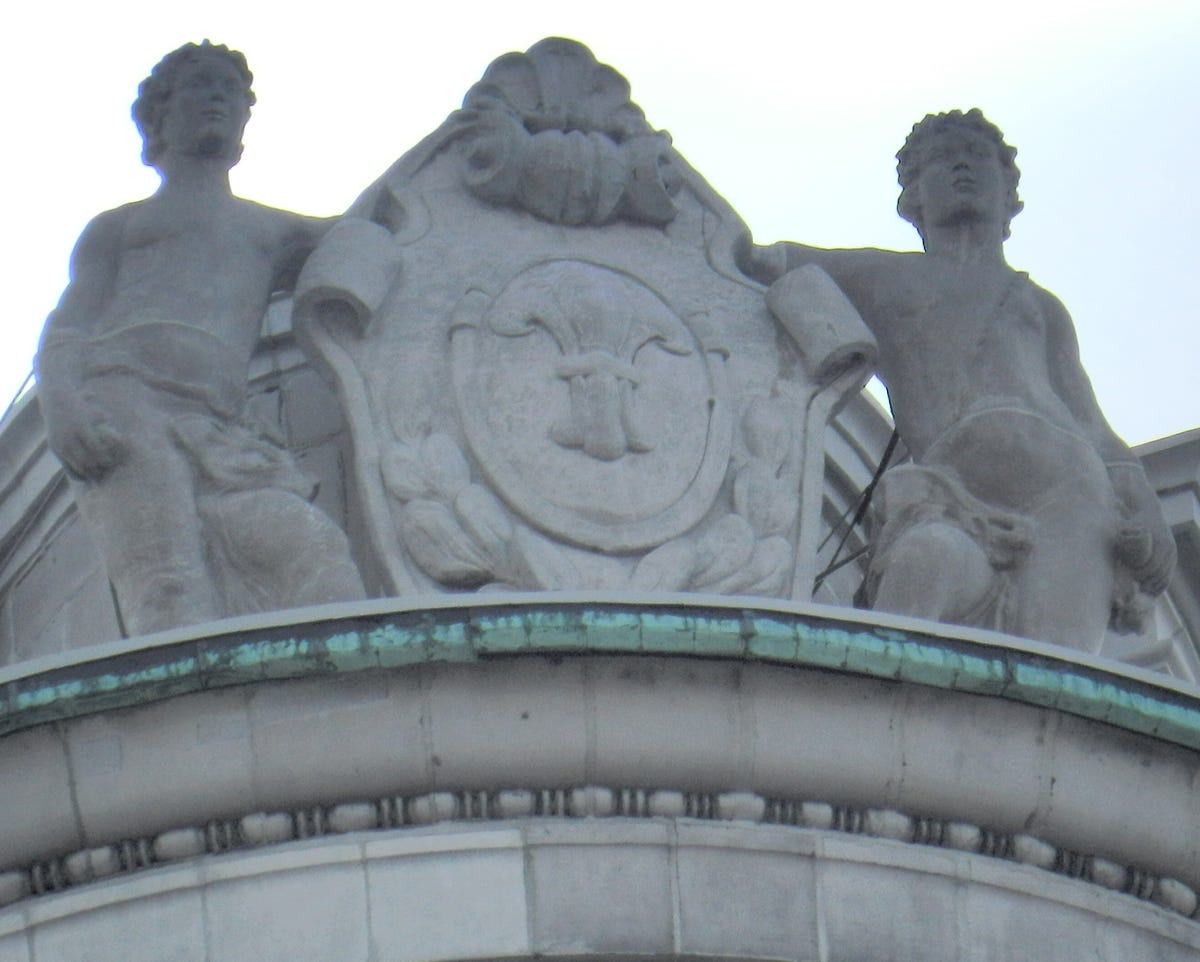
Fringing
Though it's bad with most megazoom cameras, the fringing in high-contrast areas of photos is terrible with the P500, especially when the lens is fully extended. The purple fringe on the left side of the left statue is most noticeable--even at small sizes--but you can also see yellow fringing as you move across the frame over to the right statue. It's really only the bright purple/blue fringing that's visible at smaller sizes, though. Lens flare was also an issue with the P500.
Up through ISO 400 color performance is very good from the P500. Everything turned out vivid and bright without looking artificial. Exposure is generally very good, plus there are plenty of options for adjusting and improving the results. Auto white balance looks overly warm under incandescent light; it performed well under natural light. The camera's presets work fine, too, and there's a manual option.
10 of 12 Joshua Goldman/CNET
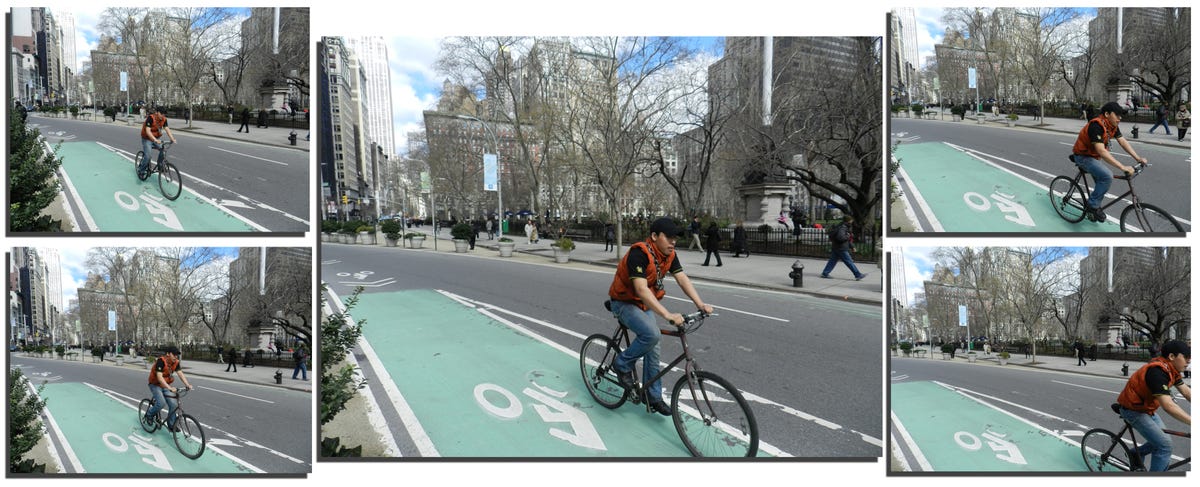
High-speed burst
While the P500 has many burst modes, most of them are at reduced resolutions of 1 or 2 megapixels. Used here is its fastest full-resolution setting, shooting at 10 frames per second for up to five shots. Focus and exposure are set with the first shot; there is no continuous option with autofocus.
Somewhat hidden in the P500's Backlighting mode is an option for high dynamic range (HDR) photos. Press the shutter release and the camera takes photos at different exposures and combines them into one shot to help bring out highlight and shadow detail (right). It also stores a normal photo taken at a normal exposure (left). The process takes several seconds, so don't use it if you're in a hurry.
Nikon includes two panorama modes: Easy and Panorama Assist. The latter uses a ghost image on screen to help you line up your successive photos. The former, used here, just requires you to press the shutter and pan the camera left, right, up, or down to create a panorama in camera. These modes never handle movement well, so they're best used on scenery without movement in it. View larger.


