Five new Facebook privacy tweaks (screenshots)
Facebook just launched a new privacy center that offers even more privacy options, and reintroduces some of the older, lesser-known settings. Find out what they are and how to adjust them.


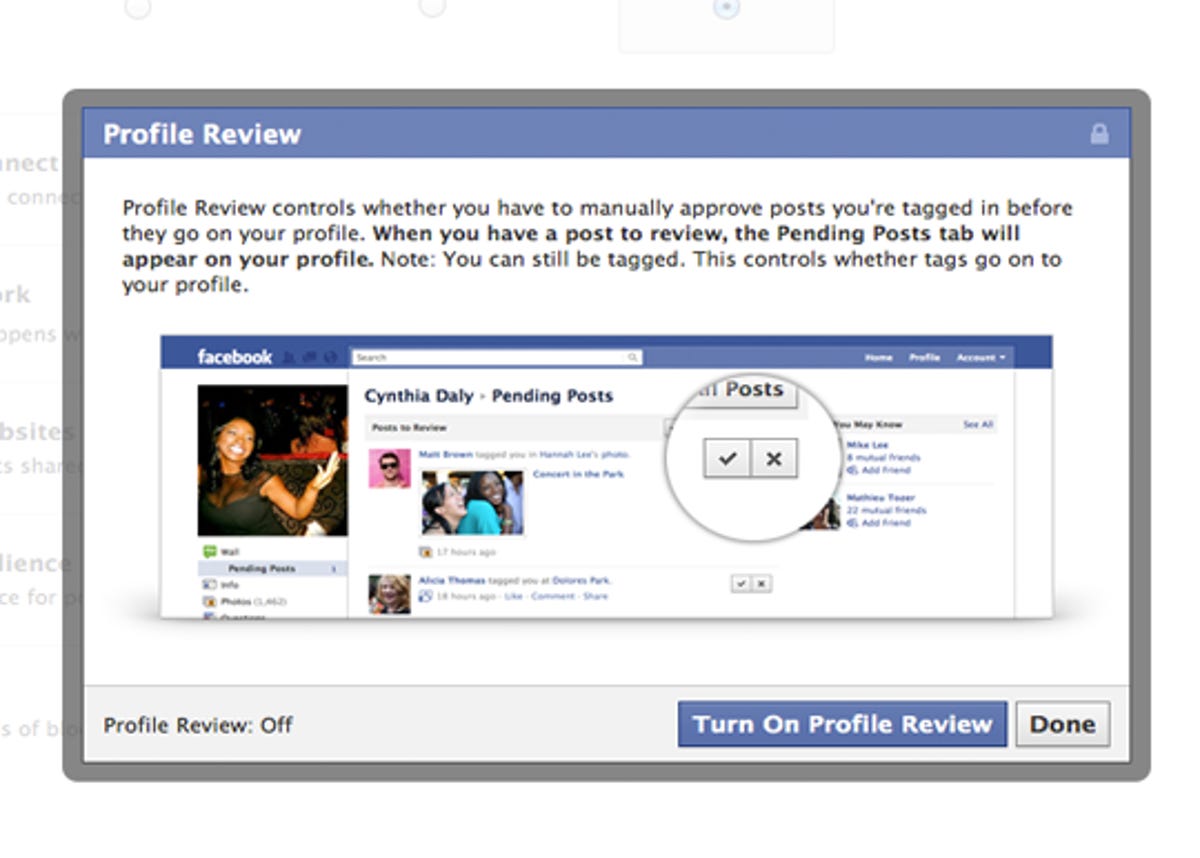
Approve tags before they're published
Facebook finally lets you approve tagged photos and posts of you before they land on your profile. How many times has a friend tagged you in an unflattering photo? It's time to end these actions.
Go to Account > Privacy Settings and select "Edit settings" next to "How tags work." Then hit "Edit" next to Profile Review and you'll be prompted to turn on the settings. Now, every time someone tags you in a status, photo, or place, the post will appear in the "Pending approval" section on your profile (in the left sidebar).
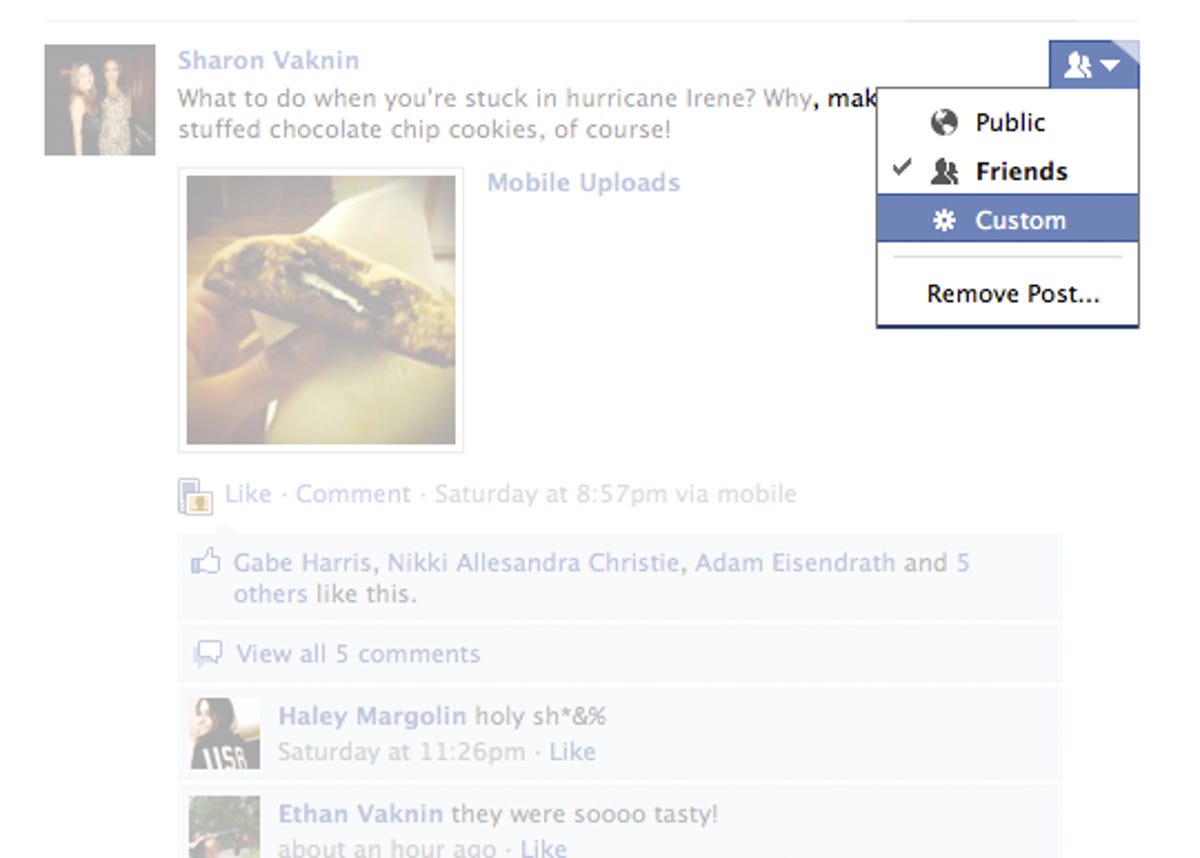
Decide who gets to see your posts
Facebook reintroduced selective posting in this privacy update. Once you write your status, click on the small triangle next to the Post button to make the post visible to friends, public (anyone on the Internet), or custom (exclude individuals or lists).
To change the visibility after you've posted, head back to the post on your wall, hover over it, and click the drop-down menu in the upper-right to change the visibility.
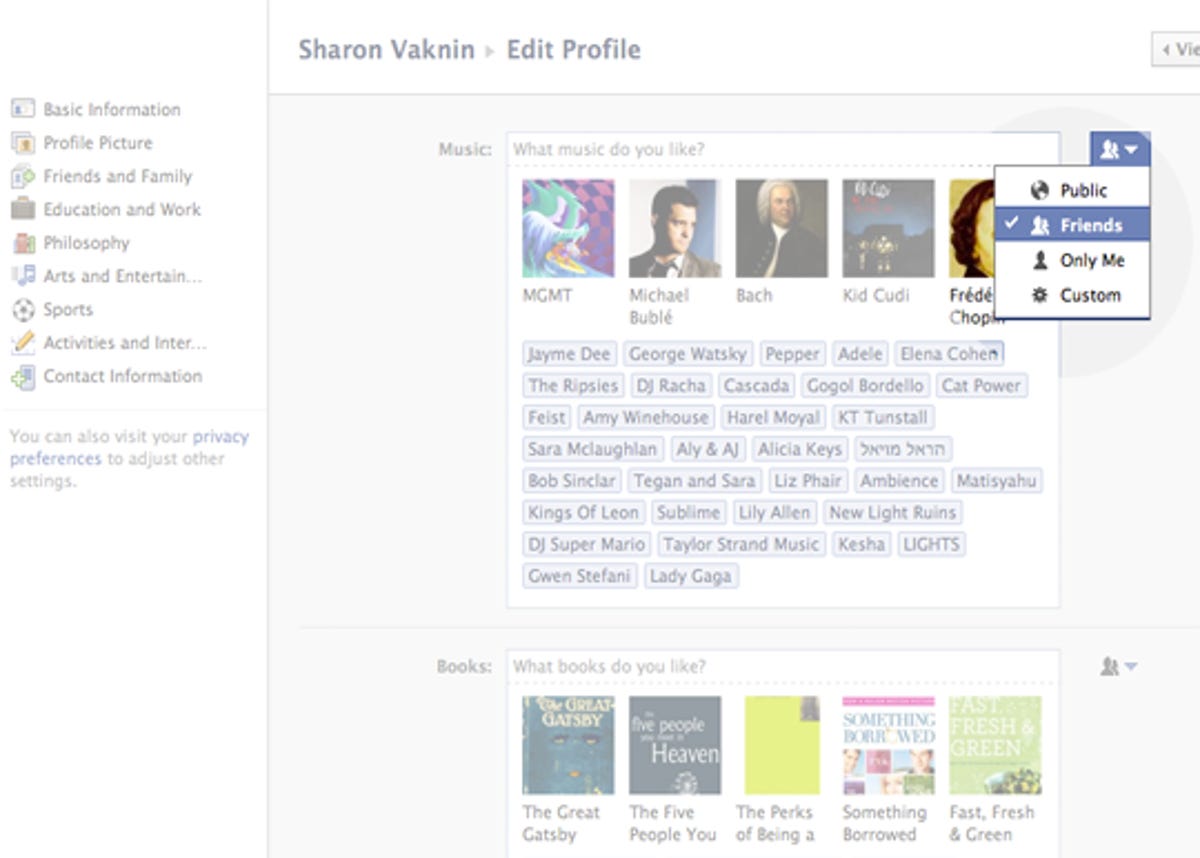
Change privacy settings for any profile item
It's now much easier to change the privacy for every element of your profile. For example, you can share your hometown with everyone, but your birthday to just your friends. Or, make it so that only close friends can see who you're in a relationship with.
Go to your profile and select Edit profile at the upper-right corner of the page. Then head to one of the categories (on the left) and change the privacy of its elements using the drop-down menu next to each field.
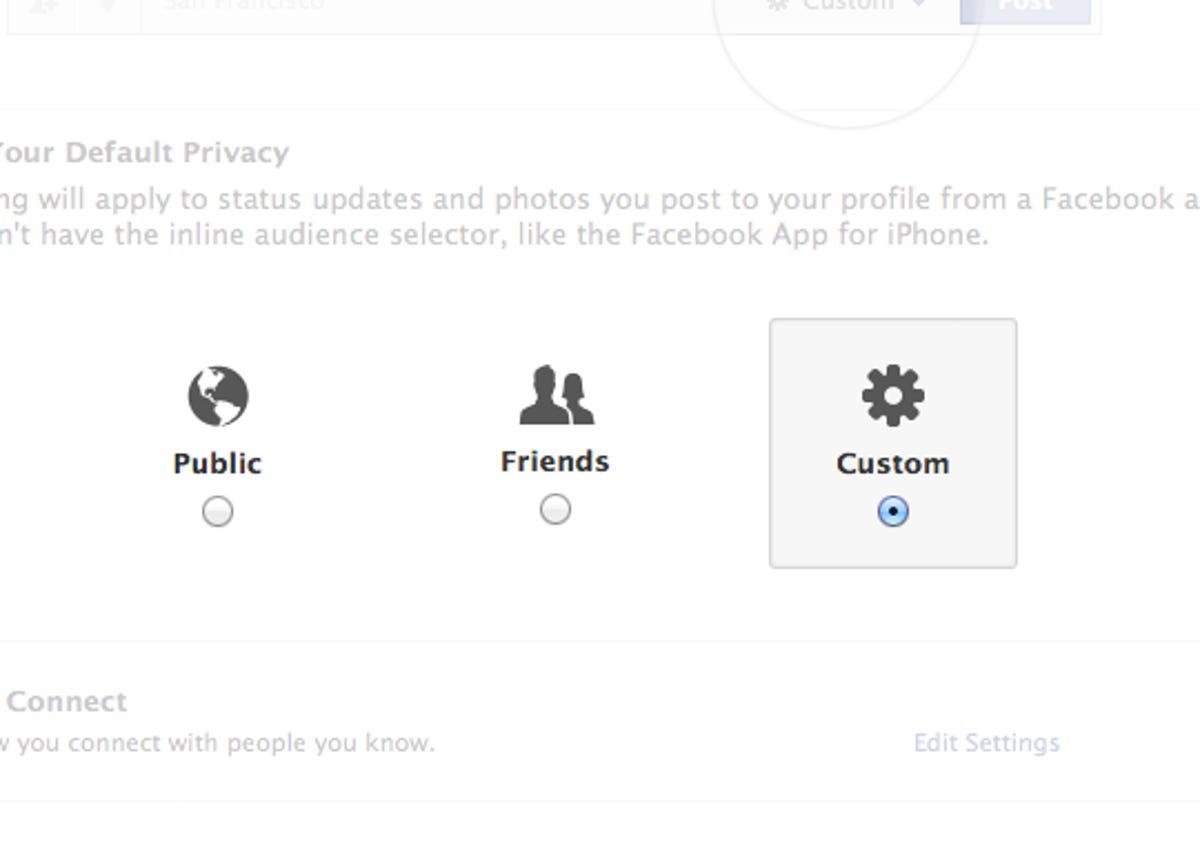
Select the default privacy setting for posts
Head to your privacy settings, and scroll down to "Control your default privacy." Here, you can select the default audience for all your posts: Public (everyone on the Internet), Friends (all your friends), or custom (exclude certain friends or lists).
Tip: If you frequently post content you'd rather keep private from a certain group of people (like your colleagues), create a list of all those people and exclude them by default using the "Custom" option in this privacy setting.
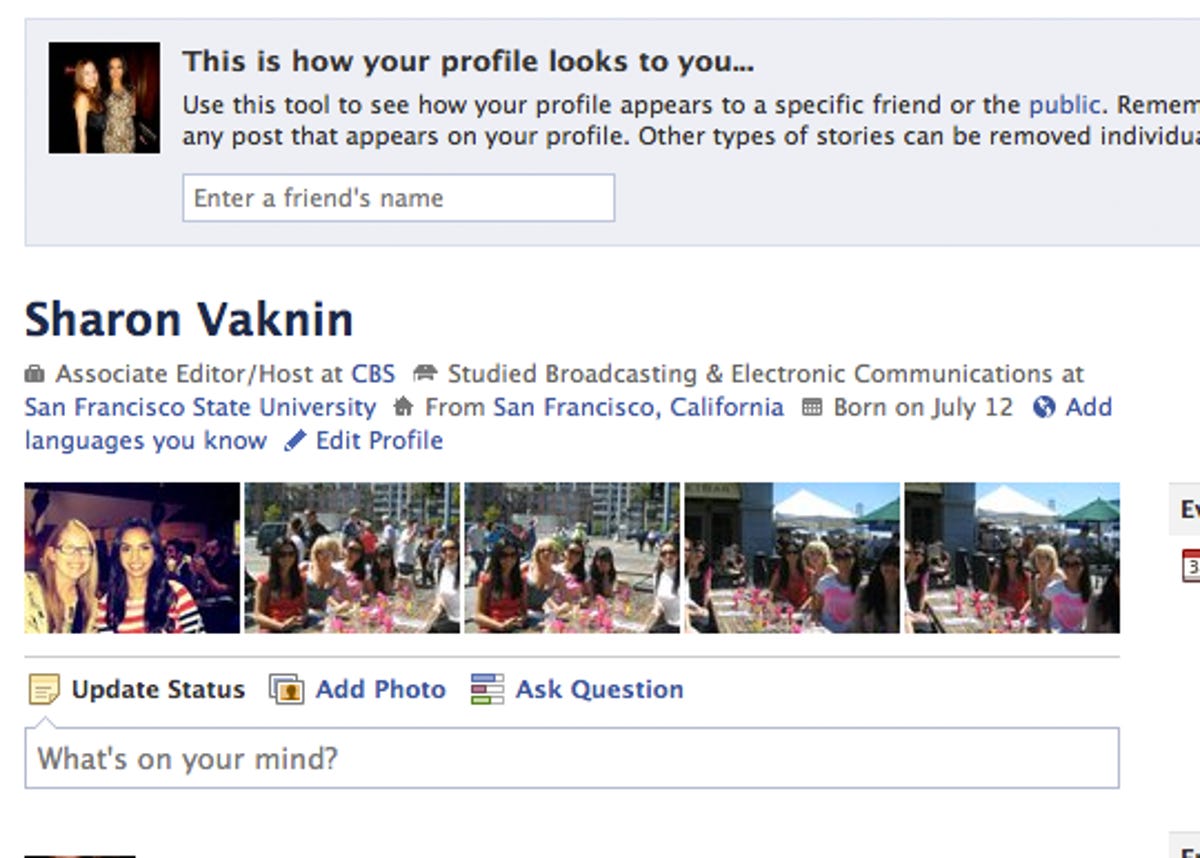
Preview your public profile
Once you make all the privacy tweaks, see how your profile appears to certain friends or anyone on the Web. Go to your profile and select "View profile as..." in the upper-right corner. Enter a friend's name or select the "public" link in the instructions above the field to see what it looks like to everyone.
More Galleries

My Favorite Shots From the Galaxy S24 Ultra's Camera
20 Photos
Honor's Magic V2 Foldable Is Lighter Than Samsung's Galaxy S24 Ultra
10 Photos
The Samsung Galaxy S24 and S24 Plus Looks Sweet in Aluminum
23 Photos
Samsung's Galaxy S24 Ultra Now Has a Titanium Design
23 Photos
I Took 600+ Photos With the iPhone 15 Pro and Pro Max. Look at My Favorites
34 Photos
