How to create custom Quick Actions in MacOS Mojave
Custom Quick Actions in Finder are your friends.


MacOS Mojave brings you Stacks, Dark Mode, a new screenshot tool and a better Finder. Finder can now do more than find things. With its new Quick Actions, you can annotate and rotate photos, combine multiple photos into a PDF and trim videos -- all without leaving Finder. And if you use the Automator app, you can create custom Quick Actions for chores you regularly perform.
Create custom Quick Actions
The Automator app has been a part of Macs forever, and Mojave adds a new Quick Action Workflow template for creating scripts that you can employ from Finder. To get started, launch the Automator app, click New Document, select Quick Action Workflow and click the Choose button.
Here's an easy one I created because I regularly take screenshots on my MacBook and then need to change them from PNG files to JPEGs. Now, I can perform this maneuver right within Finder or on my desktop without needing to open Preview.
From the left panel under Actions, I selected Photos. Next, from the column just to the right I grabbed Change Type of Images and dropped it in the blank work area on the right. It will ask if you want to add an action to copy the image (preserving the original in the process) or skip that and just change the original. After answering Add or Don't Add to that question, you'll see your action(s) on the right panel. You can choose your desired file type in the Change Type of Images box, and if you opted to make a copy of the screenshot, then you can choose the destination for the copy in the Copy Finder Items box.
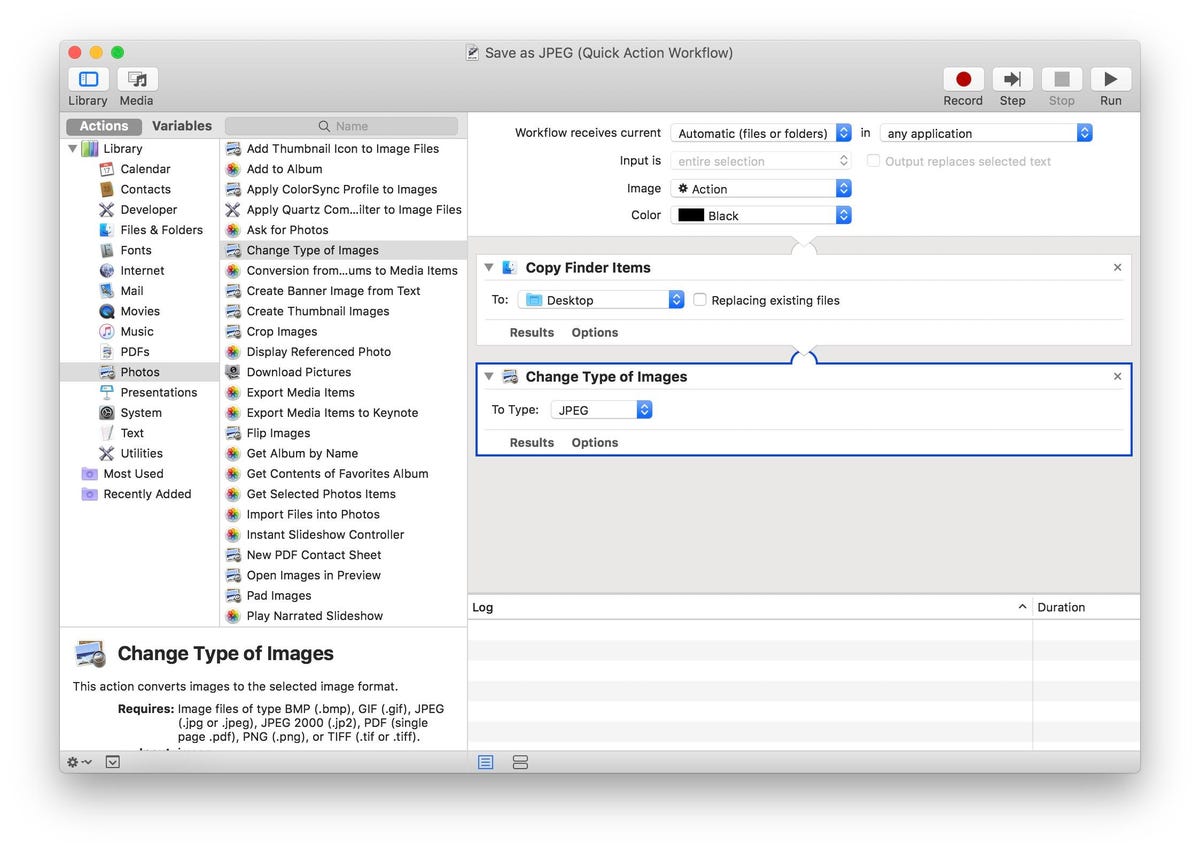
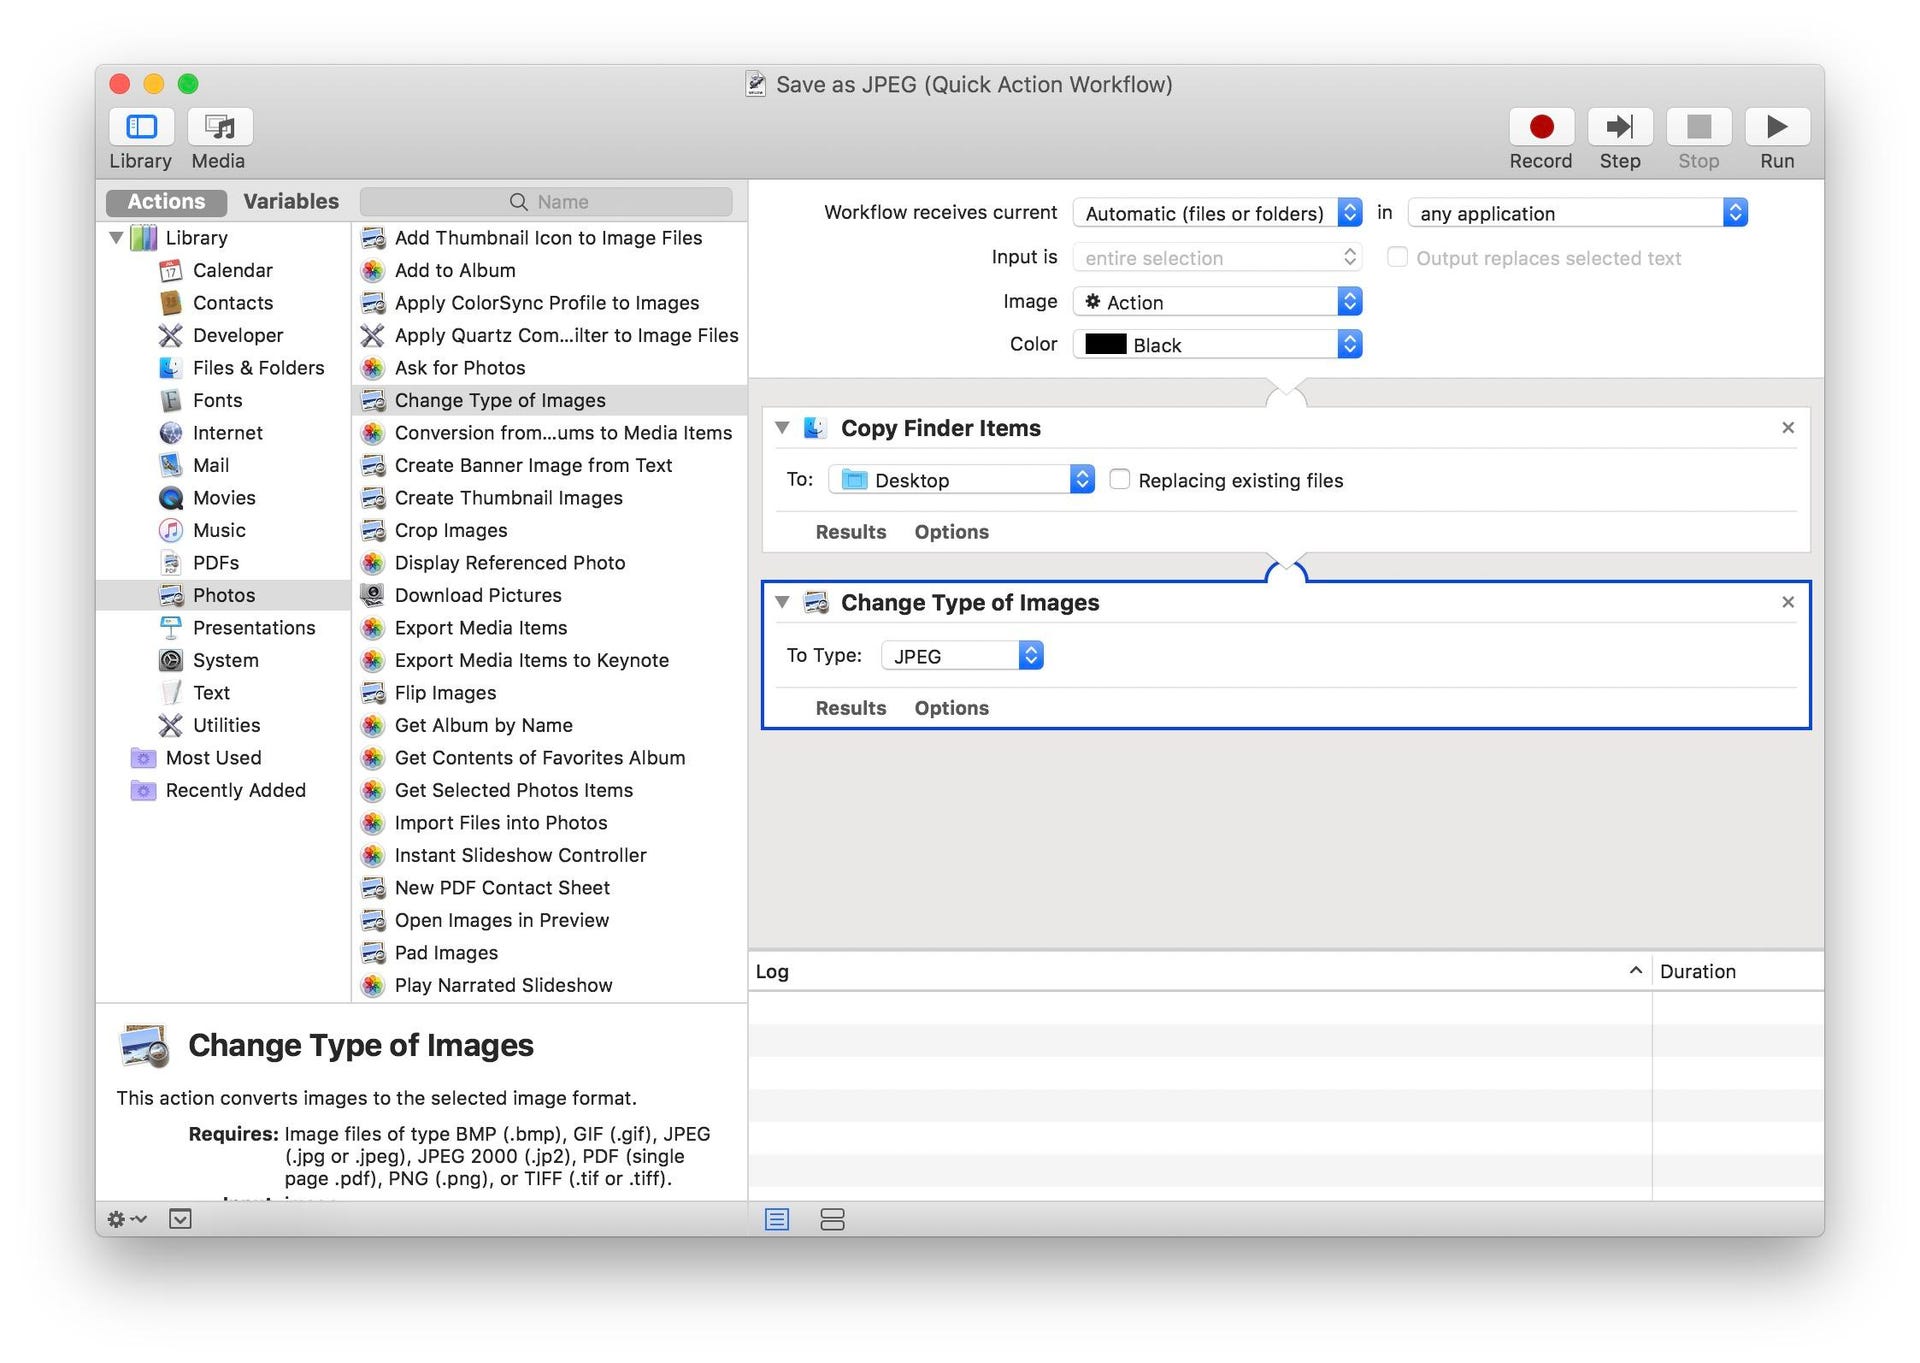
To save this Quick Action workflow, go to File > Save and name your new creation. With it saved, you'll now see it listed under the More button in the Quick Action area in Finder in the new Gallery view. (The Quick Action buttons sit below the metadata panel on the right.)
Helpfully, this action also is accessible from the right-click menu, so I was able to take a screenshot and then right-click its thumbnail and change it from PNG to JPEG without needing to bother with Preview or Finder.
Another custom Quick Action
I looked around for other custom Quick Actions and found two articles that outlined how to create a Quick Action that resizes photos to a specific dimension. They differ somewhat but here's the gist of it:
Go to File > New to create a new script, select Quick Action Workflow and click the Choose button.
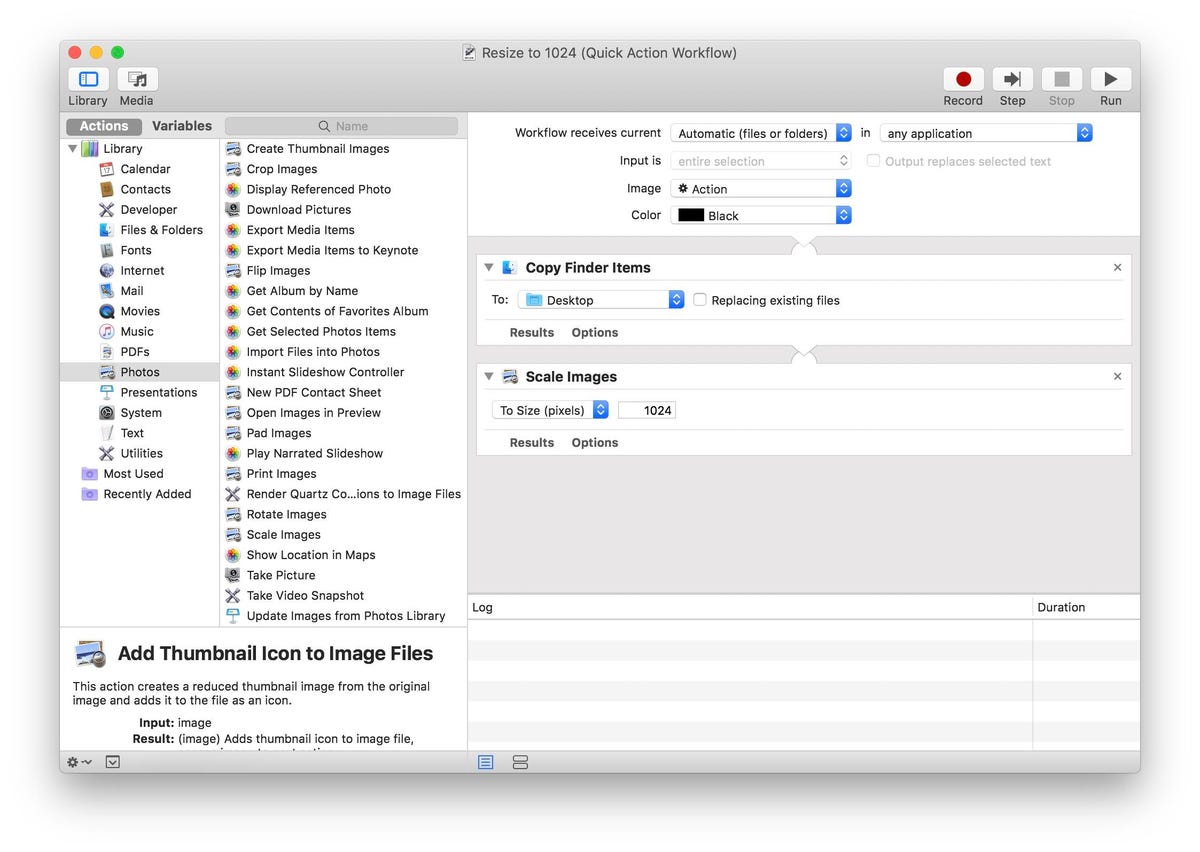
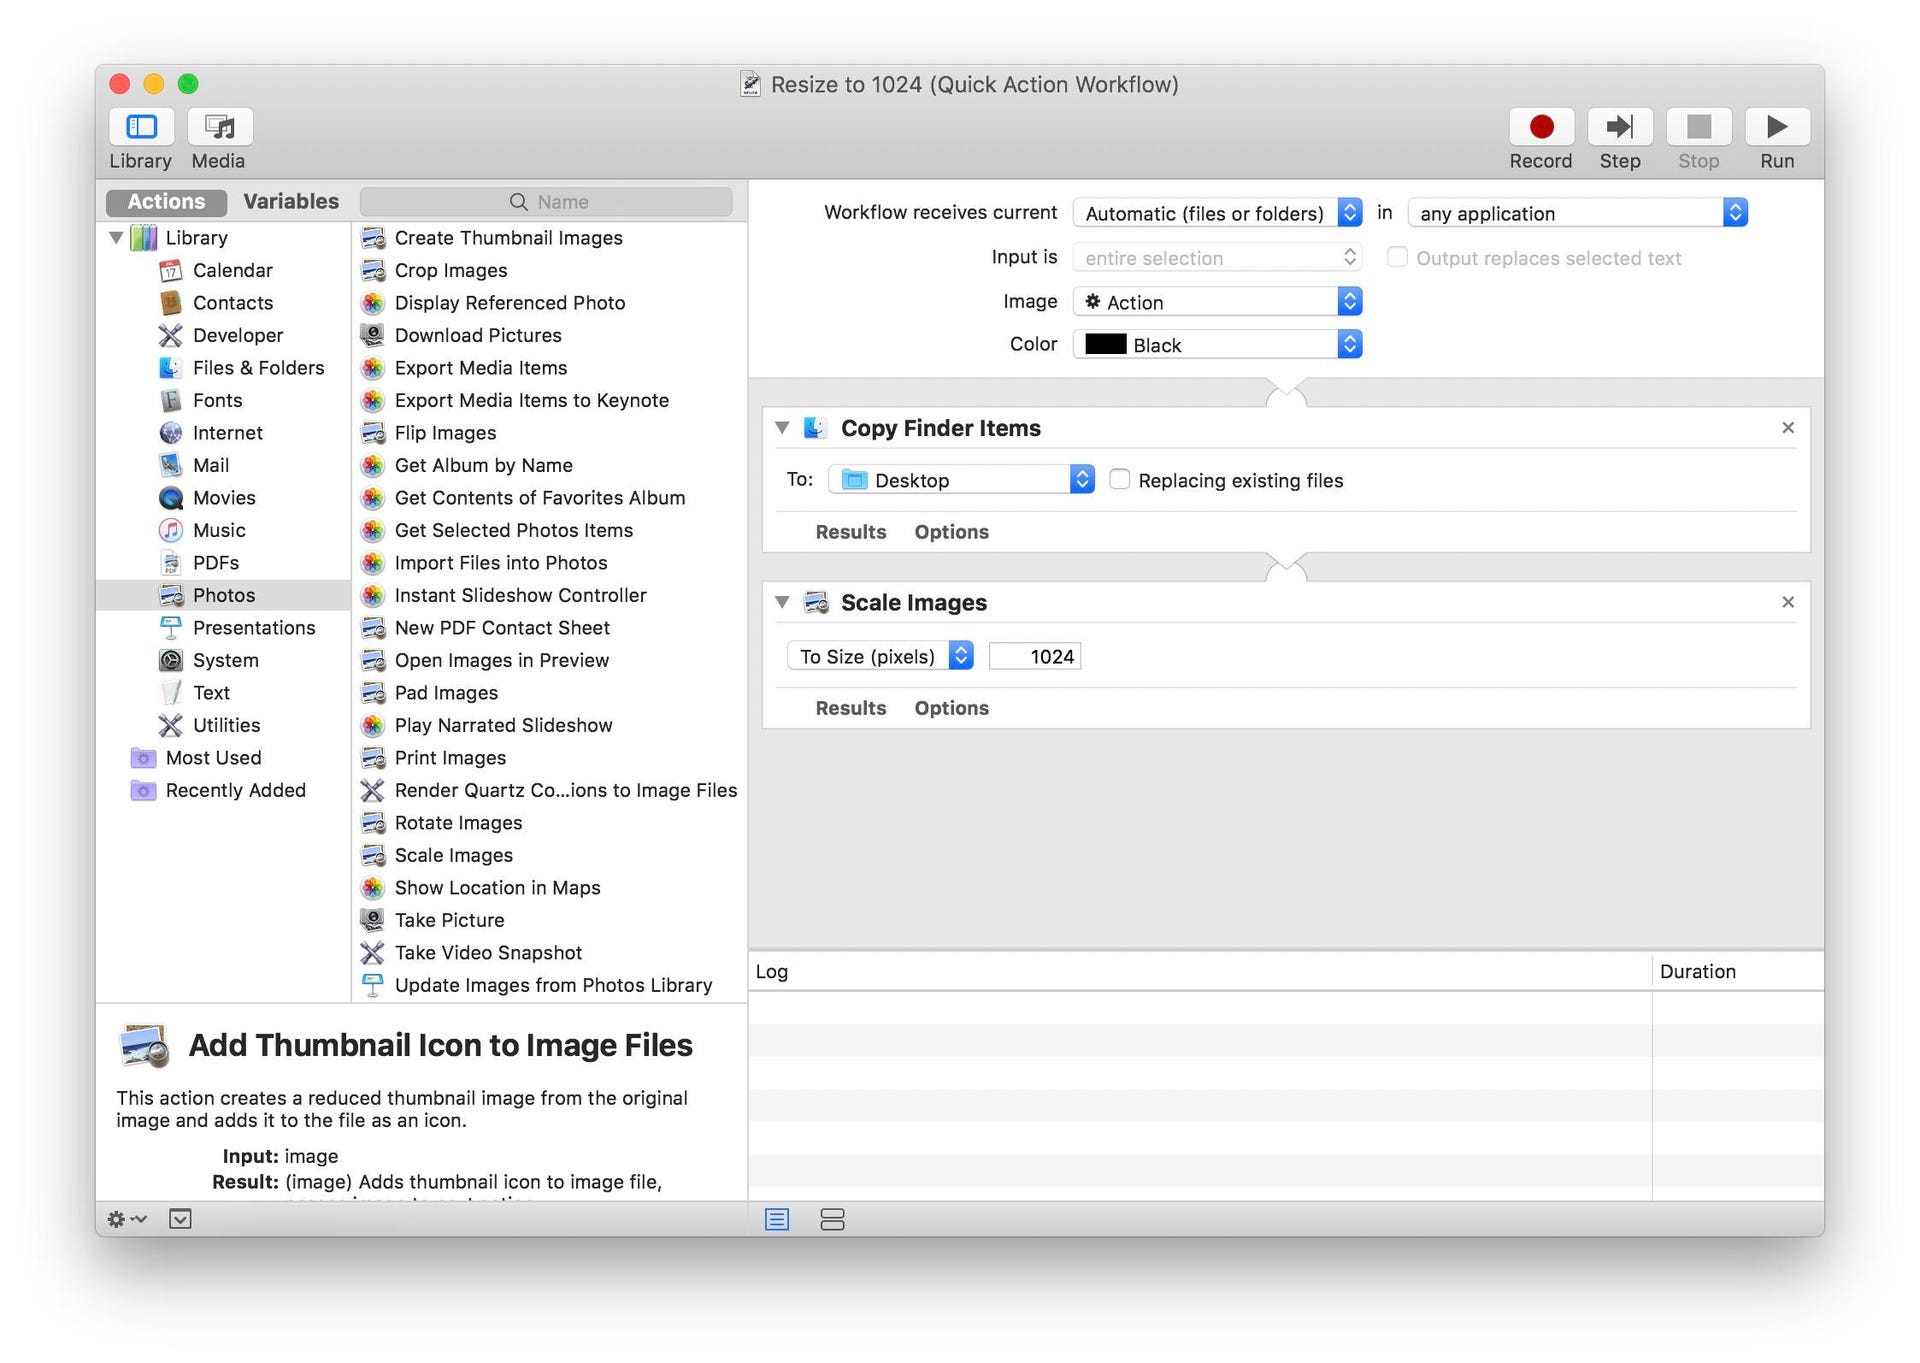
Select Photos from the leftmost Actions panel, and drag and drop Scale Images to the work area on the right. As with the previous example, you'll be asked whether you want to make a copy of the original or not. Choose the width you want for your resized image in the Scale Images box and when you're all set, go to File > Save to give it a name and save it.
As you'll see in Automator, the custom Quick Action options are seemingly limitless. If you find a custom Quick Action that's particularly useful, please share with the group in the comments below.
See also
For more, here's everything you need to know about MacOS Mojave.