How to use Facebook Friend Lists for greater privacy
The Friend Lists feature lets you control who can see what on your Facebook page. Here's how to use it, and reap the rewards of greater privacy.


Google's new social network, Google+, offers a Circles feature that aims to avoid the sort of privacy woes Facebook users are accustomed to. Circles are groups into which you organise your friends, separating your work colleagues from your family, and your passing acquaintances from your closest chums. Each group can be addressed individually, so the update you post about pulling a sickie will only be seen by those in your circle of friends, not your boss.
Circles sounds like a radical innovation, but it's not. Instead, it's a logical step forward from Friend Lists, a long-running Facebook feature that lets you control who can see what. Here we'll look at how you can use Lists to enjoy some of the privacy benefits of Google+ within Facebook.
Creating your first list
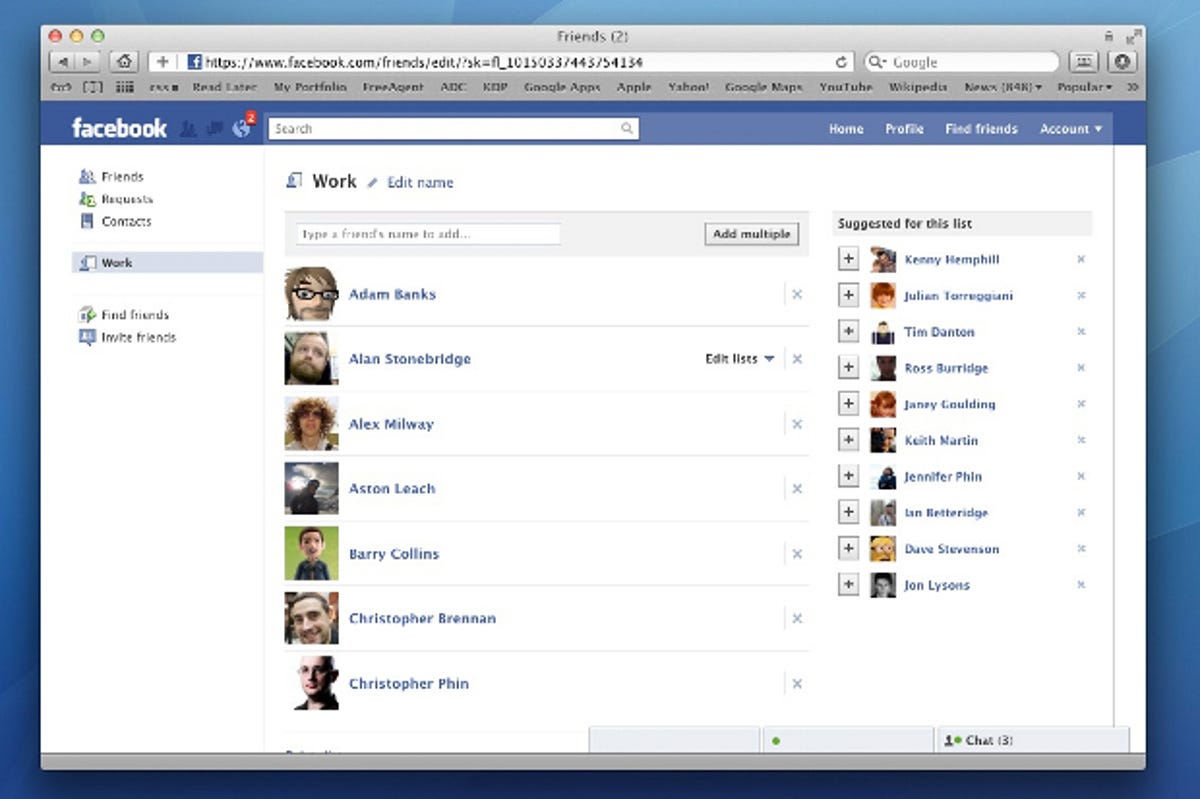
Sign in to Facebook and point your browser at facebook.com/friends. Click the 'create a list' button at the top of the screen and select the friends you'd like to add to the list. Use the 'start typing a name' box immediately above the thumbnails to isolate particular people.
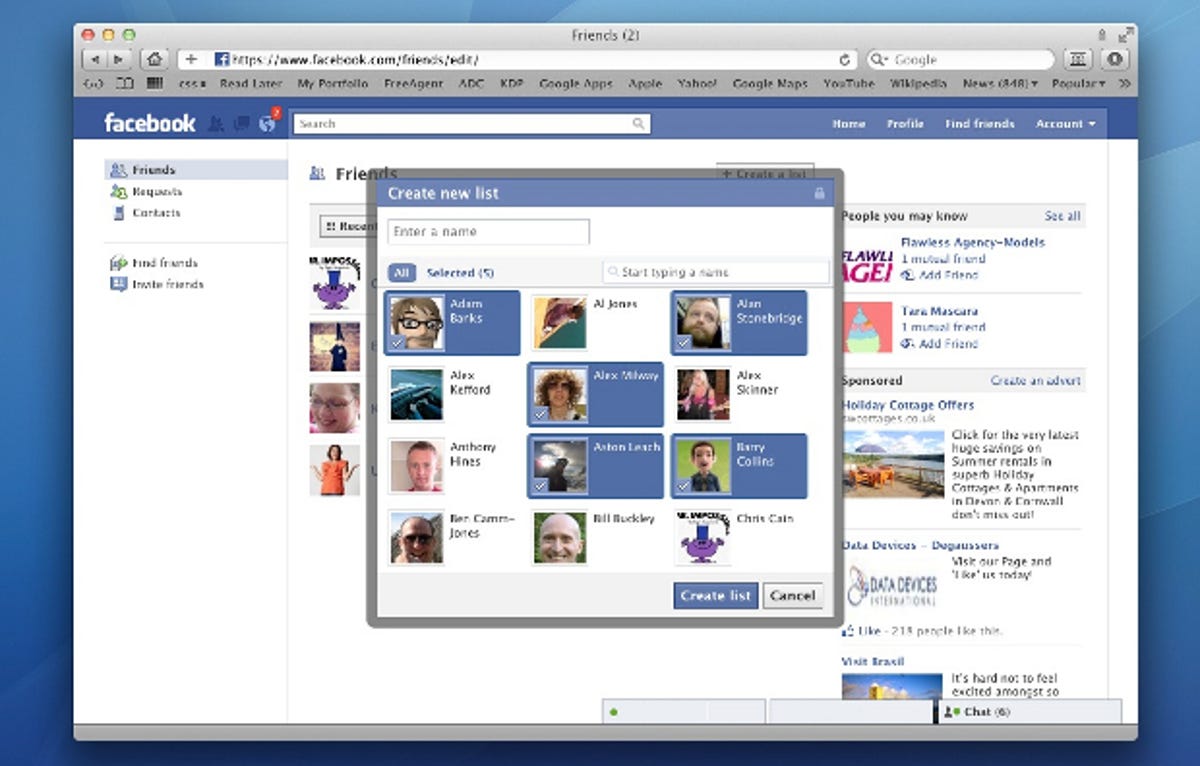
You don't need to use any modifier keys to select multiple friends, so keep clicking until you've selected everyone who should appear in the list. Click the 'selected' link above the thumbnails to see a list of only those people you've added, and double check you haven't added anyone you didn't mean to.
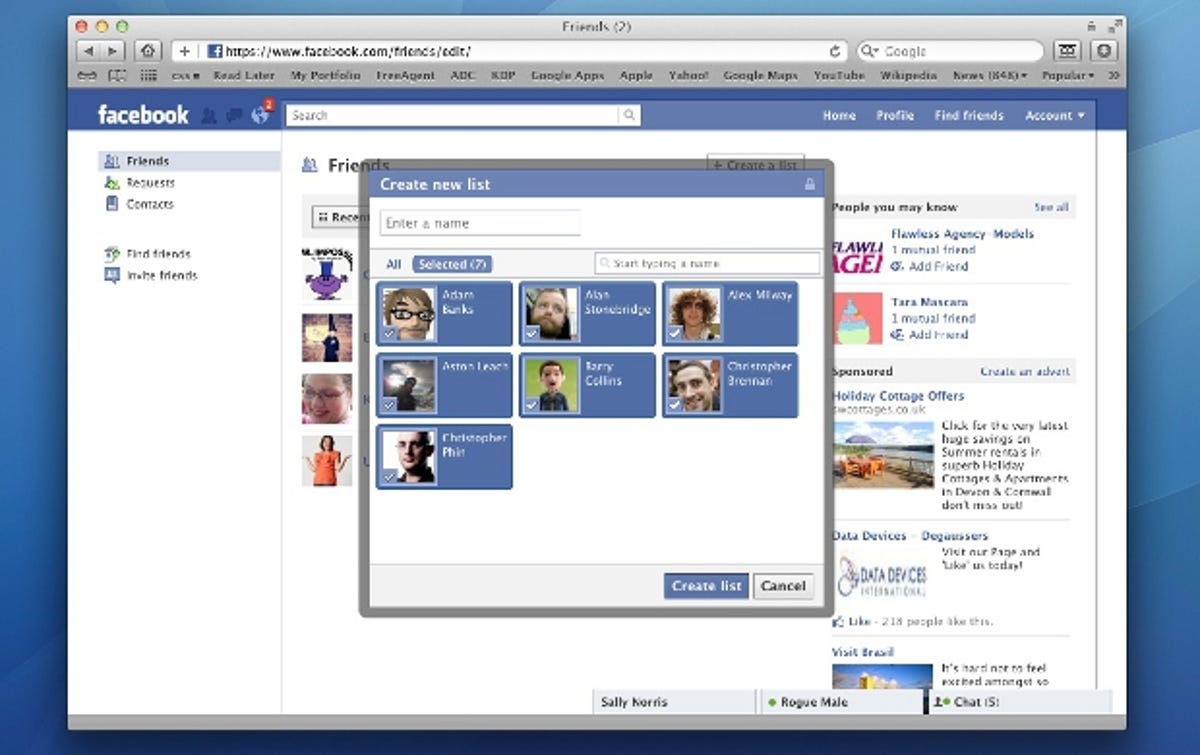
Assuming you're happy with what you see, give the list a title in the 'enter a name' box at the top of the panel, and finish by clicking 'create list'.
Your list appears in the sidebar and, in the same way that Facebook suggests people who may be your friends on the basis of mutual connections, it will now suggest new people you might want to add to that list. It has suggested that we might want to add a further ten names to our list. Impressively, they're all people with whom we've worked.
You can add friends to multiple lists, so, while you might want one overarching 'work' list containing all of the people you've worked with in the past, you can create other lists that intersect with it, with one for each office, job role, city and so on, by repeating the process above.
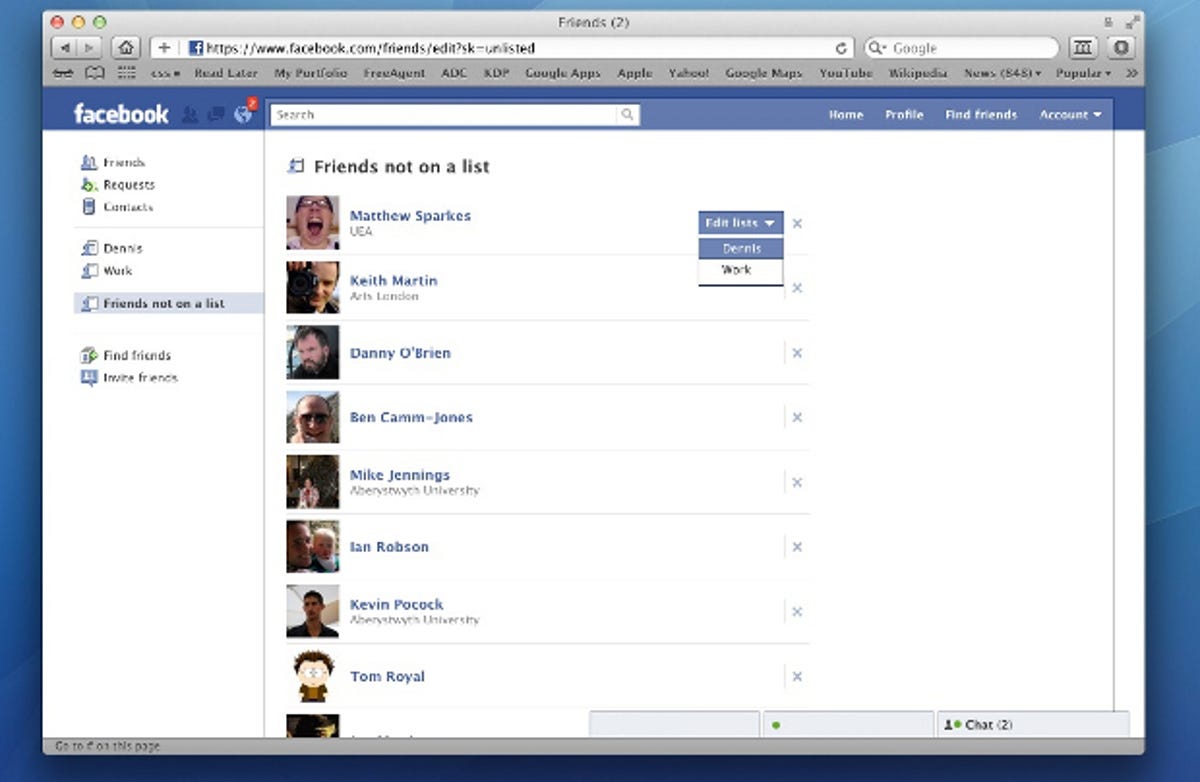
As soon as you create your first list, Facebook automatically creates a second, called 'friends not on a list'. Every entry here sprouts a drop-down menu when you hover your mouse over it, from which you can add the associated friend to an existing list.
You can remove friends by clicking the list in the sidebar, followed by the 'X' beside their name.
How to use your Friend Lists
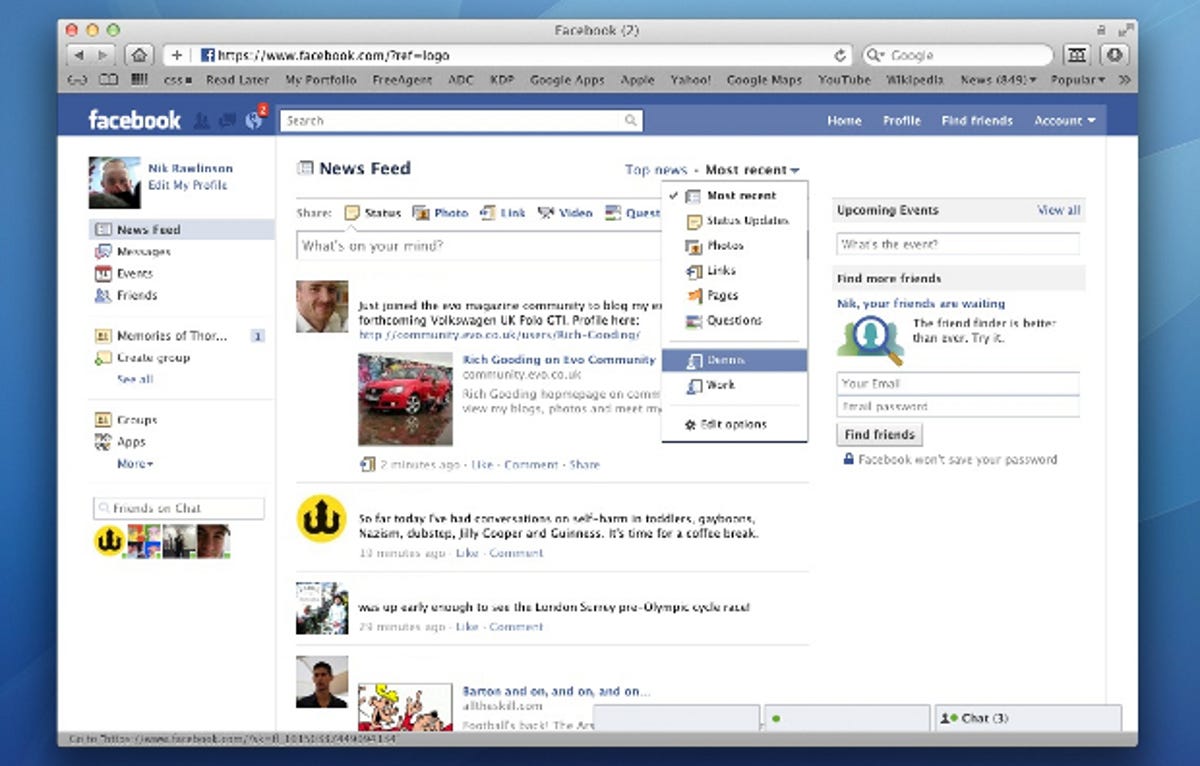
You can now use your Friend Lists to filter what you see on Facebook. Return to the home page and click the 'most recent' link at the top of the central channel. When the page refreshes, you'll see a triangle appear beside it. This pulls down a set of filters that slims down the stream to just those elements you want to see. Among other things, you can pick from photos, status updates and, crucially, specific lists, so that you only see content from particular friends.
More importantly, though, you can also use your newly created Friend Lists to control who sees what on your profile.
Open the privacy preferences and click 'customise settings'. Here you can control who sees what on your profile, including your relationship status, birthday and posts. It's the latter of those that we're interested in. Click the drop-down menu and select 'custom', then enter the name of the list from which you want to hide your posts in the 'hide this from' box.

You can enter as many list names as you want here, and remove them --perhaps because you've left a particular job so you don't need to hide your skiving from that workplace any more -- by clicking the cross on the end of each one.
You can approach this task from the opposite direction, too, instead creating a narrow list of friends with whom you're happy to share your posts. Click the drop-down menu in the 'make this visible to' section, and select 'specific people...' You can now enter the names of the lists that can see your posts in the box that appears, again entering several in a row.
Taking Friend Lists further
You can create up to 100 lists with a maximum of 1,000 people in each one, which allows for plenty of flexibility when managing your privacy settings. Building a 'family' list lets you ensure that only those who might need to know where you are can see you checking into a location, and thus avoid the risk of being stalked or letting strangers know when your house might be empty.
Although you have only one profile, Facebook classifies it according to how it looks to other people, with those that appear on your restricted lists seeing what it calls a 'limited profile'. They won't know from within the site that you're posting material that other people can see, but, for total peace of mind, you should also restrict what's visible from outside Facebook's walled garden.
Return to the privacy preferences and click 'edit your settings' in the 'apps and websites' section, then edit the public search settings. This is a simple on-or-off setting, so ensure the check box isn't ticked, and then click 'back to apps'.
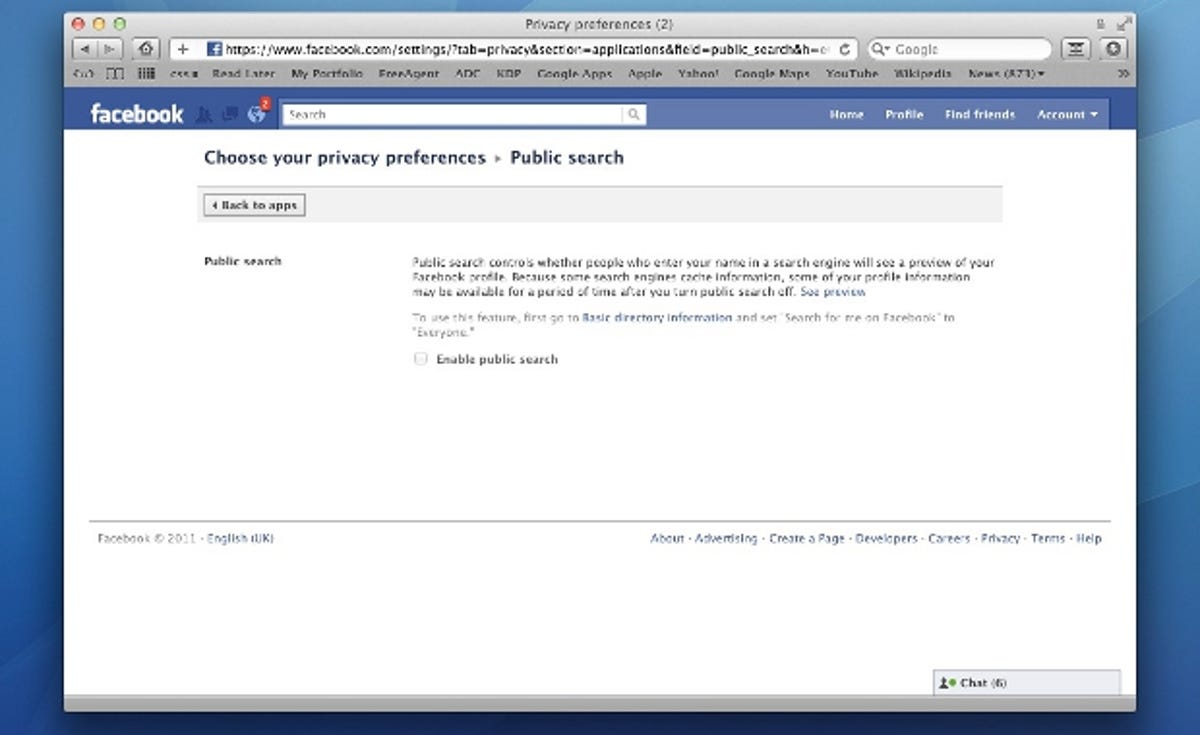
Because not all search engines update their cached pages at the same rate, you may find that your profile remains visible for a short time after you disable this option, although subsequent updates shouldn't be reflected outside of Facebook itself in the interim.
Although Facebook doesn't allow you to send messages only to specific groups in the way that Google+ does, when used on a case-by-case basis, the Friend Lists feature allows you to tailor more precisely who sees what than even the default customisation options.