How to install Windows 7
Installing a new OS isn't without its potential pitfalls, so if you're upgrading your PC to Windows 7 you should check our step-by-step guide and make sure everything is as it should be

This may sound like it could be the shortest tutorial ever, but if you were planning on just sticking the Windows 7 DVD into your PC come 22 October and hoping for the best, it's a good job you're reading it.
The Windows 7 installation isn't complicated, but limited upgrade paths do add a few wrinkles to the process. You can't upgrade a PC running Windows XP to Windows 7 -- you need to do a clean 'Custom Install' that does away with your old applications and settings. Windows Vista users can perform an 'In-Place Upgrade', but only with certain Vista/Windows 7 combinations -- it's a Custom Install otherwise.
Fortunately, a Windows 7 Custom Install is less destructive than with previous versions of Windows and you don't need to reformat your intended drive partition as part of the process. Instead, Windows 7 will simply archive your old Windows setup -- you won't be able to run any of its programs, but you can at least see what you had installed beforehand.
Whichever Windows 7 install option you use, it's worth doing a little PC housekeeping before you embark upon it. This will not only make the installation smoother, but it can also make it quicker. We've also highlighted the key steps for both Custom Install and In-Place Upgrade installations so you won't have any surprises come installation day -- you can save those for your Windows 7 party...
Run the Windows 7 Upgrade Advisor
1. Although the Windows 7 Upgrade Advisor is supplied on the Windows 7 DVD, it's worth downloading and running it beforehand to give you as much time as possible to fix any incompatibilities with your PC.
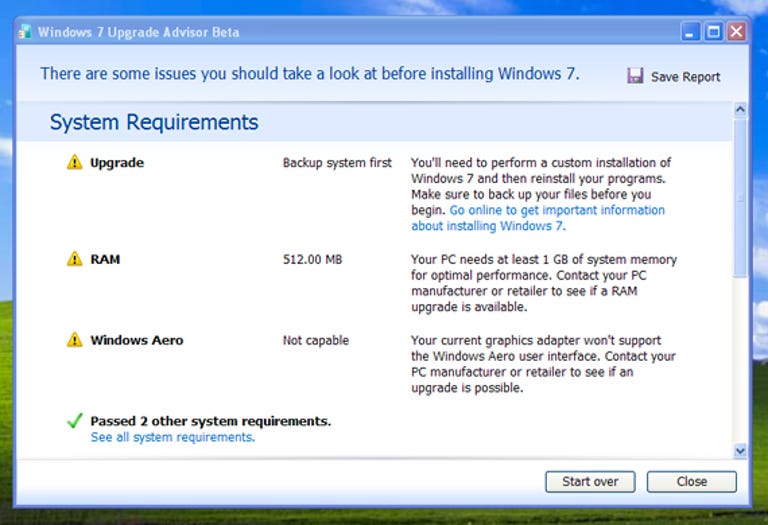
2. If you're planning a Windows 7 In-Place Upgrade, take note of any software incompatibilities. Download any Windows 7-specific updates now, rather than later, and uninstall any software that can't be patched to work with Windows 7.
Assuming your PC is up to running Windows 7 in the first place, hardware incompatibilities should be less of an issue. Some are worth acting on before you continue though, particularly network adaptor issues.

3. Download driver updates for incompatible network adaptor cards before you install Windows 7 -- without new drivers, you won't be able to download anything after the installation.
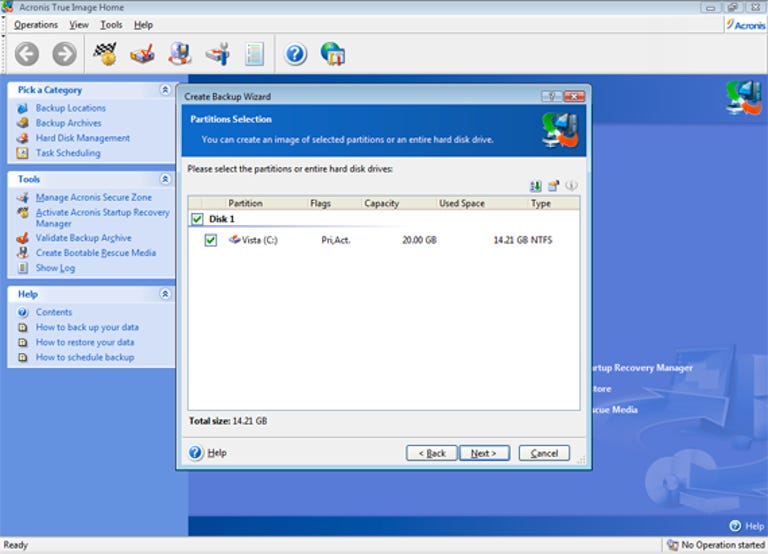
Back-up your data
4. Regardless of which installation type you're planning, it's worth backing up your entire C: drive (or the partition you're installing to) before you go any further. An application such as Acronis TrueImage with an external hard drive is ideal for this -- you can clone your entire Windows XP/Vista installation and quickly restore it should the Windows 7 installation cause problems.
For in-place upgrades, move large data collections
5. Upgrading a Windows Vista PC that has large collections of data can take a very long time, so consider moving folders containing large amounts of photos, MP3s or video files from your C: drive to an external drive you can disconnect during the installation. You can then delete the original folders and copy them back once the installation is complete.
50GB of user files is reckoned to add around 45 minutes to the total upgrade time, so you'll need to consider whether the time it takes to copy files back and forth is less than the time leaving the files in place will add to your upgrade. If you're already backing up your data with an application, you can just delete the original folders and restore them afterwards.
For custom installs, migrate your old data
6. If you're performing a Custom Install and don't want to back-up your entire C: drive, you should at least back-up your documents and settings. You can use the Windows 7 Easy Transfer utility for this -- it's on the Windows 7 DVD.

7. Run the Windows 7 Easy Transfer tool using \Support\migsetup.exe on the Windows 7 DVD.
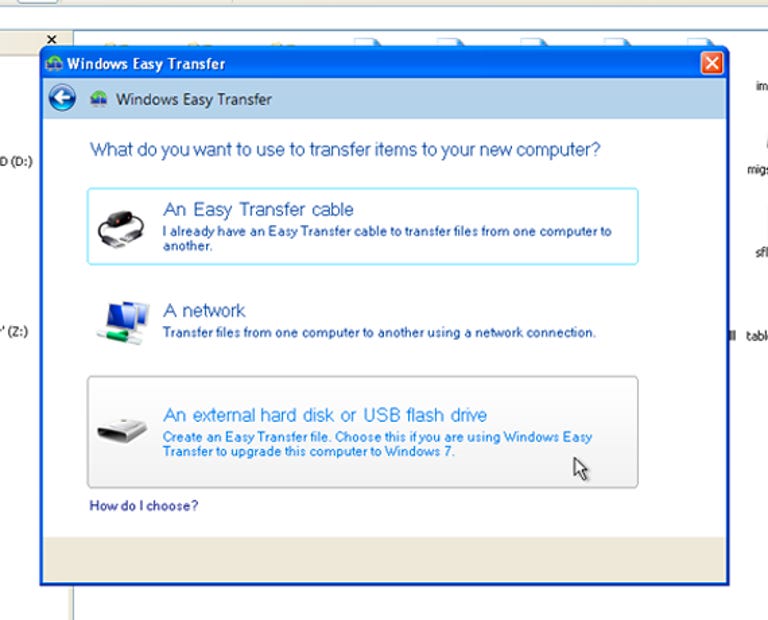
8. Use the tool to save your files and settings to an external disk drive -- don't store them on the same drive you're installing Windows 7 on to.
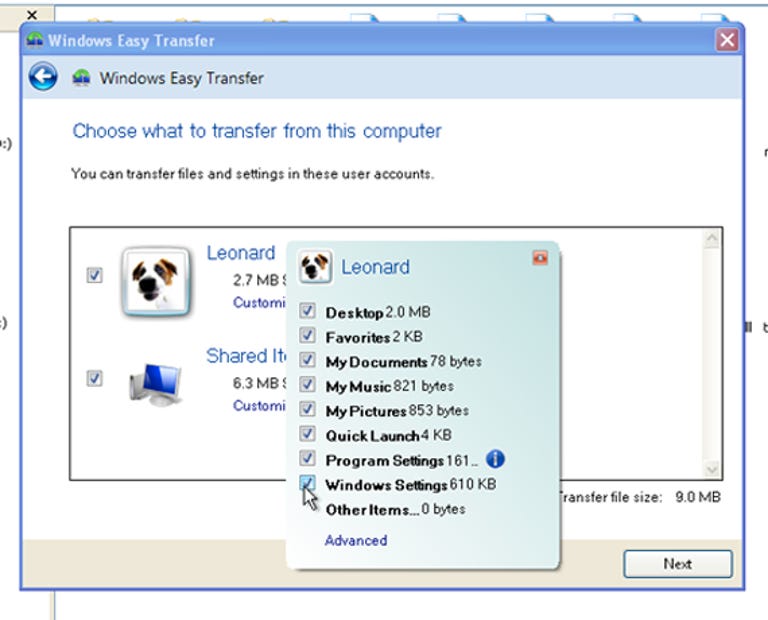
9. You can customise the list of items that are backed up if you don't want to transfer everything to the new Windows 7 installation.
Log your software serial numbers
10. You'll need to reinstall your old software after a Custom Install of Windows 7 and while you may have your original install discs to hand, you may not have the required serial numbers. Install and run the free Belarc Advisor utility, which will extract the serial numbers for all installed applications.
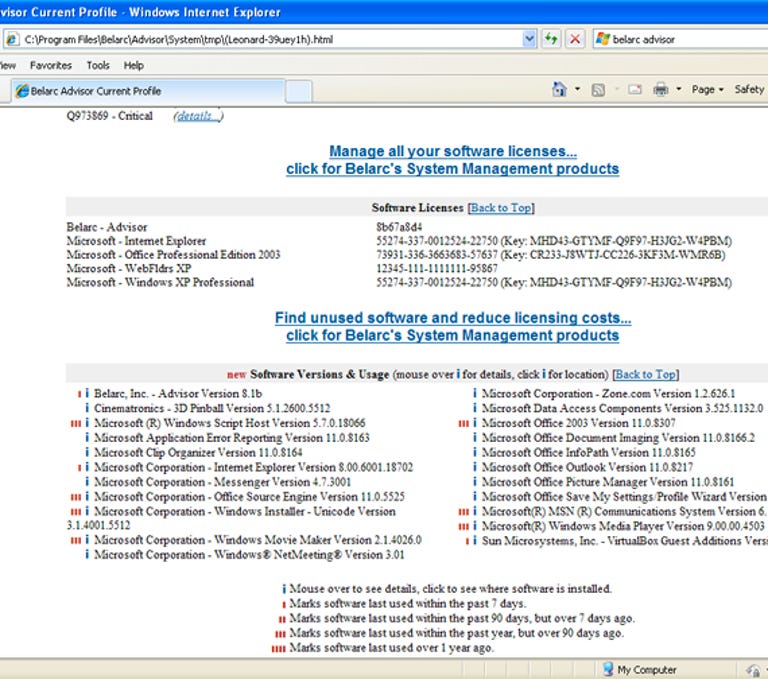
11. Just save the resulting Web page to an external disk drive to save the serial numbers for when you reinstall your applications.
Upgrading Windows 7 RC to Windows 7 RTM
If you've already been using the freely available Windows 7 RC on your main PC, you won't be able to perform an In-Place Upgrade to the final (RTM) version. Instead, you're forced to perform a Custom Install, so the same instructions for Windows XP apply.
There is actually a way around this, but it involves imaging the Windows 7 DVD and making a small change to the cversion.ini file -- you'll find full instructions for the process via Google.
You can start both Custom Installs and In-Place Upgrades for Windows 7 from within Windows XP or Vista (booting from the CD offers the same installation options) -- just choose the appropriate option when it appears.
For either install type, the installation is entirely automatic once you're at the 'Installing Windows' screen, so you can leave your PC unattended while it progresses. A Custom Install should take no more than 45 minutes, but an In-Place Upgrade will longer.
Here are the key steps for both installation types.

1. When prompted, it's advisable to download the latest updates for the Windows 7 installation for both Custom Installs and In-Place Upgrades, so make sure you have an active Internet connection before you begin.
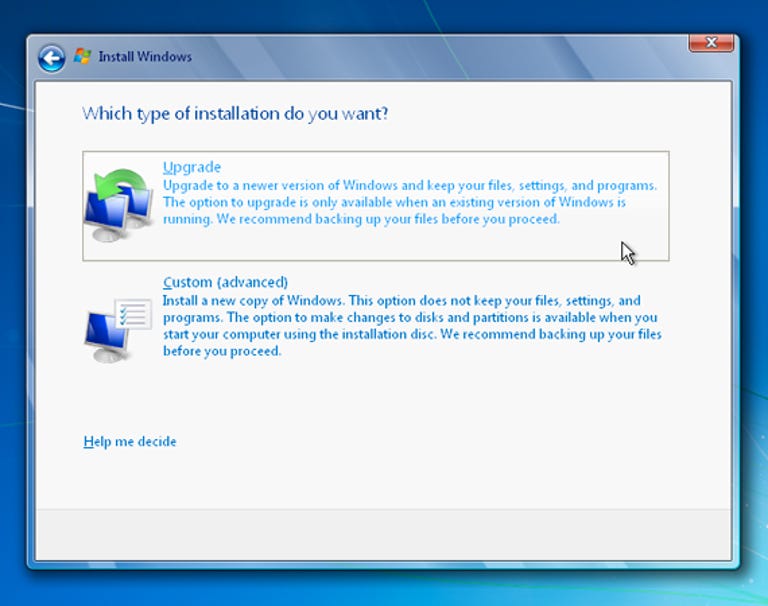
2. Choose Upgrade or Custom to suit your installation type. Upgrade leaves all your files and settings in place, but is only possible for certain Windows Vista and Windows 7 combinations. Custom performs a clean install that ignores (but does not delete) your previous Windows configuration.
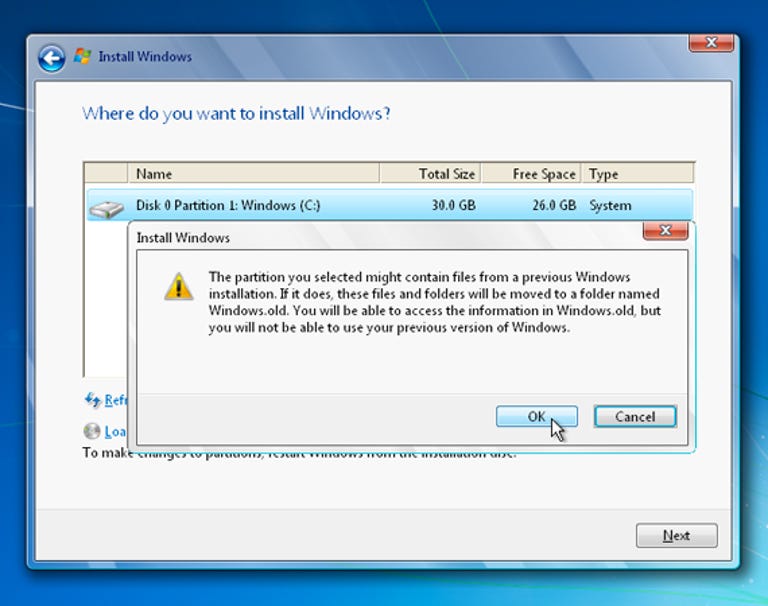
3a. For a Custom Install, you'll need to choose the partition for Windows 7 -- usually C:. Your old document, application and Windows files will be saved rather than erased -- see later.
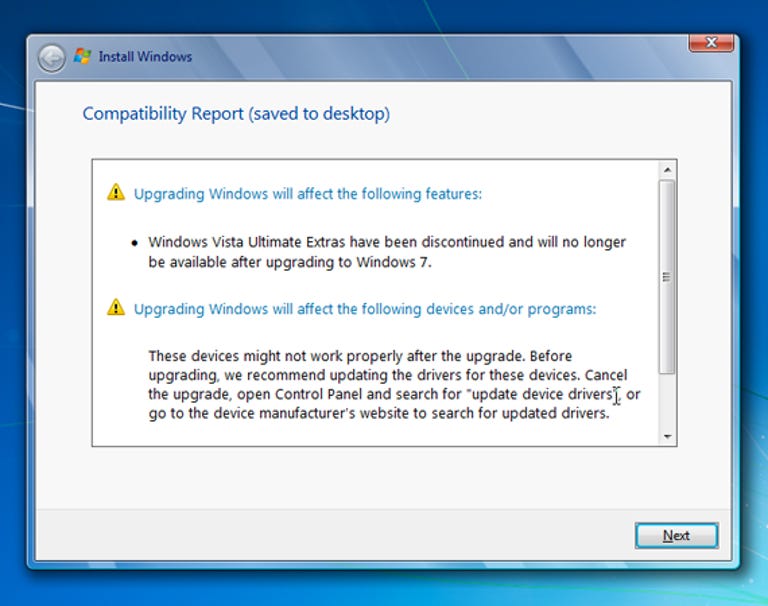
3b. An In-Place Upgrade automatically selects the partition where Windows Vista is currently installed, so you'll just see a Windows 7 compatibility report before you can continue.
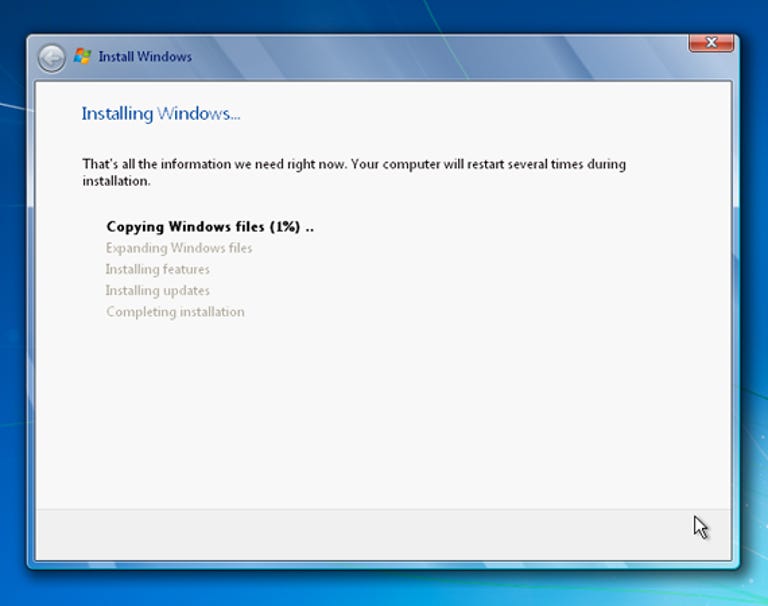
4. Both types of installation are wholly automatic from this point on, so you can just leave your PC to get on with things.
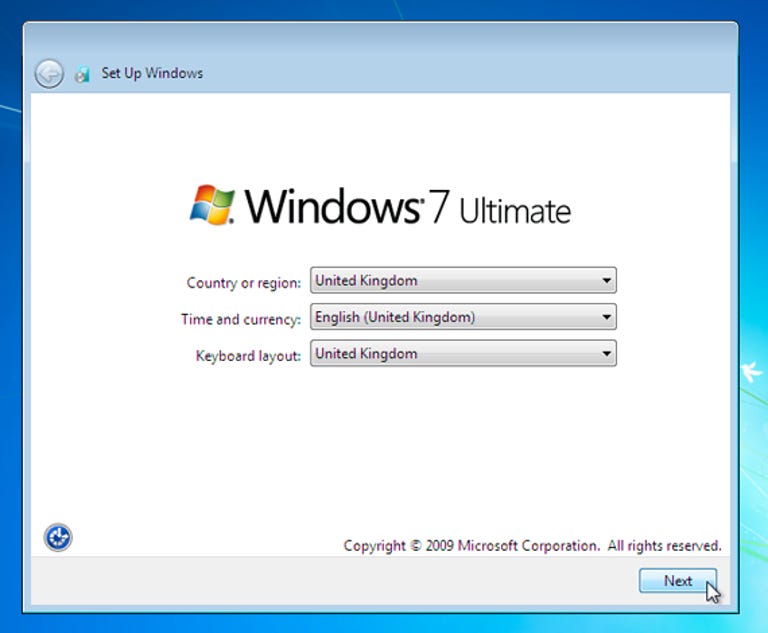
5. You'll need to go through the usual set-up steps to complete a Custom Install, but an In-Place Upgrade will use your existing Windows Vista settings, where possible.
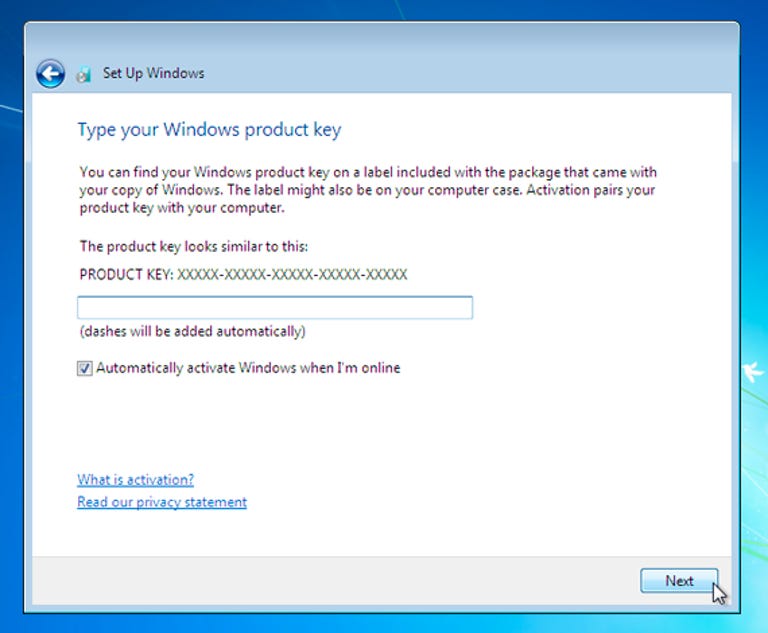
6. As with Windows Vista, you don't need to enter your Windows 7 product key immediately after installation, nor do you need to activate Windows as soon as the installation is complete. You have 30 days to activate Windows 7 after it's installed.
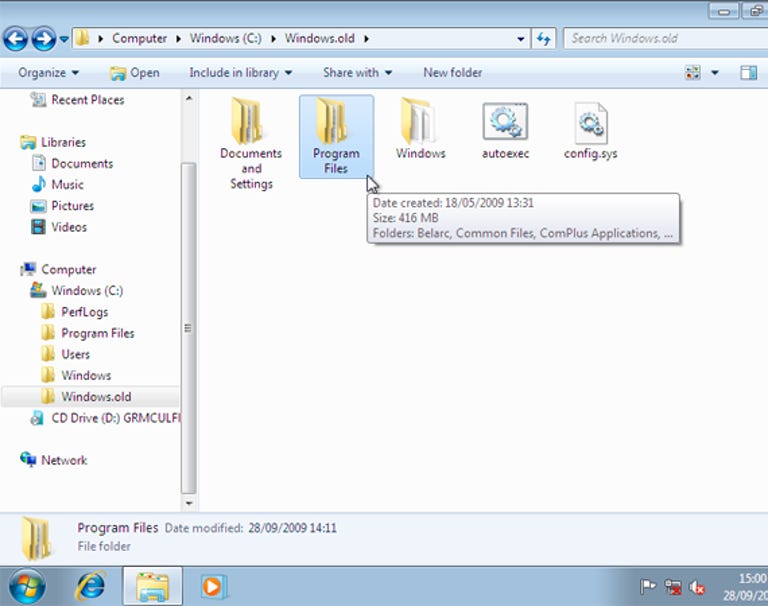
7. For a Custom Install, you'll find your old Windows set-up archived in the C:\Windows.old folder. You'll be able to open old documents, but the other files are for reference only -- you won't be able to run any of your old applications, for example. You can delete the Windows.old folder once you've saved anything you want to keep.
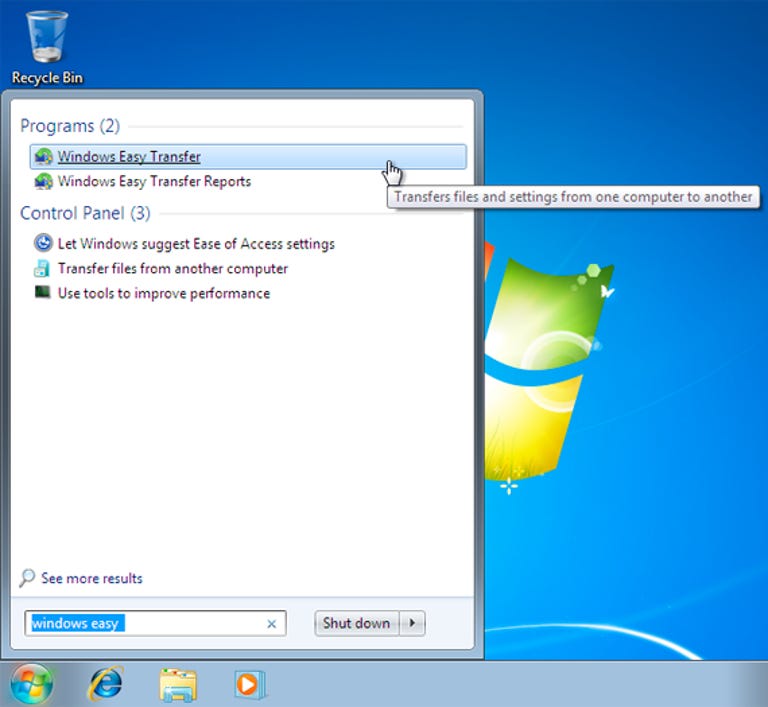
8. The last step for a Custom install is to restore your old settings using Windows 7 Easy Transfer. Start it via the Start menu (just type the first few letters of the name) and then use the 'New Computer' option to restore your previously saved files and settings.