How to use Google+ privacy settings
Sometimes you just don't want your grandma to see those pictures of you drunk and naked. So here's how to ensure some privacy in Google+.


Google already knows a great deal about you, so nothing you put on your Google+ profile is going to come as a surprise to the company. Your friends and family, though, are another matter.
The bulk of your profile is made up of data you enter yourself, but some is generated automatically. Unless you've set it manually, your profile picture will probably be drawn from another Google service, and Google+ has a knack of picking out related Twitter accounts, even if they aren't registered under your own name.
Here's how you can keep your Google+ profile under control and manage the data you share among your circles.
Google+ basics
Start with your Google profile, of which Google+ is merely an extension. Google created your profile the first time you logged into one of its core services, such as Google Maps, or shared an item in Google Reader. That could mean it contains all manner of out-of-date information that's built up over the last few years.
Log into your Google+ account using a regular browser, rather than the smart-phone client, and click the cog in the top right. Pick 'settings', then 'profile and privacy', and then click 'edit visibility on profile' in the top section of the settings box.
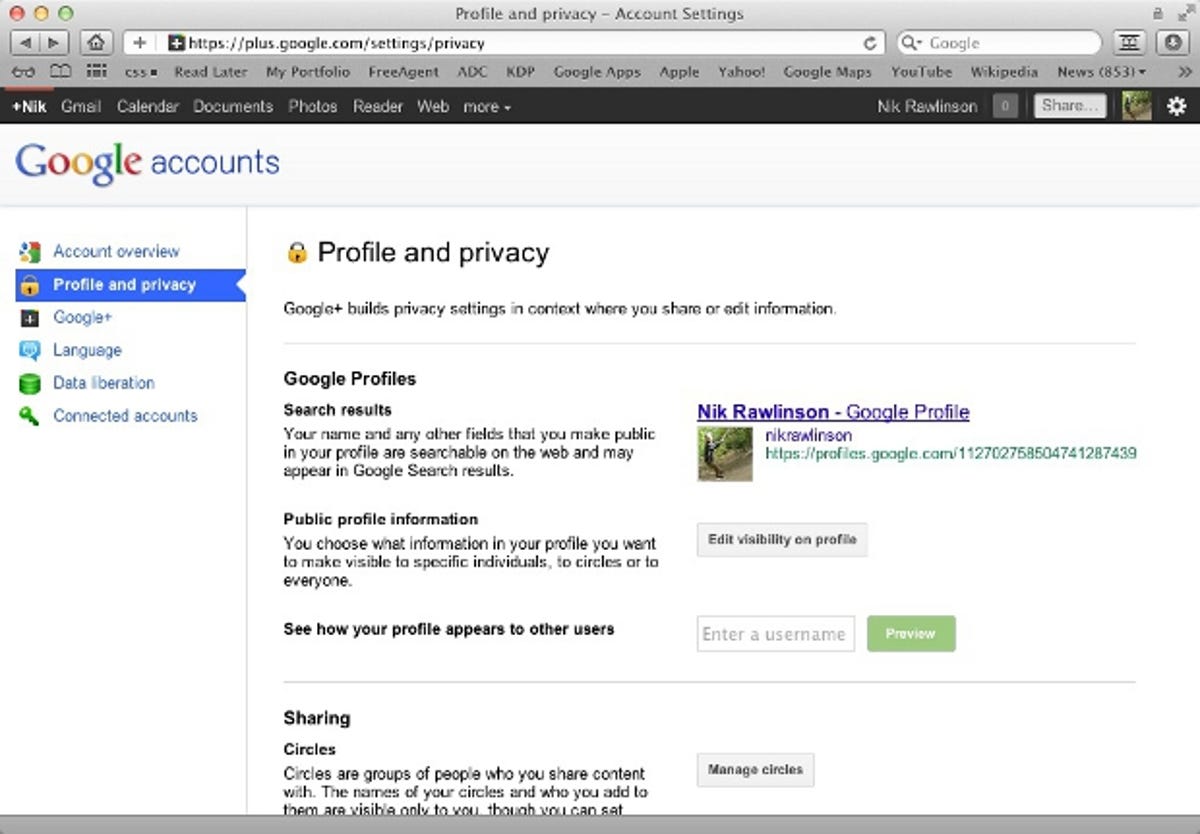
Google returns to what looks like your Google+ profile, overlaid by an invisible grid. Clicking any part of it opens the settings relevant to that part of the grid, so you can edit both its content and who can see it.
Limit who can see your written data
Work your way through the various sections, entering the necessary information to bulk out your profile. You can be quite liberal with what you write here, as Google's tools for defining who can and can't see the various parts of your profile are more tightly defined than their Facebook equivalents. We'll be tweaking them as we go.
Here we've entered an extensive biography in the introduction section, which is currently shared with everyone in all of our circles, whether they are personal or business contacts, friends or strangers. To change who can see it, click the 'your circles' button below the text box and select 'custom'. The same setting appears in each of the other parts of your profile.
The line that appears below this setting defines who can see this content. Click the 'X' beside 'your circles' to delete it, and then use the 'add more people' option to select specific circles or individual people who are allowed to view that particular part of your profile.

Limit who can see your posts
Now turn your attention to your circles. If you've added everyone you know to just one circle, then you won't be able to control who sees what, as any post you make will be sent to each of your friends' streams.
Reorganise your friends into relevant circles, splitting off work from family, and friends from your sports team, for example. Then return to your profile and type a post into the 'share what's new...' box. Here we're linking to a story that we know will be of interest only to our friends and family circles, so we've clicked 'add circles or people to share with...' below the post box and selected the circles we want to address from the menu. You can also type in specific user names if you'd like to target particular people directly.
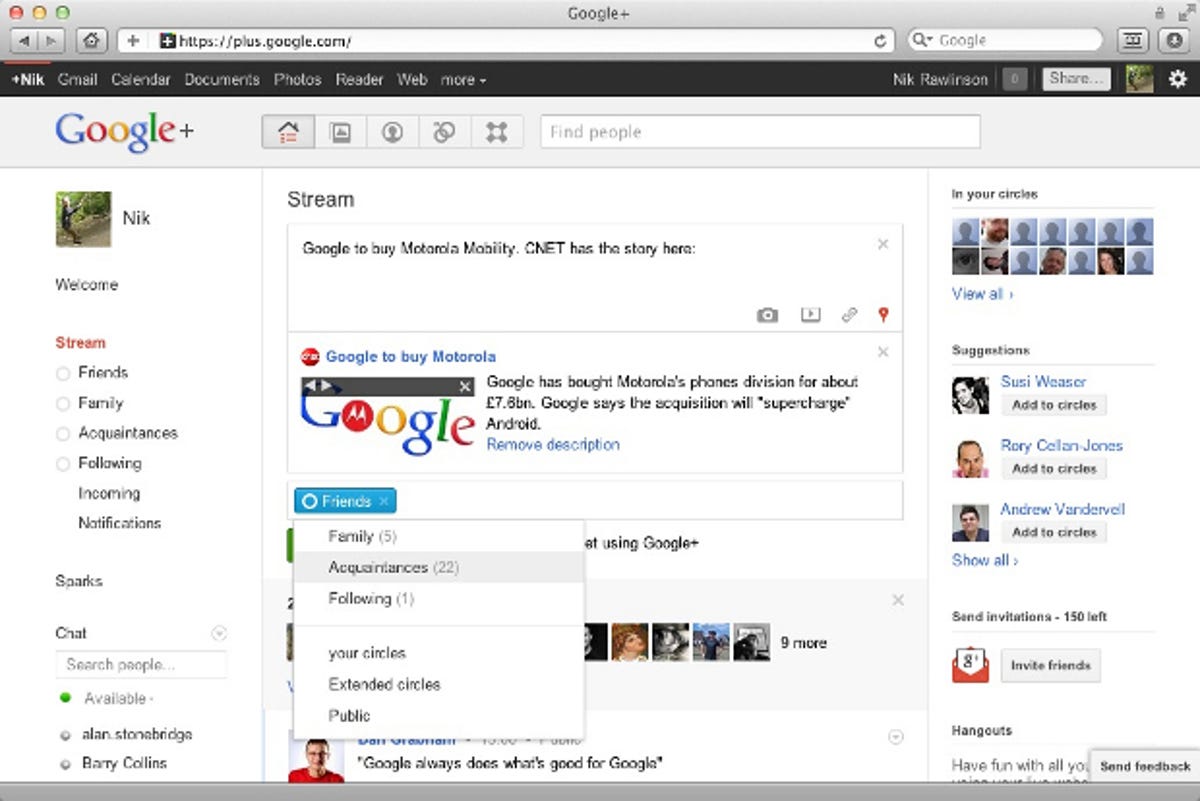
Google+ remembers what you select here and uses that as the starting point for the next post you write.
Turn off auto photo-tag acceptance
Anyone you've assigned to a circle can tag you in a photo, and, because you've shown that you know them, the tag will be automatically accepted and linked back to your profile. If you'd rather not have your most embarrassing moments picked out for all to see, you need to disable this.
Click the cog and scroll down to the 'photos' section of 'settings'. Click the 'X' on the 'your circles' chip to delete it and either leave the box empty or reinstate the individual users -- partner, family and so on -- who you trust not to post compromising material.

While you're here, check also that the option to show photo geo-location information in newly uploaded albums and photos is unchecked. Although this won't affect images already in place, it will stop further locations being uploaded. With the majority of images likely to be taken close to home or work, such data will be clustered when viewed on a map, giving potential thieves a good starting point.
To limit who can see any photos you post yourself, scroll back up the page and click 'profile and privacy', then 'edit visibility on profile' and then 'photos'. Then uncheck the box beside 'show this tab on your profile'.
Limit who can re-post your posts
There's no point being careful who can see your posts if you don't stop your friends from passing on what you write. There's currently no way to block re-sharing on a site-wide basis, so keep this in mind every time you make a post, and decide whether you're happy to have it quoted by other people to their own circles. If you're not, click the circle to the right of your posting and select 'disable reshare'. For sensitive posts, you should also disable comments.

Blocking other users
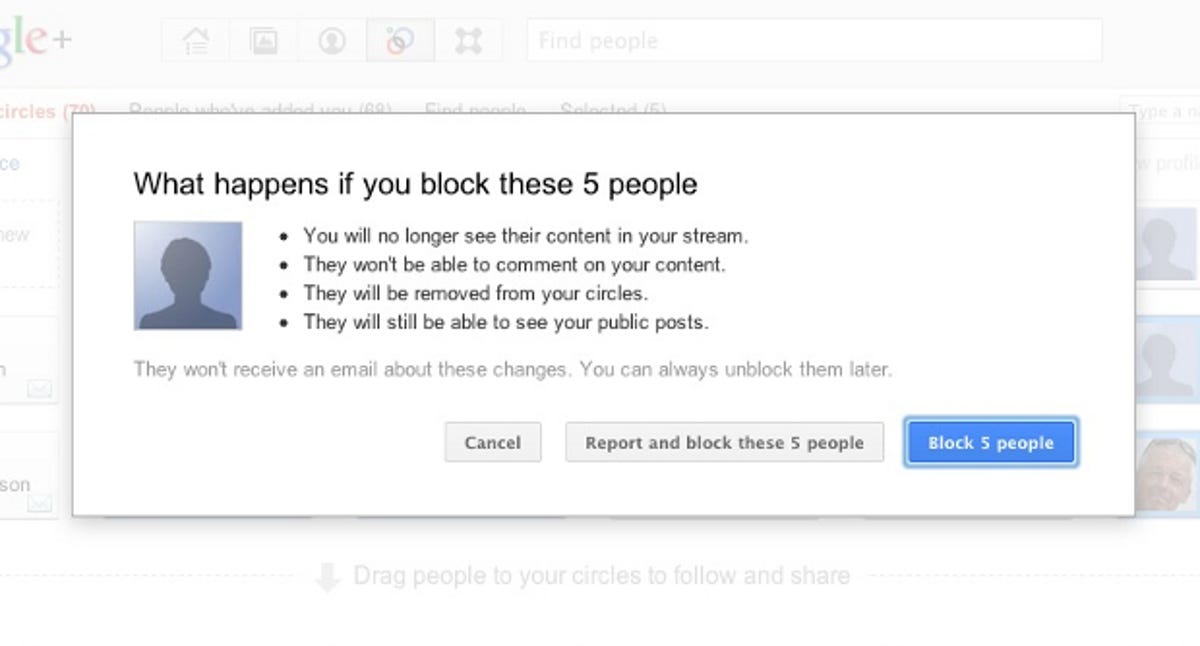
The final resort for those users who cause problems is to block them. This stops their content appearing in your stream, removes them from your circles and stops them from commenting on any of your posts or mentioning you in their own posts and comments. They won't be informed that they've been blocked, but, as they'll still be able to see your public posts while being unable to comment on them, there's a good chance they'll work out what you've done.
If you're happy with those provisos, return to the settings by clicking the cog, and click 'profile and privacy', and then 'manage circles'. Find the users you want to block and select 'more actions' and 'block'.
Test your settings
Finally, check the effectiveness of your settings by seeing how your profile looks to members of different circles. Choose a different name from each of your circles and type them into the box you'll arrive at by going to 'settings', 'profile and privacy', and then 'see how your profile appears to other users'.
Google+ returns you to your profile, this time displaying it not as you'd usually see it, but how it appears to the users whose name you entered.