Watch this: How to install the Nest Learning Thermostat
The
Nest
thermostat is so smart, it knows your house better than you do. You can adjust it remotely, teaching it your temperature preferences over time. Once it learns, it can even help you save energy. Sounds convenient, right? It is, but you have to install the thing first.
Installation is a comparatively straightforward process in the US, where the Nest was designed and built. It's a bit more tricky if you're in the UK or Ireland, but it doesn't need to be daunting.
Though this guide will help you understand how the system works, seek help from from a professional electrician to make sure you get it right.
The UK edition of the Nest comes with a plug, Heat Link, Micro-USB cable and a base. There's also an optional trim plate, which is useful if a previous thermostat has left holes in your wall that need covering up.
It's smart, it's shiny, it's the Nest thermostat.
Jonathan Garnham/CNET
Setting up the Heat Link
The Heat Link takes your Nests' instructions and controls your boiler. It's connected to the Nest with a dedicated radio frequency, which means that your heating will still work if your Wi-Fi goes down.
Note: Do not attempt to connect the Heat Link to your boiler without help from a professional electrician.
Switch off the main power before beginning the installation.
Choose where to put your Heat Link. You should position it where there are no large metal objects (such as the boiler or a water tank) that could block the thermostat's signal.
With your electrician's help, connect the neutral (N) and live (L) wires to the Heat Link.
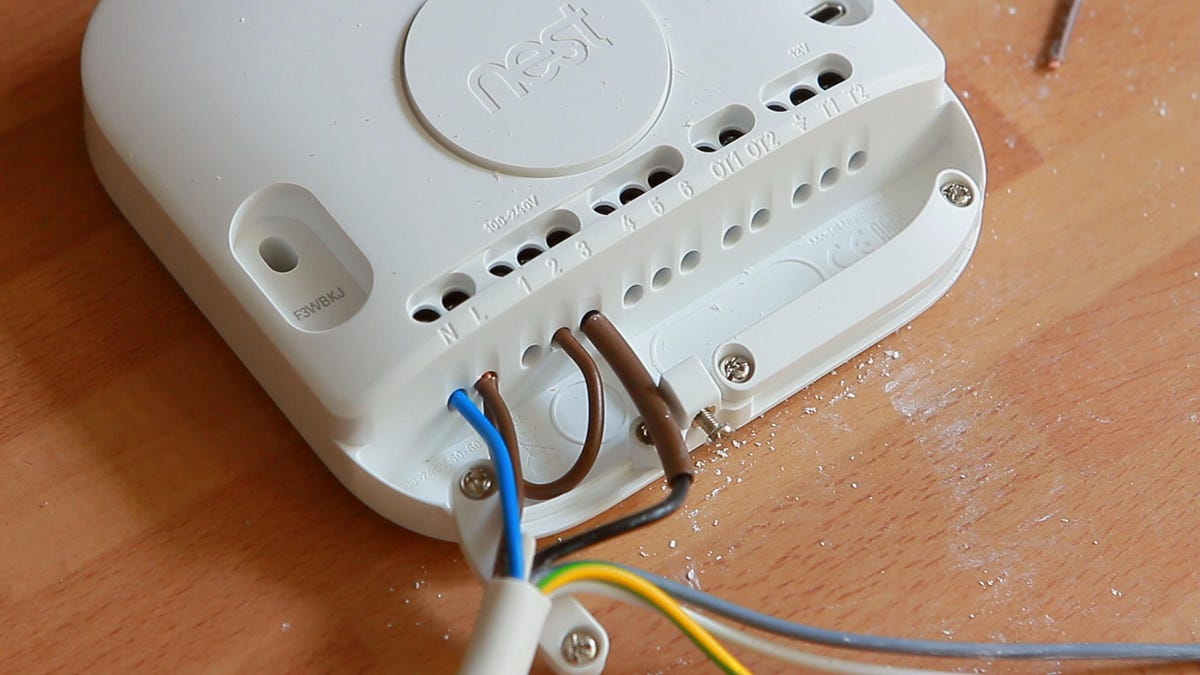
Connect your Heat Link using a circuit that matches your heating system. We used a combination boiler, which heats water for your taps, so our wired-up Heat Link ended up looking like the below photo. Yours may look different, depending on your setup.
The wired-up Heat Link.
Jonathan Garnham/CNETNote: We only had to use ports 1-3, which control the heating system. Ports 4-6 are for hot water control. If you have an OpenTherm system, you'll need the OT1 and OT2 port.
If you don't want to rely solely on the radio frequency, you can wire up the T1 and T2 points.
Now you can connect the other end of your wire to the boiler.Then, turn your heating system back on.
The light at the top of the Heat Link will turn blue when it's trying to connect to the Nest. Once it's connected the light will turn green.
Installing the thermostat
You don't need to put your Nest next to the boiler, which may be hidden under the stairs or tucked away in a corner. Here's how to position and install your thermostat.
Pick a room where you spend a most of your time, such as the living room or kitchen.
You can plug your Nest in and stand it on a surface if you don't want to attach it to the wall. Or choose a space on the wall that's within two metres of a power outlet -- the Nest will always be plugged in, so it's best to pick a socket that's not already in regular use.
Note: In our video, we've drilled a hole through a thin wall with a socket on the other side and fed the wires through. If you do this, be sure to drill a hole wide enough that the Micro-USB can fit through it.
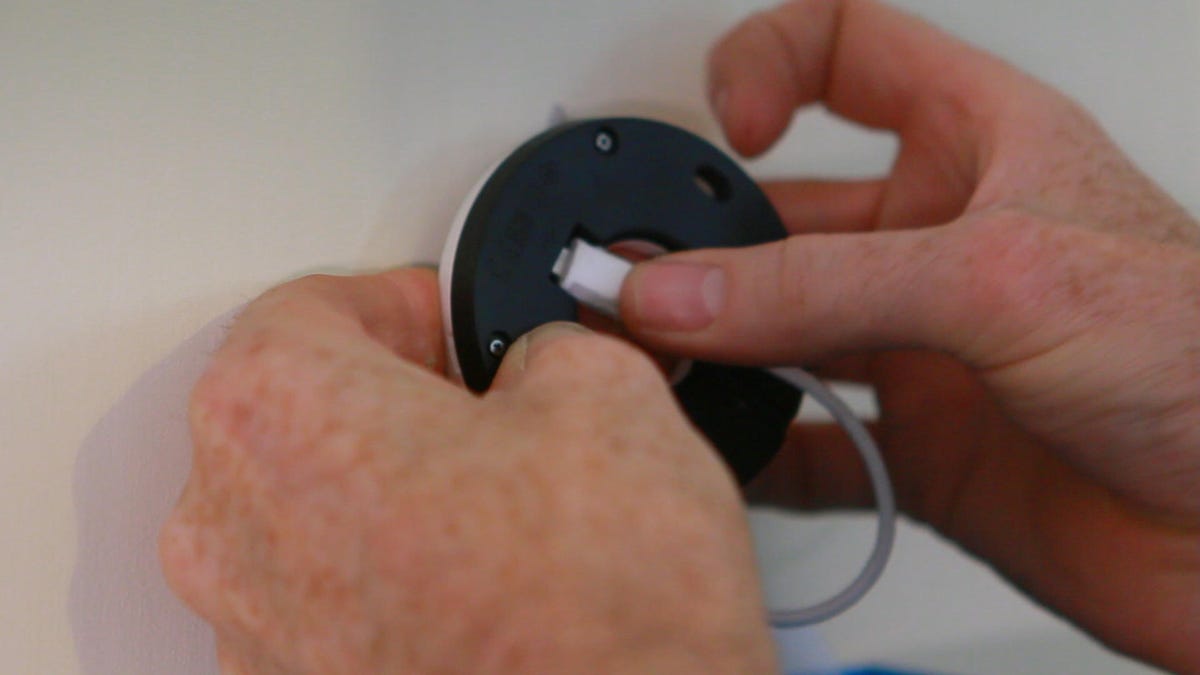
Slot the Micro-USB cable into its socket in the rim of the round base.
Connecting the micro-USB cable to the Nest base.
Jon Garnham/CNET
Use the built-in spirit level to check that the base is straight. Once you're happy with the placement, you can screw it into the wall.
Push the Nest display onto the base until you hear a click. It should now be securely mounted.
Setting up a connection
Once you've attached the Nest display to the base, it'll be powered and ready to set up.