How to edit video in Photoshop CS5 Extended
Even though the feature has been around for a while, not many people know about Photoshop's video-editing capabilities. Here's how to perform some simple edits in CS5 Extended.


- Webby Award honoree, 2x Gold Telly Award winner
Even though the feature has been around for a while, not many people know about Photoshop's video-editing capabilities. Here's how to perform some simple edits in CS5 Extended.

This feature first appeared in Photoshop CS3 Extended, allowing users to import video and apply some basic effects and edits without needing specialised software, like Premiere or Final Cut Pro.
For this tutorial, we are using Photoshop CS5 Extended. Photoshop supports the following video file formats:
- MPEG-1 (.mpg or .mpeg)
- MPEG-4 (.mp4 or .m4v)
- MOV
- AVI
- MPEG-2 (provided an MPEG-2 encoder is installed)
Import the video
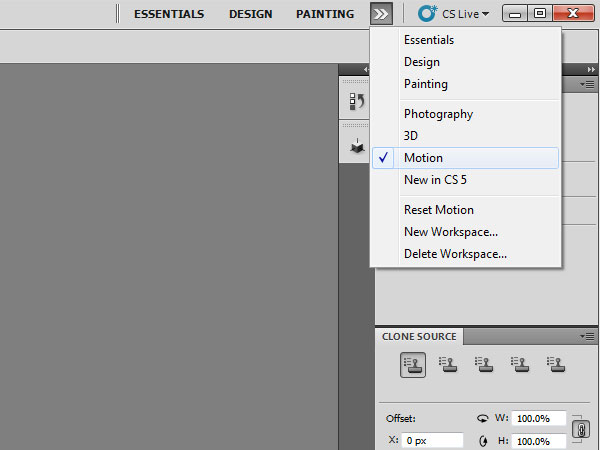
To get things started, we need a timeline. From the top toolbar, find the arrows next to Essentials, Design and Painting buttons, then select Motion. This will make the timeline show up at the bottom of the Photoshop window and activate the Motion workspace.
Next, open the file in Photoshop. You can do this in two different ways, depending on the desired output resolution of your video. The first and easiest method is to simply open the file, or drag the video into Photoshop.
The other method for making more precise input and output choices for the video is to create a new document, select Film & Video from the preset drop-down menu, and adjust the settings as required. Then, head to Layer > Video Layers > New Video Layer from File. Select the location of your video, and open it.

You should now be able to preview the playback of your clip by pressing play in the timeline. Also, make sure that you can preview the audio during playback. If not, click the speaker icon located at the bottom of the timeline window, next to the playback buttons.

The next step is to make all the frames in the video editable, so you can apply filters. Head to Filter > Convert for Smart Filters. You will then be prompted to convert the selected layer into a smart object. Press OK.

Picture adjustments
Now you can perform some basic picture edits, such as tweaking exposure or converting to black and white. If the Adjustments menu is not already showing, head to Window > Adjustments. Using the presets, you can tweak colour effects and much more, and then fine tune using the sliders. You can also apply any actions that are normally used for photos, as well as add text.
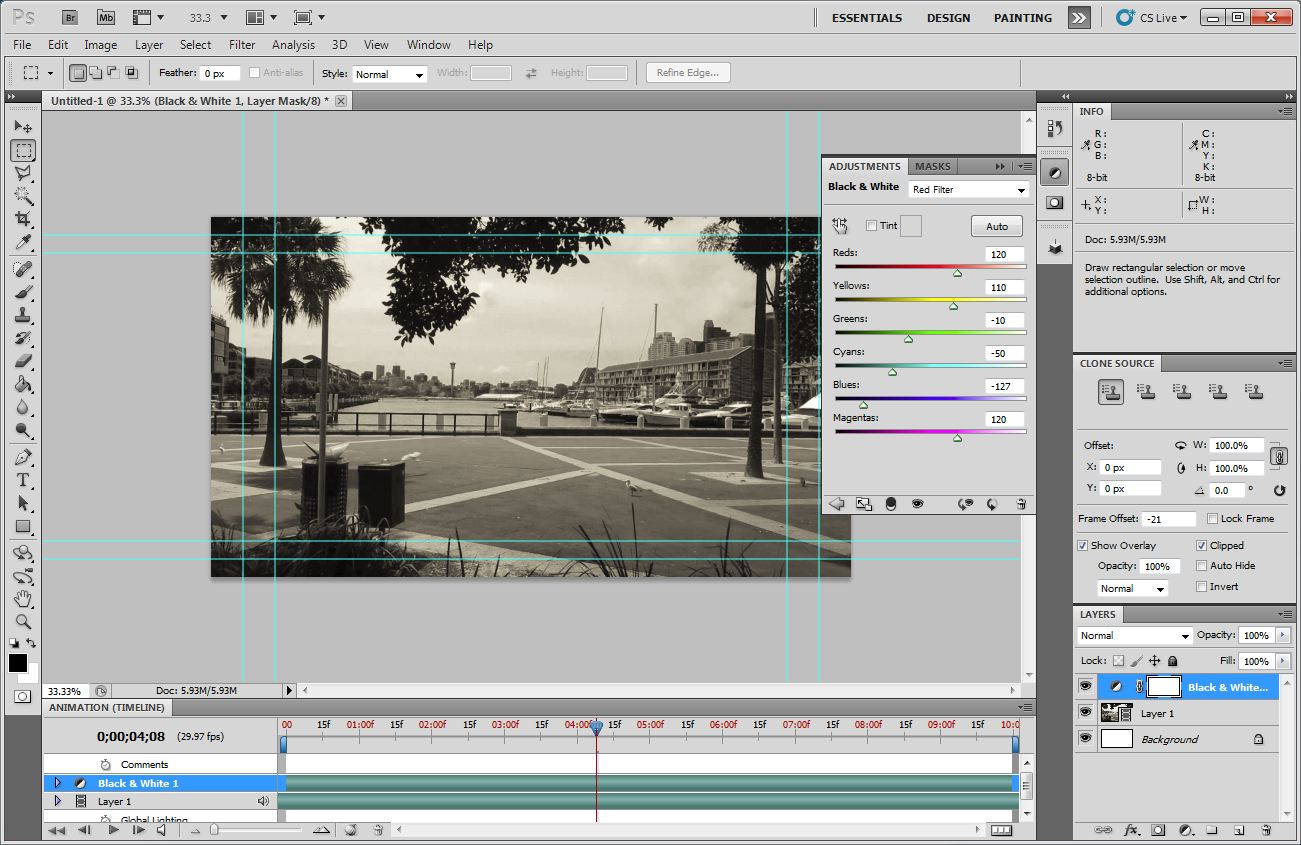
Other options available include lens corrections, in order to compensate for any distortions. Head to Filters > Lens Correction, and choose the camera and lens model.
Clip editing
Basic linear editing can be done by using the timeline window. To trim a clip, first choose where you would like the video to begin by moving the blue sliding arrow.

Then click the small settings button at the top of the timeline window, and choose "Trim Layer Start to Current Time". Repeat the same process for the end of the video, selecting "Trim Layer End to Current Time". Preview the clip again to make sure that the edit is correct. You will also want to drag the dark green portion of the video (your new edit) to the start of the timeline.

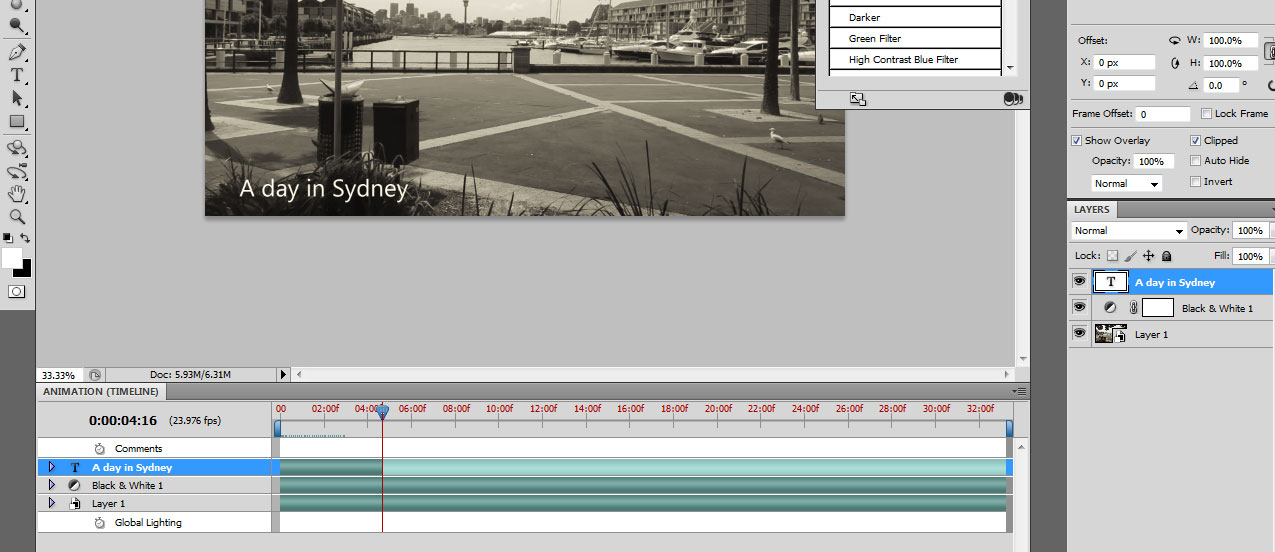
You will notice that if you add text or any adjustments, they show up on the timeline as separate layers. For example, if you wanted to include some text that shows up only for the first five seconds of the clip (such as a title), you can do so, and then drag the timeline slider for that effect for the desired duration. Hover over the end of the green bar of that layer to see the sliding arrows, and adjust as necessary.
Exporting the video
Once you have edited your video, it's time to export. To do this, head to File > Export > Render Video.

Here you have the option of rendering to an image sequence or exporting to a particular file format. Normally, you will want to maintain the aspect ratio, frame rate and original size of your video, so make sure that these settings all match up to the original.
When exporting, make sure to select a file type where Photoshop supports audio, otherwise you will have a silent movie. For example, Photoshop does not support exporting audio in AVI or DV formats.
For more detail on all the rendering options and formats available in CS5 Extended, read Adobe's support page.