 Why You Can Trust CNET
 MakerBot Replicator review: MakerBot Replicator
MakerBot's Replicator 3D printer is the most polished, most powerful 3D printer for under $2,000. Just brace yourself for a long learning curve.


Before you consider buying a MakerBot Replicator 3D printer, ask first why you might want it. Making plastic doodads can be fun, but the novelty will fade, particularly once you discover how challenging it can be to achieve certain prints. If you want a 3D printer to experiment with, or for a professional environment where color isn't crucial, the value of the $1,999 Replicator's dual-extruder head could also be hard to justify. A single-extruder Solidoodle 2 3D printer costs just $500.
MakerBot Replicator
The Good
The Bad
The Bottom Line
And yet, if I weren't concerned with price, and if I had the time to master the software, the hardware, and the quirks of the printing material, I would buy the MakerBot Replicator. 3D printing offers raw, creative potential on a par with the early days of personal computing. With real advances like affordable dual-extrusion capability, the Replicator leads its market. You won't currently find a more powerful consumer-level 3D printer. Just know that getting the most out of the Replicator will involve a time commitment, and a willingness to endure repeated trial-and-error in order to print certain objects successfully.
A brief, brief overview of 3D printing:
1. Acquire a 3D model file via download, by designing a model yourself, or by scanning a physical object.
2. Send that file to the 3D printer, generally via your Windows, Mac, or Linux-based computer.
3. The printer then draws from a spool of 1.75-millimeter or 3mm plastic filament, printing your design by building up layers of heated, extruded plastic.
4. Bask in the glow of having brought into existence an actual 3D object.
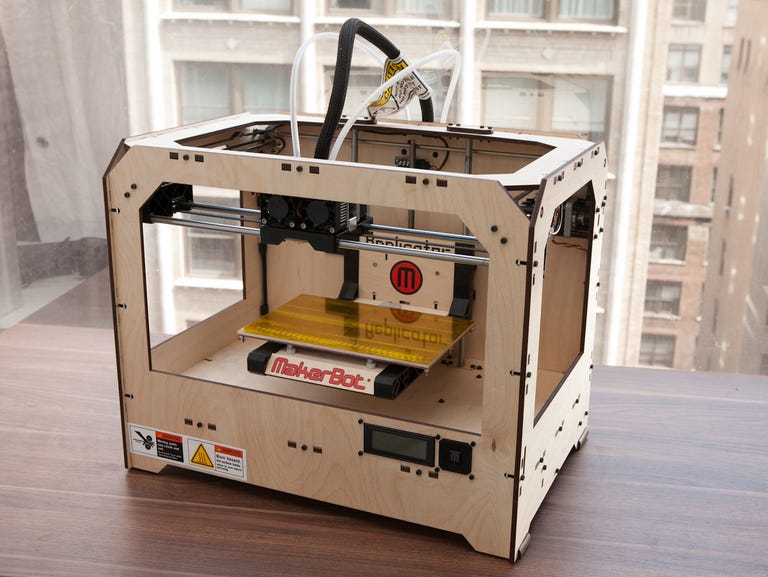
Unlike the MakerGear Mosaic 3D printer I wrote about in January, the MakerBot Replicator is not a build-it-yourself kit. MakerBot used to sell 3D printer build kits, but the Replicator, announced at this year's Consumer Electronics Show, is the company's first true prepackaged product.
The Replicator ships in an unassuming cardboard box, but the wooden frame and the various mechanical components are well-protected by rectangular cardboard supports, some of which contain accessory hardware. MakerBot placed the contents logically to protect the Replicator in transit, yet they're also easy to remove. If Apple has achieved the highest level of technology product packaging, MakerBot is a promising disciple.
A paper manual walks you through the few minor steps of assembling the hardware. These steps include anchoring down one cable with a plastic clip, screwing the print head to the motorized drive sled, connecting the mounting points and the plastic tubes that hold the spools of plastic filament consumables in place, and routing them into the print head.
Despite its thoughtful packaging and simple hardware setup, the Replicator still shows signs of MakerBot's DIY roots. The body of the printer is made from laser-cut plywood, an uncommon material for a finished technological product. For feet, the Replicator uses small pieces of rubber tubing that you slide onto the bottom edge of the printer's frame.

MakerBot presumably uses these materials to keep its costs down. The company might also want to reassure the 3D-printing community that by maintaining a garage-built feel, it hasn't forgotten its open-source pedigree (the printing technology behind the Replicator comes from the University of Bath's open-source RepRap project).
From the user's perspective, the rubber feet are annoying because they fall off too easily whenever you move the Replicator. The plywood will also certainly warp over time, affecting print quality to varying degrees depending on the temperature and humidity of your work environment.
Any warping might not be dramatic. MakerBot also advises that you can correct for it with the software. Still, as more 3D printers hit the market with warp-resistant plastic and metal enclosures, MakerBot might start to feel pressure to use different materials for the Replicator. Then again, against the coming consumer-level competition from large commercial printing companies like 3D Systems and (likely) Stratasys, MakerBot might also find value in preserving its printers' handmade charms.
Even if consumers come to like the MakerBot's wooden frame, I expect most complaining will be about the software.
Technically speaking, MakerBot Industries does not have direct ownership of the open-source ReplicatorG or Skeinforge software required to operate the printer. The company does have influence over their development, though. When I asked MakerBot if the company has any plans to make the software easier to install, I was told, "Yes&We released a Mac/Windows installer in February. We are working on another round of improvements to that this spring to make it even easier."
I hope MakerBot can make the software installation easier. Right now the process will intimidate novices, and MakerBot's documentation could use some clarity.

MakerBot's paper manual directs you to the online software installation guide, but that document only addresses installing ReplicatorG. It's only after you install that program that you find you also need to install the Python software interpreter. Which version of Python should you use? Better search the separate ReplicatorG wiki page.
Python bridges the gap between the ReplicatorG software and Skeinforge, a powerful software package that mostly works in the background while you print, at least until you find you need to use it.
Confused? I was. The software side of 3D printing is one of its biggest usability weaknesses, and it highlights the gap between its technical roots and its mass-market ambitions.
Look through Skeinforge and you'll find it's capable of driving 3D printers, laser cutters, CNC mills, and other fabrication devices. It shows remarkable flexibility and a wealth of configurable options, but it's clearly designed by and for engineers.

ReplicatorG can also be intimidating, but the way it helps you configure 3D models for printing is comparatively intuitive. A simple graphical interface lets you scale models to size, and rotate, mirror, or otherwise reorient them on the build platform.
To print an object on the Replicator from your computer, you open the design in ReplicatorG and then manipulate the model on the virtual build platform. From there, ReplicatorG sends the design to Skeinforge, which it works in the background to generate "gcode." Gcode is the series of instructions that tells the printer how to print an object. It determines the printer's settings (how fast to feed the plastic, how hot the build plate should be), and it also communicates the coordinates that map out each layer of plastic that makes up a 3D object.
You will spend most of your time with ReplicatorG, and once you generate gcode for a specific object, you can even edit the code manually within the same program. You might do this if you want to set your build platform at a hotter temperature than normal in order to ensure that a smaller object sticks well to the build plate, for example.
Interactions with Skeinforge directly come primarily when you want to set the Replicator to use a profile with custom printing parameters. You can make a profile that always prints very fast, for example, or that changes the build plate's default temperature from 100 degrees C to 110 degrees C for every print. You can change between profiles in ReplicatorG once you've made them via a simple dropdown menu. Learning how the various settings affect your prints is one of the primary challenges of 3D printing.
Also, if I could add any feature to the software, although it might involve some hardware tweaking as well, I wish it would let you pause a print and then resume it after a day or two. You can pause currently, but it leaves the heat elements on, meaning that you can't walk away from it for an extended duration. Some prints can take hours, and having to babysit the printer for the duration can be tedious.
Learning to use the Replicator's involves more than just the software, though, and to understand how the hardware is involved, it will help to understand the printer's unique features.
The Replicator stands out from other consumer-level 3D printers mainly because of its dual-extruder print head. No other printer under $2,000 has one. You can buy a Replicator with a single extruder head for $1,799, but the dual-extruding head (along with the larger build platform) is the Replicator's hallmark.

With the dual-extruder, you can print a single two-color object, or you can print two objects in one print job, each made from a different color. You can also print one single-color object, as with other 3D printers. The extruder motor only pushes plastic through one head at a time, so mixing colors is tricky (although not impossible). Printing two objects side by side using both heads simultaneously is also out.
The Replicator can store two spools of plastic filament on its back panel, and mounting the spools on the printer directly makes for a tidier work area since you don't need to make extra room for a freestanding spindle. It also means you can have two colors, or even two print materials, loaded onto the printer, reducing the number of times you need to load and unload filament.
An onboard control panel is another useful feature of the Replicator. Comprising a four-line LED screen and a five-button control pad, the control panel offers a level of convenience you won't find on many other 3D printers. It's via this panel that you'll launch the initial printer setup and build platform calibration, and where you control loading and unloading filament. It displays the temperature of the extruder heads and the build platform as well as the progress of a print job.
You can also use the control panel to print directly from the printer's SD card slot. You will need a computer to load design files directly onto the SD card, but once those files are on there, you can print from the MakerBot with no PC attached.
The built-in SD card slot is unique to the Replicator, but 3D Systems will offer the option to print over Wi-Fi in its forthcoming Cube 3D printer, due out later this month.

The last prominent feature of the Replicator is its large build envelope. At 8.9x5.7x5.9 inches, the Replicator lets you build the largest objects of any consumer-level 3D printer. However, successfully achieving maximum-size prints can be difficult since large objects are prone to cracks due to uneven cooling. It would also take hours to print something that big. Despite those challenges, it's of course better to have the option for large prints than not.
Actually printing an object on any 3D printer is exhilarating the first few times you do it. You may find yourself enrapt by the process, watching the print head extrude the material layer by layer for 30 minutes or more until your object is complete.
Alternatively, after your fourth failed attempt at a 2-hour print, you may need to walk away for the day.
As it turns out, printing in three dimensions can be unpredictable. The plastic doesn't always adhere properly, either to the build platform or to itself. Other times the plastic doesn't melt quite right, giving you unsightly globs, gaps, or wispy tendrils that disrupt the print.

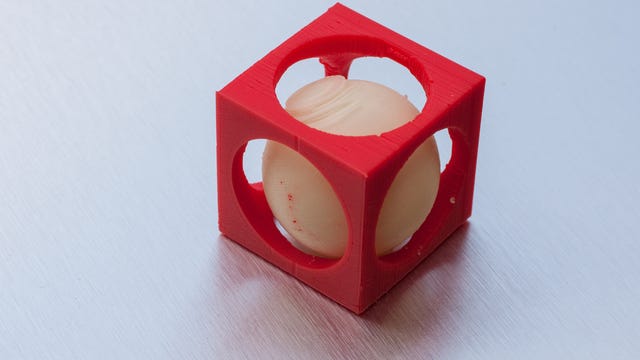
Printing in two colors can be equally a give and take. To print a two-color object, you need to use ReplicatorG and Skeinforge to merge two STL 3D object files into a single, combined gcode file. You can't currently print a two-color object with support material yet, but once you've generated the combined gcode, the process is the same as printing a single-colored object.
Two-color results can look great, and blending experiments hint at the potential to make objects with nuanced color characteristics. Sometimes the two object designs don't merge quite right though. Other times the two different filaments don't adhere to each other well enough.

Adjusting the software settings is one way to troubleshoot a print, and you might solve a problem by slowing down the motion of the extruder heads or increasing the temperature of the build platform. You should also maintain a clean and properly calibrated build platform.
Some of the difficulties you will encounter, though, are due to general characteristics of the ABS (acrylonitrile butadiene styrene) or PLA (polylactic acid) plastic filaments. Each material wants to print at certain temperatures and at certain speeds, both of which can vary depending on the design of your object.
Other issues, like when the idle extruder head interferes with a print in progress as it passes over, are specific to the Replicator.
To a certain extent it's fruitless to complain about the general problems of 3D printing. Between the open-source software and the industry-standard plastic filaments, 3D printing is still in its early stage as a consumer-level activity. It would also have been nice if old micro floppy disks had held more than 1.44MB, but the technology at the time simply wouldn't allow it.
For the Replicator specifically, two issues with its design could stand improvement.
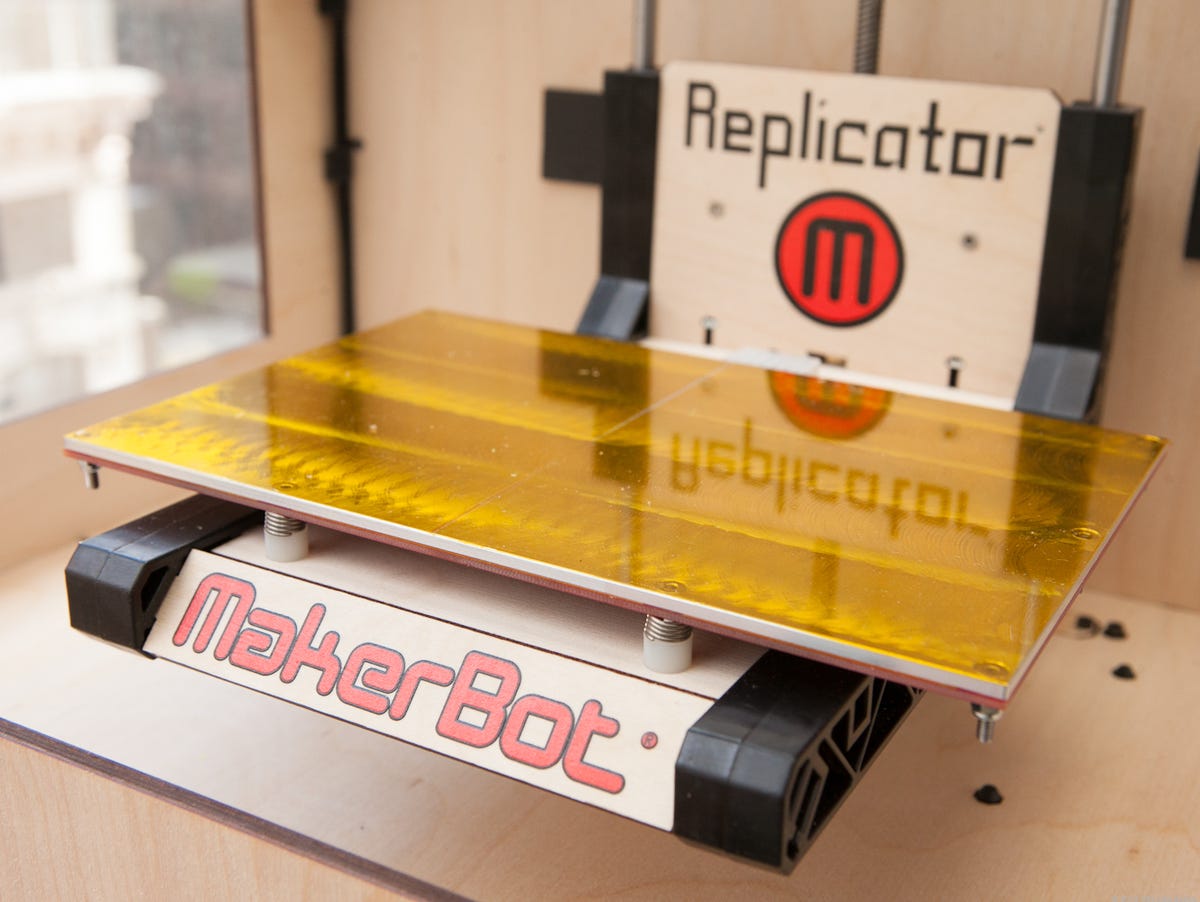
First, enclosing the build platform in the wooden frame makes for a tidier overall appearance. It also seems to provide convenient anchor points for the print head's X- and Z-axis drive frame. The problem comes when you want to replace the Kapton tape on the build platform.
Kapton tape is an insulator, and it helps ABS adhere to the build platform. You need to wipe it down between prints using either acetone or rubbing alcohol. It's also susceptible to tearing, especially if you use an implement to pry your finished prints off the build surface.
Once the Kapton tape tears enough, you need to replace it. MakerBot kindly includes a roll of 120mm tape in the Replicator's box, but the enclosed frame impedes access to the build platform, making it very difficult to apply the large sheets of tape accurately. I had a roll of 25mm Kapton tape left over from the MakerGear Mosaic 3D printer, and those narrower strips were much easier to apply smoothly. The fact that I had to use six pieces of 25mm tape didn't seem to prevent good adhesion, either.
MakerBot says it's working to improve the process of reapplying the Kapton tape. As a short-term fix, I'll suggest adding a couple rolls of 25mm tape to the box.
The other issue alluded to above has to do with the second extruder.
The two extruders come attached to a single print head assembly that you connect to the drive sled via a pair of hex screws. The extruders are level with each other (or should be), but when the path of the extruders brings the idle head over a print-in-progress, occasionally the second head can exacerbate printing errors by catching on stray strands of plastic. The idle head can also stain an object when it passes over if the head has residue on it from printing with a different color.
Solving idle head pass-over issues is more complicated the applying new tape. A mechanism to raise and lower each extruder head independently would certainly add to the cost of the printer, and potentially introduce other complications. The extruder heads are threaded, so you could technically unscrew them, but it's not easy with the current design.
Whether your print suffers from a general problem of 3D printing or an issue specific to the Replicator, part of the challenge for some of you, or maybe the appeal, will involve spending time experimenting with the printer.

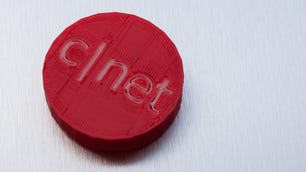
I had a good stretch of success with my first few prints on the Replicator. I printed three of the sample projects on the included SD card. I also printed a two-color CNET logo I designed myself in Google SketchUp.
After the second day of printing, I found that objects frequently wouldn't stick to the build platform. I changed the Kapton tape, cleaned it with acetone between each print, and finally, on the advice of MakerBot support, made sure to calibrate the platform as close to the extruder heads as possible without touching. All of that solved my problems for most prints, but there are still objects I found on Thingiverse I haven't been able to print successfully.
That others have printed those objects tells me that it can be done, it might just be a matter of tweaking the printer settings. What those settings might be, I haven't found yet. Some Thingiverse listings include custom settings, but not all. Even when they do, applying special settings doesn't guarantee success, perhaps due to your build environment, or your specific printer.

The thing about repeated trial and error in 3D printing is that it takes a while. Print time varies by the size and complexity of each object, but some objects can take 10 hours or more, especially if you use a full support structure (a lattice work of thinner plastic that supports overhangs; Skeinforge automatically calculates the support structure if you select the option, and you break it off once the print is finished).
Even for short prints that fail in the early stages, it takes time for the software to process the gcode (the bigger the print, the longer the processing time) and for the build platform and the extruder heads to heat up. Twenty minutes or so between trials isn't out of the ordinary as a minimum, and over three or four tries the time spent experimenting adds up, even with small prints.

Some people will relish the opportunity to dig into brand-new technology like this. If not, MakerBot wouldn't have such a passionate community on its Thingiverse site (15,000 user-uploaded object plans and counting, available for free) otherwise. You will also find a vast trove of online help available from MakerBot and its community members. The information is useful, but it's also scattered among various Google Groups, wikis, MakerBot's own documentation, and elsewhere. Finding help can become a hobby in itself.
Conclusion
If I've concluded anything from this review, it's that 3D printing is an inspiring activity, although it can be frustrating and demanding of your time. It also seems certain to grow in popularity. Crafters, hobbyists, and design professionals will likely integrate 3D printing into their routines, and it is an obvious educational junction point for art and science. It has the potential to become one of those generational-gap technologies that kids pick up naturally.
That doesn't mean I would buy my daughter a $1,999 3D printer and tell her to go to town. I might consider buying her a $500 model, but the Replicator is too expensive for simply noodling around on. I would, however, vote yes to funding the purchase of a Replicator for her middle school.
For professionals and hobbyists, your needs and your budget will vary. If you don't care about multiple colors, or can't spare the time to use the Replicator to its full potential, a more affordable 3D printer, or even an on-demand 3D printing services like Shapeways would be a better alternative.
3D Systems will release its much-hyped Cube 3D printer in a few weeks. A single-color printer for $1,299, the Cube is directly targeting consumers, more so than the consumer-professional-enthusiast mix MakerBot has on its radar. If 3D Systems can nail the software experience and improve some of the uncertainty involved in 3D printing, it will be able to call the Cube a success. I'm also curious to see what kinds of compromises are involved in the $500 Solidoodle 2.
If either of those products offers a dramatically improved experience from that of the Replicator, I may review my assessment. For now, the MakerBot Replicator is the best 3D printer available for under $2,000. It's not a toy, but rather a challenging, thrilling creation platform. If you have the time to invest in learning how to use it, you will surely be rewarded.