How to install 4GB of RAM in a MacBook
Your 2008 unibody MacBook might be a year old now, and in need of more memory. It can use up to 4GB of the stuff, so we got hold of some to walk you through the simple upgrade process
Your 2008 unibody MacBook might be a year old now, and in dire need of more memory. Fortunately, these models can use up to 4GB of the stuff, so we got hold of some to walk you through the simple upgrade process.
Fear not: it won't void your warranty or your AppleCare, as long as you don't break something while you're inside the machine.
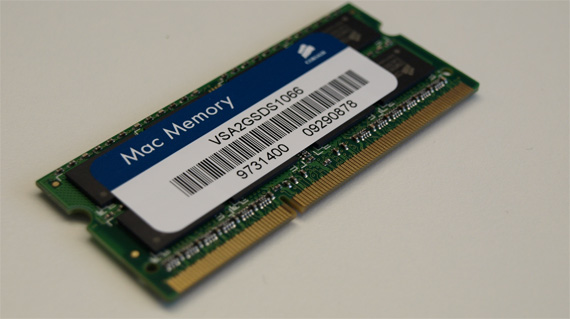
We're using RAM from Corsair, which we highly recommend. The 4GB kit comprises two sticks of RAM, each with 2GB of memory. The model number is VSA4GSDSKIT1066 (memorable, right?), and works in the 2008 unibody MacBooks, and also the current MacBook Pro models.
Incidentally, if you want to shop for your own RAM, look for 204-pin SODIMM DDR3 PC3-8500 SDRAM running at 1,066MHz.
In addition to the memory itself, you'll need a mini Philips screwdriver, something to store some screws in for a while, 15 minutes of spare time and probably a coffee.
Got all that? Good, then let's get on with it.
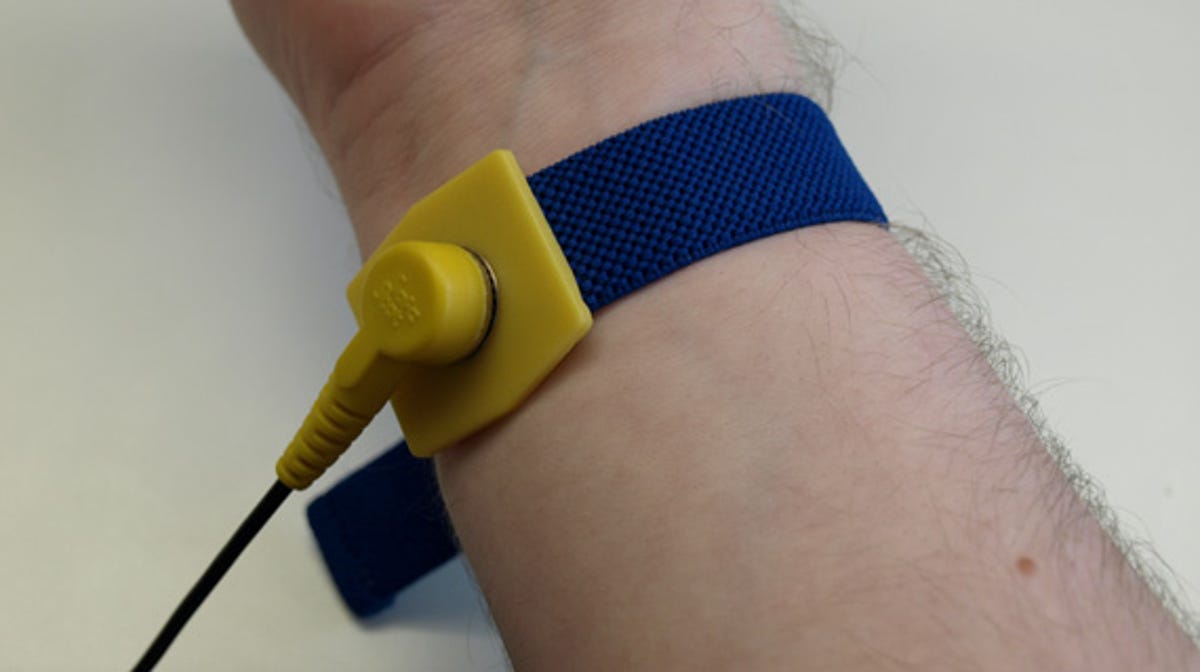
First, make sure you discharge yourself of any static. We're wearing an anti-static wristband, which you can pick up pretty cheaply. But all you really need to do is touch a metal surface such as a radiator, or the fan grille on the back of a PC.
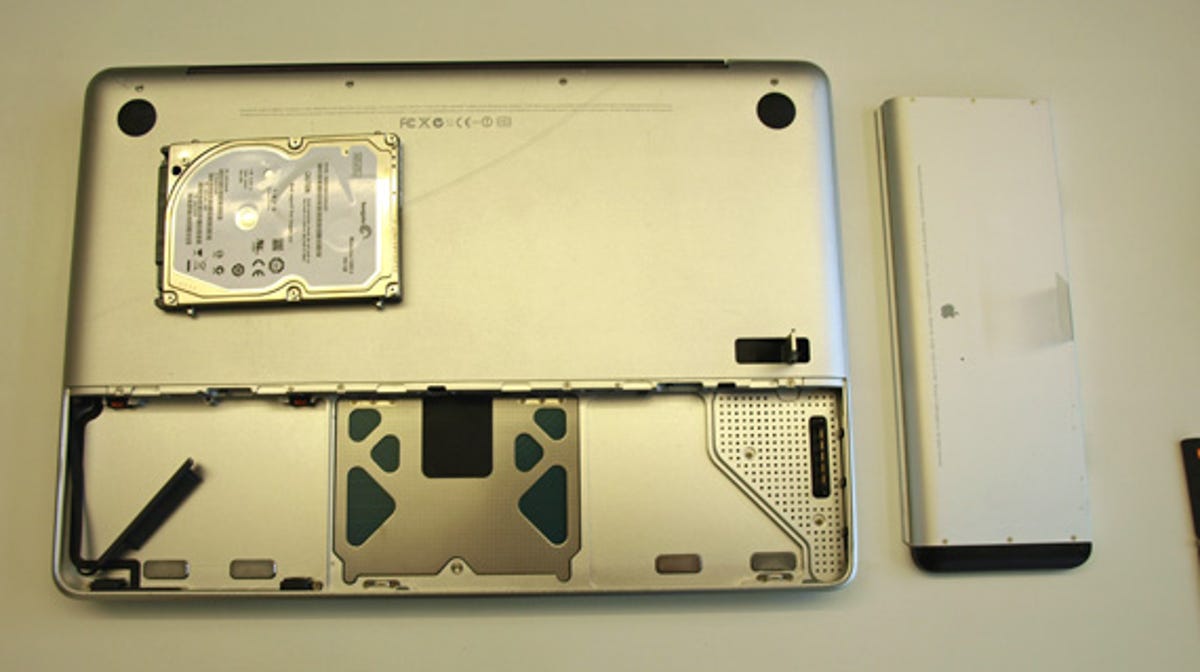
Now, push the latch to remove the MacBook's battery cover. Once removed, unscrew the small bracket holding the hard drive in place (here's a guide to removing a MacBook hard drive if this bit stumps you), disconnect the drive from its cabling and whip out the battery.

Now use your screwdriver to remove the four small screws at the top of the underside of your MacBook. One of them is shorter than the others, so keep it separate from the rest.

Next, remove the four screws along the ledge above the hard drive and battery compartment. Keep these screws separate from the others, because they don't get on with each other.

With all eight screws removed, lift off the backplate of the MacBook and bask in the glory of your old RAM. Look, there it is, inside a yellow circle. Thank it for its hard work and prepare to end its career.
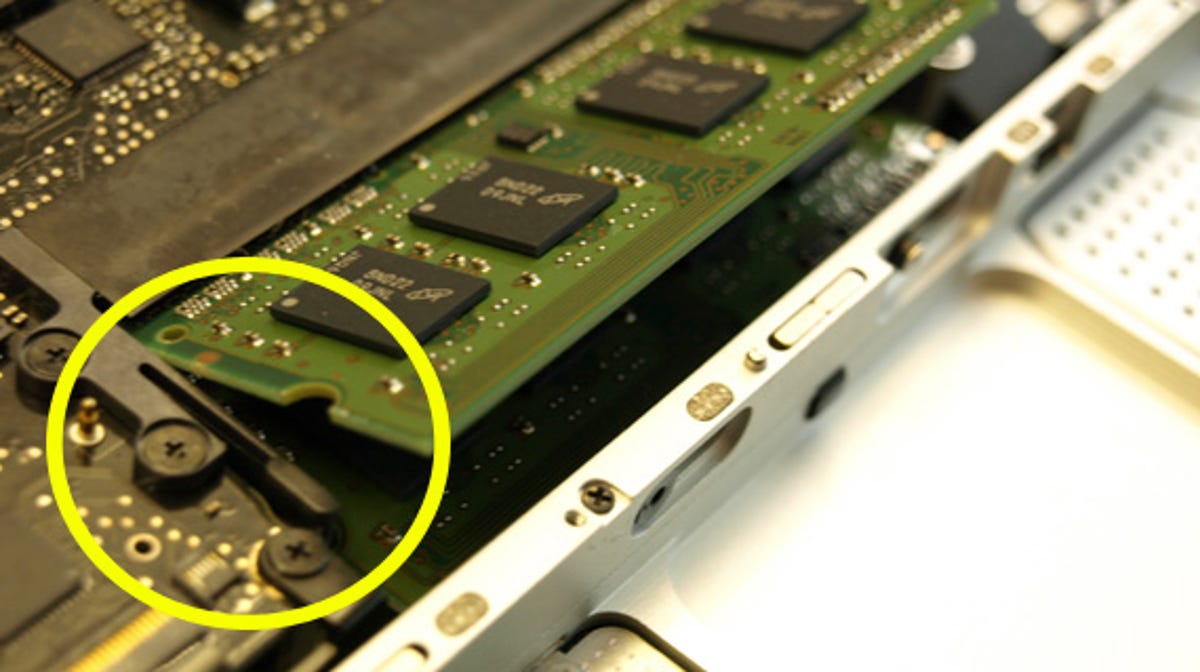
There's a little latch to the left of the RAM, and another one to the right. Pull these apart and the RAM stick will pop up. Grab it by its edges and ease it out. Then repeat the process for the second RAM stick, which is cowering underneath, like a child whose mum has just turned up to take him home from the party.
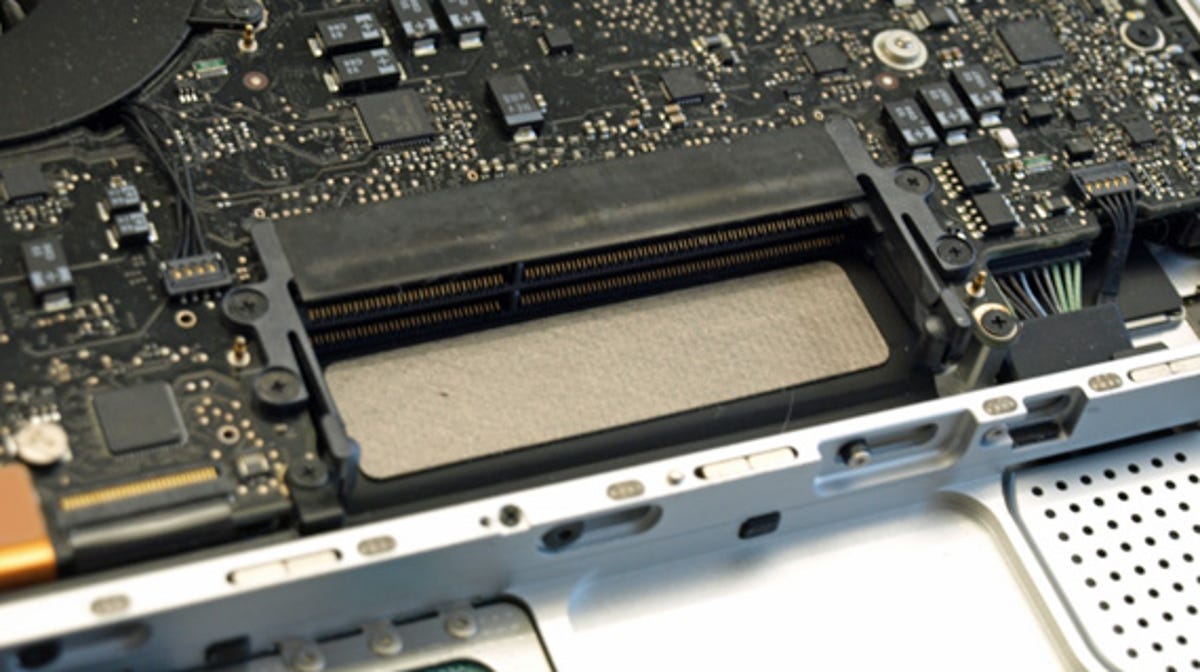
With all the RAM extracted from the guts of the MacBook, you should be looking at a gaping great void like you see in the picture above. This means you now have two empty RAM slots.
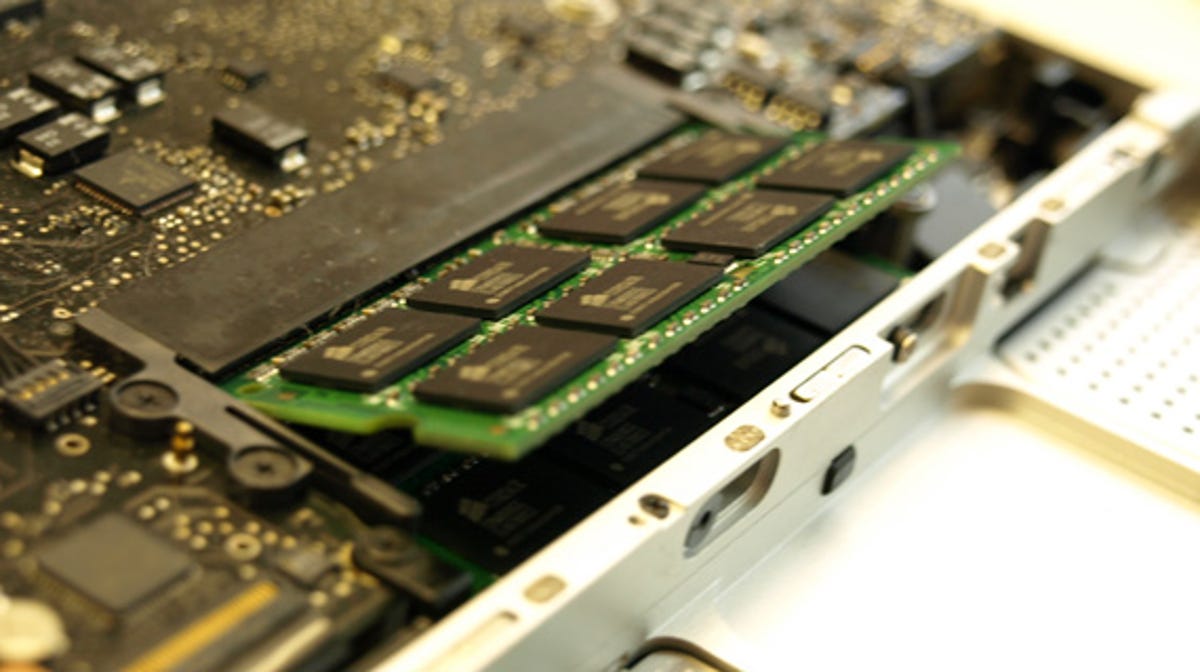
Pick up the first stick of your new RAM and push it into the lower slot. Make sure it's firmly in place and push it down so it lies flat.
Then take the second stick and push it into the upper slot. Again, make sure it's firmly in place and push it down so it's flat against the stick below it. The two clips on the left and right of the memory should click back in place to secure both sticks.
And you're done! That's really all there is to it. Put the metal plate back over the guts and put the eight screws back in place. Reconnect the hard disk and its security bracket, put the battery in and slide on the battery cover.
Now for the moment of truth: turn the computer on!
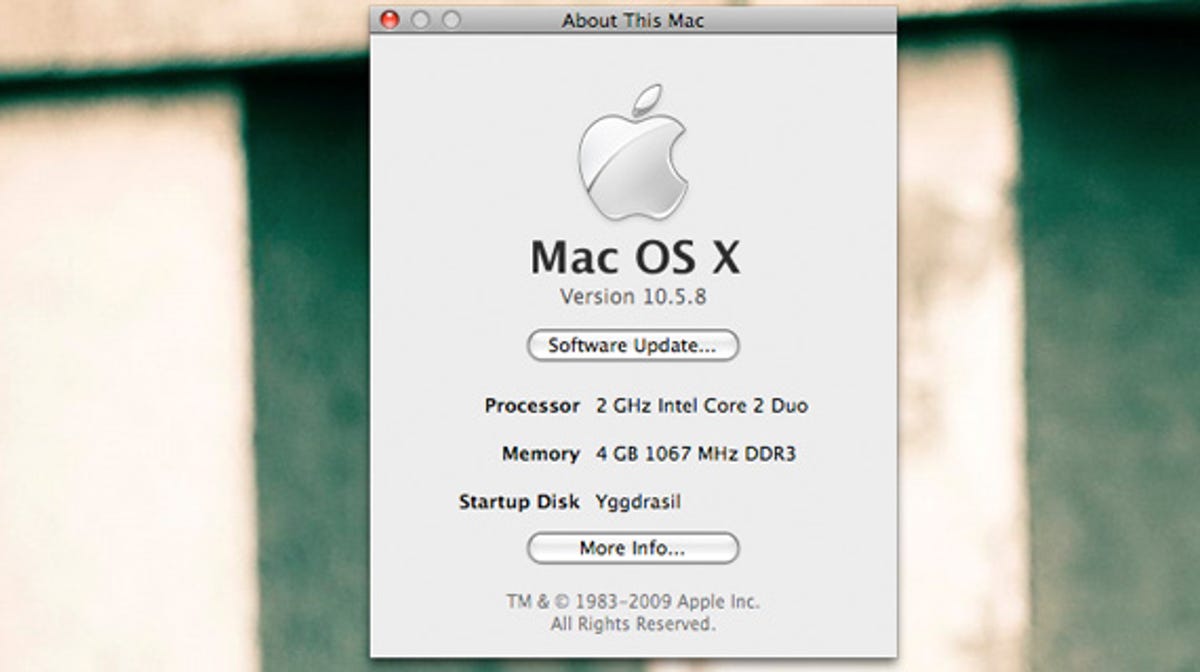
If all has gone to plan -- and there's really no reason why it shouldn't have -- your computer will automatically start using the new memory. Once you're in OS X, click the Apple icon on the taskbar and click on About This Mac. A box will pop up to confirm how much memory you're now using.
Any questions, throw them in the comments!