Blank CDs and DVDs not mounting in the Finder
Sometimes the default behavior of displaying optical discs on the Desktop and in the Finder sidebar may not happen.


Normally when you insert a blank CD or DVD, the disc may mount on the desktop, in the Finder sidebar, or at the top level of the computer where you see your drives and network displayed. Sometimes, however, this default behavior may not happen, and inserted discs will not appear.
There are several potential causes for this problem, which should be easily addressed by changing various settings pertaining to how the system and Finder handle removable optical media.
System settings
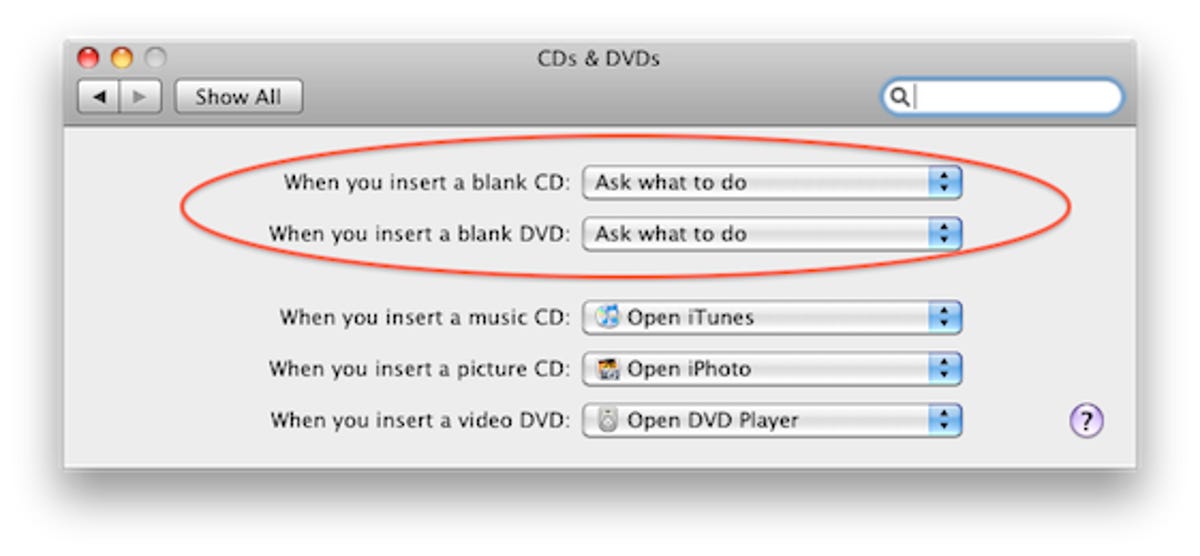
Go to the "CDs & DVDs" system preferences, and change the options for handling blank CDs and DVDs to "Open Finder" instead of "Ask what to do." When this is done, try inserting a blank disc, and hopefully it will automatically mount in the Finder. You can then change this setting back to have the system ask what to do.
Finder settings
While blank optical discs can be managed in the Finder, there are specific settings in the Finder that may prevent them from being handled as expected. Go to the Finder preferences (in the "Finder" menu) and in the "General" section, ensure you have "CDs, DVDs, and iPods" checked under items to show on the desktop.
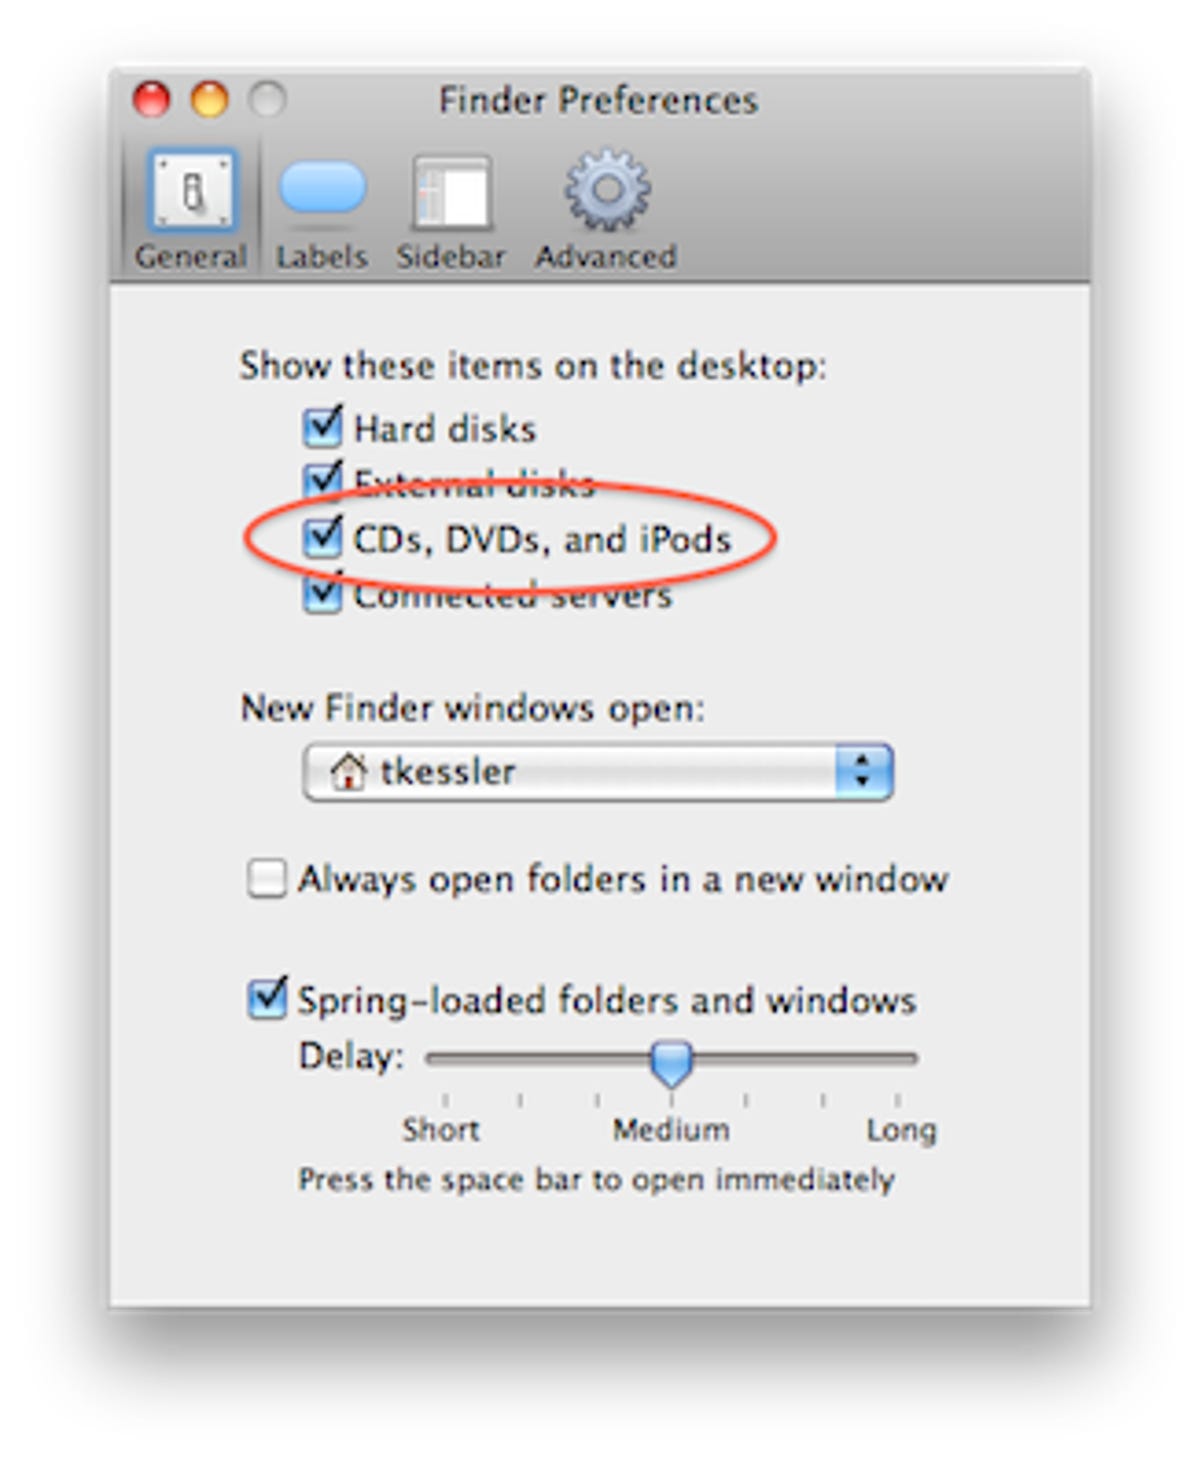
Additionally, ensure the same option is checked in the "Sidebar" section of the Finder preferences.
If changing these settings does not seem to have any effect, go to the /username/Library/Preferences/ folder and remove the file called "com.apple.Finder.plist." After doing this, log out and log back in to your account so the Finder preference file is recreated (you can also force-quit the Finder for the same result).
Other Problems
There may be other problems besides software settings that will cause a disc to not display in the Finder. If the media you are using is bad, while the Finder may display an error, sometimes it will not, and the disc could just spin in the drive. If this is the case, try the media in another computer to see if it is recognized there.
Sometimes bad media can be more than just one bad disc in a batch. Sometimes small differences in the way discs are manufactured can result in incompatibilities for some optical drives and the firmware running those drives. If you are not having any luck with any of your blank discs, try a different brand to see if you get more favorable results.
Tip: Ejecting discs
If you cannot locate the disc in your drive to click and eject via the Finder, first try pressing and holding the eject key, but you can also use other means to eject discs as well.
The first is to use Disk Utility to select the disc and click the "Eject" button in the top toolbar of Disk Utility's window. This should eject any device in the drive, regardless of whether the file system is properly mounted.
The second option is to eject a disc by rebooting the system and holding the mouse button down to force any disc in the drive to eject at boot. This will command the firmware to eject the disk, instead of relying on software to identify the disc and send the command.
Questions? Comments? Post them below or e-mail us!
Be sure to check us out on Twitter and the CNET Mac forums.