3 ways MacOS Mojave improves Finder
Finder is better.


With MacOS Mojave , you get Stacks, dark mode, a new screenshot tool and a more fully functional Finder. Let's have a look inside Finder's new bag of tricks.
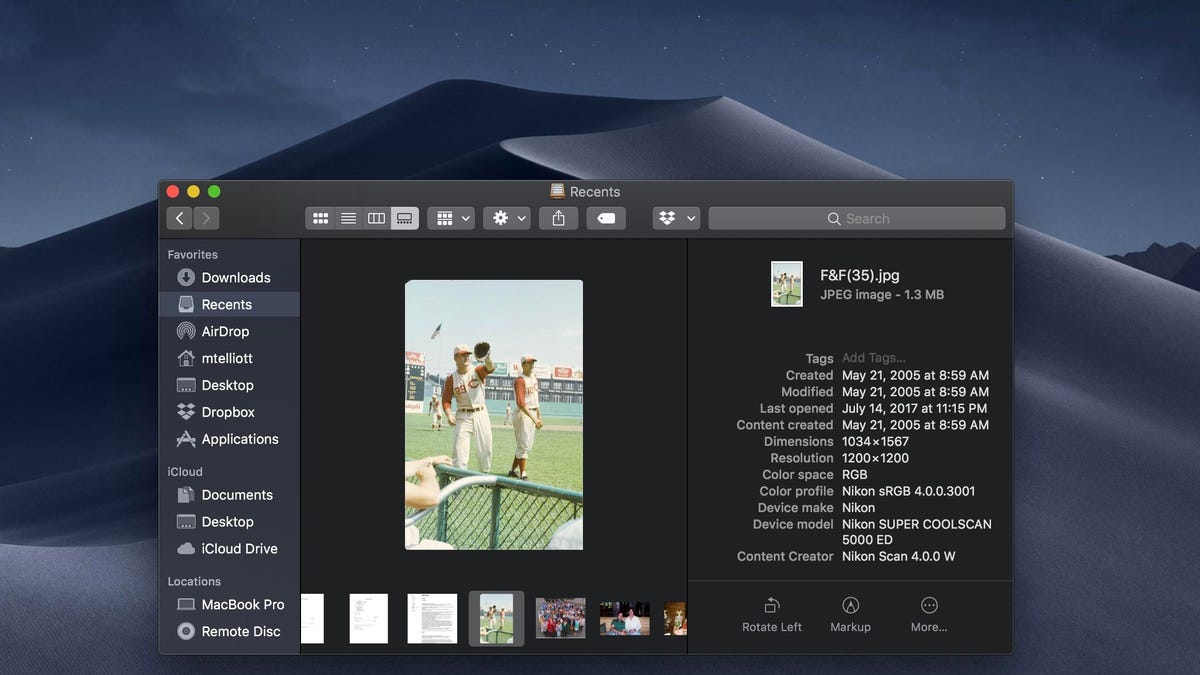
Gallery view
Gallery view replaces Cover Flow. Like Cover Flow, it gives you a large preview of the file you have selected, but the preview is even larger with Gallery view. Unlike Cover Flow, it shows small thumbnails below the preview instead of the awkward list view that Cover Flow displayed at the bottom of Finder. That said, the thumbnails are so tiny that they are nearly useless.
Still, it's easier to scroll sideways through the small thumbnails in Gallery view than it was to scroll vertically through the list view in Cover Flow, which was able to display only a few lines unless you made the preview image really small. Gallery view makes better use of Finder's space.
Metadata at the ready
You get the same navigation panel along the left edge of Finder, but the right edge helpfully shows metadata for your selected file when you're in Gallery view. (You get metadata in Column view, too.)
You can hide the metadata -- you'll probably find it more useful for photos than for Word docs, PDFs and other file types -- by going to View > Hide Preview. Hiding the metadata panel, however, does not increase the size of the preview image.

Quick actions
I've saved the best for last. You no longer need to open Preview to annotate or rotate an image. Mojave puts Preview's drawing tools right inside Finder along with its ever helpful rotate button. With an image file select, you'll find three buttons at the bottom of the metadata preview panel: Rotate Left, Markup and More.
Rotate Left is self explanatory, but you can hold down the Option key to rotate right.
Markup opens the image in a preview window (but not with Preview) where you can draw on the image, add text or arrows and so on. When you've finishing marking up your photo, you can save it as a new file or replace the original. For video files, the Markup button becomes a Trim button that lets you trim the start and end points of a video. And if you select multiple photos, the Markup button becomes a Create PDF button that lets you throw multiple images into a single PDF file.
The More button lets you create a PDF of an image file, and there is a Customize button where you can add your own selections to the More menu.

Originally published on June 28, 2018.
Update, Sept. 25: Added new video for MacOS Mojave.
For more, here's everything you need to know about MacOS Mojave.