How to take tilt-shift photos with a smartphone
Learn how to make cool miniature effect photos using nothing more than your smartphone.


- Webby Award honoree, 2x Gold Telly Award winner
Tilt-shift photos make the world look miniature, almost as if you are looking at a diorama.
Traditionally, to achieve these photos you need to manipulate perspective and depth of field with a dedicated tilt-shift lens and dSLR.
However, the miniature effect can be mimicked using tools like Photoshop, or even a smartphone.
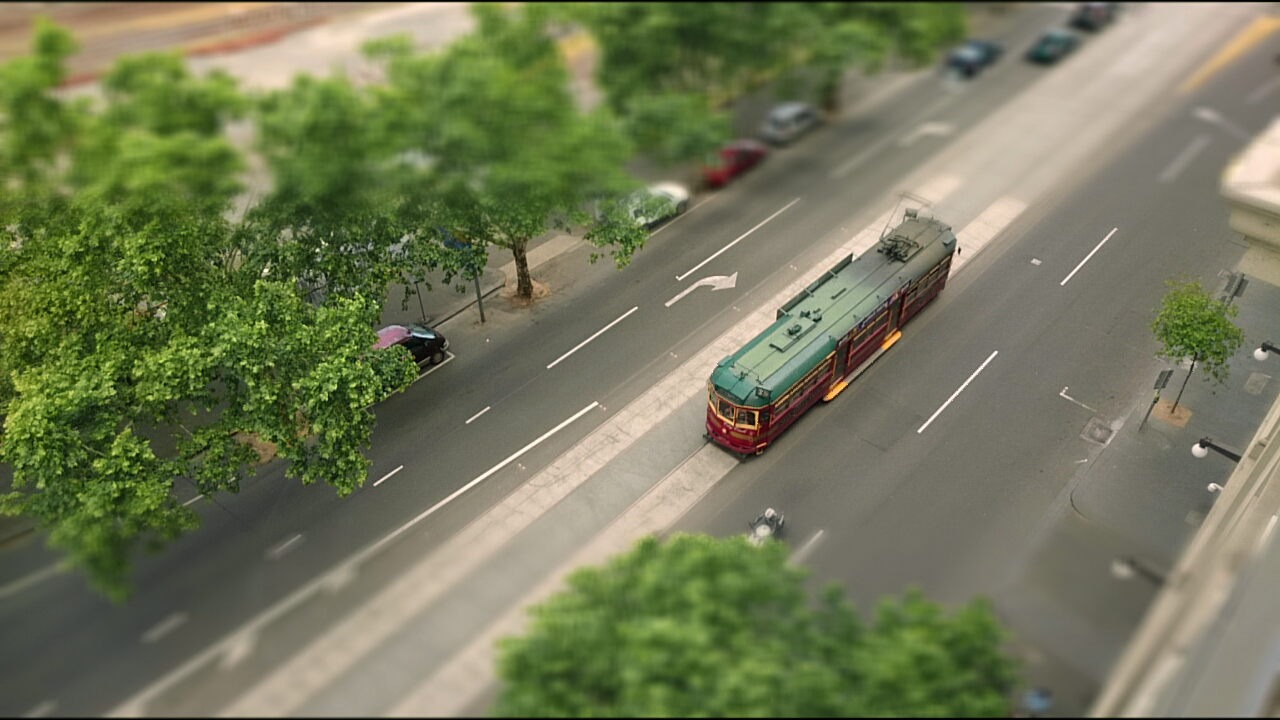
Ben Thomas is a photographer who has captured cities around the world in their full tilt-shift glory. Although he often uses traditional photographic gear, he also uses a smartphone for many of his images.
Thomas suggests starting with something that reminds you of your childhood. "Cars, trains, planes even playgrounds and the beach make great subjects," he says.
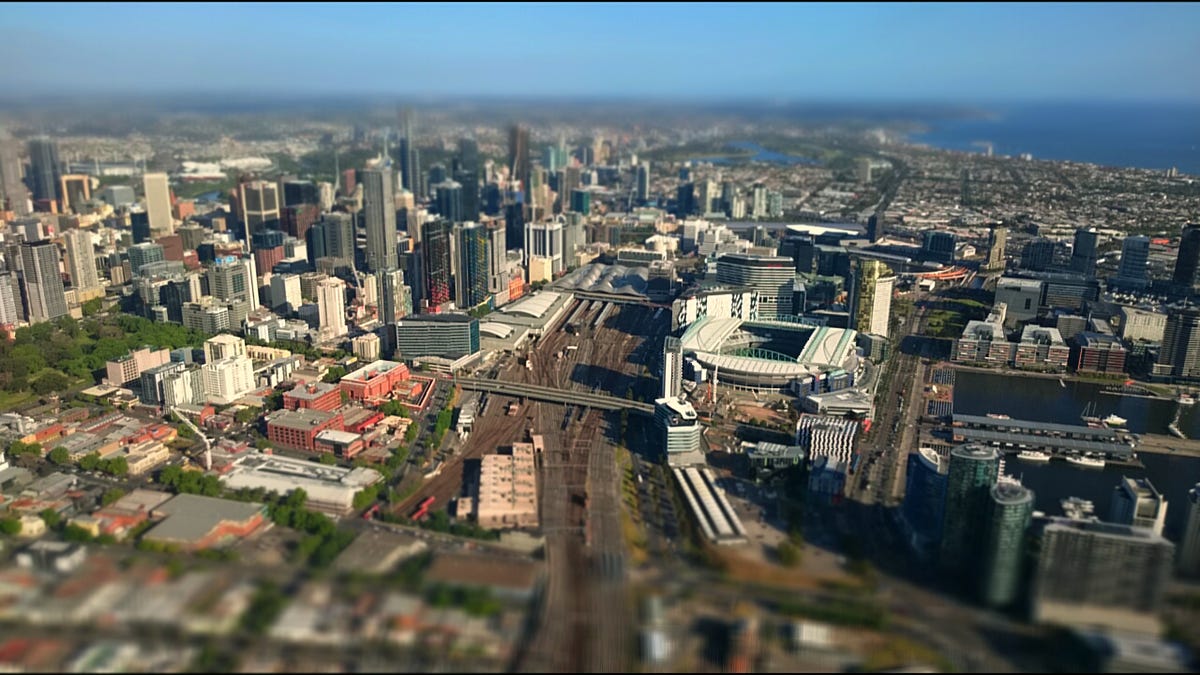
Step one: The key to achieve a good result is to find a high vantage point. Try photographing subjects from buildings looking down to the ground; a bridge; Ferris Wheel or even in a sports stadium.
Keep your composition relatively simple and make sure any human subjects are small in the scene. Ensure there is plenty of light available so you can take the sharpest starting photo possible.
Step two: Load up a tilt-shift filter in your default camera app. Look for something called miniature or blur effect. Otherwise, you can use a separate app to edit an existing photo that you have already taken.
Some third-party apps to create tilt-shift photos include TiltShiftGen2 for iOS. Windows Phone users can try the Lumia Creative Studio app with a tilt-shift effect (look for the blur menu). For Android, grab Pixlr for free. Otherwise, Instagram also has a tilt-shift effect.
Step three: If you are taking the photo from within the tilt-shift app, adjust the exposure if necessary to avoid blowing out highlights or losing detail in shadow areas.
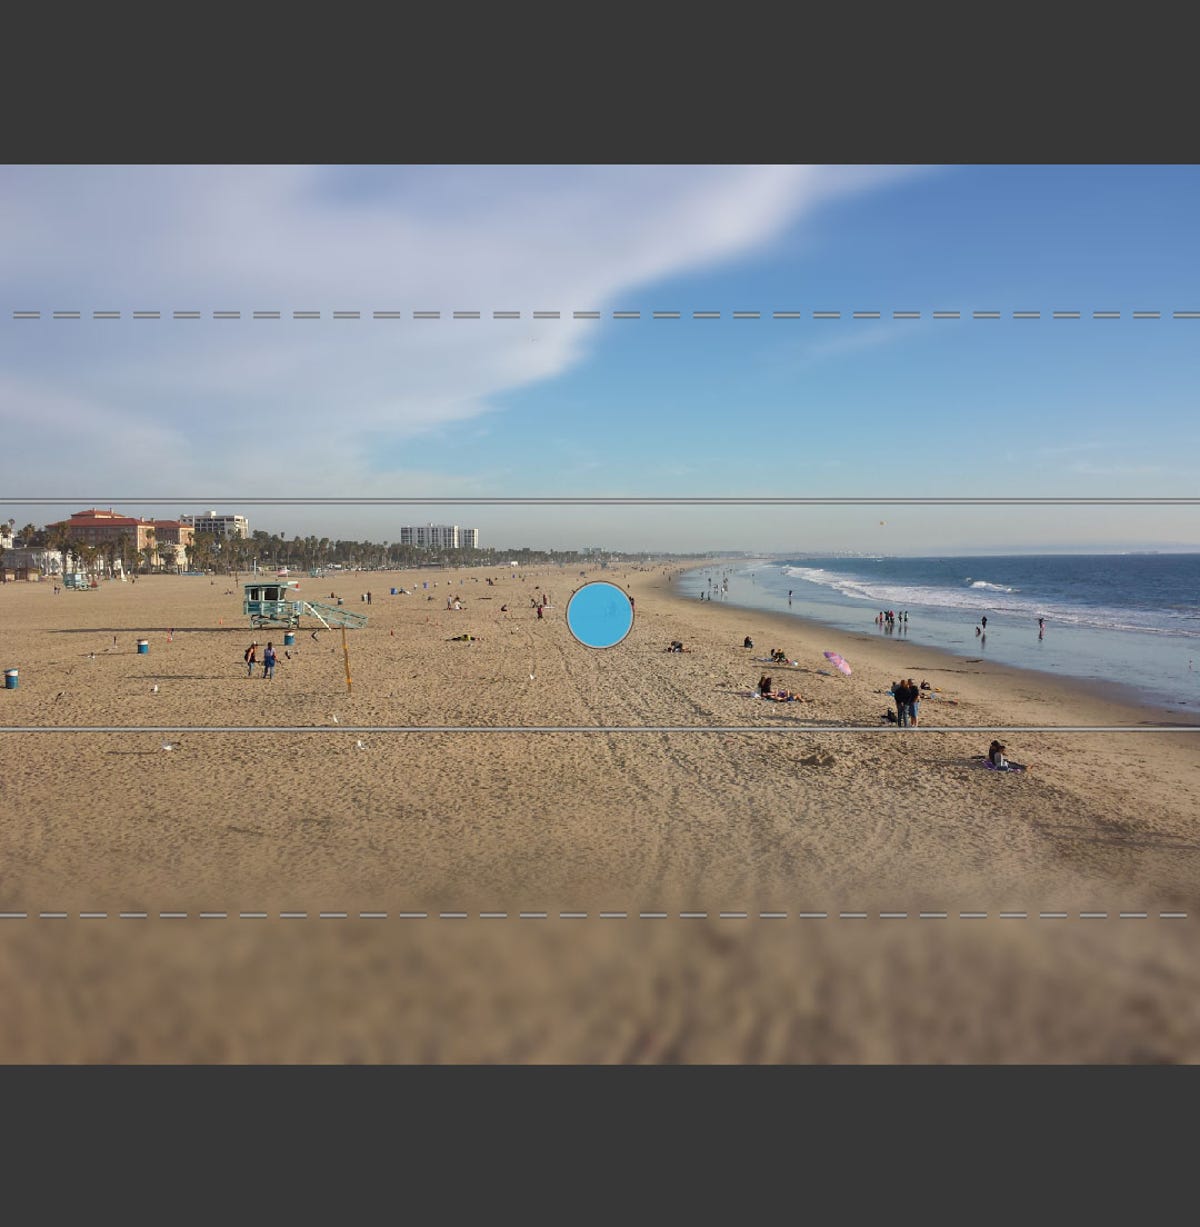
Step four: Now it's time to add the effect to your photo and select your plane of focus. Depending on the app, you can usually adjust other variables like the amount of blur.
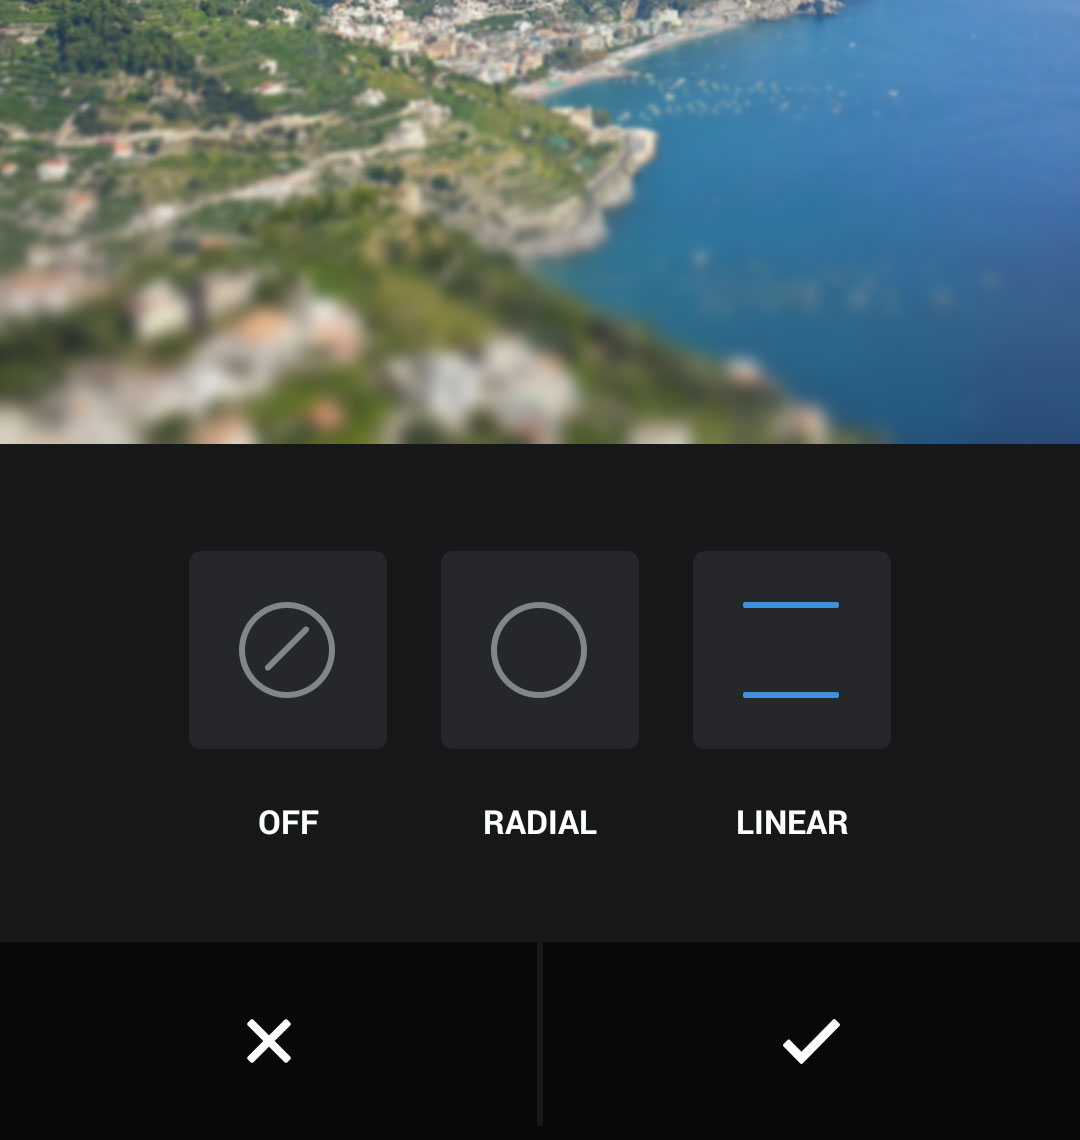
In Pixlr, tap the Adjustment icon then select Focal. Choose a linear (rather than circular) effect and move/rotate the lines where you want to keep your point of focus. Select the amount of blur you desire.
In Instagram (right), once you have loaded or taken the photo you wish to post, tap the wrench icon and scroll across to find the tilt-shift icon at the far right.
From here, you can choose a radial or linear effect. Adjust the focal point by tapping on the image and dragging up and down. Expand the range by using two fingers to pinch and drag. Here's a detailed run-down of how to use this effect on Instagram.
Step five: Thomas suggests boosting colours and other image attributes to bring the subject to the fore.
Saturation, contrast and vibrancy are all settings you may want to tweak for a more pronounced effect.
