 Why You Can Trust CNET
 Pixelstick review: Light paint any image you like with the Pixelstick
Light paint any image you like with the Pixelstick
To trip the light fantastic means to dance or move gracefully.
The Good
The Bad
The Bottom Line
That was pretty much the complete opposite of what happened the first time I used the Pixelstick, as I tripped sideways trying to create a light painting.
In photography, light painting is a technique that involves moving a light source in front of a camera while it is taking a long exposure. This produces an image where you can see the trail of light across the scene.
What is it?
The Pixelstick is a 1.8-metre (6.1-foot) wand that houses 200 LED lights designed to be used for light painting. Mounted on one side of the Pixelstick is a central control unit that tells each of the LEDs to "flash" a pixel in an image, one line at a time.
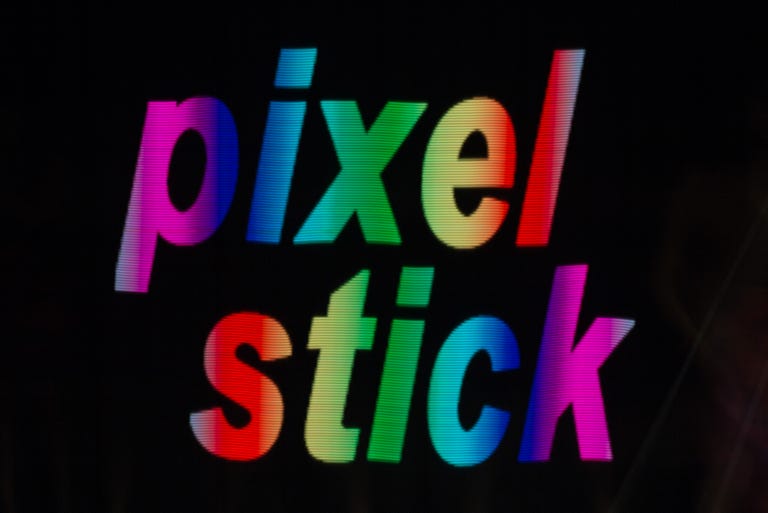
To the naked eye, the Pixelstick produces a sequence of lights. To a camera, the Pixelstick produces an image suspended in midair across the scene -- or, a light painting.

Any light source can be used for light painting, from a tablet to the humble torch, so US$349 (about £233 or AU$443) for the Pixelstick may seem a bit steep for a single-purpose device. For those inclined to DIY, it is even possible to make your own programmable LED strip with some Arduino (or Raspberry Pi) know-how.
What sets the Pixelstick apart from these other options is its plug-and-play nature. Within five minutes of assembling the device, you're ready to start light painting. Anyone who has ever tried to produce patterns, logos or text in light paintings knows that it can be difficult and frustrating to get the results you want. The Pixelstick makes it simple to get great results without investing a lot of time.
What's in the bag?
The Pixelstick arrives in a long padded case. Slide open the zip to reveal two internal compartments that house the individual components, each wrapped in plastic.
It sounds imposing, but there are only four main pieces that assemble to become the Pixelstick: two rows of LED lights on aluminium rails; a main controller that connects the two rails; and a handle. The LED rails need to slide into position on either side of main controller, which takes a bit of effort the first time around. Hand screws help secure everything together.
The Pixelstick juices up by way of eight AA batteries. The manufacturer recommends rechargeable batteries, but it works just fine with standard alkaline units.
Also in the bag, cable clips are provided to secure the power cord running from the battery pack. There is also an extra swivel component to the handle to give different effects.
Once your Pixelstick is constructed, the main control unit is where the magic happens. The panel has a yellow backlight to make it easy to see in the dark (which is when you'll be using it) while a simple four-way control pad and centre button directly underneath are used to select options on the screen.
Making your own images to display on the Pixelstick is easy, as long as you have access to basic photo-editing software, an SD card and an SD card reader. Images need to be in Bitmap (BMP) format, at a height of 200 pixels and rotated 90 degrees counterclockwise.
For those who want to jump in as soon as possible, the Pixelstick comes with a few preset images built-in -- no SD card required. Or, you can download packs of images from the website, then load them on to an SD card.
Performance
First you need to choose an image for the Pixelstick to display. Then there are a number of other options available to tweak from the control panel, including:
- Direction you are walking the stick (left to right, right to left, or yoyo)
- Speed at which the image is projected (set by default to 80 percent which is a normal walking pace)
- Brightness of the image
- Number of times to repeat the image display
When the image and your chosen display parameters have been selected, press the big yellow button (and your camera's shutter button) to start the light show.
I experimented with a few different types of source images, from photographs to abstract patterns and paintings. Logos and typography work particularly well. You might even recognise the effect from the most recent "Saturday Night Live" opening credits which use the Pixelstick to display the show name.
Like any sort of light painting, there is trial and error involved in setting your exposure and focus to get the best results. For abstract patterns, such as those that ship with the Pixelstick, rotating and flipping the stick around during the exposure can produce some great-looking results. For images and logos, a steady hand and walking pace helps.
It takes a bit of practice, but soon after putting the Pixelstick together I was walking sideways in sync with the light stick. I managed to get the best results by setting a reasonably narrow aperture between f/8 and f/11, ISO 100, and focusing on the ground along the plane where I wanted the image to appear. The length of time the shutter needs to stay open depends on the effect you desire, so this is the main variable you will want to change.
The Pixelstick is a large tool to wield. While not particularly heavy, its sheer height means that it is best used in large indoor spaces or outdoors. You can use just one half of the stick, but you do need to relocate the battery unit to the same side as the control unit, which can be tricky.
Walking at a reasonably normal pace across the frame matches well with the default speed set on the Pixelstick.
With a firmware update to version 1.1, the Pixelstick offers white balance presets, as well as the ability to set a custom value.
There are currently two extra accessories available to enhance the Pixelstick experience: a wireless trigger and a lens pack. The trigger is used to start the Pixelstick show remotely, while the lens pack provides either a diffused or "scanline" effect. Both are US$25 and available separately on the Pixelstick website.
Conclusion
The Pixelstick is an elegant tool that might be overkill for some but is worth the investment for photographers with deep pockets and a love of light painting. It's also a lot of fun.


