9 ways to protect and fix cords around the home
Tired of replacing cords? Here's your solution.


How many times have you had to replace cables around your home due to fraying, animals or accidents? Instead of buying new cords, there are many ways to keep your cords like new with inexpensive items.
These protection tips can be used on most cords that are found around the home.
The repair tips, though, should only be used on low voltage cords such as phone charging cables, gaming console controller cords or headphone cords. It's best to throw away larger cords that are damaged, such as extension cords, to prevent shock or fires. Always unplug any cord before trying these tips.
Armor cords with tubing
Does your pet chew on your cables? There is an easy way to protect them from little munchers. Buy a roll of clear vinyl tubing, make a slit down one side of the tubing and slip it over vulnerable cables. (Thanks to Byronicg for this tip.)
Wrap cords in spiral wrap
If cutting tubing sounds like too much work, you can also purchase a product called spiral wrap to sheathe your cords. The great thing about spiral wrap is you can wrap multiple cords together.

Use heat shrink tubing to encase cords
If the casing on your cord is losing connection, you can fix it with shrink tubing. Carefully cut two pieces of shrink wrap tubing that are 1.25 inches long. Put a little silicon adhesive over where the cord meets the connectors on each end.
Before the silicon dries, slip the tubing onto the cord, covering both ends where the cord meets the connecters. Wipe off the excess silicone and shrink the tubing by holding it over a lighter. Be sure not to hold the lighter too close. You don't want to melt the cord. If using a lighter scares you, try using a blow dryer on its highest heat setting to shrink the tubing.

Prevent fraying with pens
Some cords are more prone to fraying, like phone charging cables or headphone jacks. You can prevent fraying with an ink pen.
Take apart a clickable ink pen and remove the spring. Stretch out the spring a little and then wrap it around the base of the cord. The wire adds just enough protection to prevent frays.
Plastic weld cords back together
If it's too late and the damage is already done, you can repair cords by welding them back together. Bondic is a plastic welder that can fix a cord in under a minute.
All you do is clean the cord, apply the Bondic to the broken area and cure the plastic with the LED light that is included in the repair kit.
Use electrical tape
A simpler, and cheaper fix, is to wrap your frayed cord in electrical tape. Wrap the frayed area first, then wrap outward along the cord a few times to prevent further damage.
Paint a new cord
Liquid electrical tape, such as PlastiDip or Gardner Bender, are liquid plastics that you can use to repair cracked or frayed cords. Simply apply two coats and let it dry.
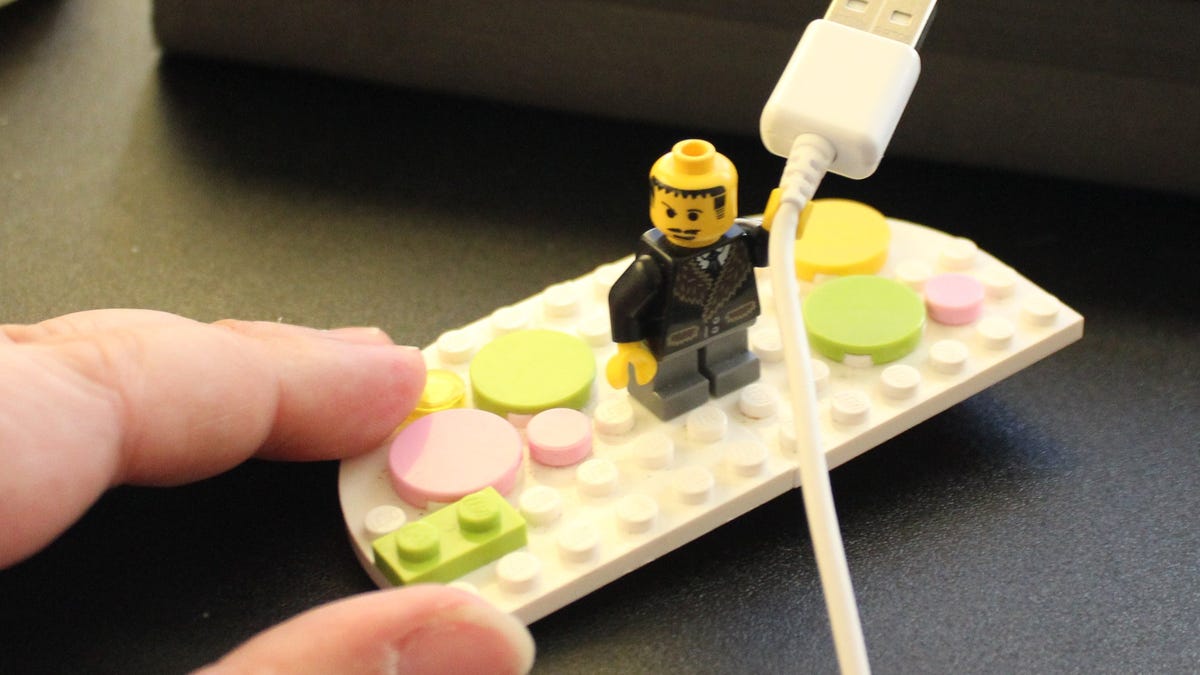
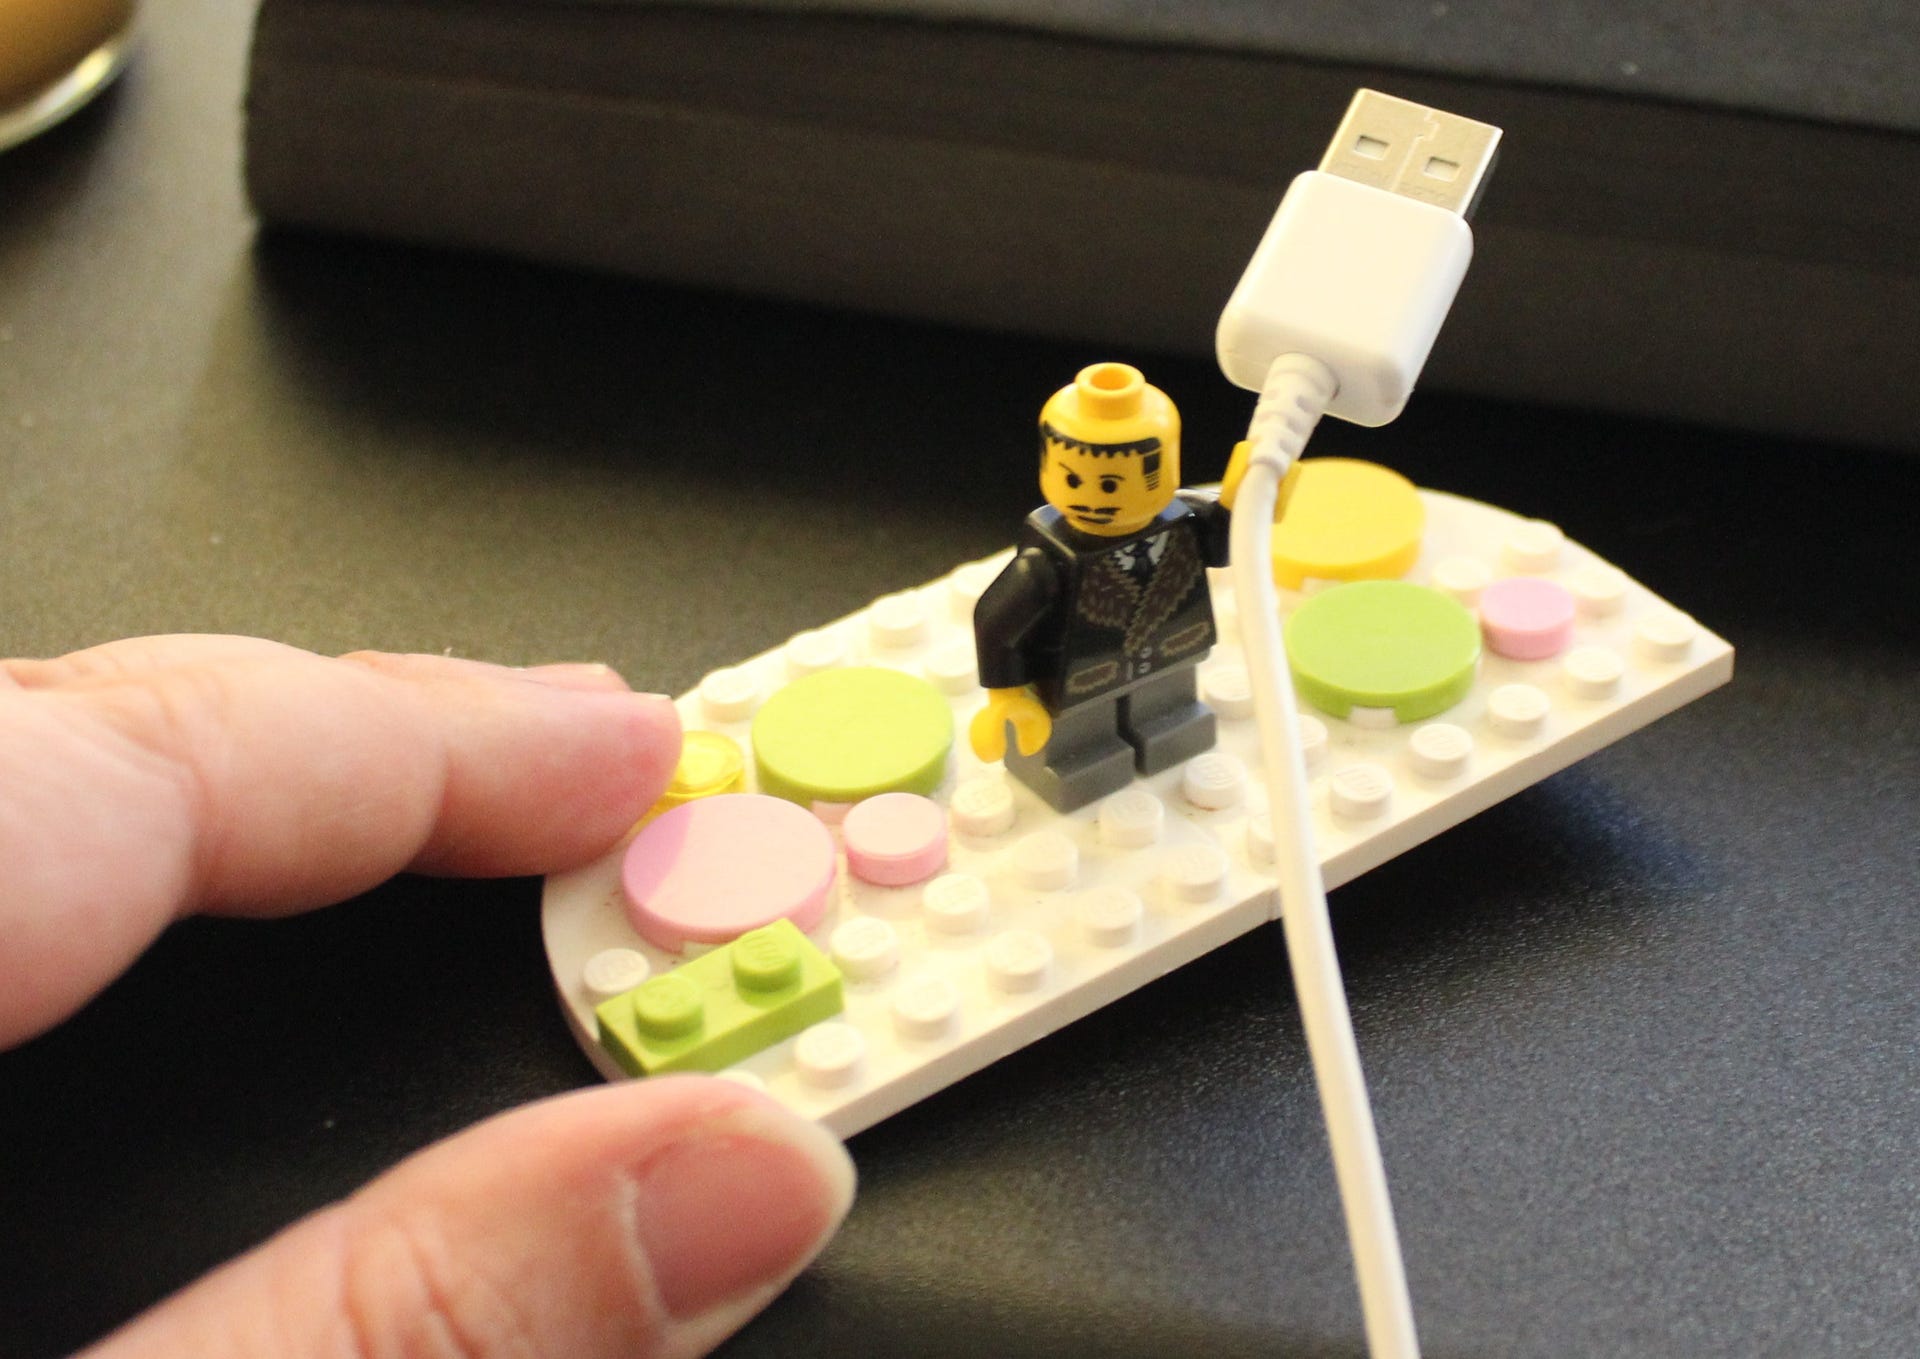
Lego your cord problems
Did you know that Lego people have perfect sized hands for holding cables? Use double stick tape to adhere a Lego person to wherever you use your cords. When cords aren't in use, let your Lego dude hold onto them so they stay out of the mangling reach of your dog or cat.
Don't tread on them
My home is almost 100 years old and we have very few outlets. So, cords end up strung across where people walk, which is a great way to destroy cords quickly.
A good solution is to protect cords with a cable bridge like this two channel protector or the Vestil rubber cable protector.
Here are more tips for organizing your cords.


Originally published Dec. 2, 2015.
Update, Jan. 14, 2018: Adds new tips.