Keep your iPad data safe
Password-protect individual apps, switch from a four-number passcode to a full-fledged password, locate and lock your iPad from afar, and wipe the data remotely or after multiple access attempts.


The more you use your iPad for work, the more important it becomes to safeguard the data and applications stored on the device. These tips let you apply password protection to specific iPad apps, replace the four-digit passcode with a password, track your iPad's location and lock or wipe it remotely, and erase the machine's contents after a set number of unsuccessful passcode entries.
Assign passcodes on an app-by-app basis
Passcodes are the primary method of securing an iPad, but they can be overkill when you merely want to browse or access e-mail and other services that are protected by their own passwords. Most of us need to protect only certain apps or activities, such as App Store purchases and inadvertent app deletions.
To require a passcode for specific iPad apps or functions, open Settings, choose General, select Restrictions > Enable Restrictions, enter a passcode twice (this will differ from the passcode you may use to lock the iPad itself), and choose the apps and operations you want to restrict.
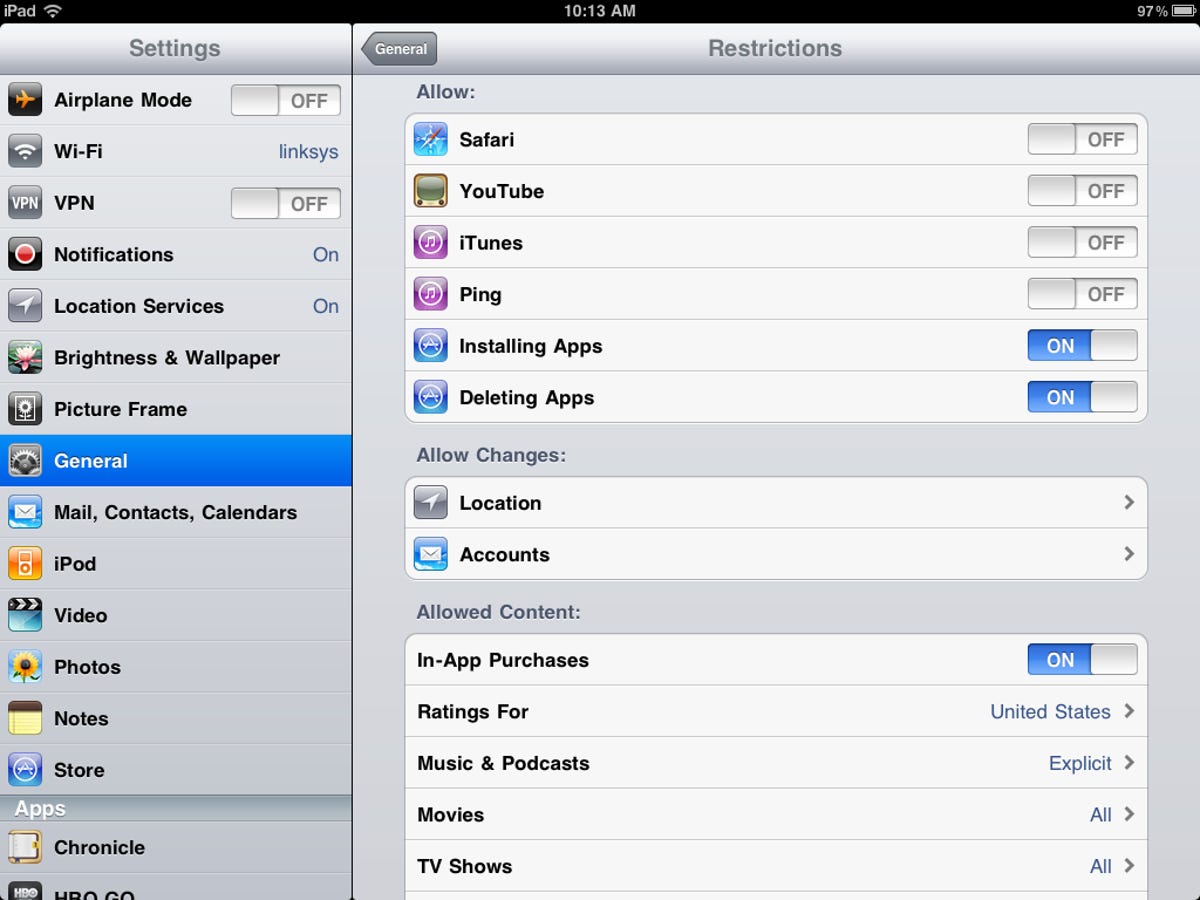
From this screen you can also prevent apps from using location services, block changes to account settings, filter music and videos with explicit content, allow or block movies and TV shows by rating (G, PG, R, etc.), age-restrict apps, and disable the ability to add friends and play multiplayer games.
Use passwords rather than four-digit passcodes
The iPad's numeric passcodes are not difficult to crack, in part because the onscreen keypad for entering them always appears in the same area. A person wanting entry can simply look for the smudge marks to figure out which four numbers are used and then enter them in their 24 possible sequences.
Keeping your screen clean and using the same number twice can slow down the would-be interloper, but a better way is to enable text passwords. Choose the Passcode Lock option under General in the iPad Settings, make sure Simple Passcode is Off, select Turn Passcode On, and enter a password twice. You may want to change the time after which a passcode will be required from the default 15 minutes, but as the iPad warns, shorter times are more secure.
Locate your iPad and lock or wipe it remotely
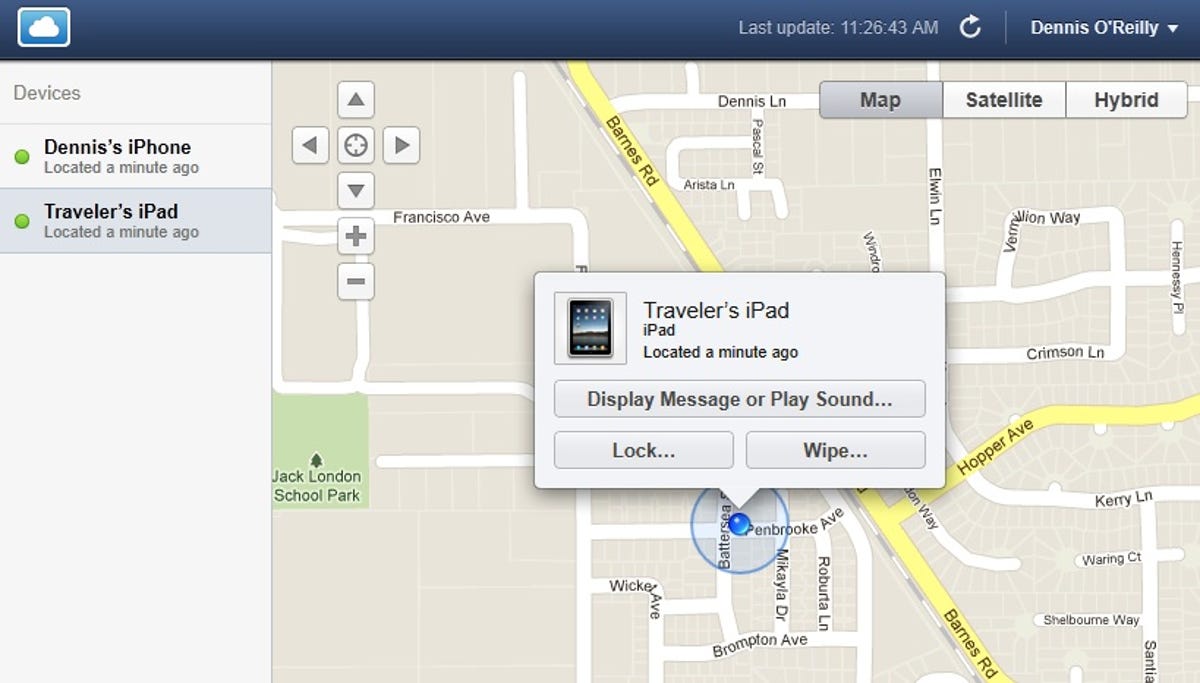
Apple's free Find My iPhone app won't ship your lost iPad, iPhone, or iPod back to you via overnight delivery, but it can increase the odds of recovery by letting you locate the device and send a message to the person who "found" it. The app also takes some of the pain out of losing the device by letting you lock it or wipe its data remotely.
You need a free MobileMe account to use the service. After the Find My iPhone app is installed on the device, sign into your account at me.com from any PC and select Find My iPhone to pinpoint your iPad's location on Google Maps. Click it to view options to display a message or play a sound, lock the device with a passcode, or wipe its data.
Of course, the first thing a thief will do to thwart Find My iPhone is to disable location services on the iPad. To prevent this, open the iPad Settings, choose General > Restrictions > Location, and select Don't Allow Changes. (Note that this option is available only if you have enabled restrictions on the device.)
Last resort in guarding against brute-force access attempts
There's no self-destruct switch on an iPad, but the closest thing to it is the option to erase the data on the device after 10 failed passcode attempts. To enable this feature, open the Passcode Lock options in the General section of the Settings app and set Erase Data to On. This setting is available only if passcodes are enabled.
You may consider this a high price to pay to protect your data, but you can minimize the damage by having a recent backup available. iTunes creates a backup each time you sync your iPad. Apple's support site lists the information on the iPad that's backed up automatically and where the backup is stored.
To restore a backup, right-click or Control-click the device in iTunes' left pane and choose Restore from Backup. You can also encrypt your backup or set up your device as it was when it was new. To delete a backup, click Edit > Preferences (Windows) or iTunes > Preferences (Mac), choose Devices, select the device, and click Delete Backup.
Bonus tip: Clear private data from Safari. Wiping your tracks from Safari is as easy as opening the iPad Settings, choosing Safari in the left pane, and selecting Clear History, Clear Cookies, and Clear Cache. You may also want to set AutoFill to Off and/or select Clear All in the AutoFill settings.