How to use YouTube's video editor
YouTube now has a tool that lets you edit and splice together your videos. Want to know how to use it? We'll show you how in five easy steps.


Back in June, YouTube released an experimental tool that had been long asked for by its users: a browser-based video editor. The tool, which requires no additional software, or browser plug-ins (besides Adobe's Flash), lets users make minor edits to videos they've uploaded, as well as stitch several clips together into one.
While it lacks many basic features of modern day consumer video editing software (such as captioning, transitions, and image stabilization), it makes up for it in convenience. All your video files, and the rendering, is taken care of by YouTube's server farm, meaning you can do some very involved HD video editing on older machines that would be otherwise woefully inadequate.
YouTube has its own introductory guide on what the editor's various features are, but we thought it would be a good idea to walk you through how to create something, as if you had just come back to your computer with a digital camera full of clips you wanted to put into one, cohesive video. Read on to see how to do it.
1. Upload

First things first, you need to upload your videos. You can't actually do this through the editor--they need to be on YouTube before you even begin. If you're new here, that involves hitting the large "upload" link on the top of the YouTube home page, then following the directions.
Tip: if you're working with several clips that you wish to string together, but that you don't want to have exist as their own, standalone videos, simply check the "unlisted" or "private" option while they're uploading. This way, they won't show up on your public profile, but they're still in YouTube's system. (More on unlisted videos here.)
2. Arrange
To get to YouTube's editor, you can either head to TestTube (a directory of YouTube's Skunk Works projects) and click the "try it now" option, or visit the direct YouTube.com/editor link.
Once here, you'll see a listing of your videos in chronological order. For the purposes of this story, we're going to start with these three at the top:

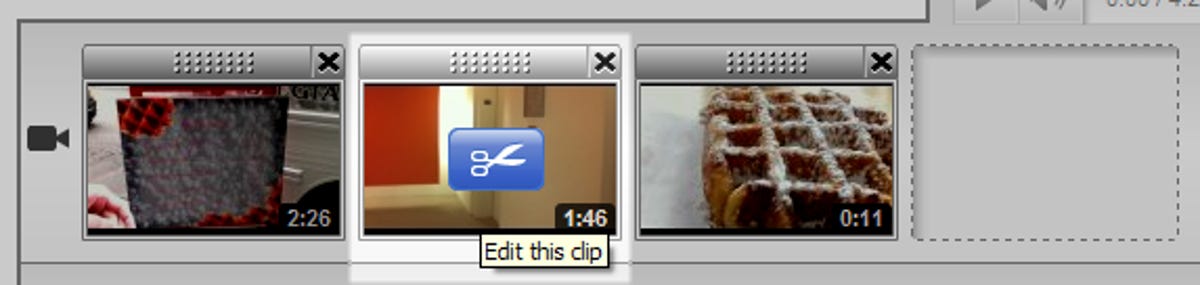
To add clips to your video you can drag them from the "my videos" section, down to the time line, or you can hit the plus icon that's in each clip's top right hand corner. In case you're not sure what a clip contains, you can mouse over it and hit the play icon to watch the whole thing without leaving the page.

3. Cut
At this point, if you don't need to make any edits to your videos, you can just give your work a title and hit the publish button. But that's no fun, is it? To make use of the editor's power you need to make some cuts.
YouTube's editor lets you trim a video, but not split it, so if you want to cut a single clip into two or more parts you need to drag more copies of that video down into the time line.
One very important thing to note right up front is that you can have only seven clips in your time line; this means cutting up something longer into several smaller clips will take up more of that work space. It's definitely something to think about when you're capturing video and know that you're going to use this editor.
Once you've added clips to your time line, you want to hit the scissors icon that appears when you mouse over the time line. This pulls up the edit dialog, where you can pick the in and out points of the clip. From there, you just need to drag the start and end markers to contain the segment of the clip you want to use.
To view the edit you're in the progress of making, you can just hit the play button and it will start wherever you set your in point. Work the start and end points into the spots where you want them, then hit save to finish the edit for that particular clip.
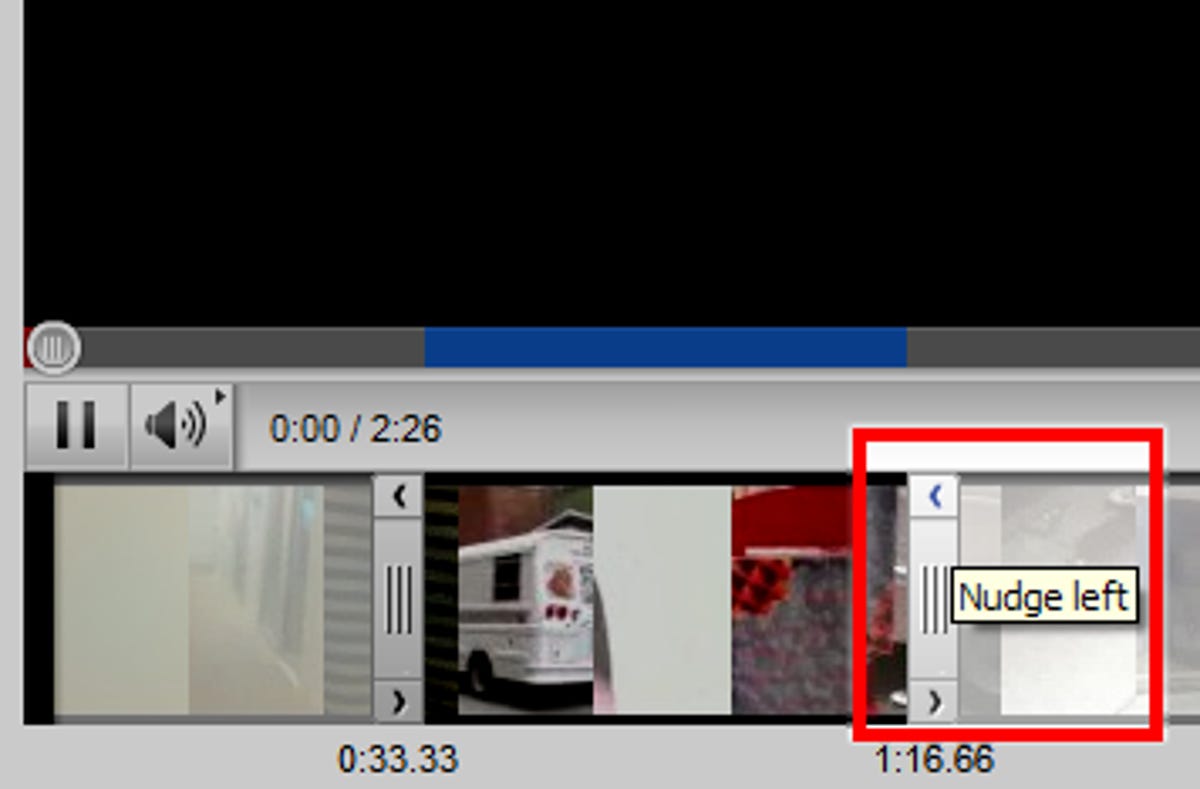
Tip: If you want a finer level of control, you can hit the little left and right arrows that are on the top and bottom of the in/out points. These "nudges," as YouTube calls them, go forward or backward by 1/15th of a second, which can help give you a more exact stop or end point than you'd get with your mouse.
4. Audio (optional)
While you can't adjust the volume level, or add an audio track of your own, you can use YouTube's AudioSwap feature to add music to your creation.
It's worth noting that just like using AudioSwap on a standard YouTube video, using it in YouTube's editor completely removes any audio that was already in your video. You can add only one audio track to your work, so you have to choose wisely.
Tip: If you're planning to use YouTube's audio over your own, you should do it once you've published your video. The AudioSwap interface you can get to from the video editor page offers a much better browsing experience, as well as a way to whittle down the list of songs to those that match the length of your finished product.
5. Publish
When you're done, just give your work a title and hit the publish button. This takes you to the same screen you'd see if you went into the "edit video" dialog.
YouTube took about 15 minutes to process our less than two minute clip, so expect some downtime if your creation is longer. Just go watch some cute kitten videos while you wait.
For reference, here's the video I put together with three different clips that were cut into seven within YouTube's video editor (yes, the camera work is awful, but the editing was easy!):
Some other things to note:
• While YouTube doesn't let you download a video from the editor itself, you can download the finished version when it's done processing.
• If you shot your video in HD, you have to wait for it to be processed in HD to see a properly sized version of it in the editor.
• The finished version will be in HD too.
• You can cut together HD and non-HD clips.
• You can delete the original video clips you used, and your new creation will continue to exist.
• YouTube's video editor doesn't have any image stabilization algorithm built-in, which, as you can see from the above video, means you need steady hands.
Update at 8:30 p.m. PDT: Here's the how to in video form. In it, we cover most of the main points mentioned above:
