How to connect your iPhone to a Wi-Fi network
Connecting your iPhone or iPod Touch to a Wi-Fi network not only gives you a faster Internet connection, but it can also help eliminate any data overages from your wireless carrier. This four-step guide will walk you through connecting your iPhone to a Wi-Fi network.


In four easy steps we will walk you through connecting your iPhone to a Wi-Fi network. Whether you are at home, a local coffee shop, or at the office, Wi-Fi is a great way to get a boost in speed while browsing the Internet, or even help cut back and the amount of data consumed by your device. The importance of limiting data consumption on your device is especially important if your carrier has rolled out tiered data plans.
For the purpose of this guide we will be using an iPhone as the example, please note that the same instructions apply to the iPod Touch.
1. Find the Settings app on your iPhone, open it.
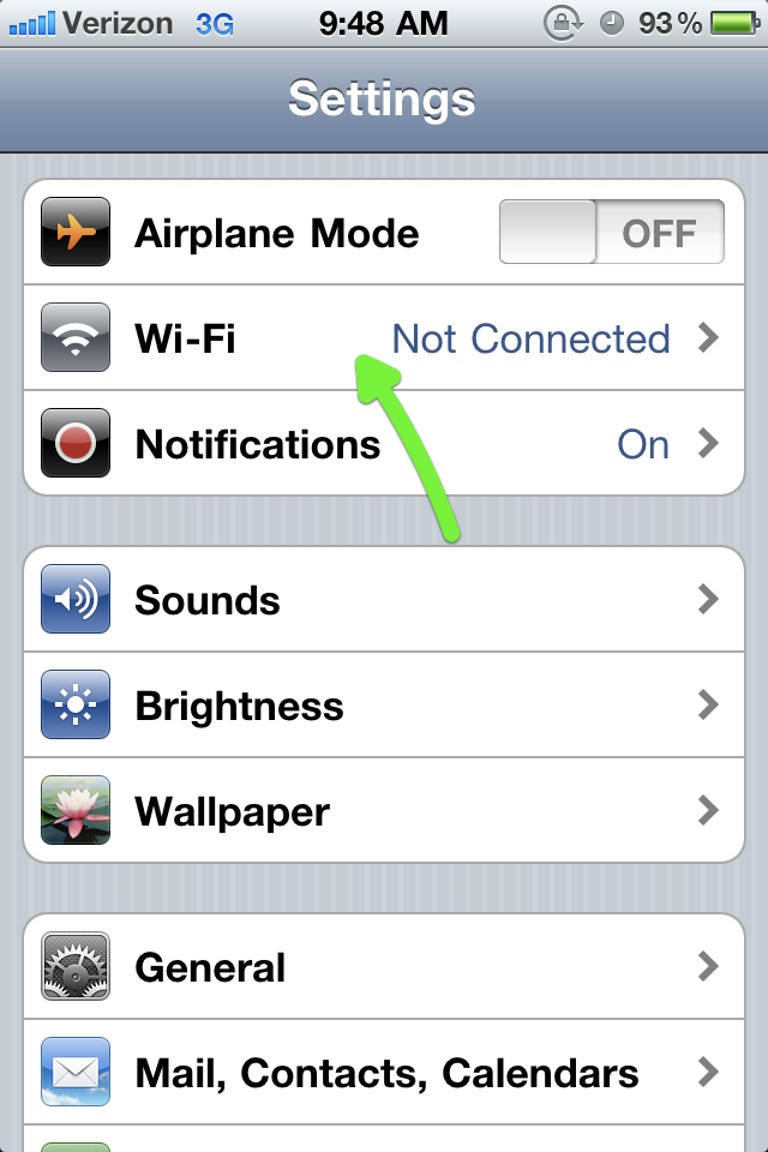
2. Click the second option, Wi-Fi, on the list.

3. On this screen you can turn Wi-Fi on and off on your iPhone. or select the available Wi-Fi network you want to connect to. Go ahead and select the network you want to connect to.
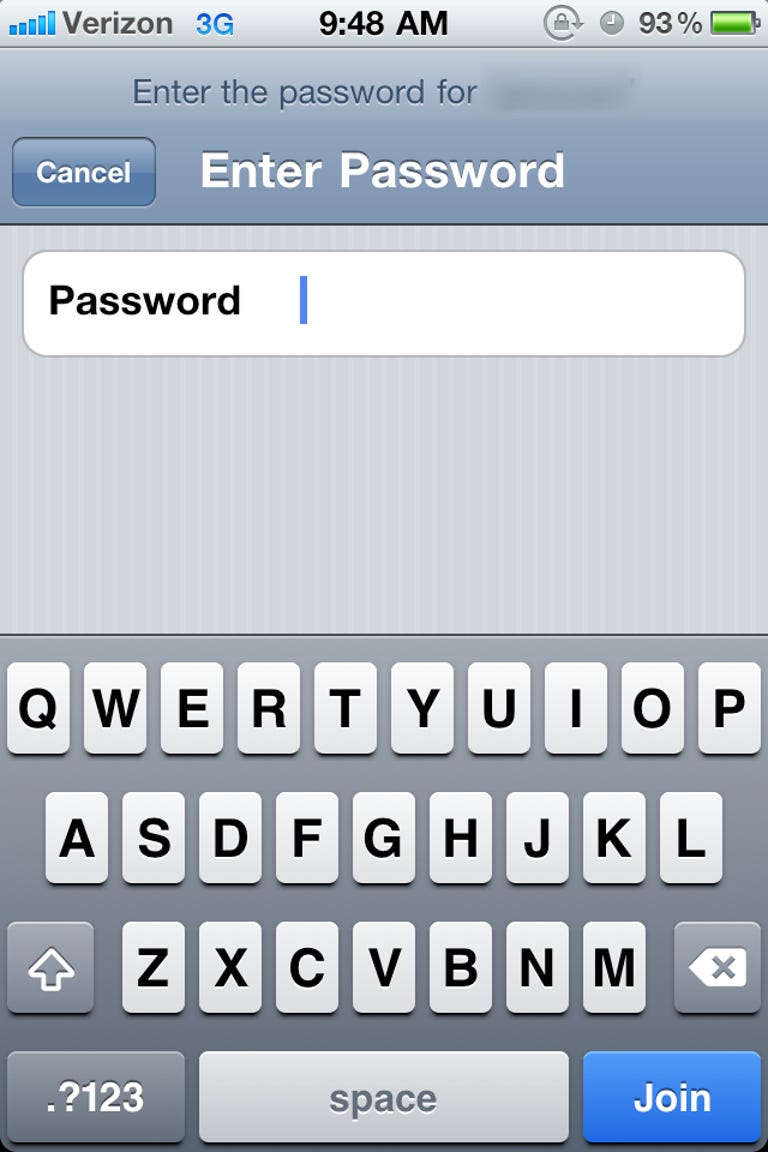
4. Enter the password for the Wi-Fi network you selected. If you are unsure what the password is ask your IT department, the front desk at the hotel, your barista, or your teenager. Once you have entered the password, press the blue "Join" button. Your iPhone will now verify the password with the chosen network.
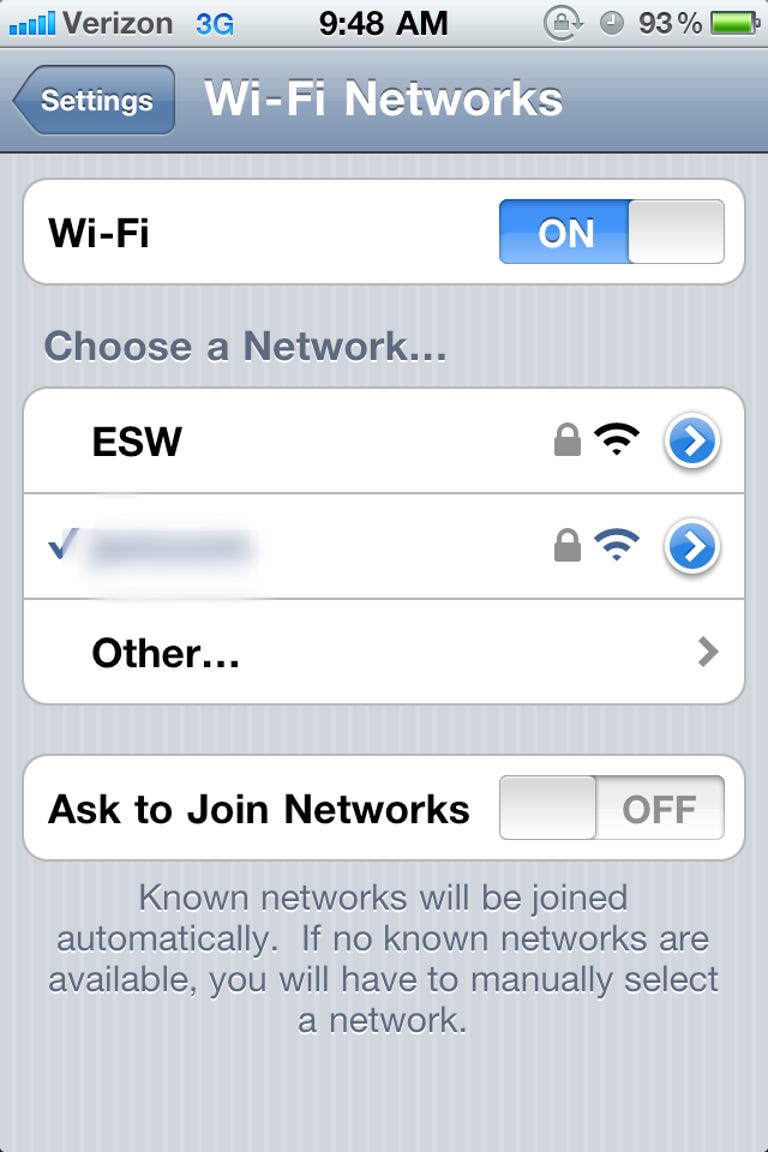
Once you have connected to a Wi-Fi network you will see a checkmark next to the network, indicating you have successfully connected to that network on the Wi-Fi Networks screen.
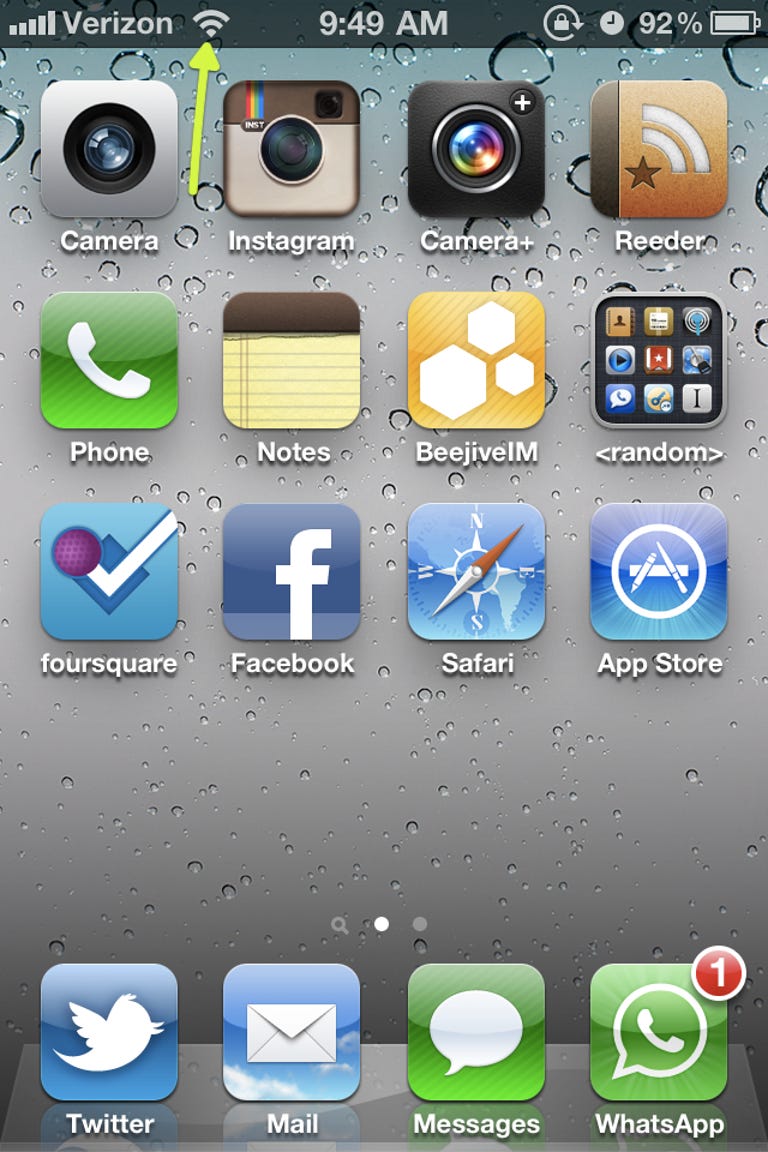
Another quick way to tell if you are currently connected to a Wi-Fi network is the icon to the right of your carrier name changes to a signal meter, like the one pointed out at the top of the post.
A neat feature also hidden in this page is the "Ask to Join Networks" option. If you would like to be alerted when wireless networks are detected, turn this feature on. Your iPhone will now alert you to both locked and free public Wi-Fi hotspots when you are traveling or if you frequent local coffee shops.