 Why You Can Trust CNET
 Nikon 1 V1 review: Nikon 1 V1
With compact lenses and a sturdy body, the Nikon 1 V1 should last you a lifetime. That's just as well as it doesn't come cheap.


Launched in concert with the J1, the V1 is the second of Nikon's newly-announced interchangeable lens compact cameras. With a 10.1-megapixel sensor, it's aimed squarely at those who are wowed less by resolution than by what really matters: image quality. Like its sibling, the V1 puts out some of the sharpest, most detailed, most colourful pictures we have seen in some time.
Nikon 1 V1
The Good
The Bad
The Bottom Line
Build and looks
The V1 is built like the proverbial tank. The camera's heavy, tipping the scales at 383g -- that's without any lens attached -- and made mostly from metal. It has a wonderful retro look to it, with a chunky viewfinder protruding from the back, just above the LCD. Beside that is a slide-off cover, which hides a hotshoe for mounting an optional flash or GPS unit.
Buttons and dials are kept to a minimum, with a four-way mode selector mounted on the back covering off still image, 'smart photo selector', movie and motion snapshot modes. Still image speaks for itself, but smart photo selector is worth exploring further.
Select it and half-press the shutter to fix the focus; the V1 immediately starts capturing data. When you fully depress the shutter release it stops, then it compares 20 stored images to pick the best shot in terms of composition and exposure. It saves this and four further options to a stack on your memory card, discarding everything else.
That's as smart as the function's name suggests. As a bonus the staked 'candidate' shots are hidden beneath what it considers to be the best one so you don't need to scroll through them all when you're reviewing your day's shooting.
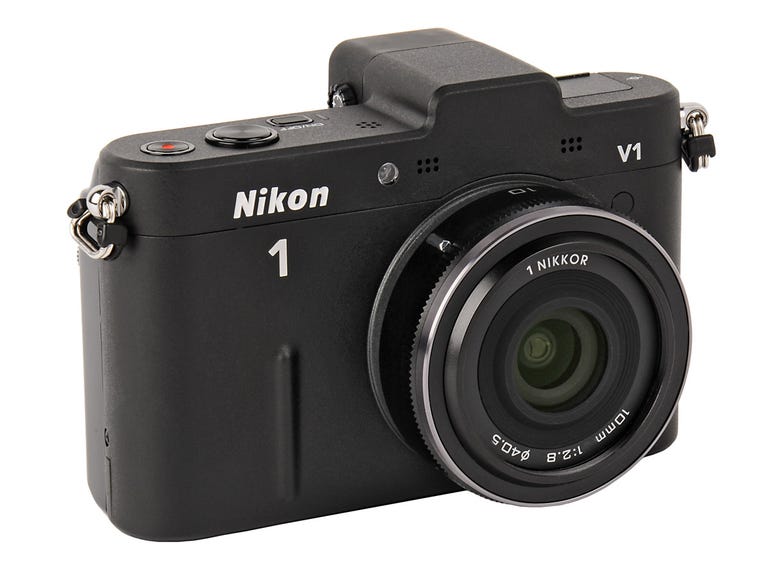
The Nikon 1 V1 is a heavyweight at 383g -- that's without the lens attached.
Movie mode is self-explanatory, but motion snapshot is an interesting halfway house; it takes both a still and a very short snatch of video, then edits them together with a choice of four clips of music, variously denoted as beauty, waves, relaxation and tenderness. When you play it back, it runs through the video in slow motion, then cuts to your photo to finish on a still. We're having difficulty thinking of a scenario when you might want to use this feature, but nonetheless it's an interesting take on shooting stills.
The V1 we tested was shipped with a 10mm prime lens using Nikon's new 1 Nikkor mount. This is incredibly compact, protruding from the front of the body by just 22mm. It really looks the part, complementing its industrial lines.
Don't be fooled by the stated focal length. Although the 1 Nikkor lenses were developed in concert with the Nikon 1 cameras, you still need to multiply their focal length by 2.7 to work out the 35mm equivalent, giving this unit an effective focal length of 27mm. The 10mm lens is one of just four lenses currently on offer, but Nikon has also produced an adaptor for mounting its regular dSLR lenses.
At present, the Nikon 1 raw files aren't supported by either Photoshop or Apple Aperture, so unless you're happy to work with the JPEG equivalents -- which you can set it to write simultaneously alongside the NEF files or in their stead -- you'll need to use the bundled ViewNX 2 software to manage your downloaded shots.
Shooting stills
The rear LCD screen, as with the J1, is one of the best we have used. It's bright, responsive and supplemented by an electronic viewfinder. We would always prefer an optical equivalent here, but the V1's implementation, as with the Sony Alpha SLT-A35, is among the best we have used. It's sharp and has a quick refresh, so there's no skipping or smearing as the image sweeps past. A proximity sensor to the side of the eyepiece switches between this and the rear screen as you bring your eye towards it.
With just 10.1 megapixels across which to spread each frame, the Nikon V1 demonstrates good dynamic range, with bright, vibrant colours. There was only faint evidence of colour fringing where narrow, dark details such as fine branches passed over very bright backgrounds, even when shooting against a bright, overcast sky.

Lesser cameras would have trouble here, but the V1 produced a clean shot with only minor fringing on these branches where they passed in front of an overcast sky (click image to enlarge).
However, the effects were more pronounced where the sharp edges of a building overlaid a bright background. This was evident in our shots of a railway viaduct, behind which the sky was slightly overcast. Here, a clear magenta glow was visible on the underside of the arches. This became more pronounced as we moved our attention towards the edge of the frame, where it also manifested on the side of a silver lamp post overlaying the darker brickwork.

The above cropped portion of a larger image shows clear fringing, called chromatic aberration, on the underside of the bridge archway (click to view this section in context).
It is natural that such an effect would become exaggerated towards the edge and corner of the frame as the lens has to work harder to focus the light on the sensor from this angle, but we were disappointed to see it appear at all.
We suspect that this has less to do with the camera body than the 10mm lens we were using in our tests; shots of the same subject taken on the Nikon 1 J1, which we were testing at the same time using the 30-110mm lens, didn't exhibit the same fringing.
Beyond this instance of fringing, the V1 performed well, accurately focusing light across the frame. Natural colours -- particularly autumn leaves -- were vibrant and realistic, with well-differentiated tones helping to clearly pick out areas of complex detail.
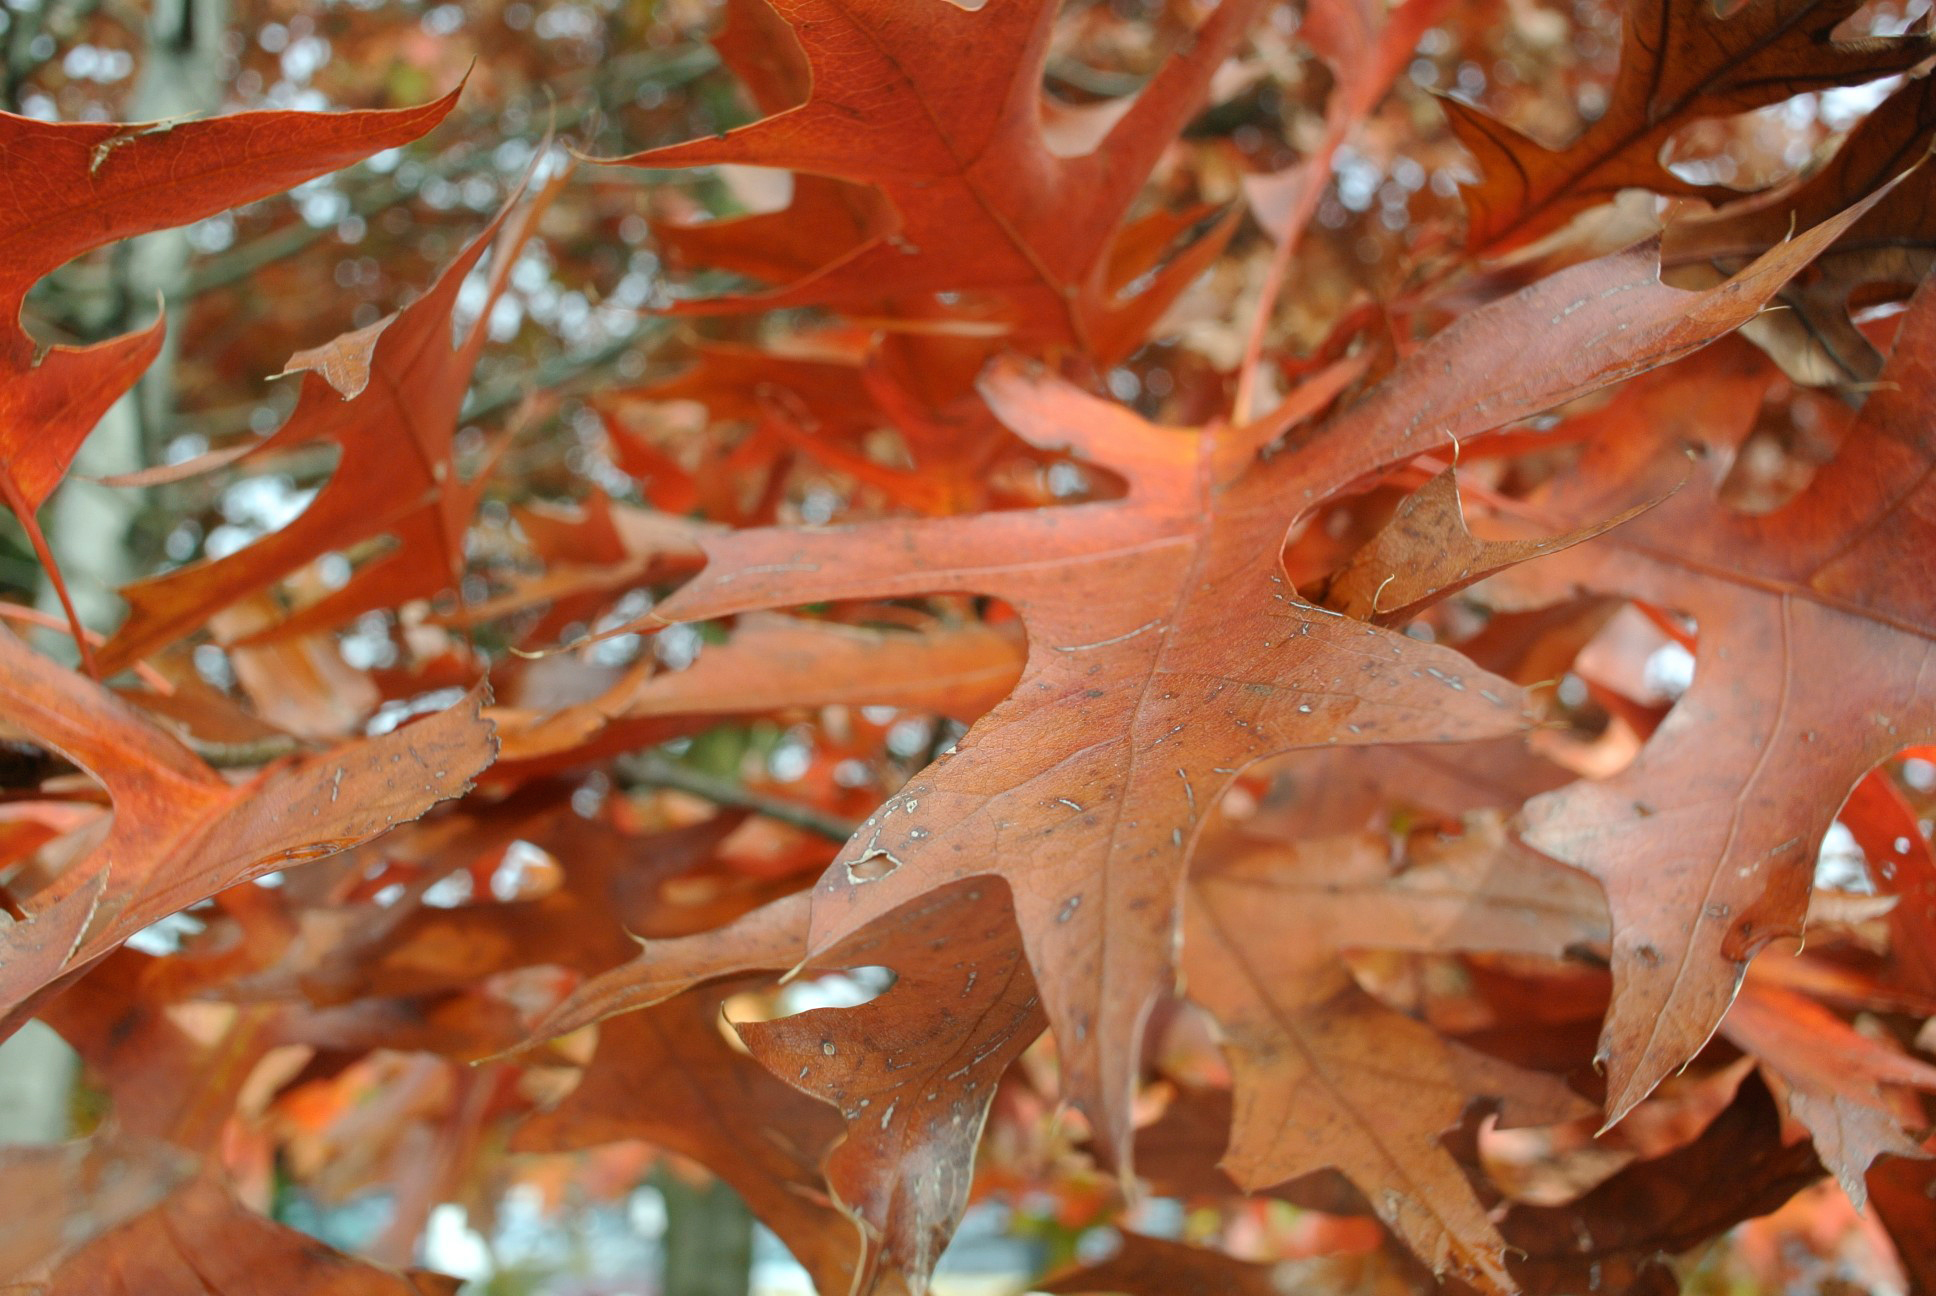
There's not a great variety of colour differentiation in this autumnal scene, yet the V1 still managed to clearly differentiate each part with an impressive level of detail (click image to enlarge).
However, it occasionally had difficulty in balancing highlights and shadows when using the scene auto selector. In the shot of this church, below, some detail was lost from the upper parts of the stonework as the V1 compensated for the darker areas of the scene, which filled around half of the frame.
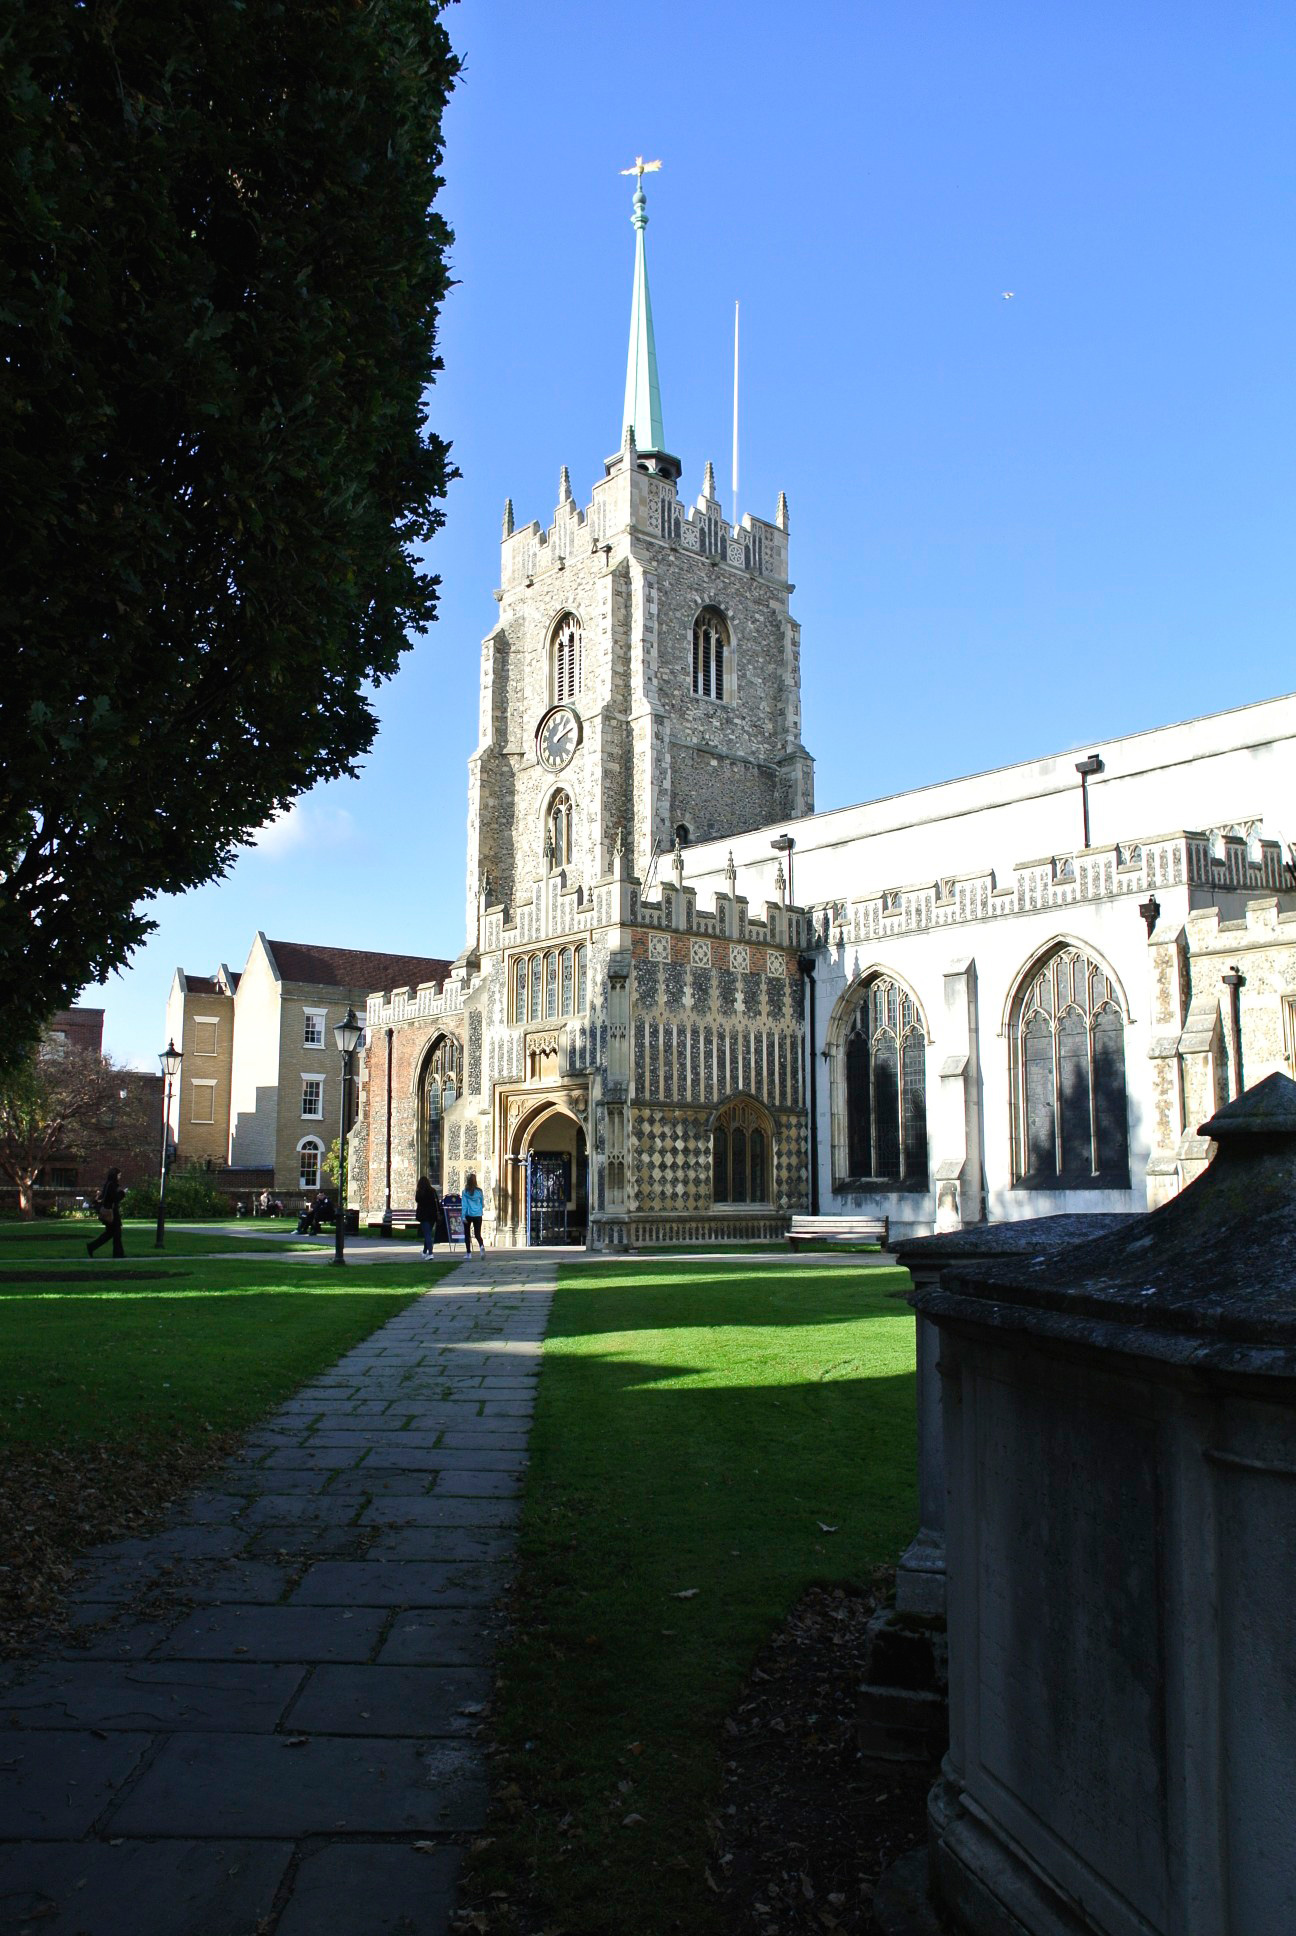
The composition of this portrait shot resulted in some bleached highlights on the flat stonework 45-degrees on to the camera (click image to enlarge).
Reshooting in landscape mode changed the overall lighting conditions, allowing the camera to rebalance the stonework for a better overall result. In switching to landscape orientation it changed the aperture from f/4 to f/4.5 and increased the shutter speed from 1/320 to 1/500-second for perfectly rendered stonework.

Recomposing the shot allowed for more balanced exposures of the stonework resulting in greater detail (click image to enlarge).
Our highlights again lost some detail when we shot this mill pond with the sun to one side and slightly behind us. Closely examining the building at the centre of the frame, which was exposed for 1/250-second at ISO 100, shows that some detail has again been lost in the brickwork and window frame.
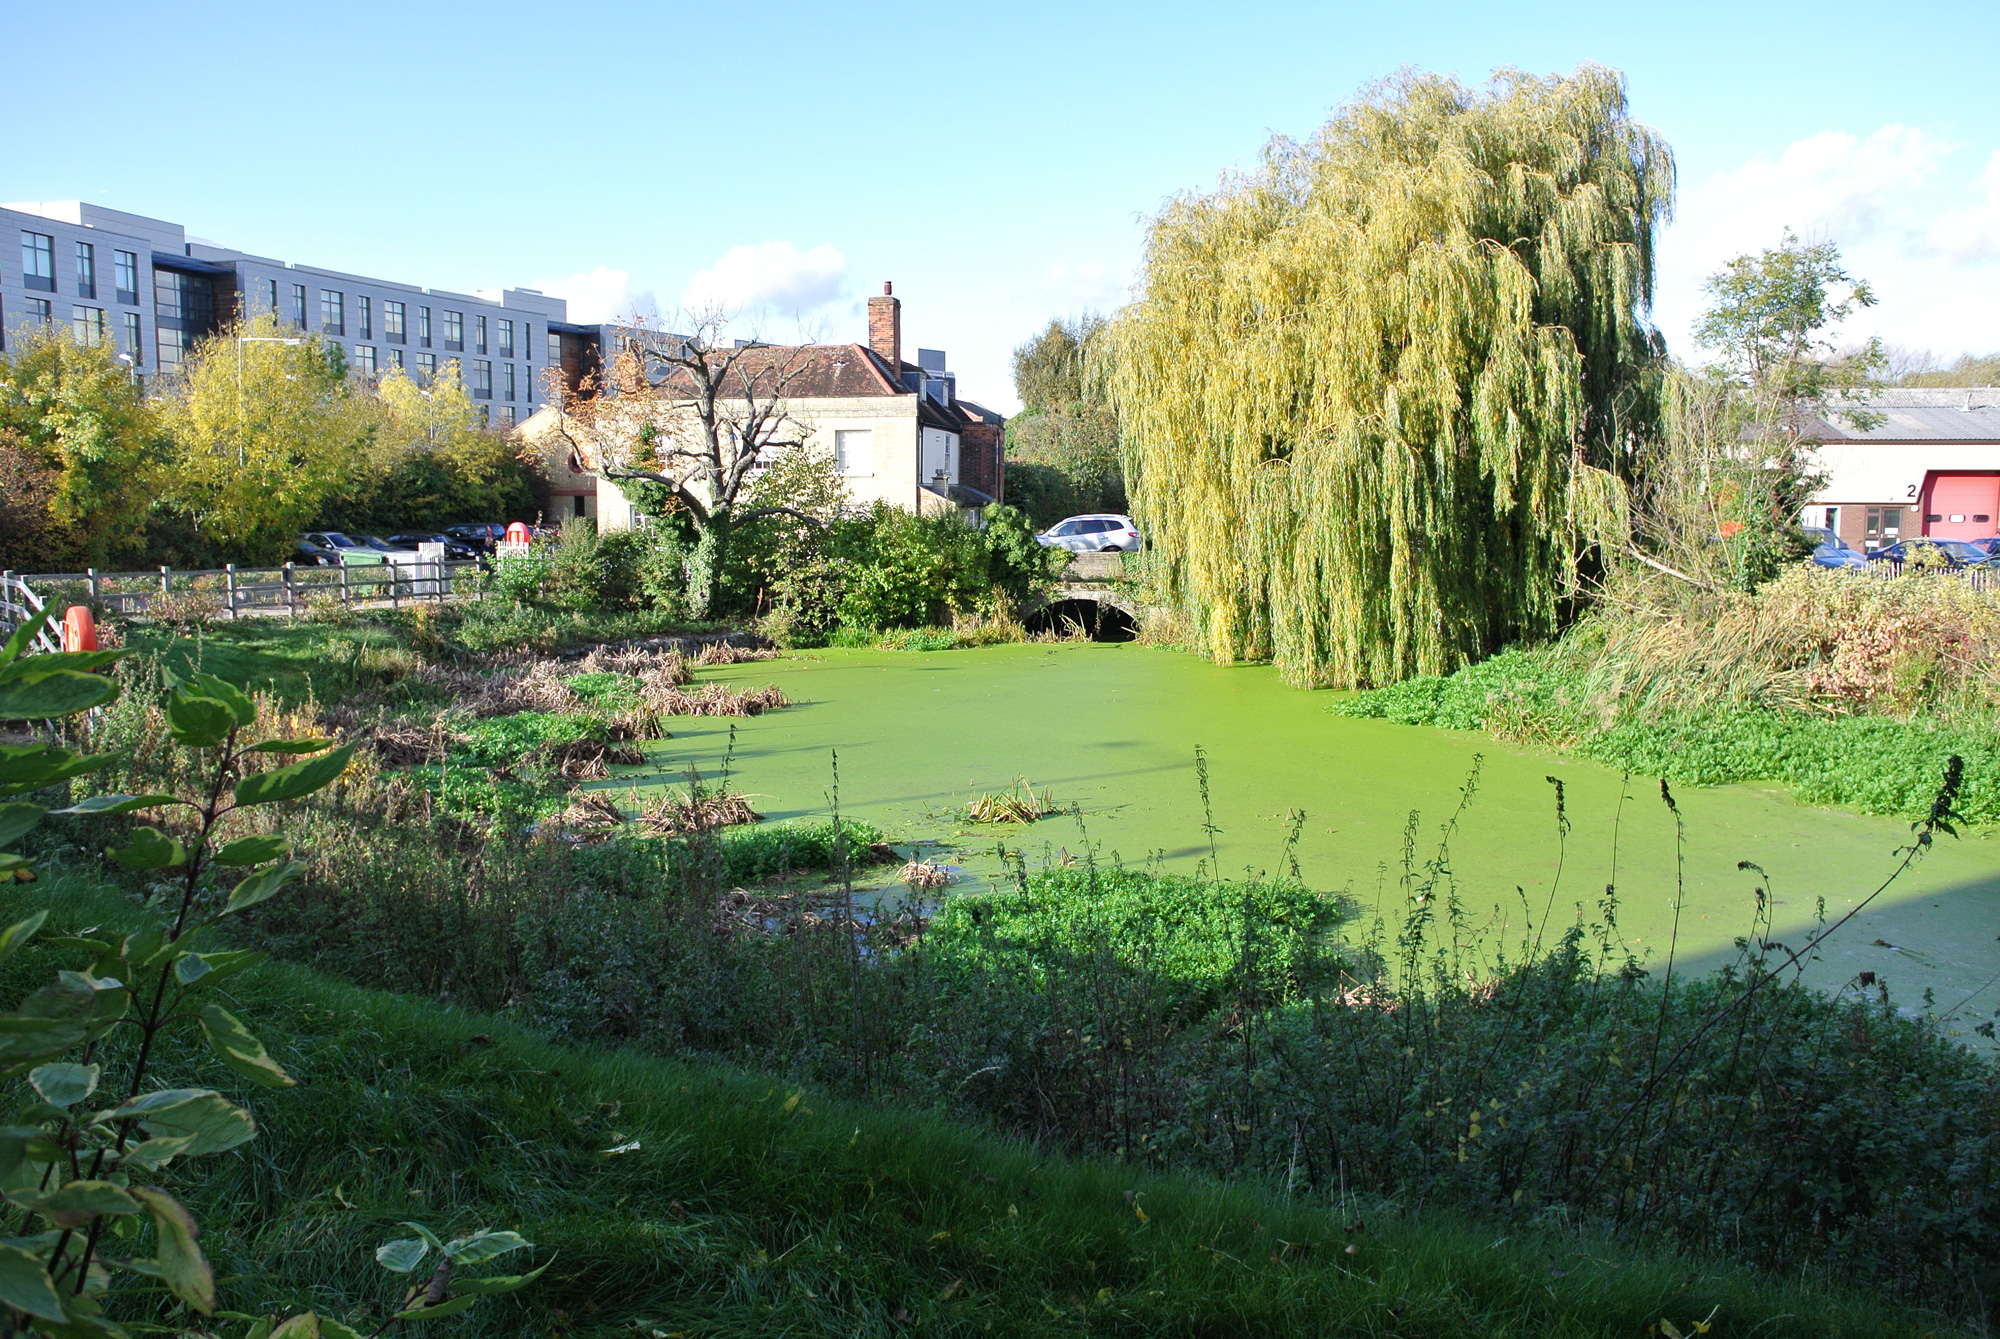
Some detail has been lost in the centre of this frame, where the brickwork and windows of the mill house are facing the oncoming sun (click image to enlarge).
The controls to switch to aperture or shutter priority, program or full manual control are found within the classy, knocked back menus. Switch to either shutter or aperture priority and the zoom control, used to enlarge or reduce images in playback mode, steps up and down through each scale. It's both simple and effective, and very fast.
Opt for full manual and this same control takes care of the shutter while the thumbwheel handles aperture. Each of these modes is extremely responsive, taking no time at all to action your settings, with a live preview on the rear LCD.
While we usually perform our still-life test using studio lighting, ambient light and a camera's onboard flash, we tested the V1 under only the first two conditions in this instance as the SB-N5 speedlight is an optional extra.
As with all cameras it naturally performed best under studio lighting, self-selecting a shutter speed of 1/200-second at ISO 100. The full range runs to 1/4,000-second to 30 seconds in mechanical mode and a maximum of 1/16,000-second in electronic mode; sensitivity stretches from ISO 100 to 3,200 with compensation of +/-3.0 EV in 1/3 EV steps.
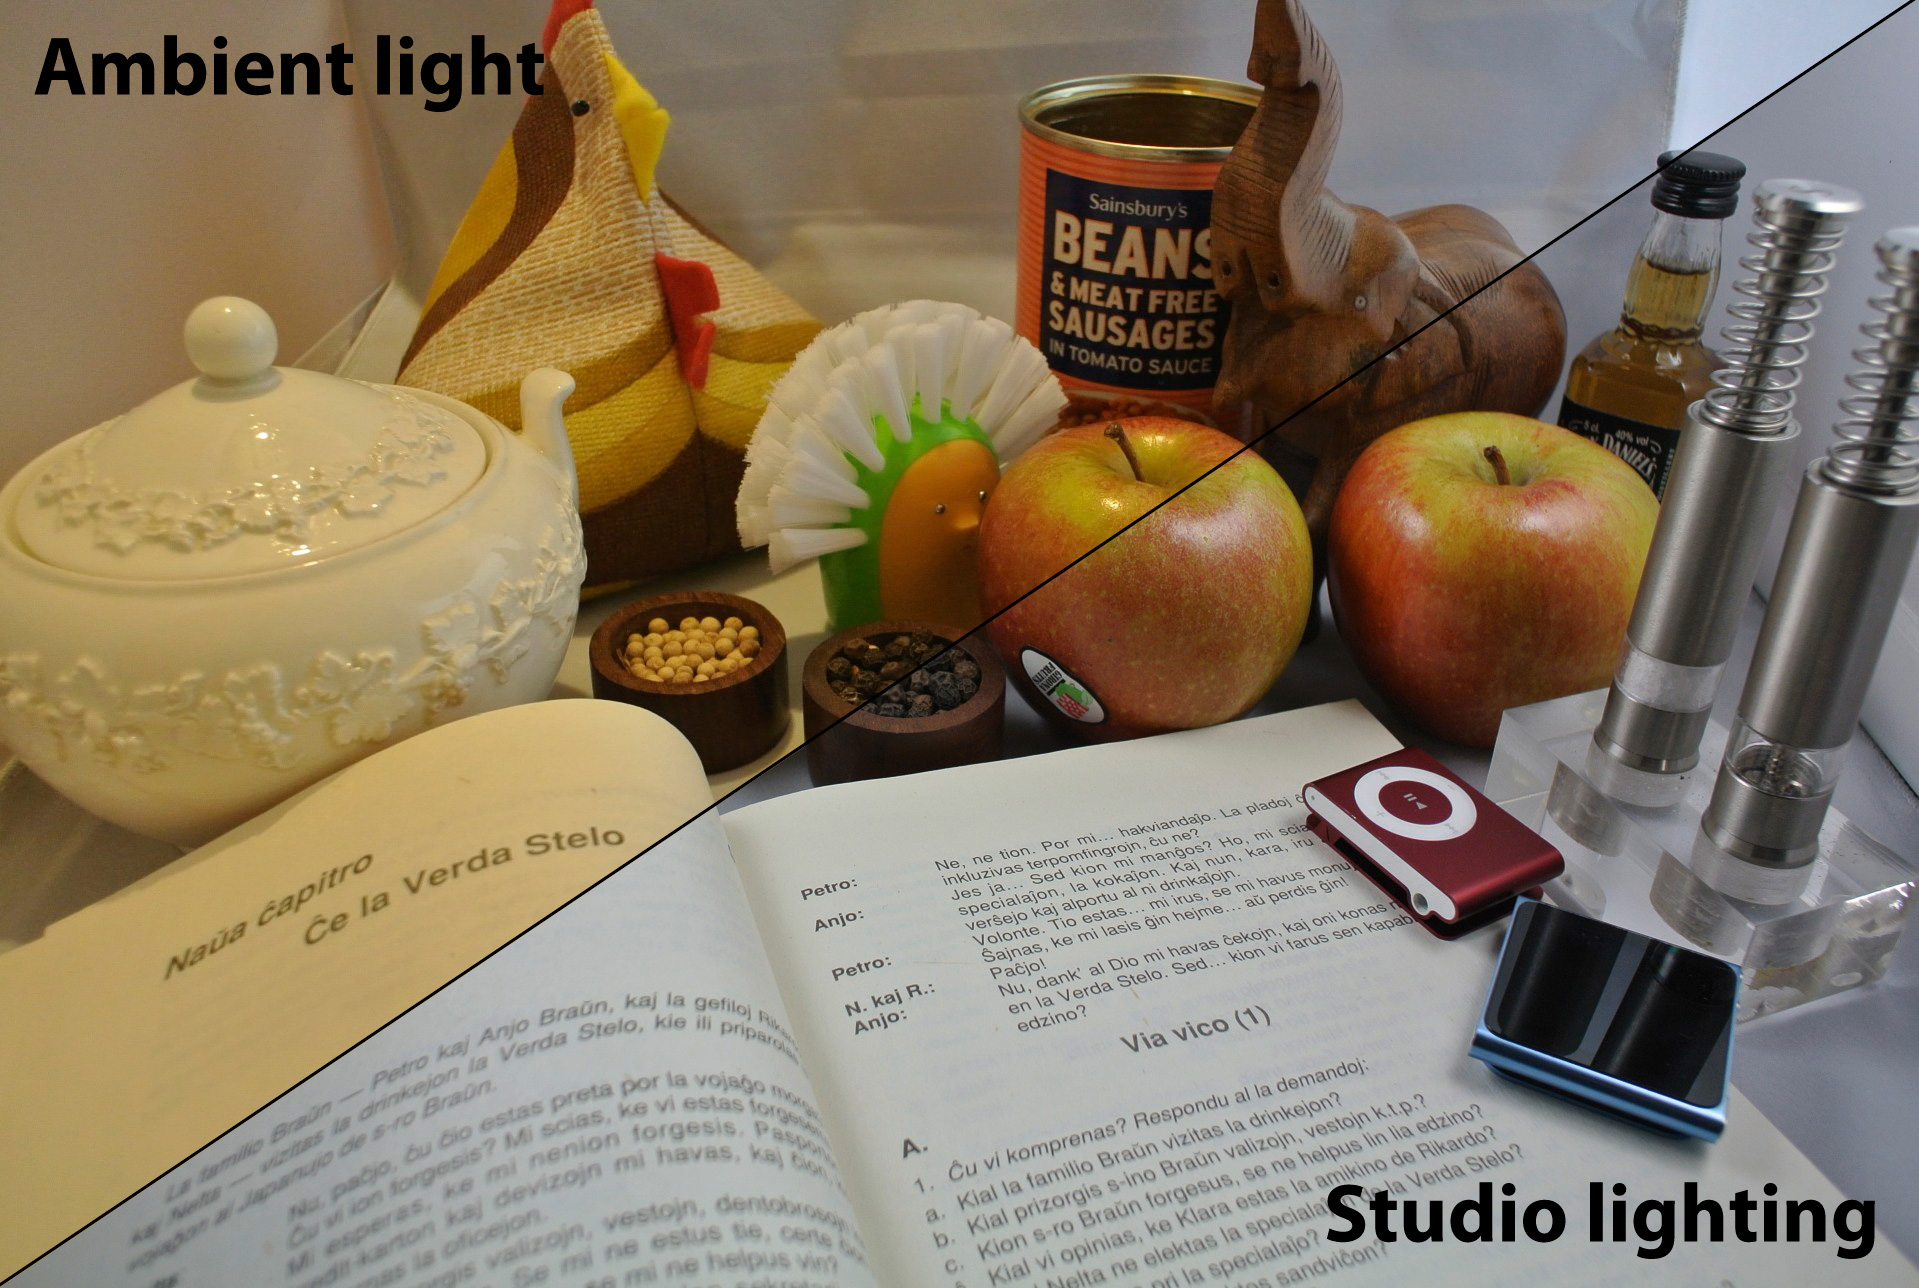
The Nikon 1 V1 performed well under both studio lighting and ambient light, introducing only faint noise as it increased the sensitivity to ISO 560 when the studio lights were turned off (click image to enlarge).
Colours were bright and true in this studio-lit test, and the level of detail in the image was very impressive. The skins of our two apples were softly textured, while the red and green tones on their surface were accurately spotted. In areas dominated by a very narrow gamut, such as the white bristles of a scrubbing brush, the V1 made great use of the available light to clearly differentiate each element. Reflections were clean and accurate; printed text was extremely clearly rendered on the pages of a book where it receded from the front to the centre of the frame.
When we switched to using just the ambient light, it increased its sensitivity to ISO 560, which subsequently introduced a degree of noise into the image. As we stated when examining the same test shots from the J1, this was evenly distributed and didn't interfere with the clarity of sharp edges or underlying detail. Our apple skins remained gently pocked and despite a yellow cast, the colours were accurately plotted within the visible spectrum. This allowed us to boost the exposure in post-production to recover an accurate representation of the scene.
Movie recording
The V1's movie mode shares many features with its stills shooting setting, including shutter and aperture priority and full manual control. There are three resolutions and frame rates to choose from: 1080/60i; 1080/30p or 720/60p. We performed our tests using the first of those settings.
We also opted to have our recordings start and stop as soon as we pressed the movie shutter button. We could have instead chosen black or white fades, both in and out which, if we were smart enough to capture only the footage we wanted and nothing on either side, would mean we could quickly lace our results together with the minimum of editing.
The results were good, with sharp pictures, bright colours and plenty of detail. Panning was handled smoothly, although obviously as we were using a prime lens there was no zoom. The soundtrack was also very cleanly recorded when we were out of the wind. We had set the audio sensitivity to auto (you can change this to high, medium or low, depending on your surroundings); there was a fair amount of wind noise in some more exposed scenes despite the fact that wind noise reduction was active.
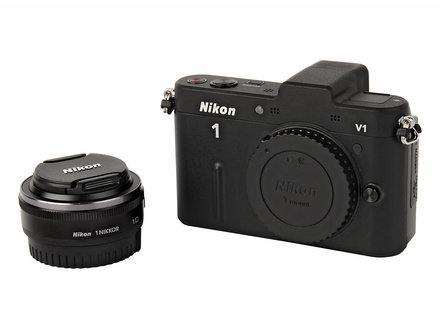
V1 vs J1
It's easy to see how the V1 and J1 are closely related. They share a 10.1-megapixel sensor and 1 Nikkor lens mount.
With the V1 you have the added bonus of an electronic viewfinder, but with the J1 there is the arguably more useful built-in flash. They share common maximum movie resolutions but the V1 can also record in still image mode at 720p -- the J1 only shoots stills in this mode -- and will also accept an external microphone, which should allow for a cleaner soundtrack.
The V1 is a more capable and powerful camera, which in part explains why it's almost 40 per cent heavier without the lens and considerably more expensive. Another excuse for all that extra weight is the chunkier block battery, capable of delivering 400 shots on a full charge versus the J1's 230.
Which should you buy?
We were very impressed by the level of detail in the V1's output. With just 10.1 megapixels on the sensor each one can be larger, allowing the V1 to perform well in low light. This explains why the grain in our ambient light test was faint and even, despite the fact it had increased its sensitivity to ISO 560.
We were disappointed by the colour fringing that the 10mm lens exhibited in some areas of high contrast. As we stated earlier, we did not see equivalent fringing when using the compatible 30-110mm lens with the J1.
On the basis of our test results, then, the specific bundle of the J1 and dual 10-30mm and 30-110mm lenses was the better performer. So, if you want the broader feature set of the V1 either opt for the body on its own, to which you can add your own choice of lens, or buy an alternative kit set-up, perhaps with the dual 10-30mm and 30-110mm lenses we tested with the J1. Do that, though, and the price climbs to £900. The equivalent set-up for the J1 is around £550, so it represents a significant step up.
You get a lot of camera for your money with the V1, but that's still a hefty price to pay. For our money, the J1 is better value, but in the final analysis only a careful balancing of price and specs will identify which is the best camera for you.