Get started with the new Facebook Timeline (photos)
Facebook revamped profiles, now known as Timelines. Find out how to configure your Timeline and how to keep your privacy in check.


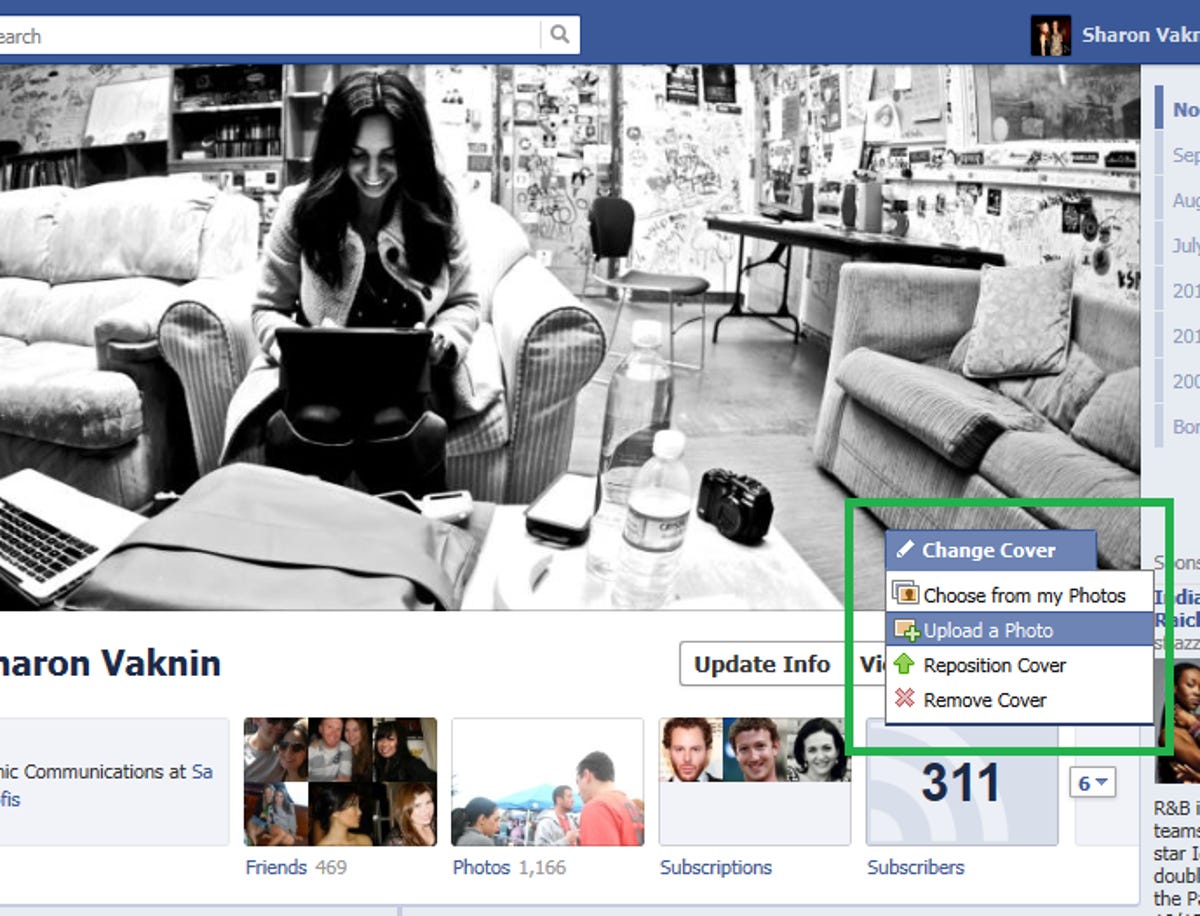
Your cover photo
At the top of your profile is the cover, which can be anything from a photo of yourself, to your dog, or favorite city. To change it, hover over it and select "Change cover." It can be from an existing Facebook album or a file on your drive. Bear in mind that the cover photo is 850x315 pixels and should be high resolution to avoid graininess.
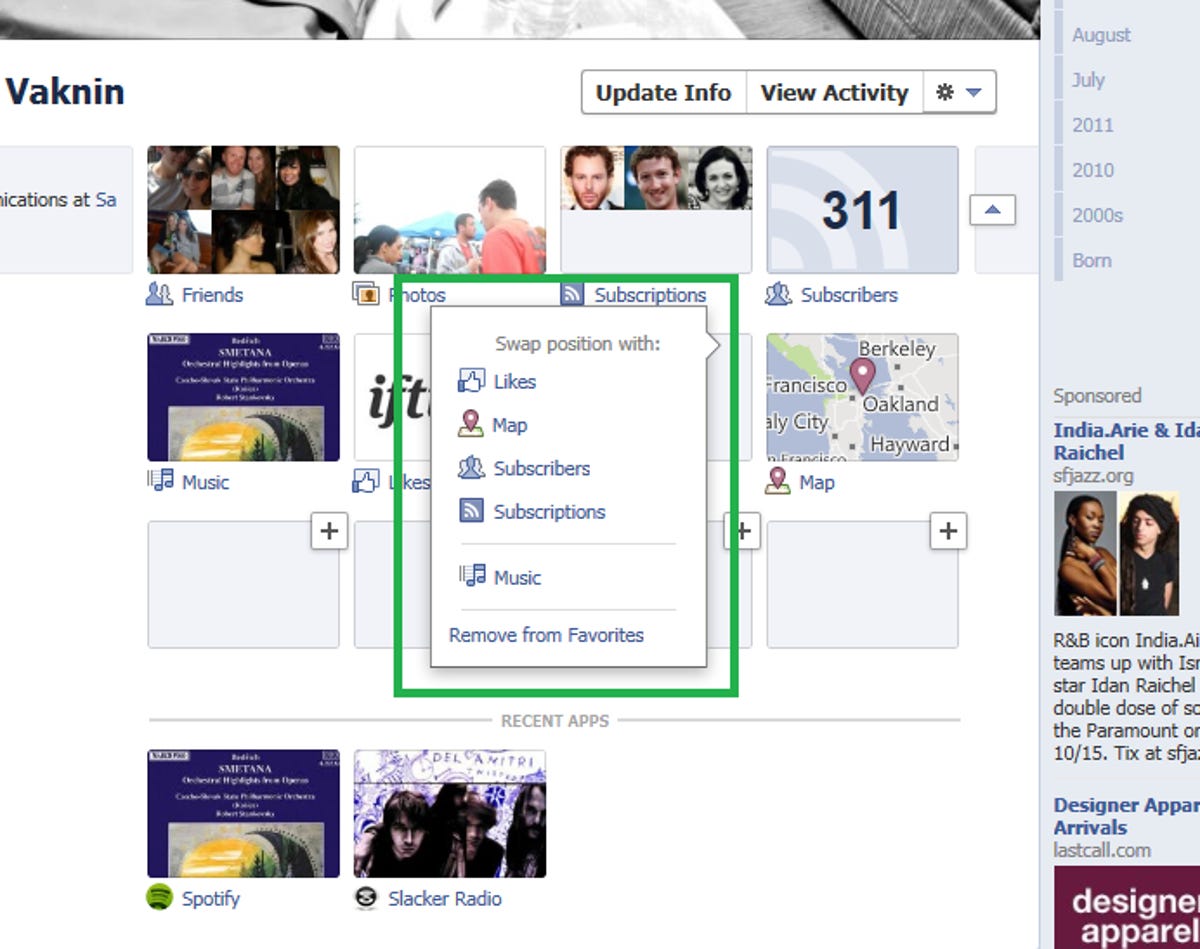
Info, friends, and apps
Below your cover you'll see all your profile info--like job, education, location, and relationship status--on the left, and your friends, photos, and apps in boxes on the right. To adjust the privacy options of your apps, click each individual app and adjust accordingly. For example, you can choose to make your friends private, and change the privacy settings of individual photo albums.
The four boxes shown at the top can be customized to your liking. Click the arrow with the number (on the right) to expand all your apps. Then, hover over a box, click the pencil, and you'll see an option to swap the box with something else, or remove it entirely.
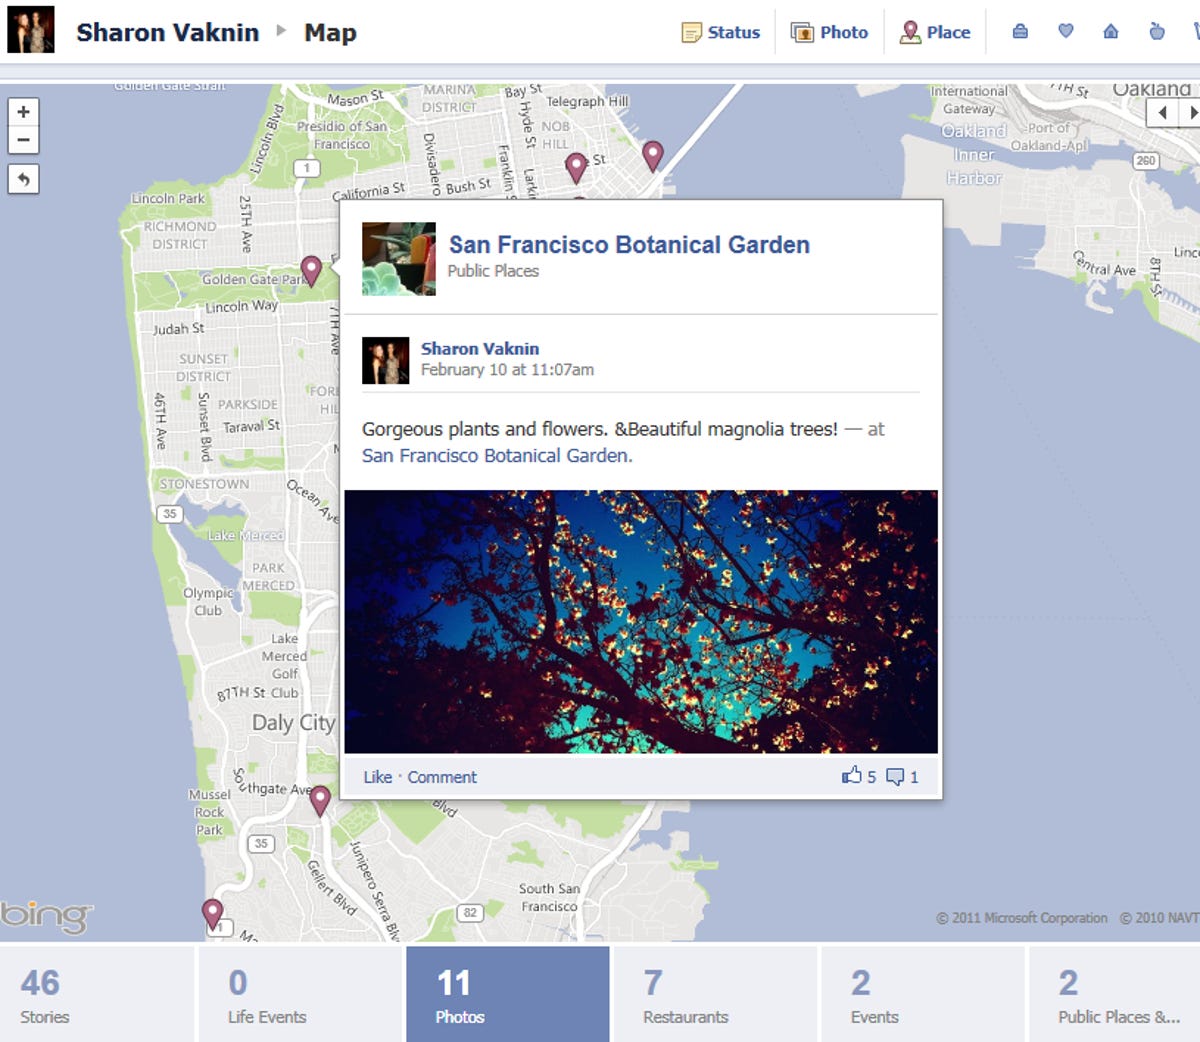
The new Map feature
When you expand your apps section, you'll see a new app, called "Map." It's a cool (and equally creepy) feature that gives you a geographical representation of your posts, with locations tagged. For many, the map will be bare, but you can plot points by retroactively adding events to your Timeline with tagged locations using the toolbar at the top. However, if the map seems too intrusive, simply hover over it, click the pencil, and remove it so that friends can't access it.
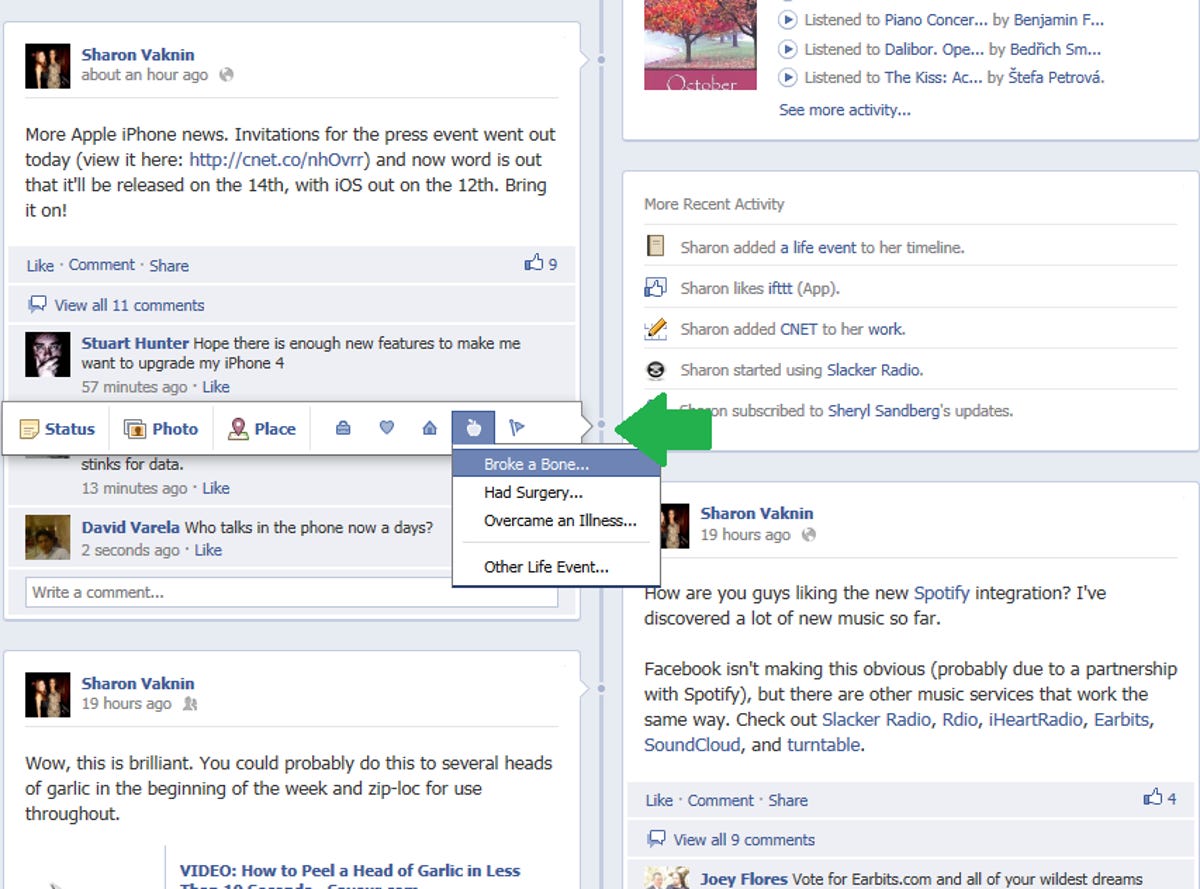
Add events to your Timeline
Here's the fun and daunting part of the new Facebook: all of your activity (including posts, check-ins, photos, info changes, and more) is now viewable to you and your friends in chronological order. Using the Timeline navigation to the right of your Cover photo, you can click to view old posts going all the way back to the very first day you joined Facebook.
Below your first post, you'll see an empty section for the day you were born. Facebook wants users to fill in events that happened throughout their lives, even before joining Facebook.
To add an event, hover over the point in the Timeline when it happened and click the gray line. There's an option to add a status update, photo, location you visited, or type of "life event." Facebook gives you many options, like "Broke a bone," "New vehicle," "Overcame an illness," "Graduated," and more. If your life event doesn't fit into one of Facebook's option, click "other life event."
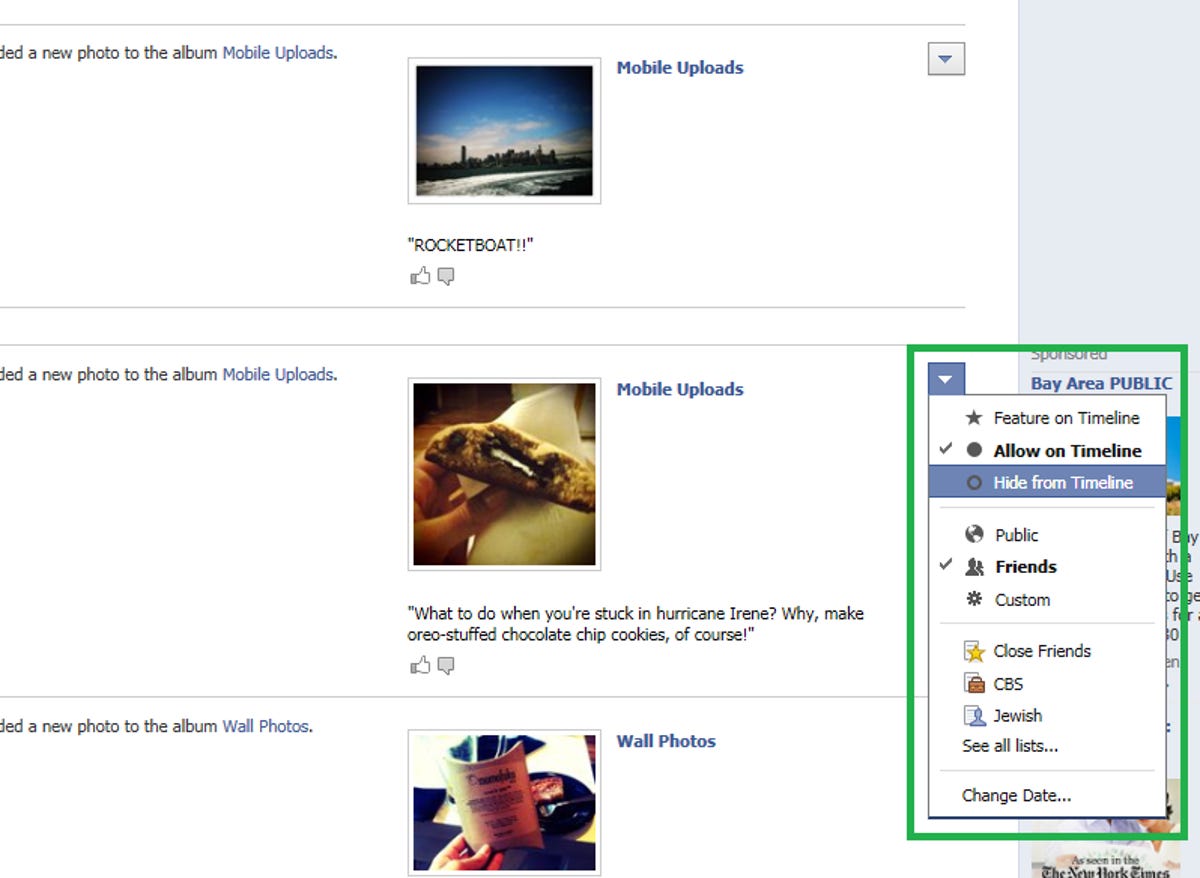
Remove events from your Timeline
To remove events from your Timeline--like breakups you'd rather forget or embarrassing photos--click "View activity" at the top of the page, where you'll be presented with a simplified version of your Timeline. Filter the Timeline by type (at the top), and once you find the post you want to remove, click the arrow next to it. You can hide it from your Timeline, feature it (makes it full-width), change the privacy settings, or delete it forever.
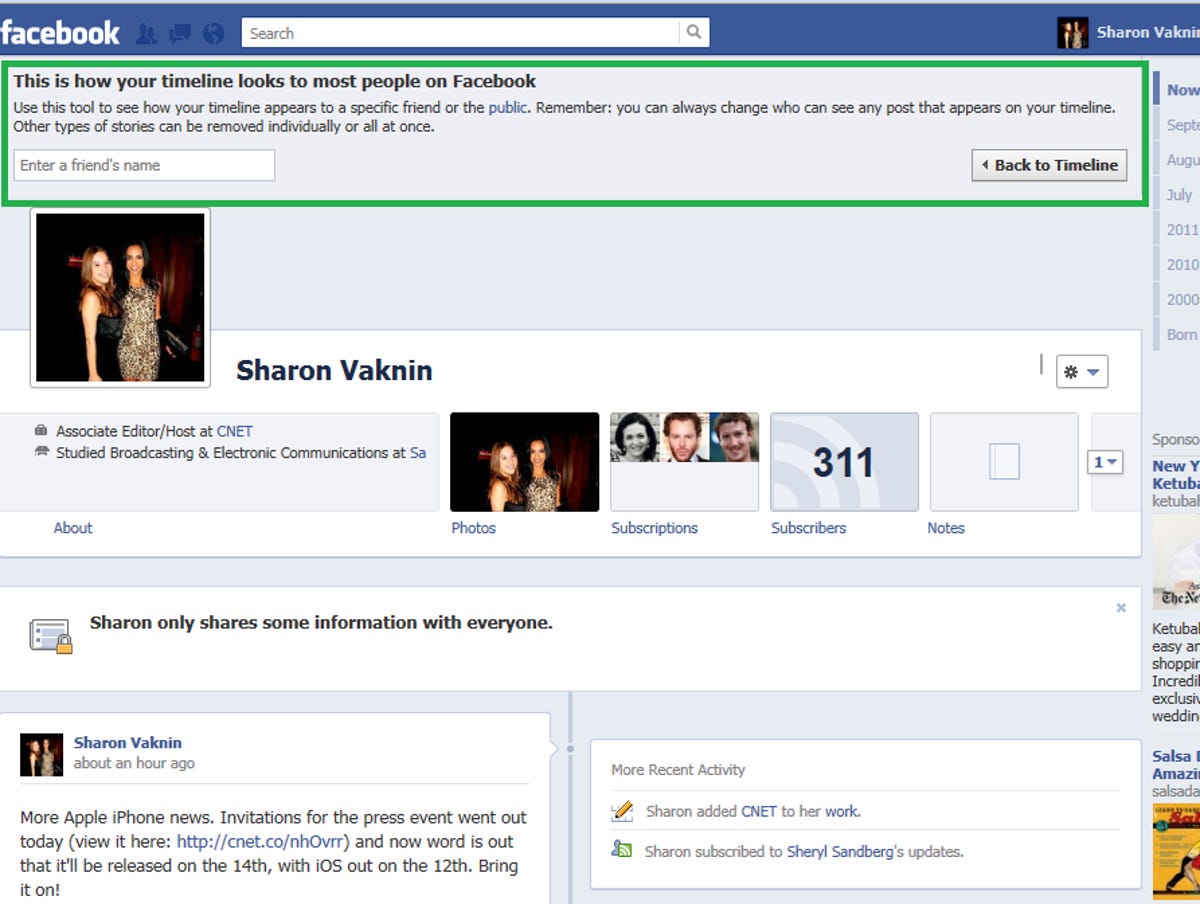
Admire your work
Once you tweak your profile to your liking, click the settings button at the top of your Timeline and select "View as." Enter the name of a friend to see what your Timeline looks like to them, or click "Public" in the description at the top to see what it looks like to everyone on the Internet.
More Galleries

My Favorite Shots From the Galaxy S24 Ultra's Camera
20 Photos
Honor's Magic V2 Foldable Is Lighter Than Samsung's Galaxy S24 Ultra
10 Photos
The Samsung Galaxy S24 and S24 Plus Looks Sweet in Aluminum
23 Photos
Samsung's Galaxy S24 Ultra Now Has a Titanium Design
23 Photos
I Took 600+ Photos With the iPhone 15 Pro and Pro Max. Look at My Favorites
34 Photos
