How to create ebooks using OS X Lion
Here's how to create your very own ebook using nothing more than a few text files and the tools bundled in Mac Lion. JK Rowling had better watch out.


In this how-to article, we're going to create an OS X Lion Service to compile ebooks in the industry-standard ePub format, using only the tools that come bundled as part of Apple's latest operating system.
If you've not come across Services before, they're small routines that modify the way the operating system works, adding non-native features that appear either in a dedicated Services menu (click an application's name on the menu bar and check for a Services sub-menu), or in the context-sensitive menu that pops out when you right click or hold Control and click on a file.
We'll be using Automator to build our Service. This simple programming tool lets you build routines by dragging and dropping pre-written instruction blocks into the order in which you want them to execute.
Building your Service
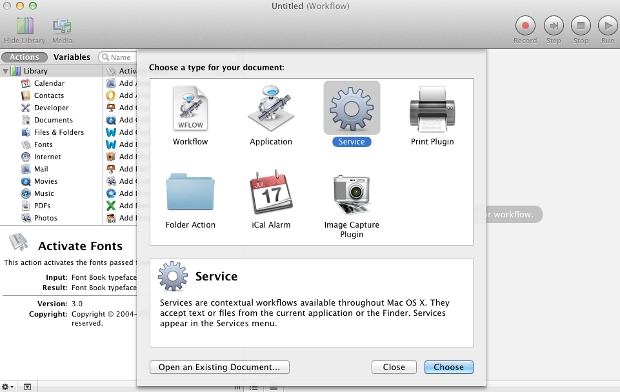
- Launch Automator and choose 'Service' from the document dialogue that pops up. Of the other options: Workflow is equivalent to a macro, which you can save to your desktop and onto which you can drop collections of files for processing; Application creates a stand-alone OS X app, contained within a floating window; Print Plugin modifies the OS X printer dialogue; Folder Actions automatically run when you drop files into the folder to which they're attached; iCal Alarms launch processes, such as backups, at specific times and dates; and Image Capture plugins perform specified routines on images scanned or downloaded from a camera or iPhone, using the OS X Image Capture utility.
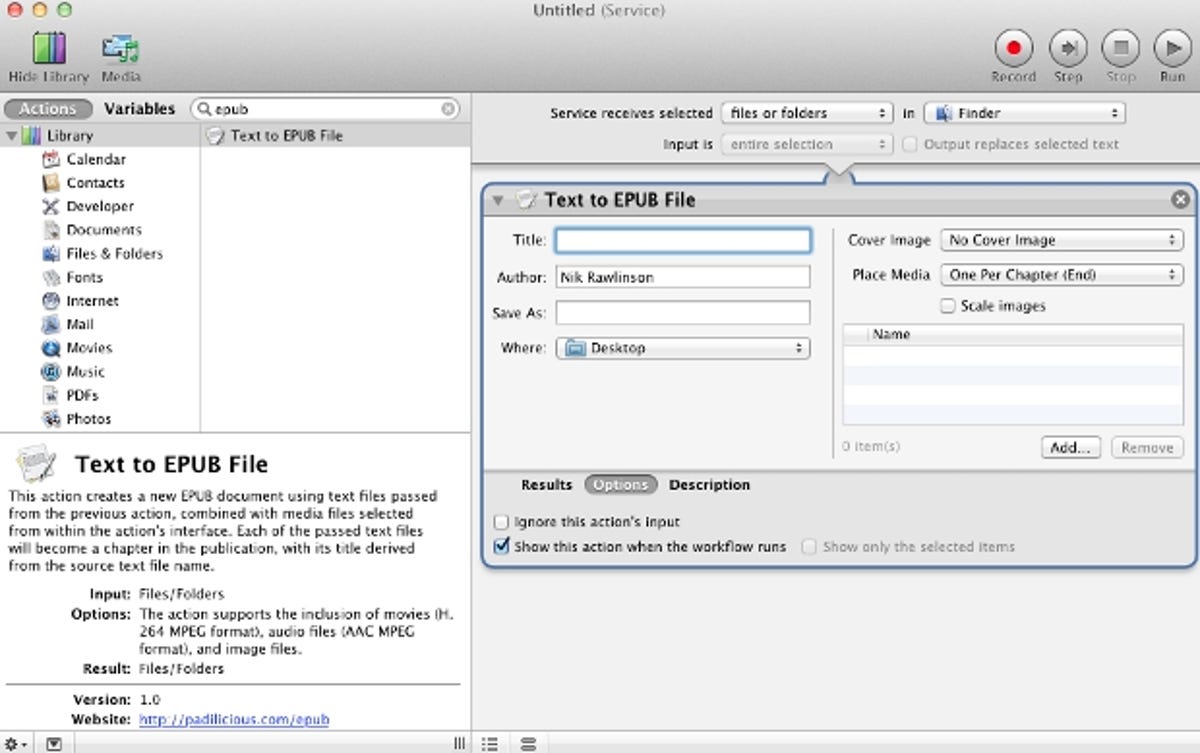
- By default, the Service expects to be acting on text, but we want it to work on a collection of files, so use the drop-down menus at the top of the largest window to select 'Service receives selected files or folders in Finder'.

- Use the search box at the top of the second column to search for the keyword 'ePub'. There's only one result, so drag the 'text to ePub file' action into the main window to add it to the workflow. Notice how the first action now has an arrow coming out of the bottom, pointing into the handle on the top of the second action. This indicates that it sends its output into the second block to be processed. If we continued adding further blocks below this second step then it, too, would grow an arrow and send on its output for processing.
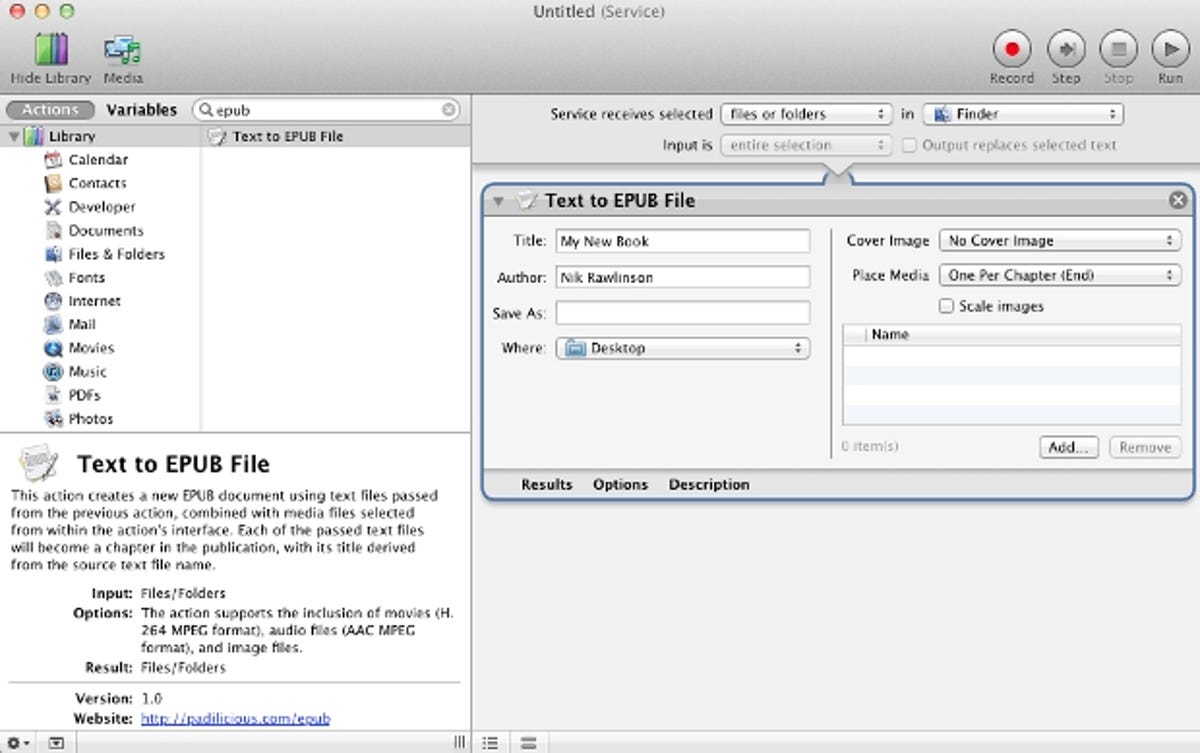
- Each of your books will have a different title, so clear out the text in the title box, and select a folder in which you want your ebook saved from the drop-down menu beside 'where'. We're leaving ours set to desktop, so we can easily find the results, and from there drag them to wherever we want. Click the word 'options' at the bottom of this block to expand it, and tick the checkbox beside 'show this action when the workflow runs'. If we left this box clear, then our Service would be entirely faceless, and we'd not be able to enter the name of the book or add a cover image later on.
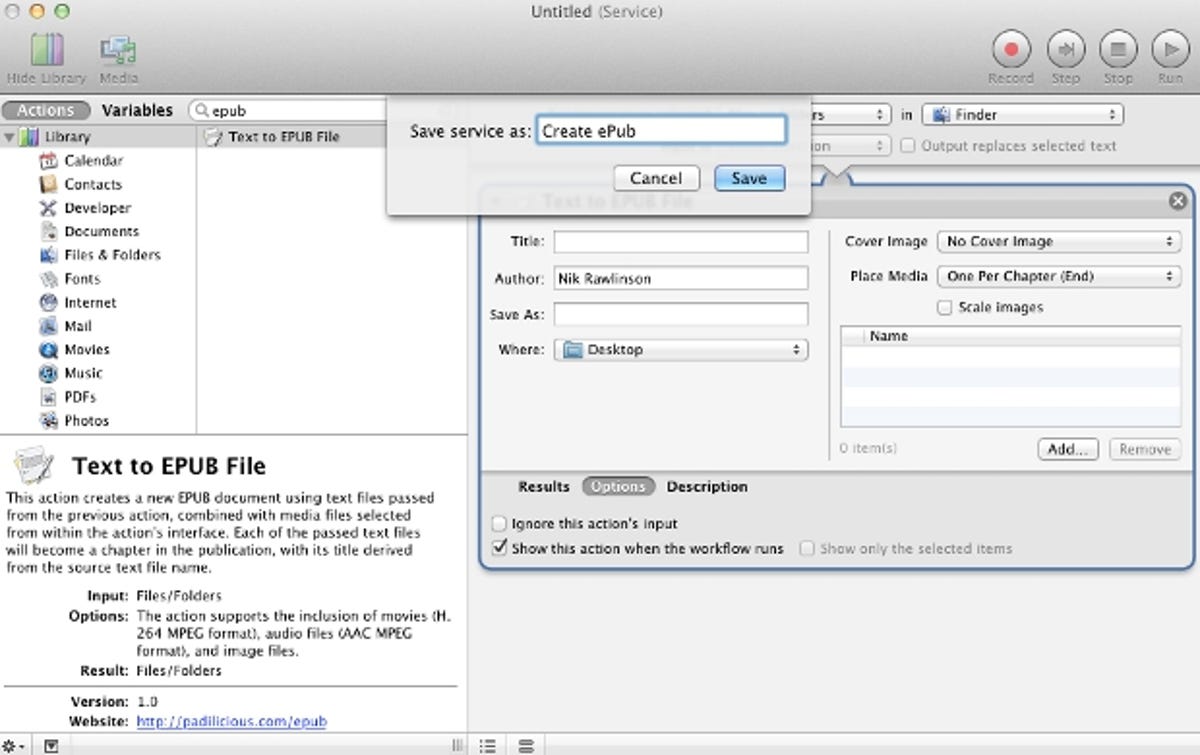
- Finally, save your Service. Choose a descriptive name that will make sense in the context-sensitive menu you'll see when you right click on your files. We've called ours 'create ePub'. You can now close your file and quit Automator.
Using your Service
- Format your book using your word processor of choice. It doesn't matter what you use, but, if you want to retain any rich formatting, you should save the file in the RTF format. Ensure you include a chapter number in each file name and gather them all together in a single folder so they're easy to compile.
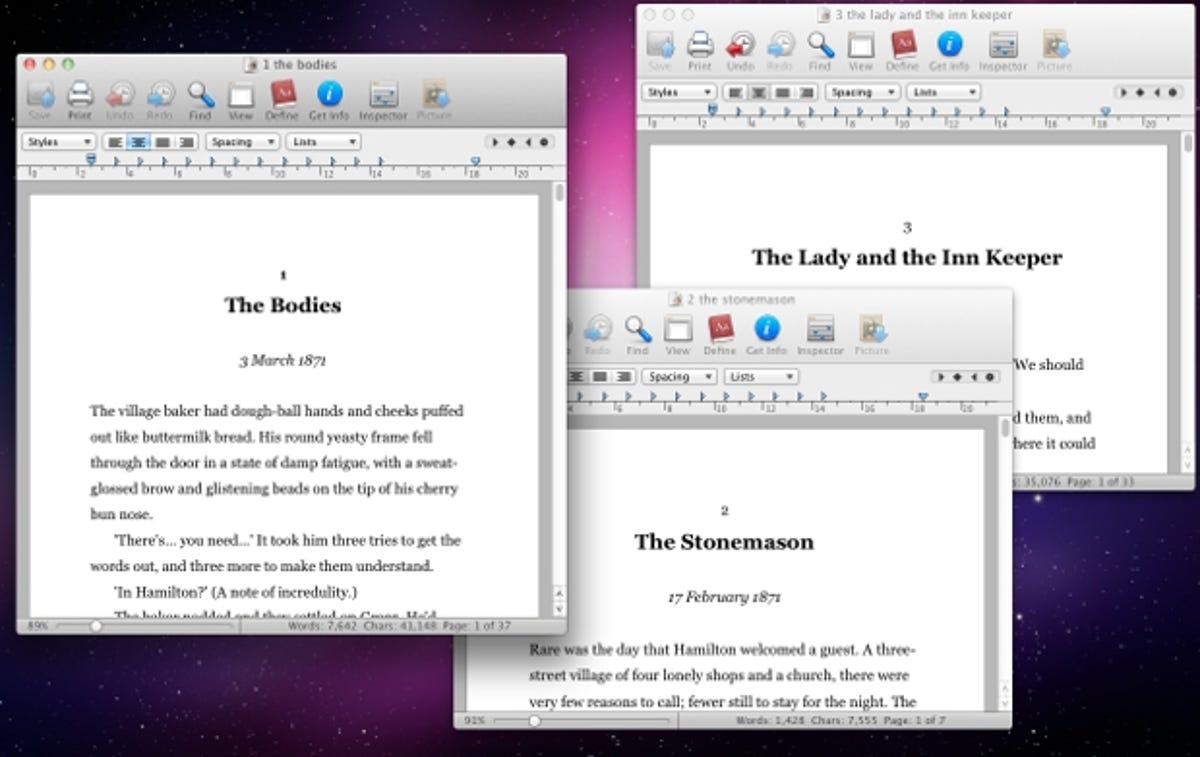
- Select all of the files you want to include in your book, and right click or hold Control and click on the selection. Pick your new Service -- 'create ePub', in our instance -- from the Services section at the bottom of the menu.

- The 'text to ePub file' block that we dragged into our Automator workflow now pops up, courtesy of the 'show this action when the workflow runs' box we checked earlier. Fill in your book title, check that the author name is correct and choose a file name for your book. If you want, you can change the file destination here.

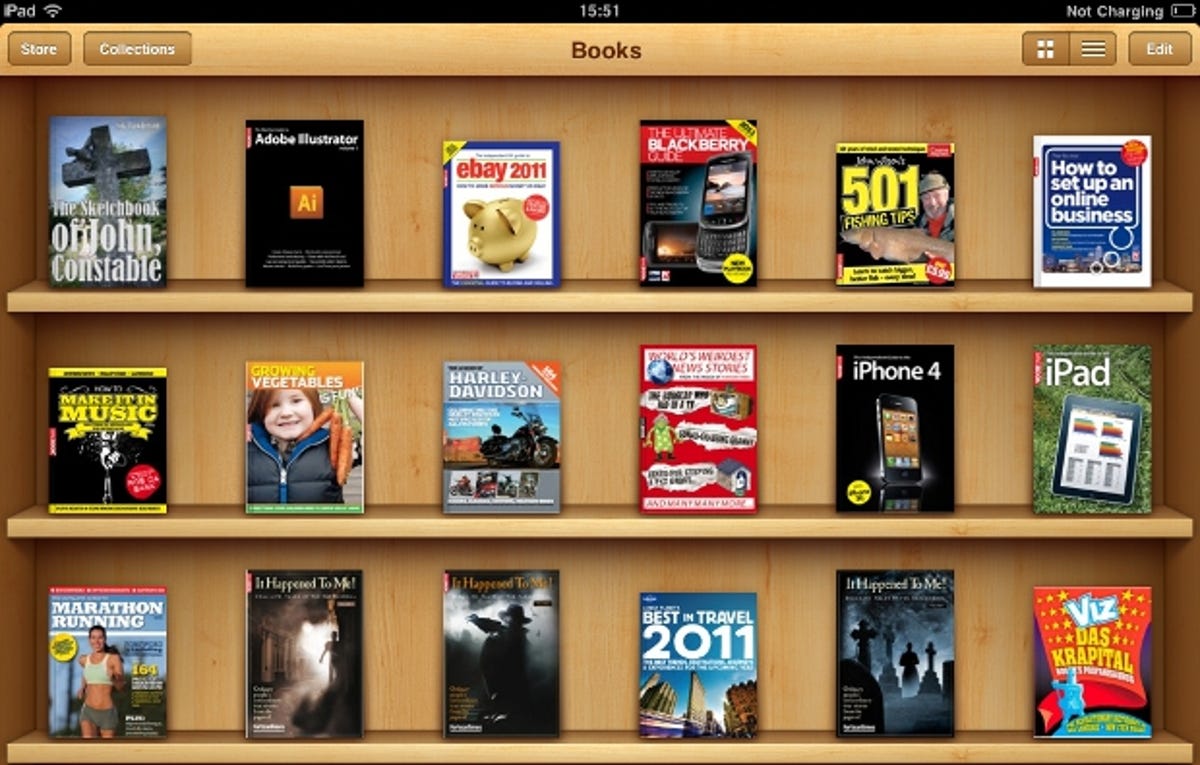
- If you plan on selling your ePub through Apple's iBookstore, or uploading it to Amazon for conversion to the Mobipocket format for selling through its Kindle Store, you'll want to include an image. This will be displayed in shop listings and when lined up on the shelves in the iPad's iBooks app. Click the 'cover image' menu and pick 'other', and then navigate to where you've saved an appropriate cover file on your Mac. You can optionally include images at the start and end of each chapter by adding them to the space below the 'place media' menu, in the order in which you want them to appear. This is useful for opening illustrations or general page furniture with which you want to embellish your book, but not a required component.

- Click 'continue' to finish the process. Your book will be saved in the specified folder using your chosen file name. To transfer it to your iPad or iPhone, open iTunes and click 'books' in the sidebar. Drag the ePub file into the main window and then sync your device. Your book will now appear on iBooks' shelves, and, when opened, it should carry across the formatting from your RTF document. Your file names will be used as hyperlinked chapter titles when you tap the index button.
Although we've synchronised our book to an iPad, ePub is an open standard used by the majority of ebook devices -- the Kindle being a notable exception -- so you should have few problems sharing your work with friends who have their own ebook readers.
If you want to convert your file to Mobipocket for reading on the Kindle, without uploading it to Kindle's digital publishing suite for selling through the Kindle store, check out Calibre. This software manages your titles and converts between all common formats on the Windows, Linux and Mac platforms.