How to root the Samsung Galaxy Note 2
If you're the proud new owner of a jumbo-sized Galaxy Note 2 and want to play around with customs ROMs, you'll need to root it. Here's how.

So you've decided you can't be having with normal-sized phones? I hear you -- I'm in the same boat, and as a proud new owner of the Samsung Galaxy Note 2, the first thing I wanted to do was root it, play around with custom ROMs, get rid of the bloatware and truly make the phone my own.
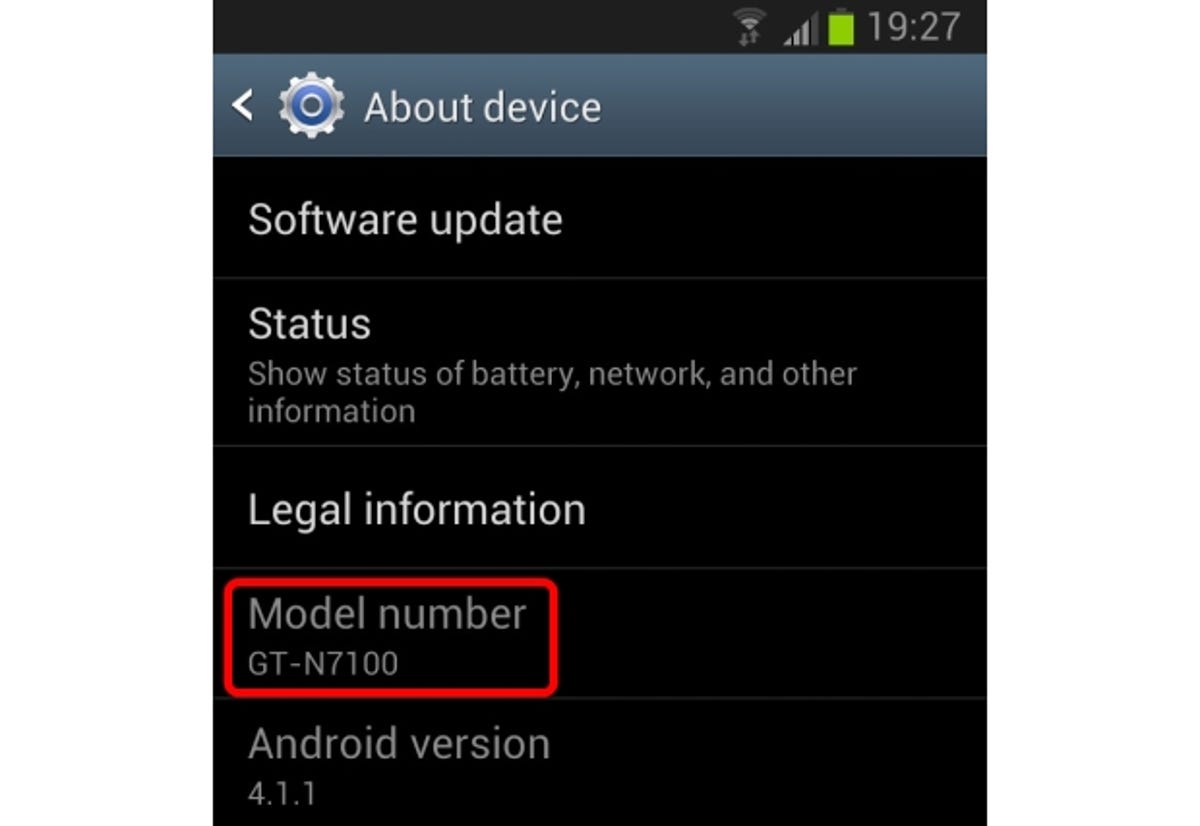
It's a relatively painless process if you follow the instructions to the letter, and I'll go into that in a moment. First things first though -- make sure your Galaxy Note 2 is the right version to work for this. To be absolutely clear, this method will only work with the GT-N7100 version.
How do you know if you have it? Easy: pick up your Galaxy Note 2, press settings, scroll down to 'About Device', and you'll see an option labelled Model number. If it's GT-N7100, you're good to go, if not then don't follow this guide any further. You should be able to find the correct code for yourself and apply most of the steps below, but you'll be flying solo for some of it.
First, a little to cover myself and CNET: rooting your phone is potentially hazardous. Yes, it comes with lots of neat stuff, like custom versions of Android, powerful apps not available on Google Play and so on, but it also bypasses a lot of security stuff that's supposed to be there for your protection, meaning a malicious app could play havok.
So use some common sense about what you do with your phone, post rooting, and suffice it to say that CNET bears no responsibility for any damage done to your device through following the steps below.
Still with us? Great. Then let's take the stablisers off your Galaxy Note 2...
1: Gather up your files
First things first, there's a few things you'll need before we start. Go ahead and install the Samsung USB drivers, Odin (the software for putting the rooting software on your phone), and finally the rooting code for the GT-N7100 flavour of the Samsung Galaxy Note 2.
2: Prepare the patient
You'll now need to prep your phone for its open-source surgery at this point. It should go without saying, but just in case, you'll want to back up everything you can't live without from your phone: contacts, text messages, photos, recordings, notes, everything. If everything goes to plan, they should still be there when you're done, but why take the risk?
Secondly, make sure you're running at 70 per cent battery or more, to be on the safe side.
Thirdly, you'll want to allow your phone to install non-Google Play apps, and run debugging mode when connected via USB. These are both simple switches in the settings. The former is under Settings > Security, and you just have to scroll down to Device Administration and tick 'Unknown sources' in the menu. The latter is found in Settings > Developer options, and just tick 'USB debugging' under Debugging.
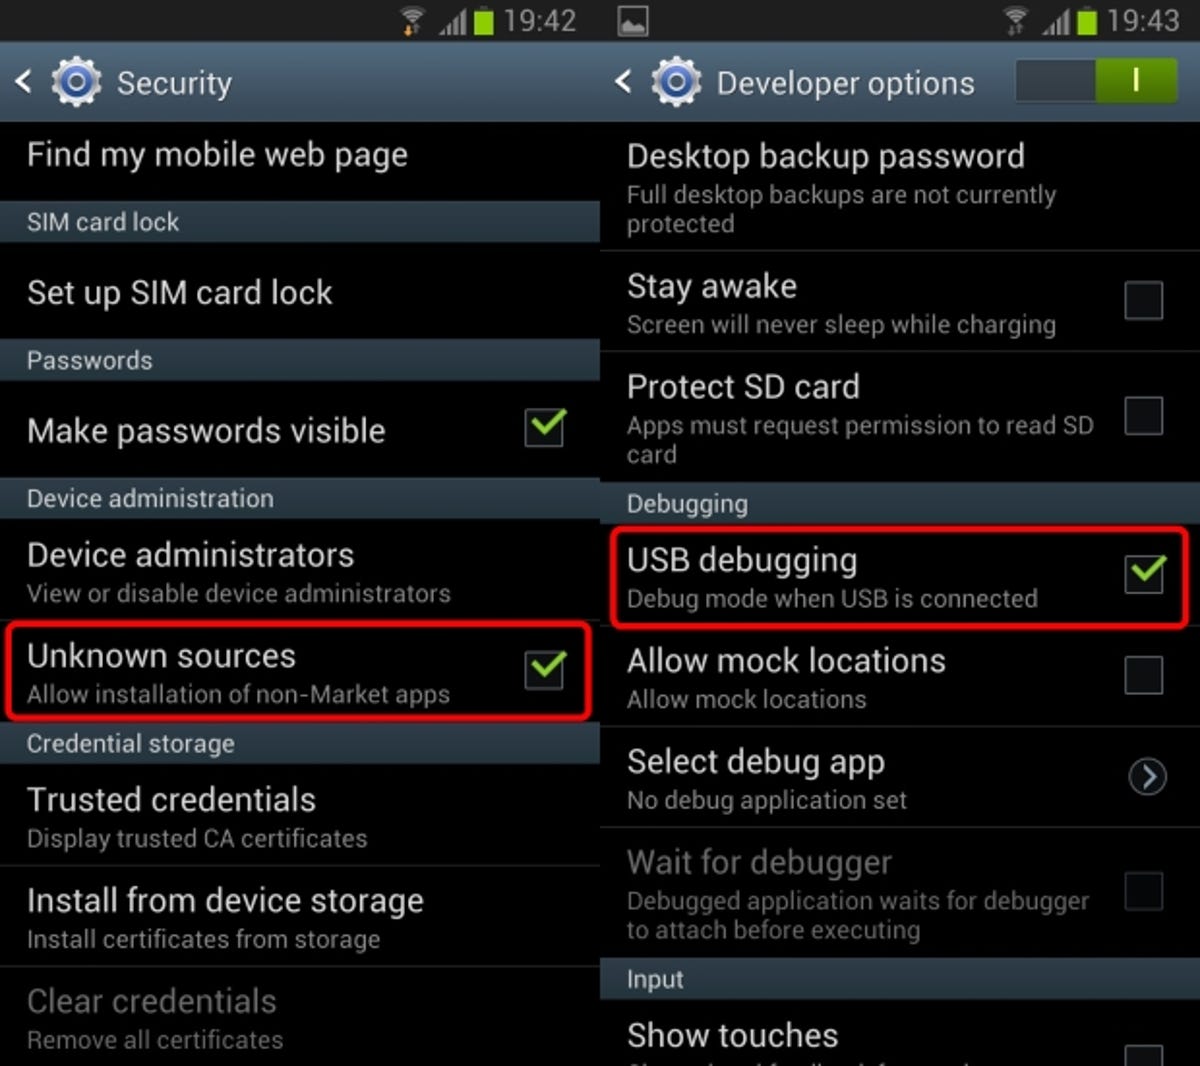
Both of these will come with warnings telling you to back off if you don't know what you're doing, but then that's good advice for this entire guide, so let's keep going...
3: It's rootin' time!
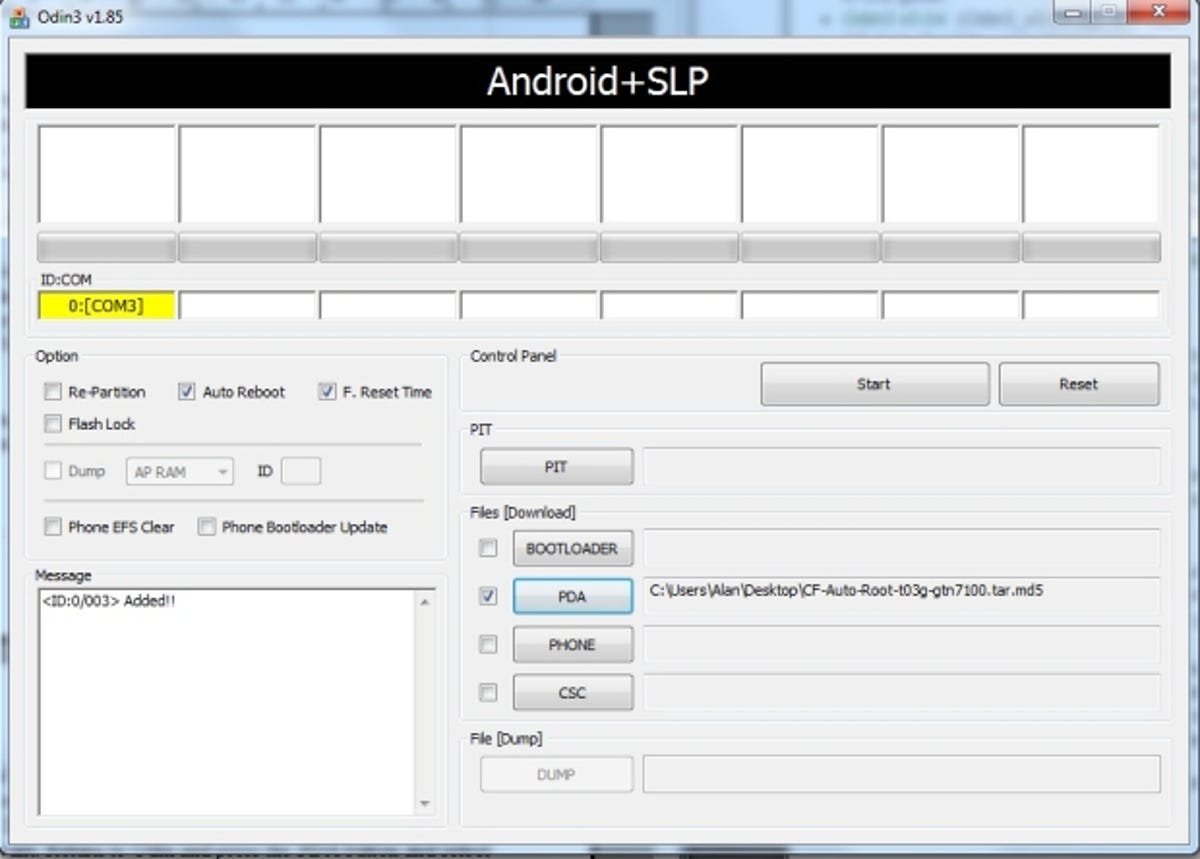
Run Odin, and make sure that 'Auto Reboot' and 'Reset Time' are ticked. Unzip the CF-Auto-Root-t03g-gtn7100.zip file that you downloaded earlier and you'll find an identically named file within, only this is a catchy sounding .tar.md5 file. Don't worry, this isn't a never ending 'pass the parcel' style unzipping game – this is the file you want. Return to Odin and press the PDA button and select the aforementioned .tar.md5 file.
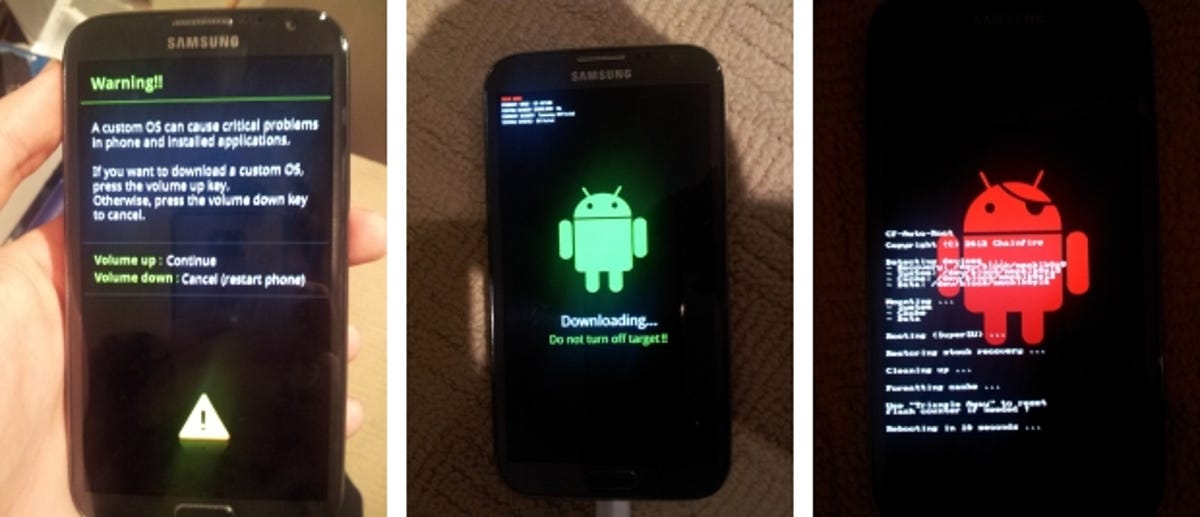
Now, turn to your Samsung Galaxy Note 2, and turn it off, being sure to let it know that you'll see it again soon. Now reboot it into Download Mode: you do this by holding down the volume down, home and power buttons at the same time. You'll be presented with a screen with some warnings about custom ROMs -- you know the risks already, so press volume up to continue. It'll change to a screen that says 'Downloading...' with a big green Android icon on it. Plug it in to your PC via USB and return to Odin.
When you connect your phone, the message box in the bottom left hand corner should (rather enthusiastically) say 'Added!!' when it spots your phone is connected. Right, now's the time to root. Say a short prayer to the big green robot in the sky, and press the big 'Start' button in the top right-hand side of the screen.
This took seconds on my Galaxy Note 2, and then the phone rebooted itself.
4: Make sure it worked
You may be wondering whether it's worked. Your Galaxy Note 2 will look and behave exactly as it did before the root -- which isn't a surprise. We've not actually changed the phone at this point, just given you greater access. That fun is still to come, but more on that in a future article.
So how do you make sure the operation was successful? The first way is to go into your apps menu -- you should find a new one called SuperSU. Put simply, this app manages and remembers the apps you've given permission to access deeper into your phone than your manufacturer normally would.
The next step to make sure things have gone smoothly is to download an app that simply won't work on a non-rooted phone: Titanium Backup is a good choice, not only because it's a good app in its own right (allowing you to backup and restore pretty much anything on your phone), but also because it's free and will let you know pretty quickly if something has gone wrong.

When you load it up, a pop-up should appear asking if you grant it root access. If you see this, give yourself a pat on the back -- your phone is now rooted, and the whole world of custom ROMs is open to you.
Congratulations! Enjoy the wonders of your freshly rooted Galaxy Note 2. I'll be looking at the custom ROMs available for the phone soon, so keep an eye on CNET UK's How To section.