How to set up a cheap home security system using Dynamic DNS
IP webcams are rapidly falling in price, making them the perfect set-up for use in a low-cost home security system.


Dedicated Internet cameras that connect directly to your router either wirelessly or by Ethernet are rapidly falling in price. What might have cost £199 a couple of years ago can now be found for less than half that price, making them a viable choice for low-cost home security set-ups.
By using a dedicated IP camera rather than a standard webcam attached to a computer, you'll have far greater flexibility in where you can position your unit, and lower costs overall. You don't have to site a computer at every location you want to monitor, nor do you need to keep one running to feed video to the Web. In energy savings alone, then, investing in a low-cost IP camera can pay for itself.
Site your camera
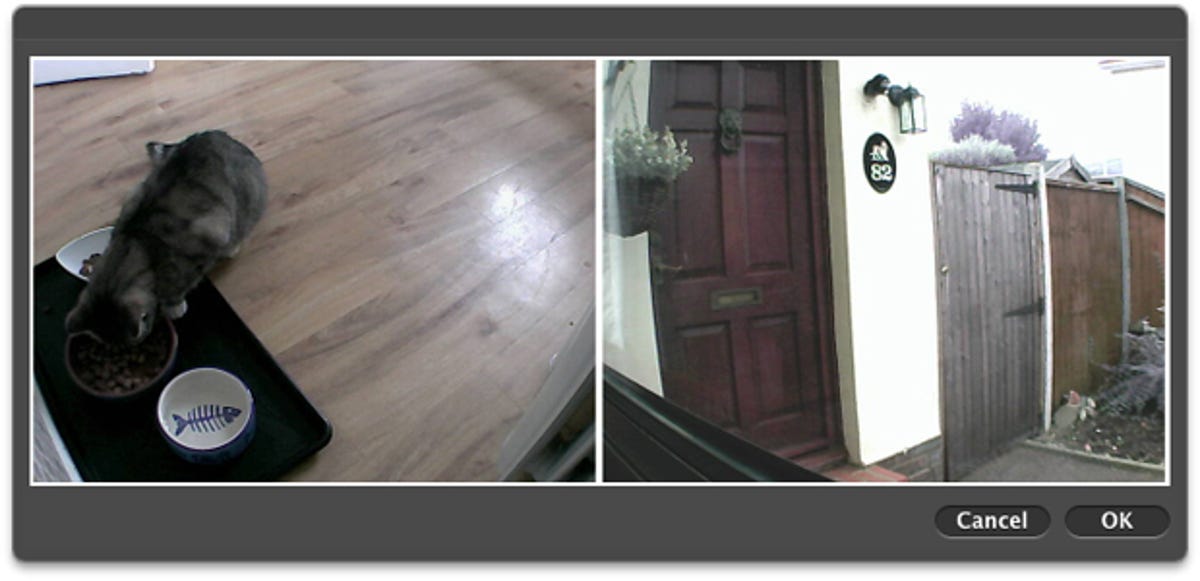
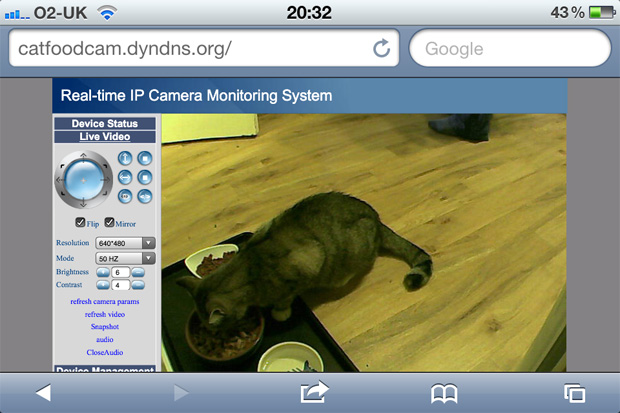
1. We have set up two cameras in our test location. The first monitors the front door so we can see who's calling while we're working upstairs (helping us ignore unwanted salespeople); the second monitors our cat's bowl (we've had problems with neighbourhood cats coming in, and this saves us running downstairs every time we hear the flap opening).
Be careful when positioning your camera to respect your neighbours' privacy. Cameras used in a purely personal and domestic capacity are exempt from the Data Protection Act, when used to prevent burglary, even if the camera overlooks the street or other areas near your home (see this point in the Information Commissioner's Office Data Protection FAQ), but you shouldn't needlessly film your neighbours' comings and goings.
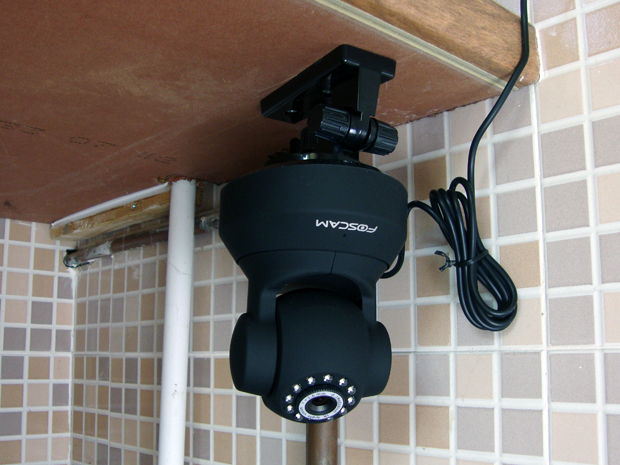
2. Fix your camera to a stable surface, screwing it into position if possible. Here we are using a Foscam FI8918W wireless camera, which comes with a tilt and swivel base, allowing us to remotely reposition the camera head over the Internet and change the broadcast view. This costs £60 from Amazon and ships with a bracket that we have used to screw it to the underside of a kitchen counter. Although the camera has been mounted upside down, the software installed on its internal Web server lets us flip the captured image through 180 degrees to correct it.
Sign up to free Dynamic DNS forwarding
3. Unless you have a business broadband deal, it's unlikely you'll have a fixed IP address, so the address at which your router can be found over the Internet will change from time to time. This makes it impossible to guarantee that anyone wanting to access your webcam would be able to locate it using the same details each time.
Dynamic DNS services, like that provided by dyn.com, maintain a database of changing IP addresses, assigning you a subdomain that forwards to your home broadband connection, allowing you to remotely access your IP camera.
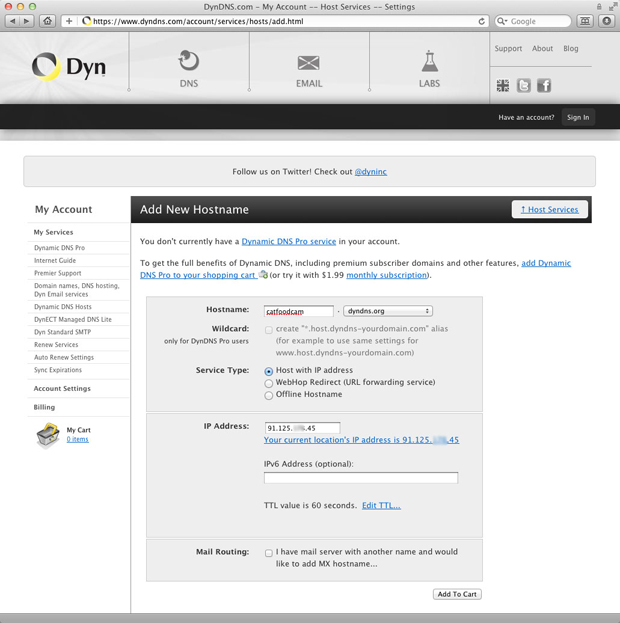
Point your browser at dyn.com/dns/dyndns-free and click Get It Now to start the sign-up process. Choose a hostname, leave the service set to Host with IP Address and click the link containing your IP address to auto-populate the field above it.
Click Add to Cart, then provide a password and email address for the confirmation message. dyn.com will send you a message containing a link which, when clicked, will let you complete the setup process and activate your chosen hostname.
Set up your router
4. Although your hostname -- catfoodcam.dyndns.org in our case -- will now point towards your home broadband connection, it might not be accurate in the future if your ISP-provided dynamically-assigned address changes. You therefore need to set your router to keep the remote database at dyndns.org updated with any changes it detects.
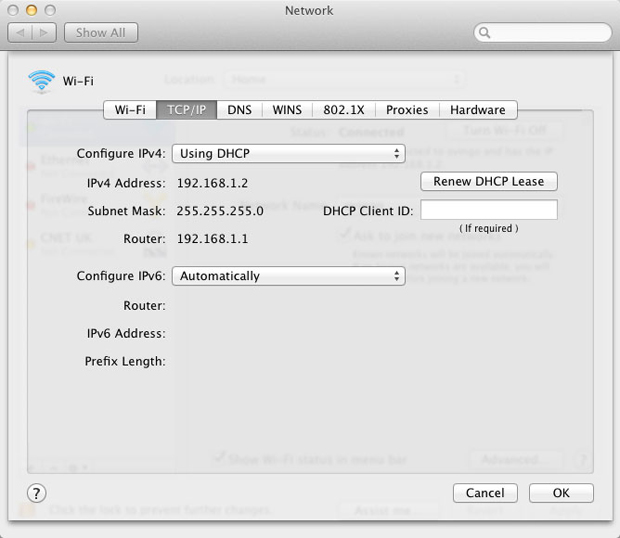
Open your router configuration pages by typing its address into your browser (find this on Windows by opening Control Panel and clicking Control Panel > Network and Internet > View Network Status and Tasks > Local area connection (under Active Networks) > Details. On the Mac go to System Preferences > Network > Advanced > TCP/IP).
5. Every router's configuration pages will differ slightly, so check the main section headings for either Dynamic DNS or DDNS. Enter the required details, which will likely consist of your chosen hostname, plus your DNS service login details. This will allow your router to write its ISP-assigned address to your subdomain's record each time it changes.

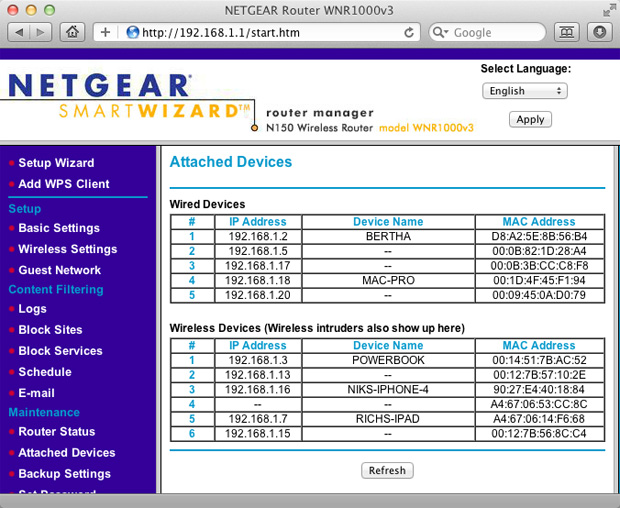
6. You now need to re-route any incoming Web traffic arriving at your router to your IP camera. You should already know its address on your network as you will have configured it through your browser, but if you can't recall what this was, check your router's list of connected clients or attached devices and make a note of its IP address. On our network, the devices at 192.168.1.15 and 192.168.1.13 are our front door and kitchen cameras respectively.
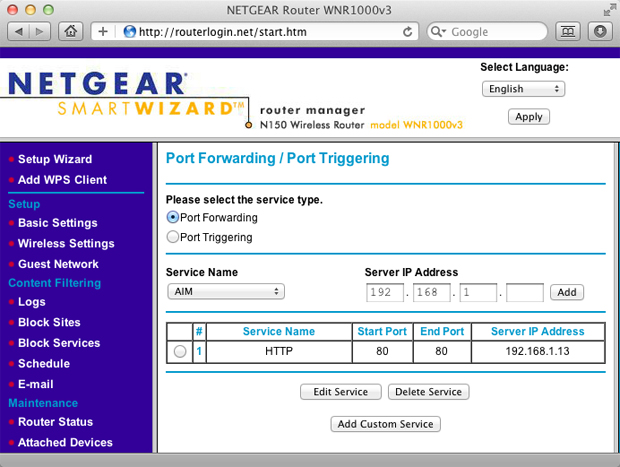
7. Check your router menu for Port Forwarding (sometimes called Application Sharing) and open a new port. Select HTTP as the service type and enter the address of your webcam as the destination for incoming traffic. If you are asked to provide a port number or port range then use 80 for both the starting and ending ports. Save and, if necessary, reboot your router.
8. You can now close your router configuration pages and open a new browser window. Point this towards your dynamic subdomain and you will reach your IP camera's login screen, allowing you to remotely monitor activity in your home. If possible, do this with a device that isn't attached to your local network, such as a 3G-enabled phone, to prove that the system actually works before you need to rely on it.
A note of caution
This method should only be used to create a personal home security system. It's unlikely we'd fall foul of the law making pictures of our cat available to the public at large, but if we were to do the same with people coming to our front door, we could fall foul of the Data Protection Act as we'd no longer be using the images in a strictly personal domestic capacity to protect our home.