How to create a dynamically resizable disk image in OS X
With a few tweaks, you can make disk images in OS X sized to fit their contents.


While convenient for file distribution, you can also use disk images as containers to store various files on your system, or on a local network server, especially if you use their encryption routines to secure them with a password. By doing this, the image contents will only be accessible by you.
Disk Images can be created in Disk Utility, by clicking the "New Image" button in the Disk Utility toolbar. When this is done, you can set the image size and optional encryption options.
When done, the image will create and mount, allowing you to copy files to it; however, you might notice that by default the image size is the same as it was when you created it, so if you created an image that was 1GB in size, then the image file would be 1GB.
Luckily this can be done, using one of two methods:
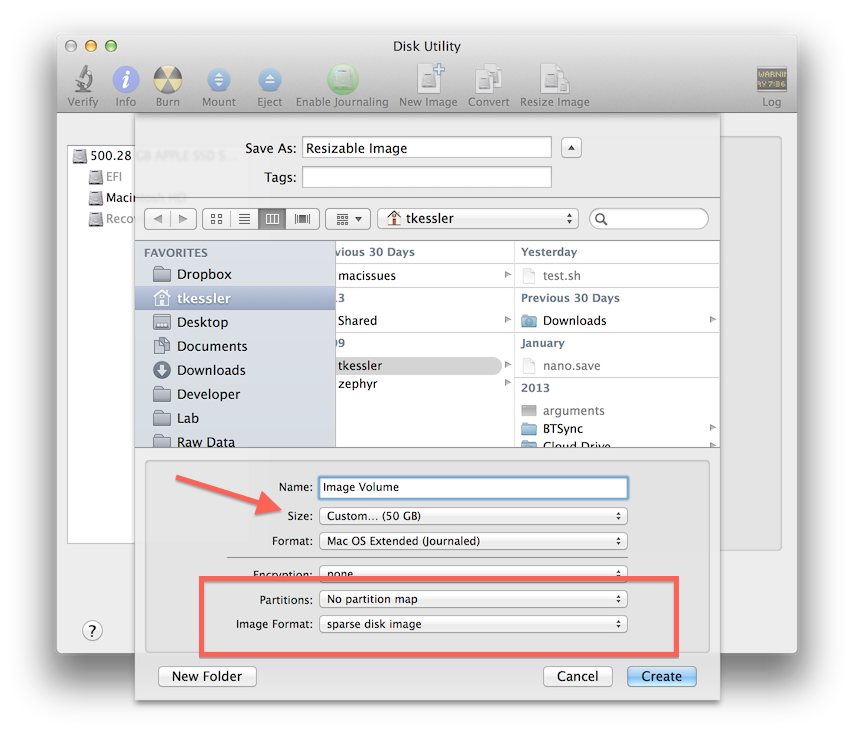
- Sparse or sparsebundle image with no partition scheme
Apple's "sparse" and "sparsebundle" image types are dynamically resizable images, and if you create one without a partition scheme then they will start at the size of the files you place in them, and grow as you add more files, up to the maximum size you set when creating the image. Simply select either "sparse" or "sparsebundle" from the "Image Format" menu when creating the image, and then choose "No Partition Map" from the "Partitions" menu. - Use compressed disk images
Instead of choosing "sparse" or "sparsebundle" for the image type, choose one of the compressed options. This will not only make the image size grow with its contents, but could also potentially make it smaller than the contents you store on it, as they will be compressed. Keep in mind that compression is dependent on the type of file being compressed, so if you have a bunch of zip files or mpeg4 movies that are already highly compressed, then you might not see much benefit; however, if you have only text files, then you may see these become highly compressed.
Questions? Comments? Have a fix? Be sure to check us out on Twitter.