Why You Can Trust CNET
 How I made my own budget knockoff Nanoleaf lights
I copied the style, but not the price, of these high-design smart lights.


- Author of the award-winning, NY Times-reviewed nonfiction book The Tetris Effect; Longtime consumer technology expert for CBS Mornings
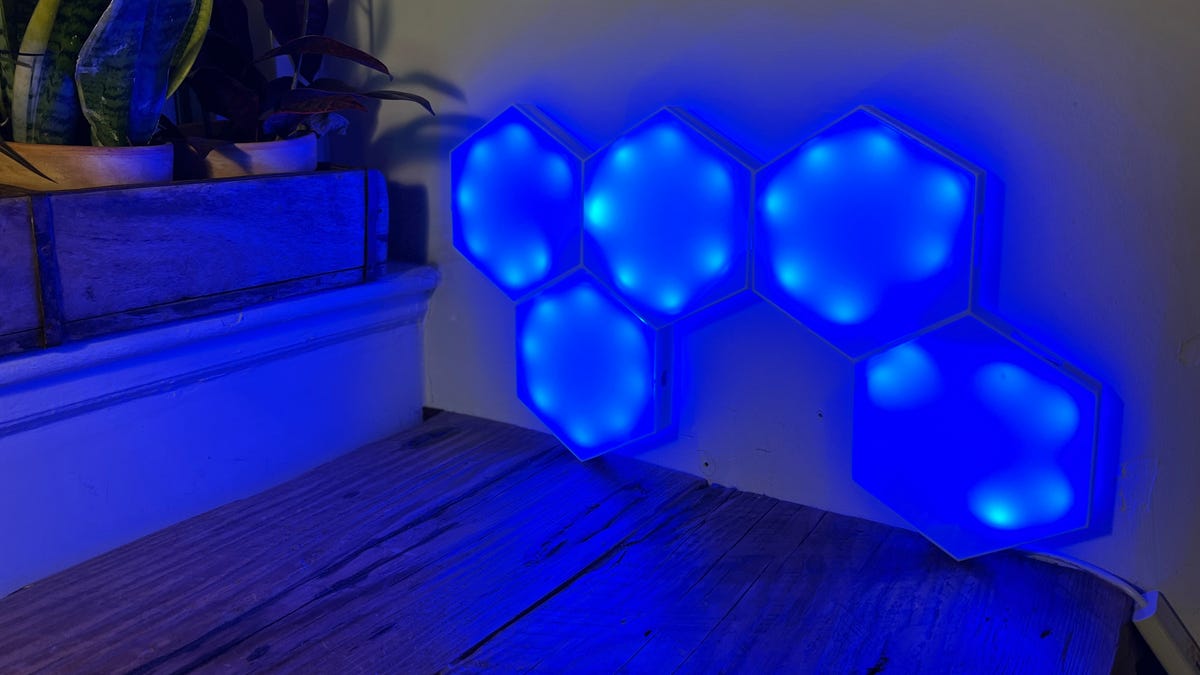
This 3D printed creation adds some ambiance to my work setup.
I love Nanoleaf lights, the touch-sensitive color-changing wall-mounted smart light panels. But they're pricey. A starter pack of the latest version, Nanoleaf Lines, is $200. I've got some Nanoleaf Canvas lights, the square ones, and I think they're great -- I use them for background in some of my product photos.
But, I also thought there must be a way to create something similar myself, using a 3D printer and some individual smart lights. I turned to Thingiverse, the default repository for 3D printing files and found many, many designs for panels, connectors and accessories to either augment your existing Nanoleaf setup or replace it with something homemade.
Yes, I made the desk, too, out of reclaimed wood.
I started with a simple hex design and wanted to incorporate a smart LED light strip. In this case, I used an 80-inch GE light strip, which is usually around $40, but I picked it up for $22 on Prime Day (I've seen it on sale other times as well).
Naturally, my design was going to have limitations. Nanoleaf lights are touch-sensitive, can respond to music and can vary their color panel by panel. My light strip could be controlled by an app or through Alexa by voice, and it could change colors, but that was about it.
This is the design I started with, which was posted on Thingiverse. I then took the model and imported it into a 3D program, where I created a new version with larger openings in the side for my GE strip to pass through. Here's the file for my updated version.

I've uploaded my remixed design to Thingiverse.
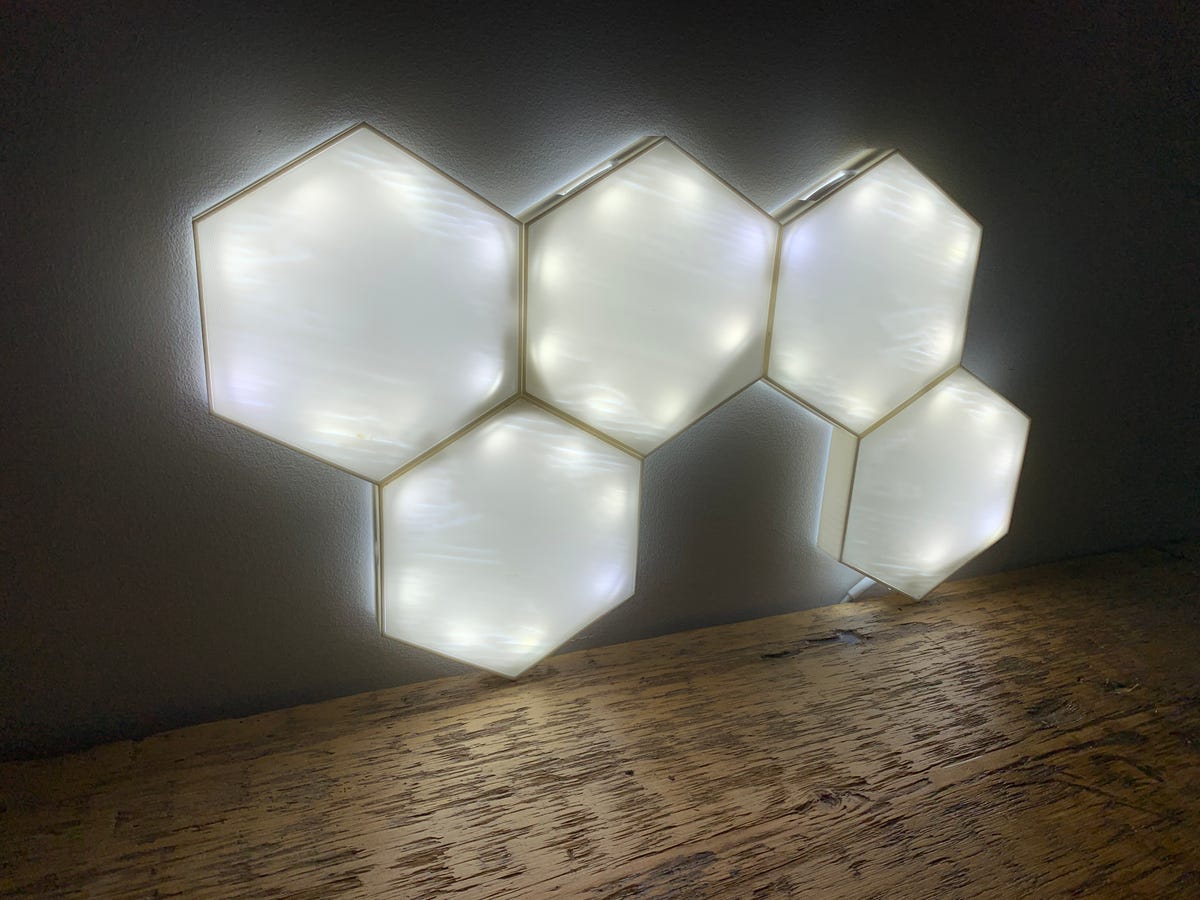
To match my 80-inch light strip, I printed five hexes, each of which took about 3 hours to print. The front panels were also 3D printed, using a thin layer of white filament, so the end result was semi-translucent and light colored lights would shine through. Each top panel took about an hour to print.
But, in my initial construction, I wasn't happy with the look of the 3D printed top panels. They weren't smooth enough and let the light through unevenly. So I went back and made some panels of exactly the same size out of 3mm translucent acrylic, using a laser cutter. If you just have a 3D printer, those panels will work, but you may have to play with your 3D printer settings to get just the right thickness.
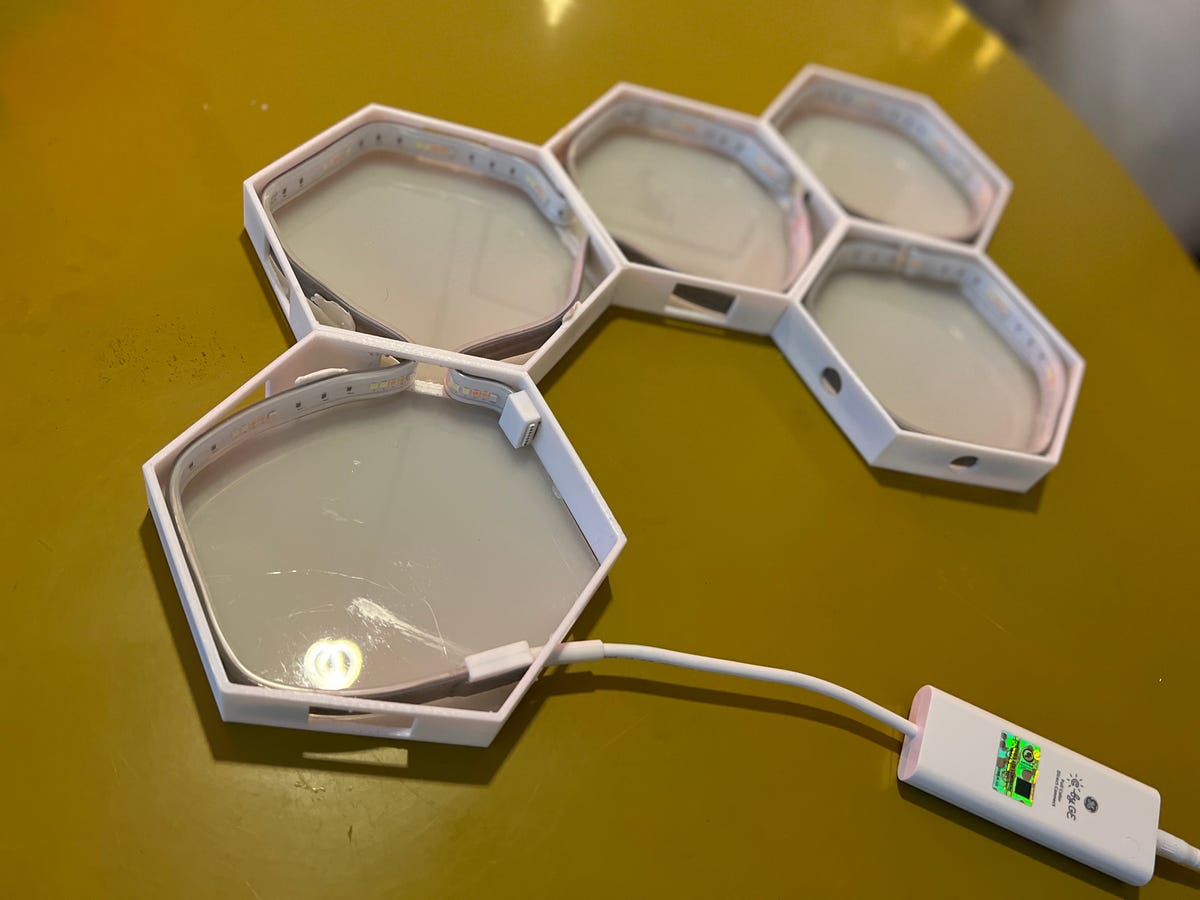
The underside of the panels, with the lightstrip threaded through.
The panels were assembled and attached to each other with regular super glue, and I threaded the light strip through them, attaching it to the inner walls with a simple hot glue gun. Once they were assembled, I hung the final product on a wall and ran the light strip cable to an outlet.
My homemade version isn't as slick or functional as real Nanoleaf lights, but I love hacking together my own versions of things and it was great building something both functional and aesthetically pleasing.
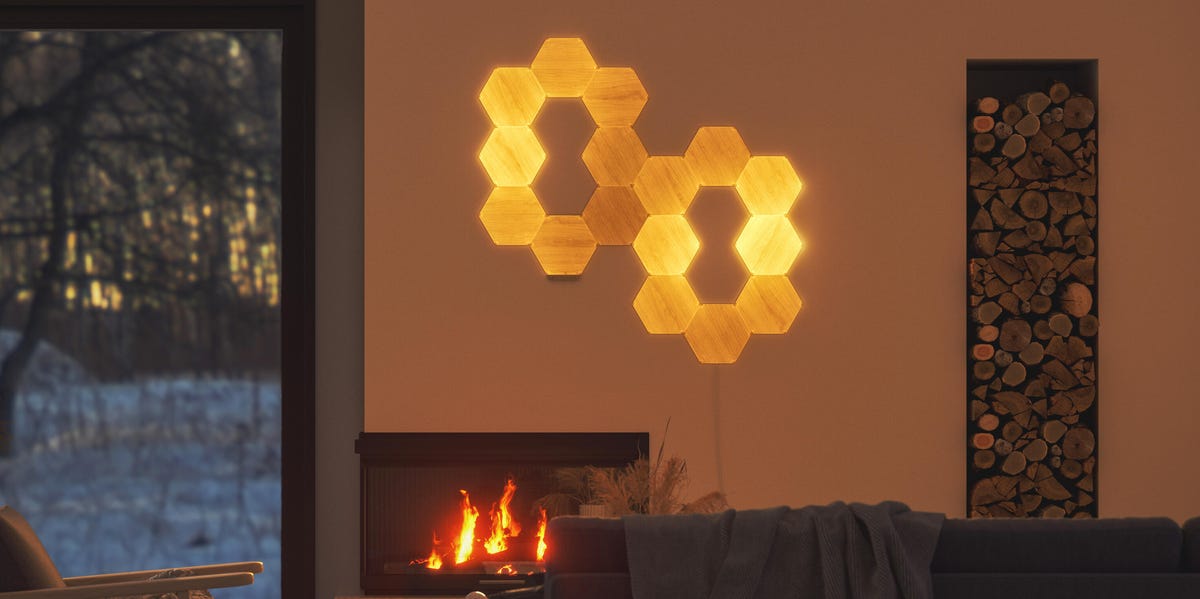
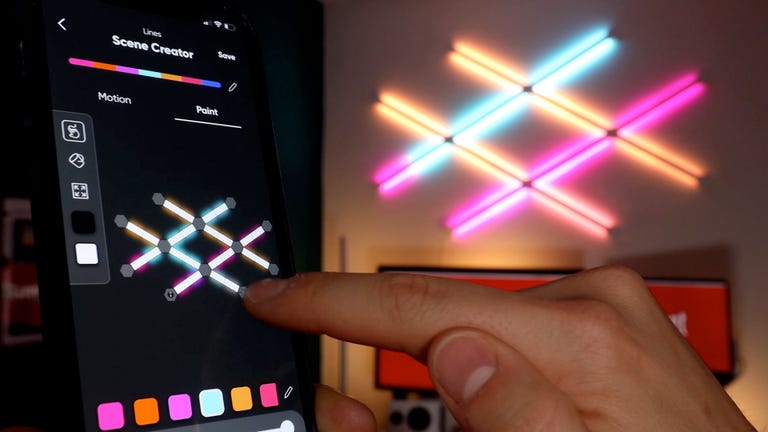
For comparison, here is the real deal from Nanoleaf.
Is this actually cheaper than just buying ready-made smart light panels? It depends on how you look at it. The cost of materials was under $50, but that's if you already have a 3D printer. If you don't, this is going to cost you more than a Nanoleaf starter pack, although both the 3D printer and the spool of PLA filament you'll need will last far beyond this project.
Here's my shopping list of the exact parts I used, but other light strips and other 3D printer filament will work also. For the printing, I used an Anycubic Vyper 3D printer, which costs $429, but is an excellent beginner-friendly printer with a large print area.
Read more: The best 3D printers for 2021
My Nanoleaf knockoff shopping list
- GE Cync smart full-color LED light strip
- Hatchbox PLA 3D printer filament, white
- 3mm Milky White acrylic 12- by 12-inch sheet (if you want to replace the 3D printed front panels)