 Why You Can Trust CNET
 Best Garage Floor Tiles for 2022
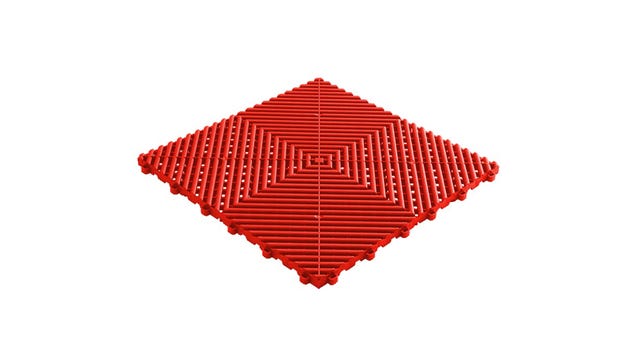
Garage floor tiles offer durable and low-maintenance ways to sustain a pristine garage floor, keeping it looking as good as new under most conditions.


Garage floors can handle a lot of wear and tear, but even freshly poured concrete can start to look rough when oil, dirt, and other debris are constantly being driven into it. The elements are stacked against it from the beginning, and keeping it clean can be a hassle.
Even beyond that, anyone who's spent any time rolling around on a slab of cold concrete knows it's not fun. Sure, a good mechanic's creeper helps, and we've got a handy list of our favorites right there, but not everyone can afford a great car lift for their garage. If you're into DIY you've surely spent some time kneeling, sitting or lying on the concrete.
For those with a DIY sensibility, garage tiles are a perfect solution to not only make your floor look better than new, but to also provide a durable, more comfortable work surface all in a couple hours' worth of work.
I just went through the process myself, and here are my picks for the best garage tile, along with some other tips and accessories you're going to want.

When it comes to premium garage floor tiles, my extensive research narrowed it down to two players: RaceDeck and Swisstrax. For my garage I went with RaceDeck for one overriding reason: the ability to mix and match tile types.
Both companies offer either solid or ventilated tiles. For my garage, I wanted ventilated tiles beneath the cars, so that rain or winter slush would drain through. However, I wanted solid tiles around the edge of the garage, where shelving and cabinetry sat, and on the far right edge for my wife's wood shop. (Sawdust and ventilated tiles seemed like a bad mix.) While Swisstrax offers both types of tiles, they're incompatible with each other; you can't mix and match.
That made the decision easy. But, after doing some durability testing, the RaceDeck tiles extended their advantage.
Compared to the Swisstrax tiles, RaceDeck is stiffer and decidedly louder to walk upon. That means RaceDeck does have a slightly less premium feel to it, but they are in fact the more durable tile. My testing experiences are detailed below.
RaceDeck is also available in a huge array of colors and can even be had with a Harley-Davidson license if your garage doesn't already have enough bars and shields. There's an easy, online designer for coming up with your perfect layout and installation is relatively easy. More on that later, too.
Ultimately both of these brands make durable, great-looking tiles, so if you can find one significantly discounted over the other, go for it. But, in my testing, RaceDeck is the better choice.
Although RaceDeck edged out the win in my testing, the Swisstrax tiles are still a really great choice. While they don't easily mix and match, Swisstrax offers a variety of different sizes and types of tiles for any application, and their online garage designer software is comprehensive. I also found their palette of colors to be more appealing. As far as durability goes, Swisstrax tiles will still take a beating and come back for more, and have all the same benefits of easy installation and repair should you ever need to replace a tile. So, price out both brands and go with the one that fits your budget best!
Important things to know about garage floor tiles
- They're durable, but not invincible. If you're particular about marks or dents in your floor, you may need to put something under jack stands and the like.
- Installation isn't hard and can take just an afternoon if your garage is small, but if you have a lot of uneven walls or pillars or the like, cutting around them will definitely slow the process down.
- Open, vented tiles like RaceDeck Free-Flow will let salt and winter crud drain down through them. If your garage has a drain, it'll be easy to hose them clean in the spring. If not, you may need to pull the tiles every few years to wash them off. (It's easier than it sounds.)
- Make sure to order some extra tiles. Should you make a wrong cut or break a tab while installing, you'll be glad to have some spares around.
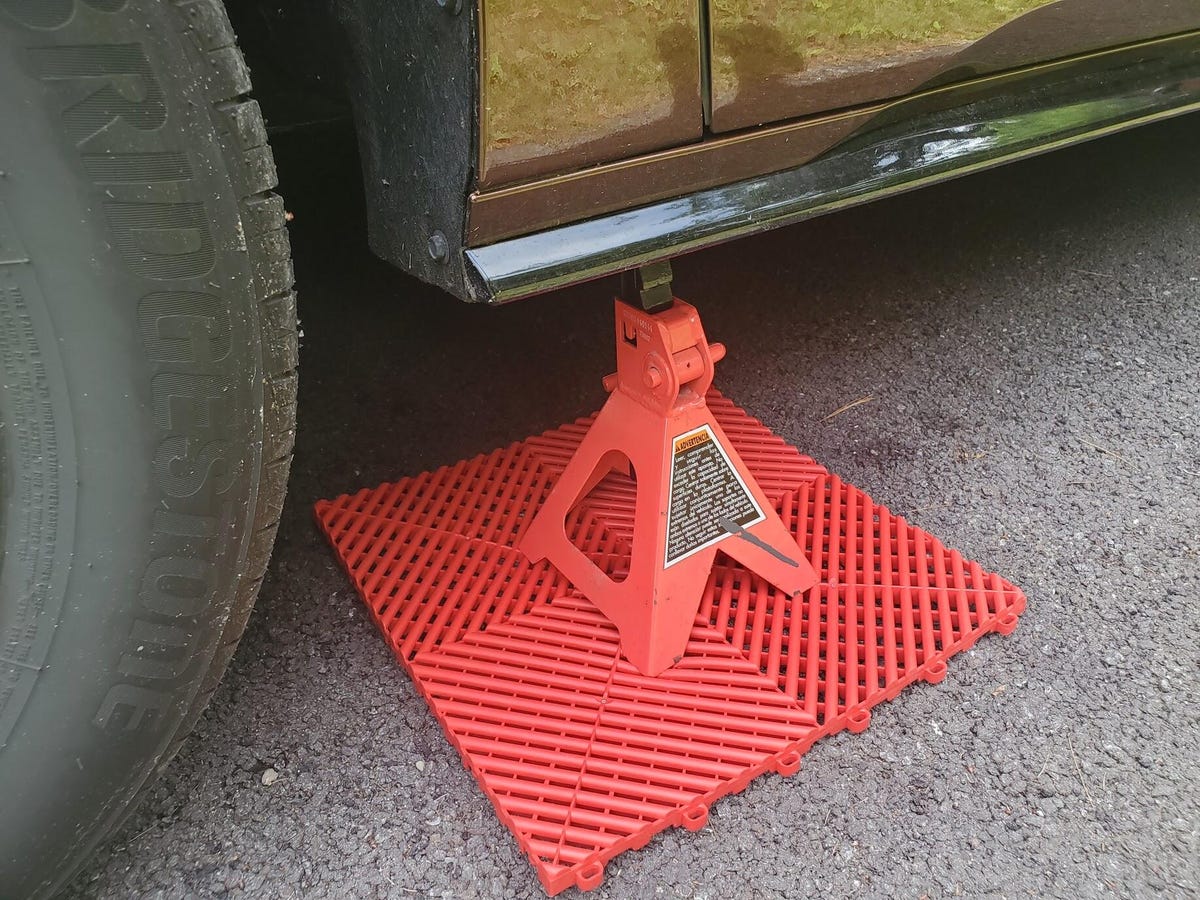
Jack stands are a vented tile's worst enemy -- but even in this worst-case scenario, the damage was minor.
Durability testing
If you read user impressions online of garage tiles, most folks recommend putting a piece of wood or the like down beneath typical jack stands with their sharp edges. So, when it came time to test the durability of RaceDeck vs. Swisstrax, I reached for my cheapest, skinniest jack stands and the heaviest car I could find: a 4,500-pound hybrid minivan.
I used sample ventilated tiles from both brands, a Free-Flow tile from RaceDeck and a Ribtrax Pro tile from Swisstrax. I set the front of the van down on two jack stands, the left on Swisstrax and the right on RaceDeck, then left them there for a few hours while I went off and played some pinball. When I came back, I could immediately tell the winner before I even removed the test vehicle.
The Swisstrax tile had collapsed slightly, its edges bending up. The RaceDeck tile looked unaffected. After removing them from their burden, it was clear the RaceDeck tile fared better. While it suffered damage, a few creases showing the edges of the stand, that was minor compared to the discoloration and deformation suffered by the Swisstrax.
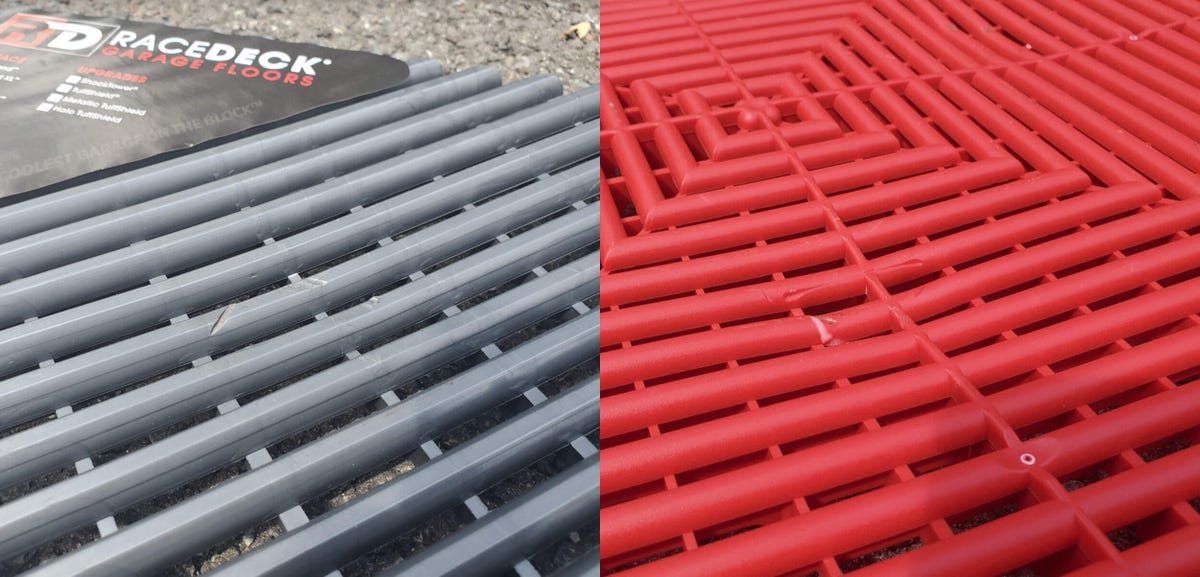
The damage on the RaceDeck tile (left) vs. on the Swisstrax tile (right).
The other thing I saw multiple people mention was heat resistance, so I grabbed my propane torch. I subjected both tiles to maximum flame for a full 10 seconds. Extreme? Yes, but maybe not unrealistic if you're a little clumsy and your Bernzomatic torch gets away from you.
Here, again, the RaceDeck tile fared better, changing sheen (getting slightly glossy) and smelling something fierce, but that's it. No deformation at all. After it cooled I could barely tell where I held the flame. The Swisstrax tile, on the other hand, began to warp under the torch.
Neither tile failed either test, but the RaceDeck tile fared better.
Garage floor tiles vs. epoxy sealant
The traditional way of doing a garage floor renovation is epoxy sealant, and this can be a good option in many cases. However, don't be tempted into thinking a cheap, DIY epoxy kit is going to be a quick, easy and durable solution.
When it comes to the application of these kits, prep work is key. If your concrete isn't properly prepared, including extensive cleaning and etching, your fresh epoxy will be quickly reduced to little bits of glitter stuck to the tires of whatever car you roll in.
A better way to go is to let a pro come in, but be prepared to pay upward of $6 to $10 per square foot. The pros will do it right, and they'll hopefully include some kind of guarantee, but you're going to pay for it. Plastic garage tiles cost about half that, though installation of course is up to you.
Also, be aware that epoxy floors can be very slippery when wet. This was a major worry for me with my motorcycles, as a little slip could have expensive (or painful) consequences. Epoxy coatings can include abrasives like sand or rubber particles, but these may wear away over time.
Thanks to the cost and the grip concerns, I decided to go with tiles for my garage.


Measuring and ordering garage floor tiles
An accurate measurement is a crucial first step. Clear everything out of the way on the floor and get your dimensions down as accurately as you can. Note any odd shapes and sketch yourself a diagram. You'll want this later.
Also, measure any entryway to your space and mark those down, too. Any openings where you'll be driving or rolling anything onto the tiles will require transition tiles. These are angled pieces that allow you to drive on to or off of your new floor more smoothly, protecting the edges.
Both RaceDeck and Swisstrack include online design tools, so plug those figures in and request a quote. Don't forget to add in those edge pieces, and I'd highly recommend getting an extra handful of tiles for when you make a mistake while cutting, or just in case you somehow manage to break one down the road.
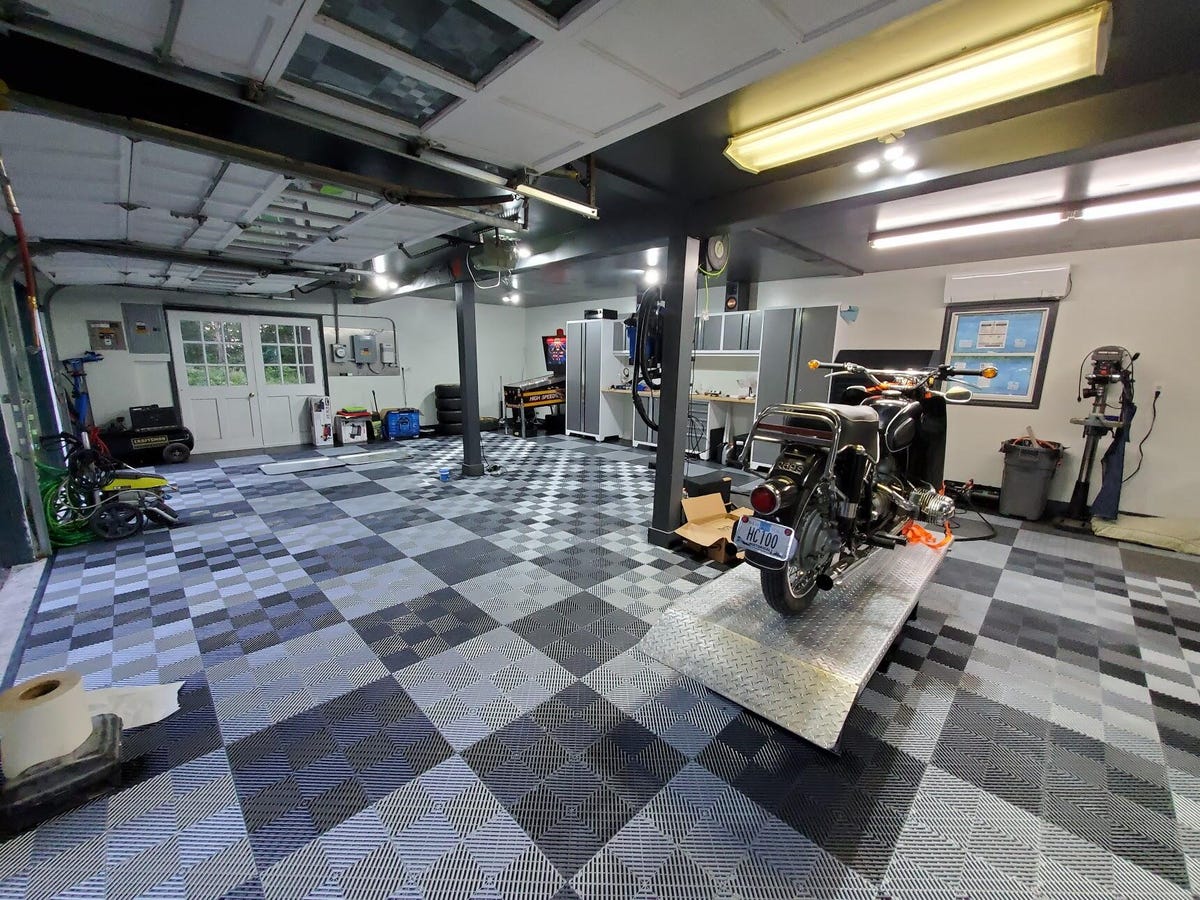
After installation, the tiles provide an amazing look. It's a huge upgrade over the old, stained concrete.
The garage floor tile install process
OK, so watch any of the videos on how to install these flooring solutions and you'll see just how easy it's all supposed to be. And it can be easy -- if your floor is perfectly flat and rectangular. If your floor is uneven, oddly shaped or, heaven forbid, features support posts like mine, you may be in for a rougher go.
The basic idea is that you start in one corner and then lay tiles down in two directions from there until you're done. Each tile clips into the tile above or to the side, and you just work outward. If you can find a helper this makes the process go a lot more quickly. It is possible to overlap tiles and stomp on them to get the tongue and grooves to engage, but I found a rubber mallet to be a much quicker way to go. Just make sure you don't hit too hard. Breaking tabs is hard to do, but it's definitely possible.
At some point you'll almost surely come to a point where a tile will need to be cut, either because the dimensions of your floor don't line up with the tile or because you have a corner or post to get around. Leave those out and cut 'em in later. A jigsaw makes quick work for corner cuts. If you're cutting a lot of tiles for length, a table saw is a better option, but be prepared to clean up a lot of plastic mess either way.
My approximately 1,000 square foot installation took my wife and I about eight hours total, but we were hampered by an odd-shaped garage, uneven floor and, yes, a lot of posts. We had a lot of cutting to do. Simpler installations will go a lot more quickly.
Oh, one final tip: make sure you leave a gap around the edge of the tiles. Follow the manufacturer's recommendation in this case. This is vital as the tiles will expand if they get warm, and you don't want your tiles lifting themselves up in the summer.


Garage floor tile maintenance
Once they're down, there's not a lot that you'll need to do with your tiles. As mentioned above, if you're working with old-school jack stands with sharp edges, you may want to put something beneath them if your car will be sitting on them for an extended period. But in my testing, the resulting marks were light.
What happens if you spill some oil? Fine sawdust poured over the spill and vacuumed up later will get the worst of it, but you'll need to pull the tile if you really want to get it all. Really, though, you don't need to. You put these tiles down to hide oil stains, right? Don't sweat a few more.
And road salt? Slush and road grime will melt down through the grates in your tiles and can accumulate down beneath the tiles. If your floor has the right slope or, ideally, drains, hosing the tiles down is an easy fix. But, you may still need to lift the tiles to clean beneath them every few seasons. This is easier than it seems since you can split the tiles down a seam and pull them out in large segments, then slide them back into place.
Accessories
Having a few tools on hand will make the installation a lot easier.
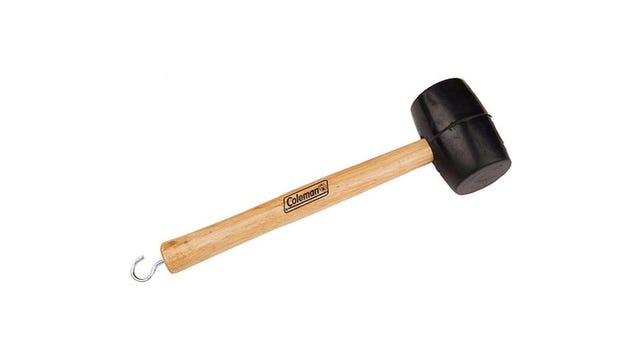
A rubber mallet is a great way to get these tiles down. I like this one because it's cheap, lightweight and has a hook on the end. It's perfect for hanging it on the back of a workbench, even though the hook was actually designed for pulling up tent stakes. (Who's going to haul this thing along for camping?)

You'll probably be spending a lot of time crawling around on your knees to get these tiles down. While the tiles themselves will make that more comfortable than crawling on concrete, knee pads will make the whole process that much nicer. These pads are cheap and comfortable, though they didn't work well for my wife's smaller knees.
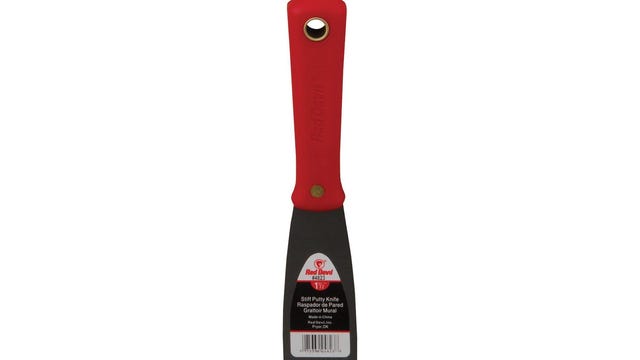
You'll need to pull up a tile at some point. That isn't a terribly difficult task, but it's made a lot easier with a putty knife. You'll want a stiff one like this one to help pop the seal between adjacent tiles.
Garage floor tiles FAQs
Are garage floor tiles worth it?
Absolutely, especially if you're keen on the DIY approach. Install is far easier than all the prep work required for an epoxy solution and is generally far cheaper than paying for a professional epoxy job. It also creates a modern, clean look that'll make your garage look like a Formula One paddock!
Do garage floor tiles hold up?
In my experience, yes. Whether tortured by rusty old jack stands or put on the wrong end of a propane torch, the tiles shrugged off the abuse. They're remarkably durable.
What color are garage floor tile kits?
These days you can get just about any color you want. Whether it's Tropical Orange or Techno Green, it's just a click away. Tile brands are even partnering up with consumer brands like Harley-Davidson to ensure that your floor matches your ride!
How much do garage floor tile kits cost?
Pricing varies depending on tile style, brand and quantity ordered, but expect to pay in the ballpark of $2 to $4 per square foot.
Are garage floor tiles better than epoxy?
If you're looking to go DIY, absolutely. The tiles are much easier to install than it is to handle all the prep work for a proper epoxy install. However, if you're looking for a permanent solution and have the money to pay for a pro, epoxy floors may hold up better in the long run.