 Why You Can Trust CNET
 Ultimaker 2 3D Printer review: Well-designed but overpriced and unreliable
The Ultimaker 2 is such a well-designed 3D printer, but does it have enough to justify its expensive price-tag?


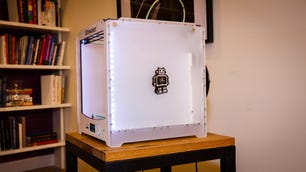
The Ultimaker 2 has a nice, well-thought out design and a large print platform for its compact physical size, promising to be a great printer for 3D enthusiasts who don't have lots of office space.

Ultimaker 2 3D Printer
The Good
The Bad
The Bottom Line
Unfortunately, in testing, it didn't perform as consistently as how good it looks, especially when I wanted to print large objects. And there are other shortcomings like the lack of support for printing directly from a computer and you must manually calibrate the print platform before you can use the printer.

The main reason it's hard for me to recommend it, though, is the price. At the current cost of $2,500 the printer is just too expensive for a single-extruder, especially when the Da Vinci 1.0 AiO (a much easier to use, more reliable machine which can also do 3D scanning) costs just $800. The Ultimaker 2 is available to ship to the UK and Australia, where the US price converts to about £1,600 and AU$3,000.
Read more: The best 3D printers in 2019 for beginners and budget creators

When working as intended, the Ultimaker 2 can print very large object for a printer of its physical size.
Excellent design
Measuring just 14.1 by 13.5 by 15.3 inches (35.7 by 34.2 by 38.8 cm), the Ultimaker 2 has an impressively large print platform that can build 3D objects of up to 9.1 by 8.9 by 8.1 inches (23 by 22.5 by 20.5 cm). That's slightly larger than what's possible with the Da Vinci 1.0 AiO, which is about twice the physical size.
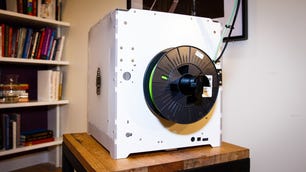
Out of the box, the machine is almost completely assembled. You just need to remove the packaging, install the glass print plate on top of the print platform and then the included standard PLA filament spool on the printer's back. The whole process took me just about 10 minutes.
The removable plate means you can clean it easily, which is a necessary part of 3D printing, especially after a big print job. And the fact that the printer uses standard filament spools means you can buy filament from different sources other than Ultimaker. Note, however, Ultimaker recommends 2.85mm filaments for the Ultimaker 2 and not the more readily available 1.75mm filaments.
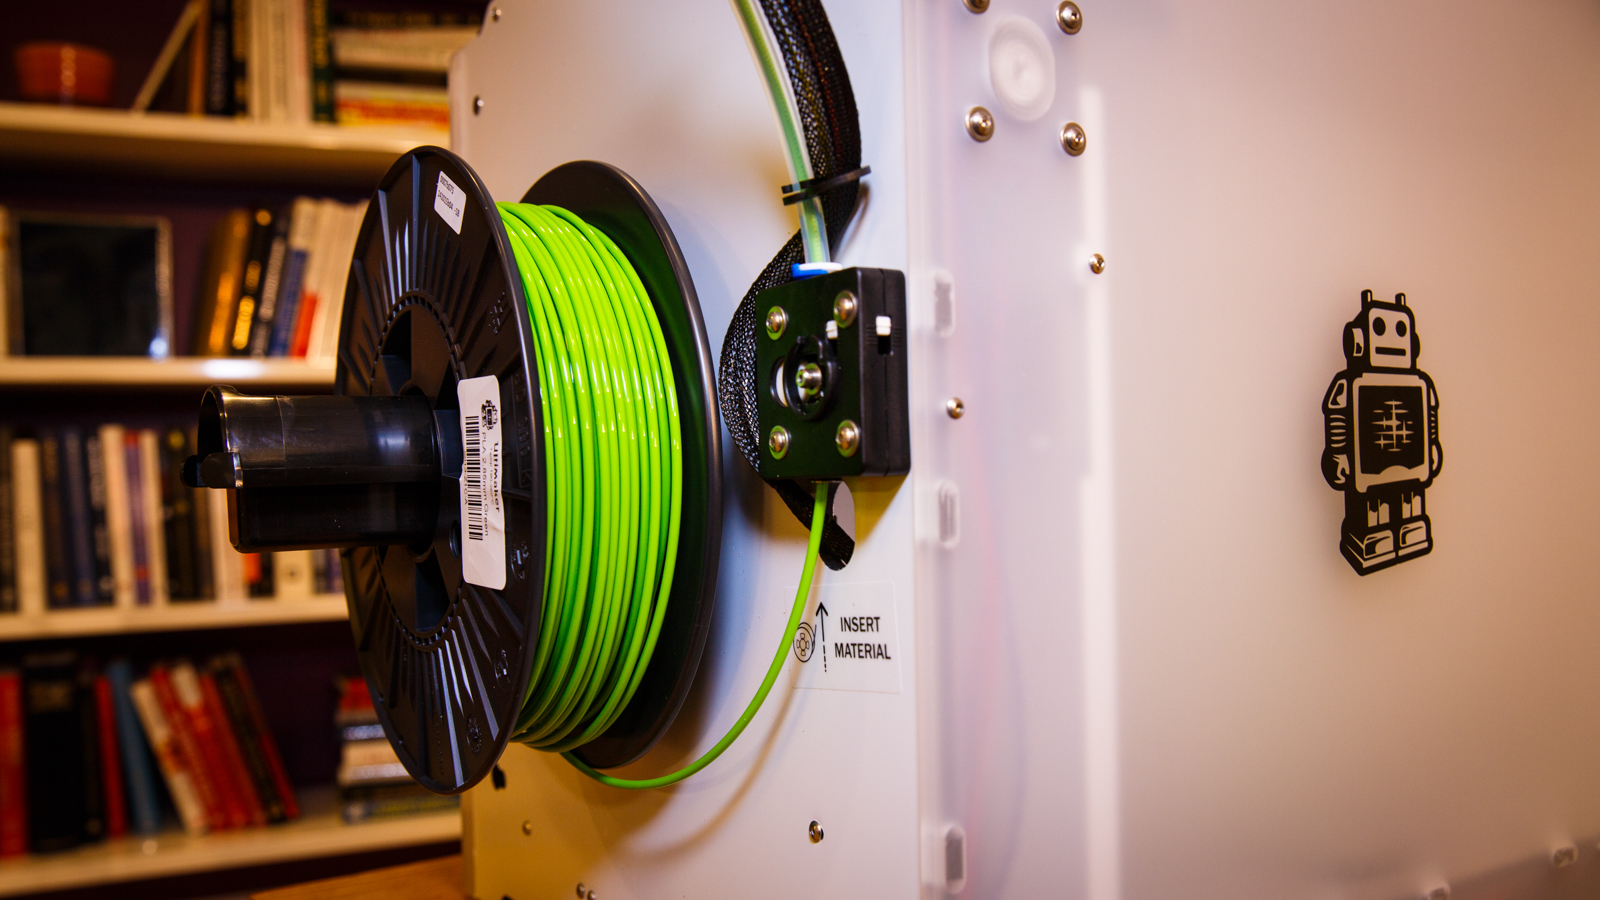
The Ultimaker 2 uses standard 2.85mm filaments with the motorized filament intake placed on its back, rather than the print-head.
Filaments are the raw material for 3D printing, just like ink cartridges in inkjet printers. They come in different colors and are basically easy-to-melt, quick-congealing plastic strings that are fed through the print-head's nozzle during a print job. The print-head then heats up and extrudes (that's why it's called an extruder) melted plastic on the print platform below to form the 3D object. This process is called fused filament fabrication (FFF) and it's the current 3D-printing technology used in all consumer-grade 3D printers.
The Ultimaker 2 can handle both PLA and ABS filaments, but as a single extruder machine, it can use only one spool of filament at a time and therefore can only print objects in one color. That's not a big deal, however, as you can always paint the object later.
Da Vinci 1.0 AiO 3D Printer specs
| Extruder | 0.015-inch nozzle single extruder |
|---|---|
| Print platform | Heated print removable plate |
| Print Technology | Fused Filament Fabrication |
| Build volume | 9.1 x 8.9 x 8.1 inch (23 x 22.5 x 20.5cm) |
| Print accuracy | up to 20 micron |
| Layer thickness | 0.4 / 0.3 / 0.2 / 0.1mm |
| Nozzle diameter | 0.015 in. (0.4mm) |
| Print speed | 30 mm/s - 300 mm/s |
| Printer control | 5-line LCD |
| Printable materials | 2.85mm standard filament (PLA and ABS) |
| Power source | 100 - 240V / 221W |
| External dimensions | 14.1 x 13.5 x 15.3 inch (35.7 x 34.2 x 38.8cm) |
| Inputs | SD card, USB port (firmware update only) |
| OS support | Windows, Mac OS X, Linux |
On the front, the print has a five-line resolution LCD screen and a large round dial button for you to control various settings and functions. It took me some time to get used to the dial since accidentally pressing on it can cause unintended actions, but after a while I really liked it. You also use the dial to control the very nice LED lighting inside (you can change the brightness, as well as choose to set the lights on at all times, during a print or once when a print is finished). Next to the screen is an SD card slot; the Ultimaker printer comes with a 4GB SD card preloaded with sample 3D models.
As mentioned above, before you can make the first print, you will need load the filament into the the print-head. The Ultimaker 2 makes this process easy by having the filament-feeding motor right next to the filament spool on the back. The motor connects to the print-head on top via a long tube. You just need to stick the filament string into the beginning of this tube and the motor will automatically pull the filament in for you. This process is more automated compared with other printers where you have to manually feed the filament directly into the print-head.
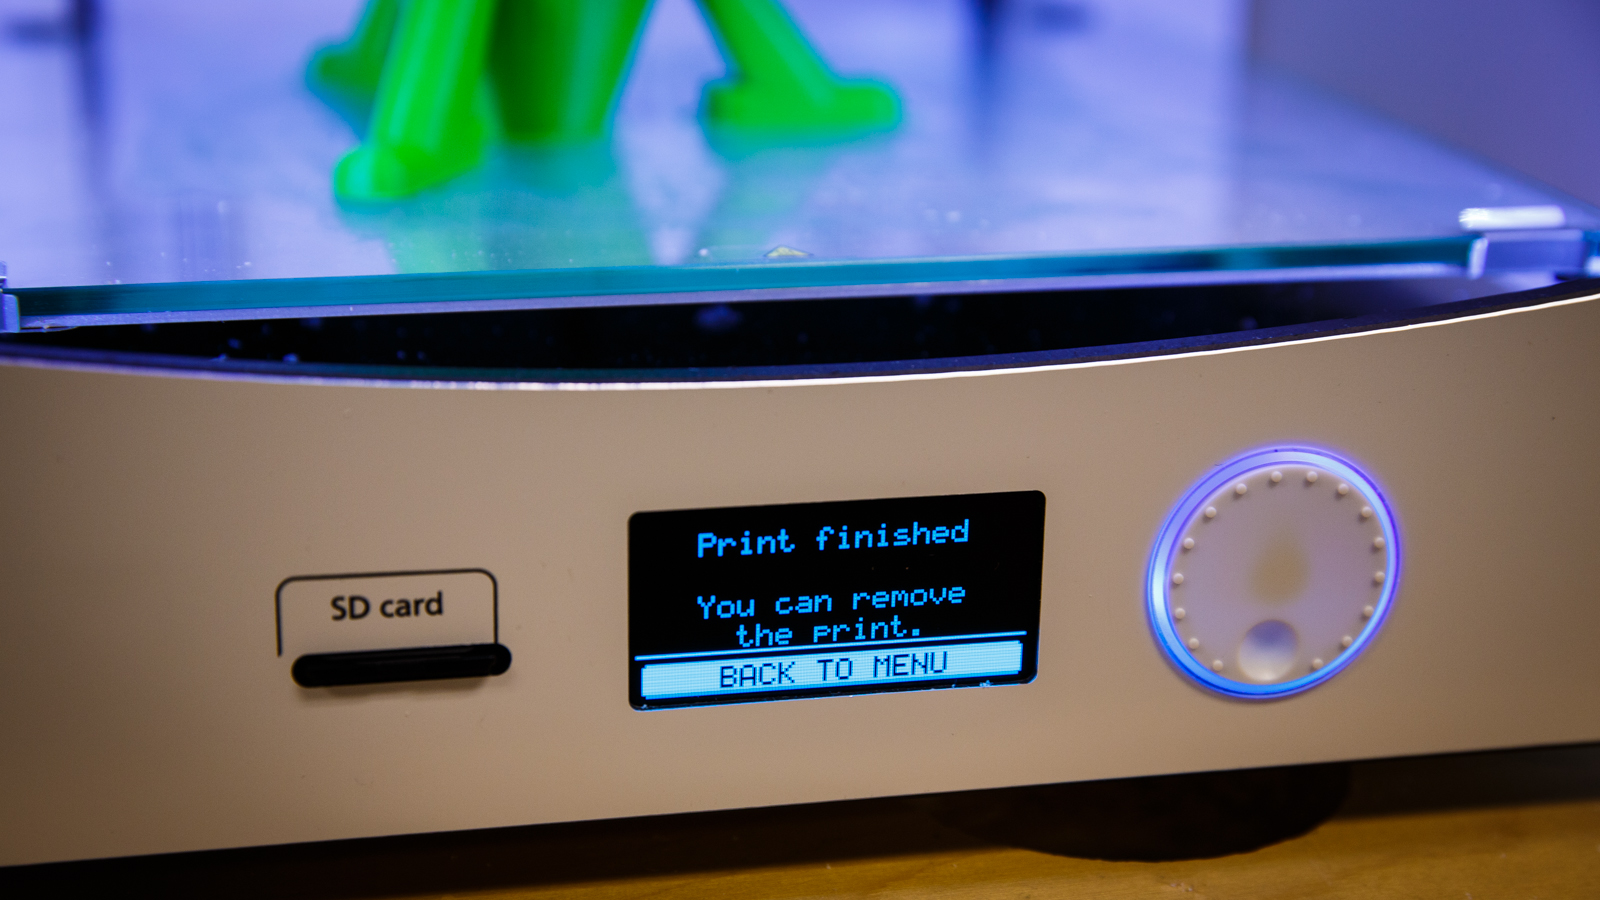
The printer can only print from an SD card but has a helpful LCD and dial button for controlling its functions.
Calibration needed
Unlike the be3D DeeGreen 3D Printer or the Da Vinci 1.0 AiO, you'll need to calibrate the Ultimaker's print platform before you can print. Calibration is an important process: you make sure the print platform's entire surface is at a consistent and perfect distance from the print-head's nozzle. If it's not set correctly, the printer won't produce an object which accurately reflects the 3D model. Generally this is the trickiest part of using a 3D printer; depending on your skill level, it can be very time consuming.
The Ultimaker 2's dial button comes in handy during this process. You can use it to raise the platform up or down about a half millimeter at a time, which is important since Ultimaker says the platform's entire surface needs to be consistently just one millimeter from the nozzle above. Still, it was quite hard to get this right in my testing. There are three screws underneath the platform for you to adjust the platform's tilt, but the fact that the print plate is made of glass makes it difficult to gauge the distance. (You can use a sheet of paper on top of the plate to overcome this, but then you need to offset the paper's thickness.)
After an hour or so of trial and error, I was able to calibrate the machine to my satisfaction and successfully print the tiny Ultimaker robot from a 3D model on the SD card. However, I needed to re-calibrate many times during the testing after failed prints. Note that each time you re-calibrate the printer, you will need to start from scratch. This is because at the beginning of a new calibration process, the printer discards all changes made by a previous calibration. In other words, you don't get to simply make changes to an existing calibration. For this reason, no matter how many times you've done it, each calibration is like the very first time and it's very hard to know if you've made improvements without a test print.
In the end, after many successful (as well as failed) prints, I wasn't sure if I had ever calibrated the printer properly. It would be so much easier if the Ultimaker 2 had come pre-calibrated like the DeeGreen or the Da Vinci.
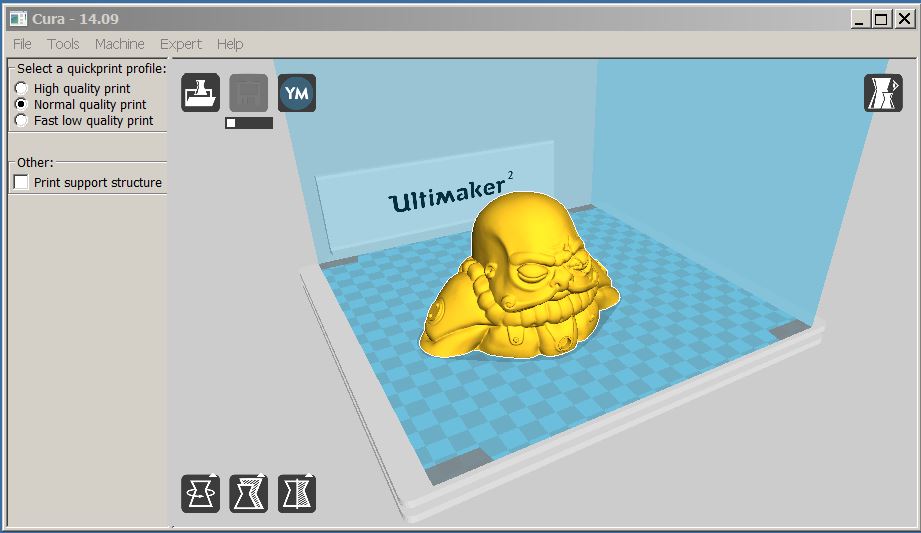
The Cura software is easy to use but doesn't allow for printing to the printer directly.
Easy-to-use software, direct printing not supported
The Ultimaker 2 connects to a computer via USB, but only to update the firmware. To print, you must use an SD card, so your computer will need to accommodate them too. The entire process is rather cumbersome, honestly. You can create the model on your computer, but then you have to save it to the card in the form of a .gcode file, then transfer the card to the printer to start the print job.
Of course it would be much more convenient if the Cura software also supported printing directly to the printer from a computer. Many computers don't have an SD card slot, after all. Ultimaker says its printers may support Wi-Fi printing in the future, but you're stuck with the SD card for now.
Other than that, the Cura software is easy to use. It allows for standard customization, including scaling, quality (high, normal, fast), print speed, the level of filling (hollow or solid), and so on. Also, you can send multiple 3D model files to a single print job as long as they don't exceed the max print volume. And on the plus side, you can use the .gcode files with other 3D printer and vise versa.
As for what to print, there's a huge collection of 3D object models at Thingiverse that you can use, and you can also find more at Youmagine.com. Of course, you could also invest in a 3D scanner.
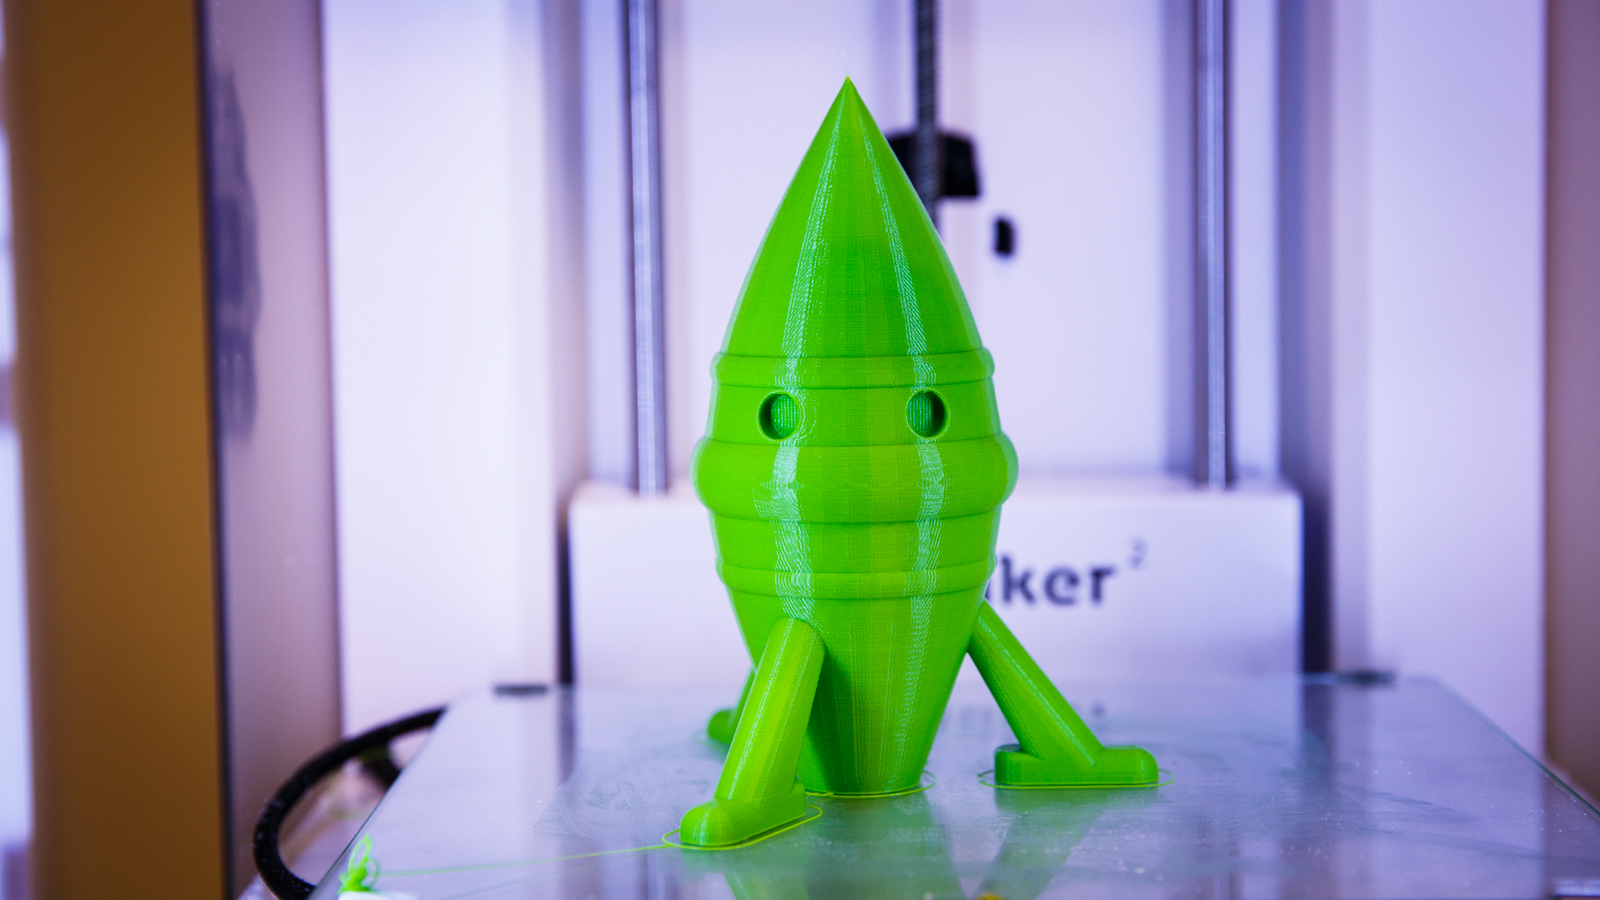
After some 30 hours of printing, including three failed prints, I finally printed this large rocket ship.
Inconsistent performance
I started by printing a few small objects and was very pleased with the performance. The printer was quick, and on par with the Da Vinci 1.0 AiO in terms of both speed and quality. For example, an iPhone 5 case took about an hour to finish on the normal quality setting. Prints look nice, with very precise detail.
When I moved to larger objects that took hours to print, however, it was a different story. Often, after printing for about 4 or 5 hours, the printer would stop for no apparent reason, or continue printing as if it wasn't properly calibrated. Each time I ran in to this problem, though, re-calibrating didn't better the outcome.
Since each large print job can take hours, it was difficult to get to the source of the problem. As of now, its performance was more inconsistent than other models I tested. From what I can tell, the calibration issue was the most likely reason for a large print's failure. Another reason might be faulty firmware, but I had updated the machine to the latest, and reset to default settings a few times.
Ultimately, if the printer can print small objects without any problems, why does calibration appear to be a problem for larger jobs? This remains a good question. (I informed Ultimaker about this inconsistency and at the time of this review, and the company is looking into it.) Overall, the experience was quite frustrating and the worst part was the fact that I kept second-guessing myself.

The printer prints small objects very well. Here are some of them (green) next to those printed by a competitior (white).
Other than that, the printer has excellent mechanics. Every part worked well and movements were sharp and fast. I could also print a lot of objects out of just half of a 1.7 lbs (0.75kg) spool of filament, which Ultimaker sells for about $65 (about £42 or AU$78). This is comparatively expensive, but you might be able to buy the filaments from different sources for less -- just make sure it's the standard 2.85mm consumables.
The printer is almost the quietest 3D printer I've seen. While it's not silent, it is quiet enough to not bother you in a room with medium ambient noise. Also, if you're bothered by the interior light, you can turn that off.
Conclusion
I really want to love the Ultimaker 2. It's the nicest, most compact 3D printer (for the size of its print platform) I've had my hands on and it works well when printing small objects.
However, I just can't see how this printer can cost $2,500 (£1,600, AU$3,000), considering there are other printers on the market with more to offer and which cost about a fourth of the price. To add to the pricing insult, the Ultimaker uses less popular consumables which are more expensive than others.
That said, I don't see why you should buy this printer now. Wait for the price to go down, or at least for the issues with large objects to be fixed via updated firmware. Personally, I would always think twice before buying any 3D printer that requires me to manually calibrate it.