 Why You Can Trust CNET
 Robox 3D printer review: Fast, innovative and frustrating
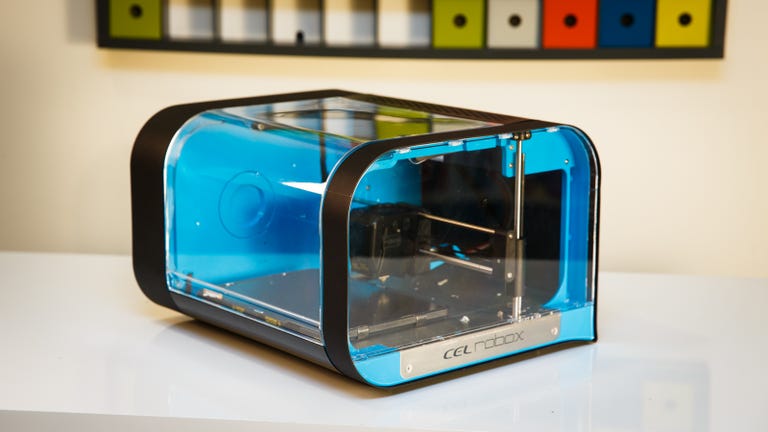
The Robox 3D printer from Cel is the first printer that uses two extruders to print from one filament source, making it the fastest FFF 3D printer to date. Here's CNET's full review.


The new Robox 3D printer from Cel is a great idea only half realized. Between its fast printing speed and uncommon features, there's a lot to like about it. Getting in the way, though, are poor print quality and an overcomplicated calibration process. That's why in the end, it can wind up being very frustrating.
Robox 3D printer
The Good
The Bad
The Bottom Line
The Robox is the first 3D printer I've tested that uses two nozzles for a single source of filament, which lets it print much faster than other machines. Unfortunately, to get the best results, you have to manually calibrate it through a difficult and lengthy process. But even worse, the speed didn't matter much in the end as the Robox's print quality was disappointing and failed prints occurred more often than I'd like to see.
Depending on your skills and level of patience, the Robox can be a good experience or a terrible one. I just found mine closer to the latter. Keep this in mind before spending $1,499 to buy one. (In the UK, it's £999.90, and in Australia it's currently on sale for AU$1,495.)
For something that's easier to use with more consistent print quality, I'd recommend the XYZPrinting Da Vinci 1.0 AiO, the Cube 3 from 3D Systems or the Be3D DeeGreen.
Advanced print-head, no PC-less printing support
With its two print nozzles, the Robox looks like a regular dual-extruder 3D printer when you first take it out of the box. Look closer, though, and you'll see something unusual: while other dual-extruder machines need a filament spool for each nozzle, the Robox uses only one (Cel prefers to call the spools "reels," but the only difference is in the terminology).
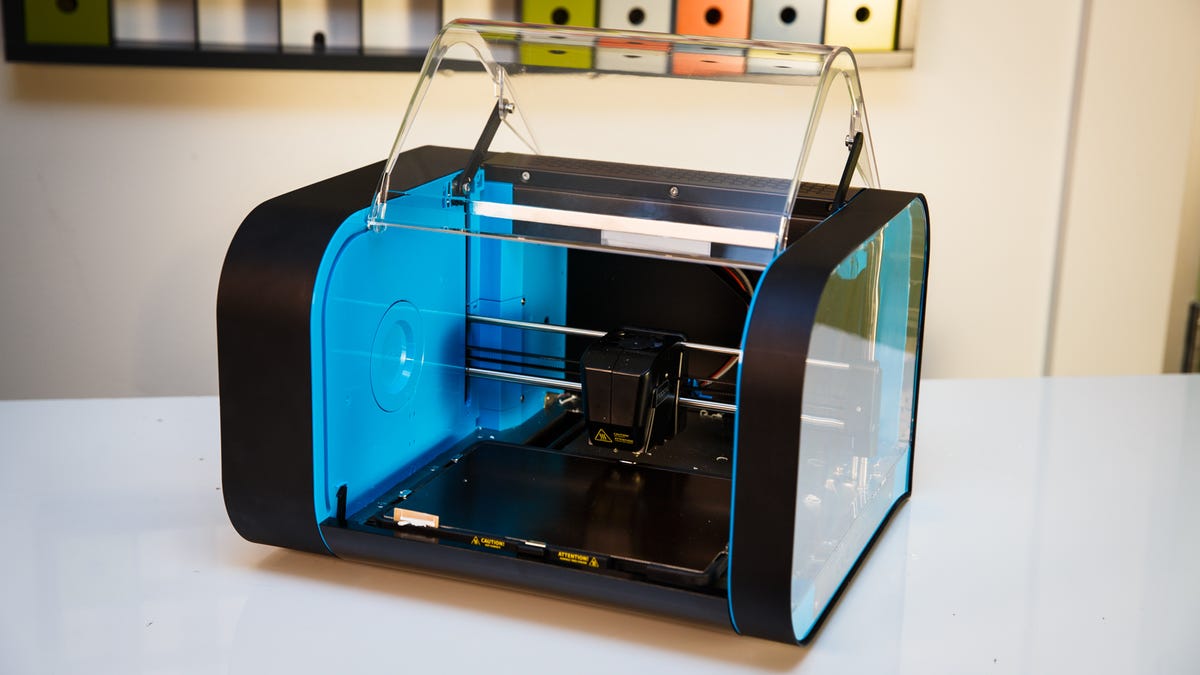
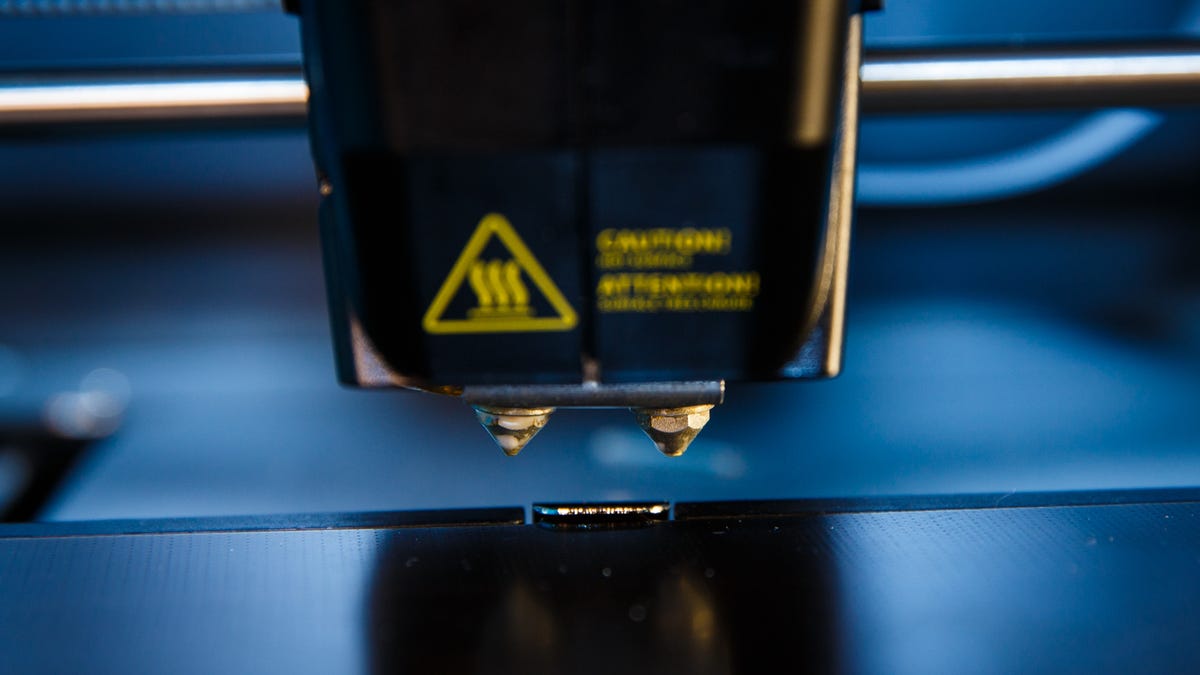
How does it work? It's simple: the single reel feeds both nozzles, with one nozzle dedicated to printing fine details and the other to filling in larger areas of a job. It's a brilliant idea that worked well in my testing, making the Robox by far the fastest 3D printer I've seen. I'll talk more about the quality in the Performance section below.
That's why it seemed odd that the Robox has a second, but unused, filament intake. Cel said the reason was that in the future, the printer can be updated with another printhead that feeds from two reels. If that happens, though, there's no space to add another reel holder. And as I see it, a second reel would just add bulk to the Robox's pleasantly compact size of 14.5x13.4x9.4 inches (370x340x240mm).

Robox's active print platform shares the same mechanism design as the Cube 3. That means that during a print job the platform moves backward and forward while the printhead moves sideways and up and down. I like that for such a small printer, the Robox has a large print platform: it can build objects measuring up to 8.3x5.9x3.9 inches (210x150x100mm).
Cel Robox 3D printer specs
| Extruder | Dual-extruder (single filament source) |
|---|---|
| Plate | Removable plate |
| Print technology | Fused Filament Fabrication (FFF) |
| Build volume | 8.3x5.9x3.9 inches (210x150x100mm) |
| Nozzle diameter | 0.012" and 0.031" (0.3mm and 0.8mm) |
| Resolution | 20 microns |
| Printer control | Via software |
| Printable materials | PLA, ABS, HIPS, Nylon, PC, PVA |
| Power source | 230 V / 120 W |
| External dimensions | 14.5x13.4x9.4 inches (370x340x240mm). |
| Inputs | USB |
| Software | Robox AutoMaker |
| Operating system supported | Windows 7 or later, Mac OS 10.8 or later |
The printer has a removable print bed, which is the top part of the print platform. That makes it easy to remove and clean, a necessary step in the calibration process.
The Robox connects to computer via a USB port on the back. The printer doesn't have an SD card slot, a touchscreen or any control button located on the unit itself, other than the on/off switch. As a result, you can't use it without a computer. Everything needs to be done via the downloadable AutoMaker software, which is available for Windows, Mac and Linux platforms.
On the whole, the software worked well in my trials -- despite some random errors and freezes -- and has a high level of customization. You can change any settings, including the openings of the printing nozzles themselves. Most importantly, the software also guides you through the calibration process.
Tricky calibration procedure
The Robox can automatically level the print bed, which it does before each print. Yet, you also need to manually calibrate it, especially the Nozzle Opening and Nozzle Height, both of which require a lot of work. The former determines the amount of material output for each nozzle and the latter makes sure the nozzles are at a perfect distance from the print bed below.

Manually calibrating a 3D printer is always tricky and time-consuming, but the Robox's process is worse than usual, thanks to the vague wording of the instructions.
For example, when adjusting the nozzles' openings, the instructions tell you to gradually use the software to open them bit by bit until you see the material "flowing" out. What exactly is meant by "flowing," isn't defined, however, and it's hard to know when the nozzle is properly opened. After talking to Cel, I learned that you need to merely open the nozzle until the material appears at the tip. Opening it further would be too much. That kind of detail is useful, but you won't find it in the included instructions.
Adjusting the distance between the nozzle and the print bed is also difficult to get right. Per the instructions, you first put a sheet of plain paper on the print bed, and the nozzle will move down to grip it. Then you use the software to slowly raise the printhead little by little to "find the lowest position that allows the paper to slide freely underneath the nozzle without touching it." Not only this is imprecise, it's also incorrect. After talking to Cel, I found out that as soon as I could easily pull and push the paper back and forth using one hand, that was the correct distance. If I raised the nozzle higher so the paper could move around without touching it, the gap would be too large.
It's also frustrating that the calibration process can only proceed forward through the process -- you can't step back if you need to. Should you accidentally click on Next prematurely and move on, you can't go back to the previous step and will need to start the entire process from the beginning. That's also true for the Nozzle Opening part -- you can't undo just the last action.
In all, it took me a long time -- a few days in fact -- to achieve what I believed to be the correct calibration. Though the calibration itself takes just around 10 minutes to half an hour, remember that you only know if you've made a good calibration after you've successfully printed a large object. And large objects can take 10 or more hours to print.
Proprietary and third-party filaments
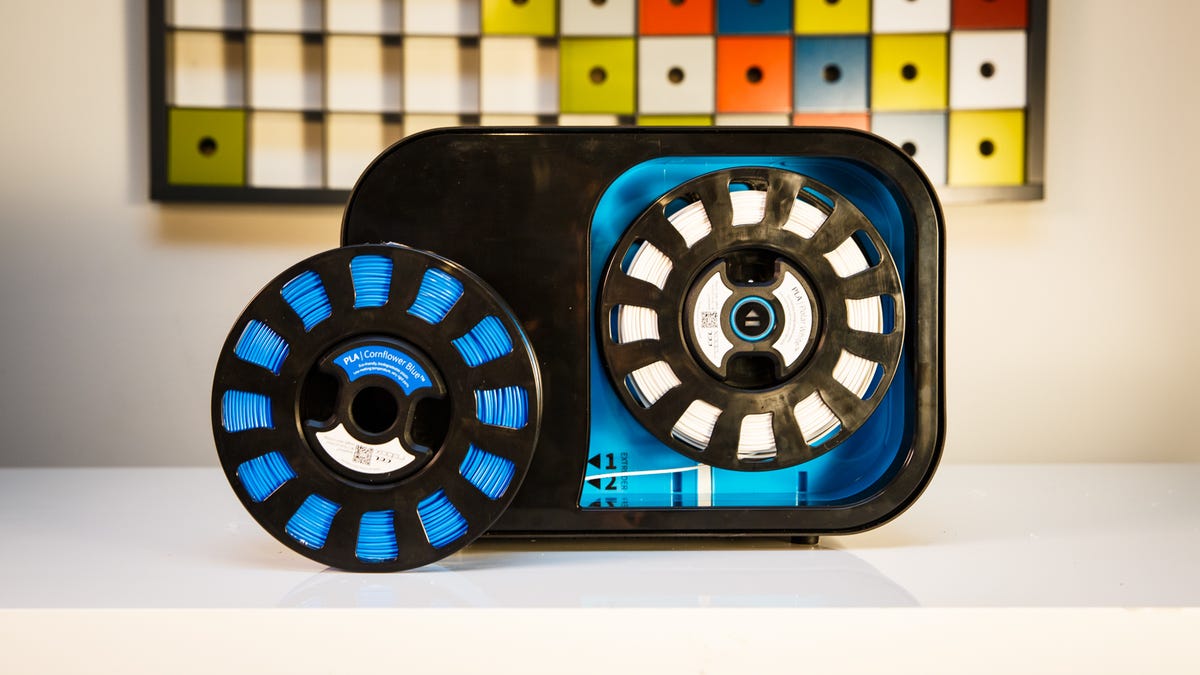
Like other printers I've reviewed, such as the Cube 3 or the XYZPrinting da Vinci, the Robox uses proprietary filaments. They come packaged in smart reels, "smart" because once installed, they can tell the printer what type of filament is being used (ABS, PLA or others) and how much material is left on the reel. The reels also fit perfectly into the holder on the side of the printer.
Filaments are the raw material for fused filament fabrication (FFF) 3D printing, which is the technology used in the Robox and most consumer-grade 3D printers. Think of them as the equivalent of ink cartridges in inkjet printers. Available in different colors, they are easy-to-melt, quick-congealing plastic strings that are fed through the printhead during a print job. The printhead then heats up and extrudes melted plastic through the nozzle (aka an extruder) onto the print platform below to create the 3D object.
The good news about the Robox, however, is that it also works with third-party filament of the same standard (1.75mm). You can also keep third-party filament spools outside of the smart reel holder, or you can roll your own reel. You'll lose the "smart" features with a third-party reel, but the printer will still work. Note, however, that, according to Cel, using third-party filament will void the warranty.
If you choose to buy filament reels from Cel, they're not too expensive. Each reel costs about $40 and includes 245 meters (268 yards) of filament string that weighs slightly less than 1kg (2 pounds), enough to print quite a few objects.
Fast performance, low print quality, high failure rate
As mentioned above, the printer needs a computer to work via the AutoMaker software. The software allows standard manipulation of the 3D model files including scaling, layer thickness, filling patterns, the level of filling (hollow or solid) and so on. You can use the software to connect to a MyMiniFactory community account, which is similar to the open-source Thingiverse, and download 3D models directly from there. Alternatively, you can load model files already saved on the computer. Like all other printing software I've worked with, AutoMaker supports standard 3D model files.
When you choose to print, the software will first transfer the information to the printer. Depending on the size and the complexity of the 3D model, this process takes from 1 to 10 minutes to complete. After that, it prints on its own, even if you disconnect it from a computer, thanks to its little storage card on the back. At any time, the software can always reconnect to the printer and show its current printing status, allowing you pause and resume or cancel the job.
The printer doesn't seem to save the 3D files from previous jobs on its internal storage. So, if you want to print the same file again, you have to restart the print job from scratch.

There's no question that the Robox is the fastest I've seen, especially for objects without much fine detail. Printing a standard iPhone 6 case, for example, took just 45 minutes on the Robox, a full half hour less than most other printers. On the other hand, you won't notice much of an improvement when printing more complicated objects. Basically, the more the printer can avoid using the nozzle dedicated to adding details, the faster its print speed will be.
Yet, speed is only half the story of a successful 3D printer. Print quality is just as important, and it's there that the Robox didn't impress me. Generally its print quality was about a notch below that of other printers, such as the Cube 3 or the DeeGreen. For example, if I printed an object using the Normal quality setting, it would come out no better than if I had used the Draft setting on other printers. And since the higher the quality you pick, the longer it takes to finish a print, this lack of quality almost completely offset the Robox's speed gains.
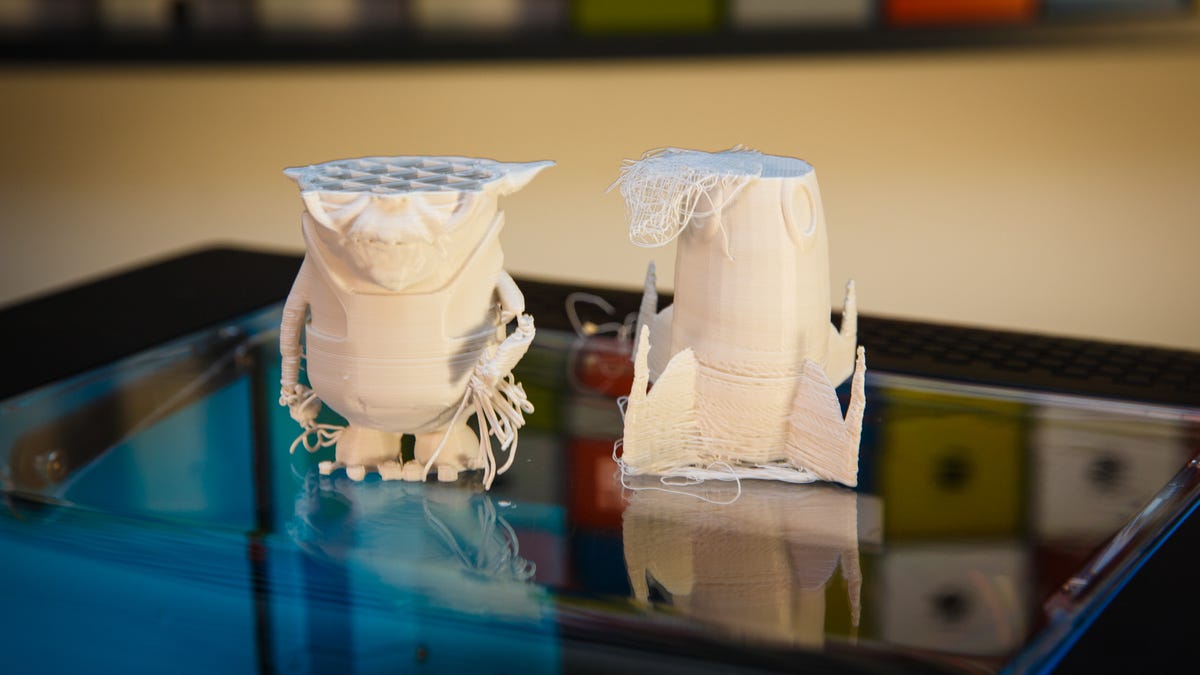
What bothered me the most about the Robox, however, is the rate of failed prints. In my testing, almost half of the objects I tried to print suffered from some sort of failure. Sometimes, the object was moved out of place during a print (Cel doesn't recommend using glue on its print bed), while at other times things just didn't come out right. Most often, the printer would just stop printing midway through the process without recovering. But then if I chose to print the same object again, it would finish without any problems.
Conclusion
I really wanted to like the Robox for its innovative dual-extruder design. Out of the box, the printer promises to be very exciting and fun to use. But after some three weeks of using it, I realized it lacked a lot of things, such as better instructions, a more intuitive calibration process (or better still, the ability to do that by itself) and also support for printing from an SD card or thumbdrive. Most importantly, the print quality needs to be much better for the printer to be worth its price tag. In short, the Robox lacks so much more than its fast print speed can make up for.
Hopefully, a firmware update will improve some of these faults. For now, though, the Robox remains an interesting idea that hasn't yet fully materialized. If you still decide to buy one, make sure you get a lot of filaments, too, since chances are good you'll run into a lot of failed prints.