 Why You Can Trust CNET
 be3D DeeGreen 3D Printer review: An excellent, expensive, 3D printer that works right out of the box
With the DeeGreen 3D printer, making your own 3D objects can be as easy and printing your own recipes.


With the DeeGreen, the notion that 3D printers are a lot of work -- a lesson I recently learned from reviewing the Monoprice Dual Extrusion -- is not true. Not only does the DeeGreen works right out of the box, it also prints fast (for a 3D printer), performs reliably, and can build objects with high details.
be3D DeeGreen 3D Printer
The Good
The Bad
The Bottom Line
Before you get too excited, though, as a single-extruder 3D printer, the DeeGreen is very expensive at €1,500, and shipping internationally that's about $1,900, £1,200 or AU$2,200. It's almost twice the price of the Monoprice, which is a more advanced printer with a dual-extruder print-head and a slightly larger print platform.
But if you're into 3D printing, just the time saved from having to set the printer up and calibrate it already makes the DeeGreen totally worth the extra cost. And the low rate of failed prints (I produced none during testing) is an extra bonus, considering it can take hours to finish printing a large object.
That said if you're looking to enter the world of 3D printing, the DeeGreen is an excellent entry. It's just a question of whether or not you can afford it.
Almost plug and play
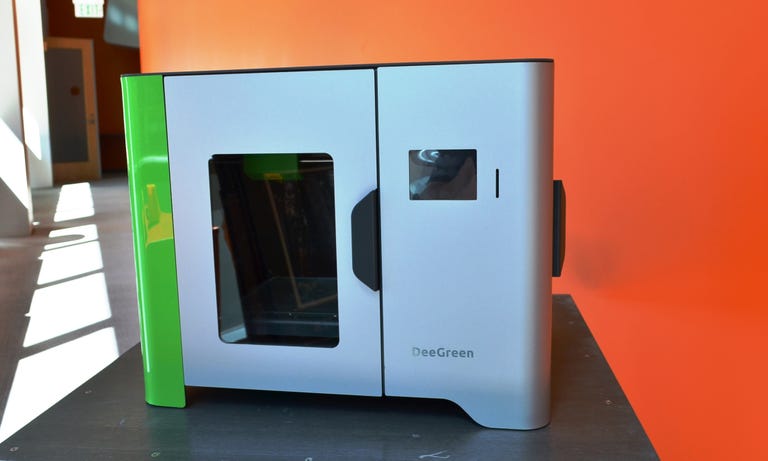
Measuring 19.4 by 15.5 by 15.3 inches (495x395x390mm), the DeeGreen is about the same physical size as the Monoprice. However, it takes just a fraction of the time to get set up and running. In fact, it was easier to use than some regular printers in my trial.
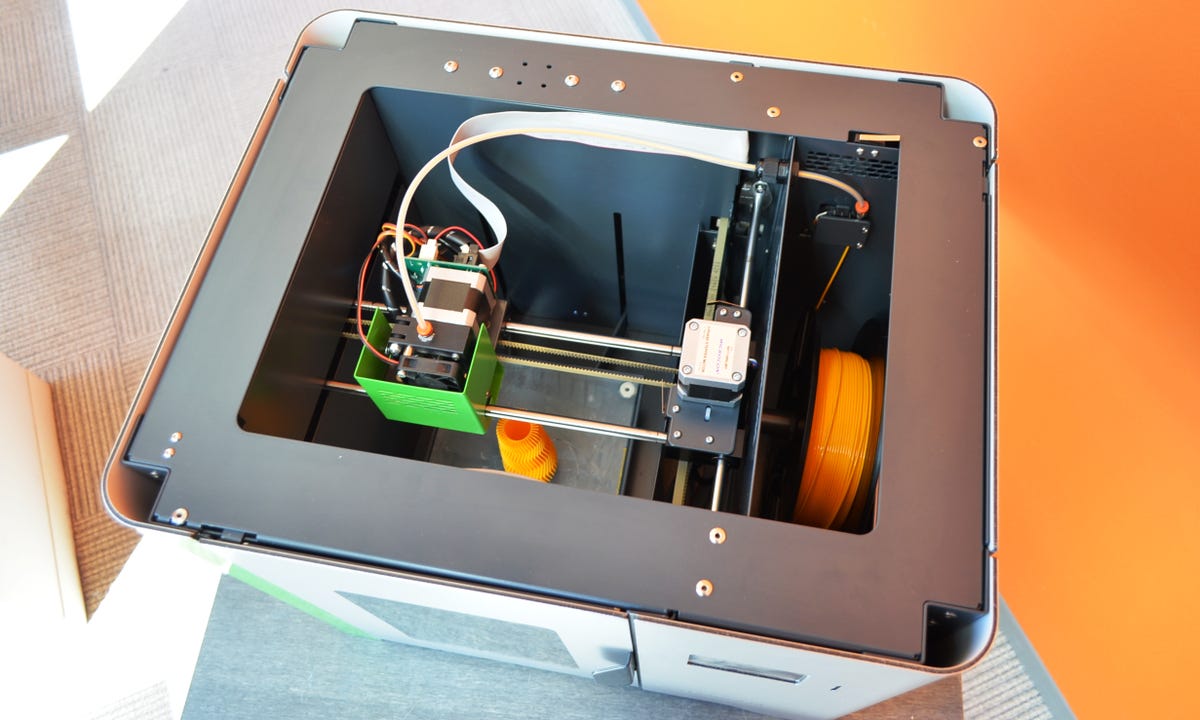
Out of the box, the printer is fully assembled with all of its important parts tied in place. There are just two parts you need to install.
First is the included 1.7-pound (0.75kg) spool of PLA filament of which the string needs to be loaded in to the print-head, which is an easy job since the filament loading tube has already been assembled. As the DeeGreen is a single extruder printer, it can only work with one filament spool at a time, so if you want to print objects of more than one color, swapping out the filaments, even during a single print, can be a frequent task.
Filaments are the print materials for 3D printing, as ink cartridges in inkjet printers. They come in different colors and are basically easy-to-melt, quickly congealing plastic strings that are fed through the print head nozzles during a print job. Be3D sells extra filaments at about $30 (£20, AU$35) per spool of 1.7-pound. The DeeGreen also works with other standard 1.75mm filaments, such as those sold by Monoprice or MakerBot. The DeeGreen can work with both PLA and ABS filaments, and even though be3D sells both, it recommends only PLA. On top of that, it also uniquely works with be3D's wood-based filament.
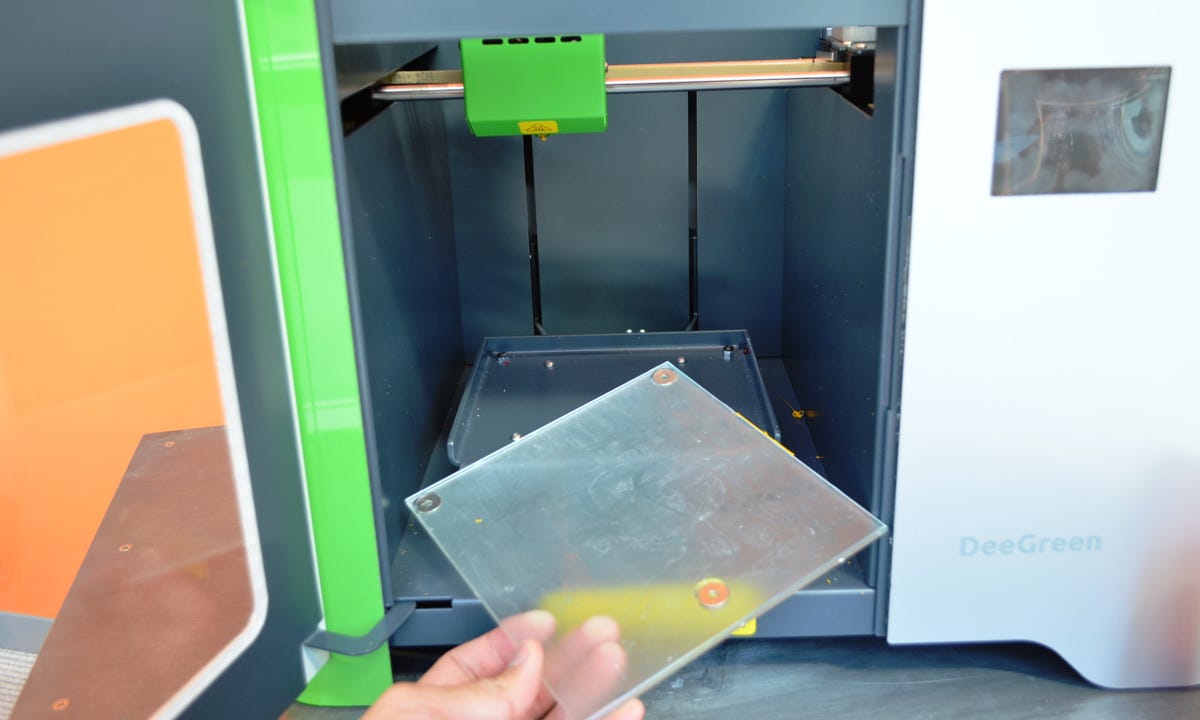
The second part to install is the 5.9-inch (150mm) square glass print plate that needs to be placed on its holder, the print platform, underneath the print-head. This plate comes with three magnetic metal feet designed to make it fit snugly and stay put on top of the platform while at the same time allowing users to remove it easily.
As for how 3D printers work, during a print job, the print head pulls the filament string from the spool, melts the plastic, and extrudes it onto the platform. The platform lowers gradually depending on the height, and the print head moves around depending on the width and shape of the object being built. As the extruded plastic piles on top layer by layer, it congeals very fast to slowly form the object. This process is called fused-deposition modeling (FDM), which is the 3D printing technology used in all consumer-grade 3D printers.
As you can imagine, the max size of an object a printer can print depends on the size of the print platform. In the case of the DeeGreen, this size tops at 5.9 cubic-inch, which is quite large. In reality you'll print much smaller objects.
Nonetheless, the DeeGreen's removable print plate is a nice design touch that helps with both preparation and post-print process. For preparation, you can easily put supporting materials or just lace the surface of the plate with glue to keep the to-be-built 3D object from being moved around during a print. And once you're done with a print, it's also much easier to remove the object from the plate itself, as well as cleaning the plate's surface from residual materials. The DeeGreen comes included with a glue stick and a palette knife, making it very convenient for anybody print multiple objects right away.
On the front the printer has a large 6-line resolution touchscreen and a SD card slot and on the back it has a power switch and a USB port to connect to a computer via an included USB cable. There's no need to use the USB cable since the printer prints from an SD card (a blank 4GB card is included) but you can use the cable to transfer a file to the SD card prior to a print. More on this below.
I was able to get the printer ready to print from out of the box in just about 10 minutes, partly thanks to a clearly illustrated "Make Your Printer Ready in Five Steps" poster. But mostly because the printer is just so easy to use.
be3D DeeGreen 3D Printer specs
| Extruder | 0.015-inch Nozzle Single Extruder |
|---|---|
| Plate | Removable glass plate |
| Print Technology | Fused Deposition Modeling |
| Build volume | 5.9 x 5.9 x 5.9 in. (150x150x150mm) |
| Print accuracy | 0.003 in. (0.1mm) |
| Layer thickness | 0.003 / 0.005 / 0.007 in. (0.1mm / 0.15mm / 0.2mm) |
| Nozzle diameter | 0.015 in. (0.4mm) |
| Print speed | 3.54 in/s (90 mm/s) |
| Printer control | 6-line resolution touchscreen |
| Printable materials | 0.068-in (1.75 mm) PLA, ABS, WOOD |
| Power source | 230 V / 120 W |
| External dimensions | 19.4 x 15.5 x 15.3 in. (495x395x390mm) |
| Weight | 48.5 lbs (22kg) |
| Inputs | USB, SD card |
No calibration needed, simple software
With the DeeGreen, the biggest timesaver is the fact that the printer requires no calibration on the user's part. Calibration is an important part of 3D printing that makes sure the print platform's entire surface is at a consistent and perfect distance from the print-head's nozzle. Proper calibration determines the success and the quality of each print. The DeeGreen has a built-in sensor for this job and the machine is so well put together that this self-calibration process, which takes place before each print, takes just a few seconds to finish.

What also requires very little time, if at all, to get to know is the printing software called DeeControl that's available for both Mac and Windows. It's very easy to install this software in a Windows computer and with a Mac, there's no need to even install it at all, you can just run the downloaded file. Once run, DeeControl has very simple control using a few large buttons. You can load a 3D model file, then use mouse to look around the model. You can also scale, rotate, or set it to stay flat on the platform. Basically, you can preview how the 3D object is going to look once printed.
As for what to print, there is a huge collection of 3D object models at Thingiverse that you can use. You can also make your own using free software such as SketchUp or Autodesk 123D. The third option is purchasing a 3D scanner than can turn an object into a 3D model file. (For now, 3D scanners carry the starting price of around $400, £250 or AU$450.)
DeeControl allows for standard customizations, including changing the size of the 3D object (scaling), the print quality (fast, normal or high), print speed, and the level of filling, which determines if the object will be hollow or solid. (The default level of filling is 10 percent, the rest will be hollow with supporting honeycomb walls.) You can also add multiple 3D model files to a single print job as long as they don't exceed the max print volume. This is especially helpful if you plan to do a large print job overnight.
SD card required for printing
Once you're done with customizing the object, there are two options for printing. You can save the final result to a .gco file on an SD card then use the DeeGreen's touchscreen to initiate the print. Depending on the size and the complexity of the 3D model, it can take up to 20 seconds to save the file to a card. Obviously, the computer must have an SD card slot for this to work. If it doesn't you can use the second option, which is to transfer the file directly to an SD card already inside the card slot of the printer, before printing. Once the transfer is done, the print job will continue without the need for the computer.
In my trial, the second option could take up to half an hour for the transfer to complete when I wanted to print a large 3D model. And in this case the glue laced on the surface of the print plate had dried up before the printing process started. Overall, it's always better to use the first option to print with the DeeGreen.
(Aside from .gco file, in my trial the printer also printed .gcode file created by other 3D printing software such as the ReplicatorG used by the Monoprice.)
Overall, it's best to copy the file onto the SD card and print using the touchscreen to start the print job. In this case the print job starts quickly, after about a minute for the print-head to heat up.
While printing from an SD card is a great idea, it also means the printer requires the SD card slot to work. If something happens to this slot, the printer becomes useless. This happened to my first review unit, where the internal cable connecting the card slot to another part of the printer broke loose during transit, forcing me to get a second unit for testing. It would be better if the printer also came with some internal storage so it could print without the need for the card slot at all.
Apart from printing, the touchscreen can also be used for changing filaments (which can be done mid-print), pausing a print job, viewing the status of the printer, and so on.
Performance
The DeeGreen worked very well in my trial. In just three days, I was able to print more than twice the number of objects than I did with the Monoprice in a week. In fact, I didn't run into any unexpected fail prints at all. Every single print came out exactly as expected.
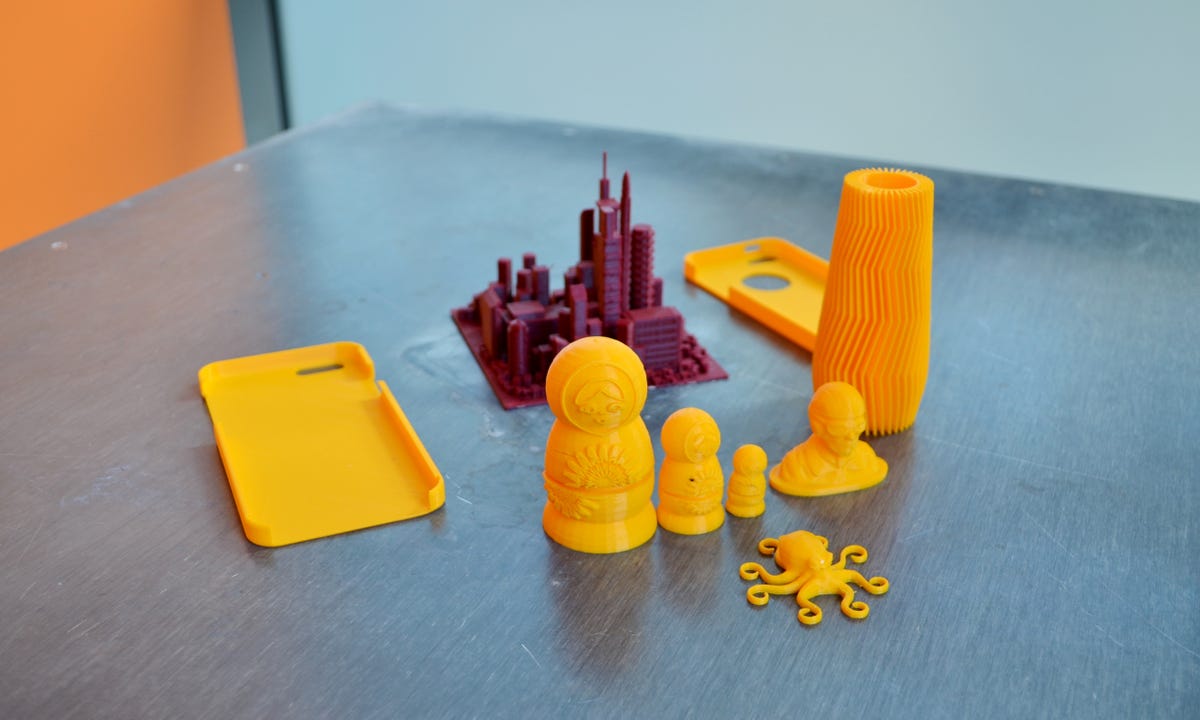
I did try a few things to see if a print job would fail. As it turned out, you don't really need to use the glue on the surface of the print plate when printing a flat object (such as a phone case). But when you print something with a small footprint, such as a thin glass, or a standing doll or basically anything that could topple easily, the glue is very important to the success of the print.
The machine also worked very fast. For example, at the highest quality setting, it took just about an hour to print an iPhone 4S case, a job which took the Monoprice almost twice as long. The print quality is also much better, with greater detailing and a much smoother surface. Obviously at this rate, 3D printing is still very slow but the DeeGreen is obviously an improvement over the Monoprice.

As for how much you can print from a spool of filament, the printer actually conserves materials quite well. After a week of printing dozens of objects using the default level of filling, I used only about a fifth of the included spool. Basically, you can print a lot with a spool of be3D consumables. There are also cheaper PLA filaments you can get from different vendors.
Similar to the case of the Monoprice and 3D printers in general, the DeeGreen is quite noisy when working. It's not deafening but is noisy enough to be a bother if you're using it in a quiet room. It's recommended that you have a different room for it.
Conclusion
After the Monoprice, the DeeGreen totally changed my perception of 3D printing. The new printer turns the new and once-challenging technology into a simple task that even non-savvy user can perform. In fact, if it's one part more expensive, it's ten parts easier to use, than the Monoprice.
And speaking of pricing, this remains biggest obstacle of 3D printing, at almost $2,000 the DeeGreen is cost-prohibitive for most users. On top of that, what it can build (namely plastic 3D objects) doesn't practically justify the investment. For example, instead of printing your own iPhone case, you can go to the store and buy an even better one for a fraction of the printer's price, and likely in less time.
But 3D printing is not just about making practical objects, but also about building things you can't buy and being creative. And in this regard, the DeeGreen is an excellent tool that works right out of the box, reliably and is really fun to use.