DIY Instagram magnets
Photojojo shows you how to get your phone photos off the screen and into your home with these easy, DIY Instagram magnets.


Craft your own Instagram magnets
You're addicted to shooting photos with your favorite mobile companion, but there's just one problem: Your photos seem to be stuck in your phone.
These services are great for printing Instagrams in a pinch, but it's actually surprisingly easy to make your own at home. And this ain't your mama's project, either -- this DIY will give you glazed, resilient magnets ready for a decades of use. Make an afternoon of it, or like a true photo geek, a Friday night if you feel like staying in.
Supplies and tools you'll need
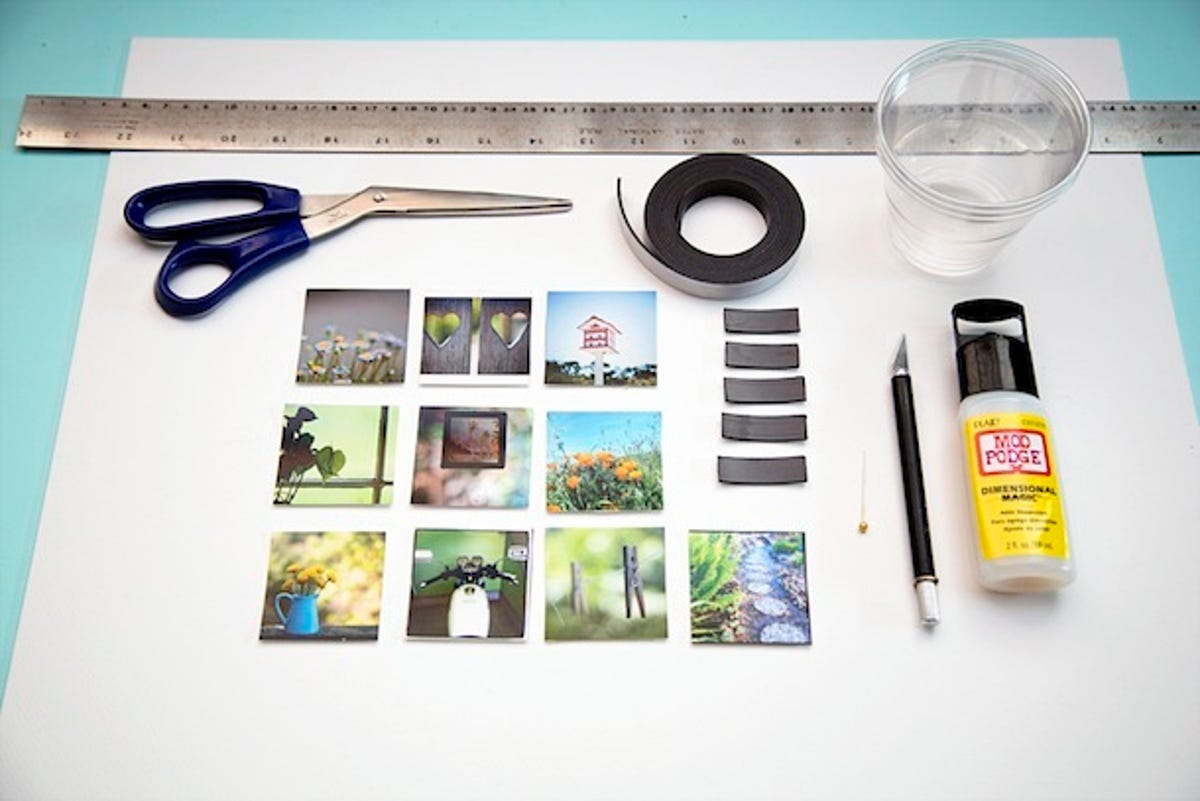
To make your magentic Instagrams, here's what you'll need:
- Your Instagrams (more on that later)
- A photo editor, like Photoshop or GIMP
- A printer
- Photo paper
- A mat board or illustration board (available at craft stores)
- Mod Podge Dimensional Magic Glaze
- Magnetic tape
- An X-acto knife or scissors
- A ruler
- A pencil
- A pin
- Plastic cups (one for each magnet, optional)

Download and format
If you have your settings set to save your Instagrams to your phone every time you upload one, then you can browse your camera roll for your saved 'grams.
Otherwise, if you're using an iPhone, you can download your photos from Instagram itself by tapping on your photo and holding until "Save Image" pops up.
If you're going for a batch of photos, you can download your entire collection using a service like Instarchive.
Size your photos to 2x2 inches at 300dpi in a photo editor like Photoshop or the free and open-source GIMP.
Then, tile those 2x2-inch photos into an 8x10-inch canvas, so they all print out on a single sheet, which can even be done in a word processor like Word or Google Docs, if you choose. This should make for 20 photos to a sheet.
Finally, place your photo paper in your printer, and print.
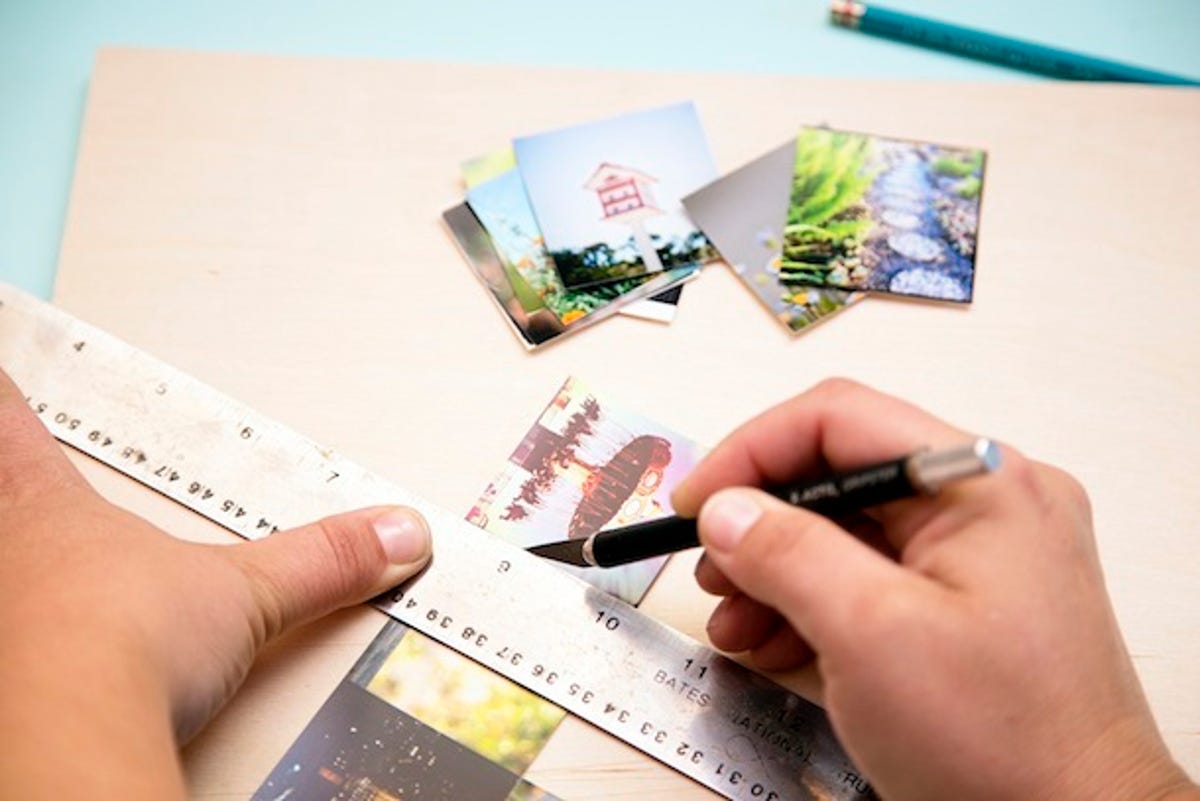
Cut and glue the 'grams
For the straightest edges, an X-acto knife works best. Set a ruler along your cut line, and run your X-act along it to cut out your photos. (You can also use scissors, if you like.)
Tip: For a shortcut version of this project, skip to Step 7. Simply turn your photo paper version into a magnet.
To fortify the back of your Instagrams, you'll be cutting out squares from the mat or illustration board you picked up at the art shop.
Use a pencil to draw a grid of 2x2 inch squares. Now cut out the squares the same way you did your Instagrams.
Glue your Instagrams to each mat square with regular glue or a dab of Mod-Podge glaze and let it dry.
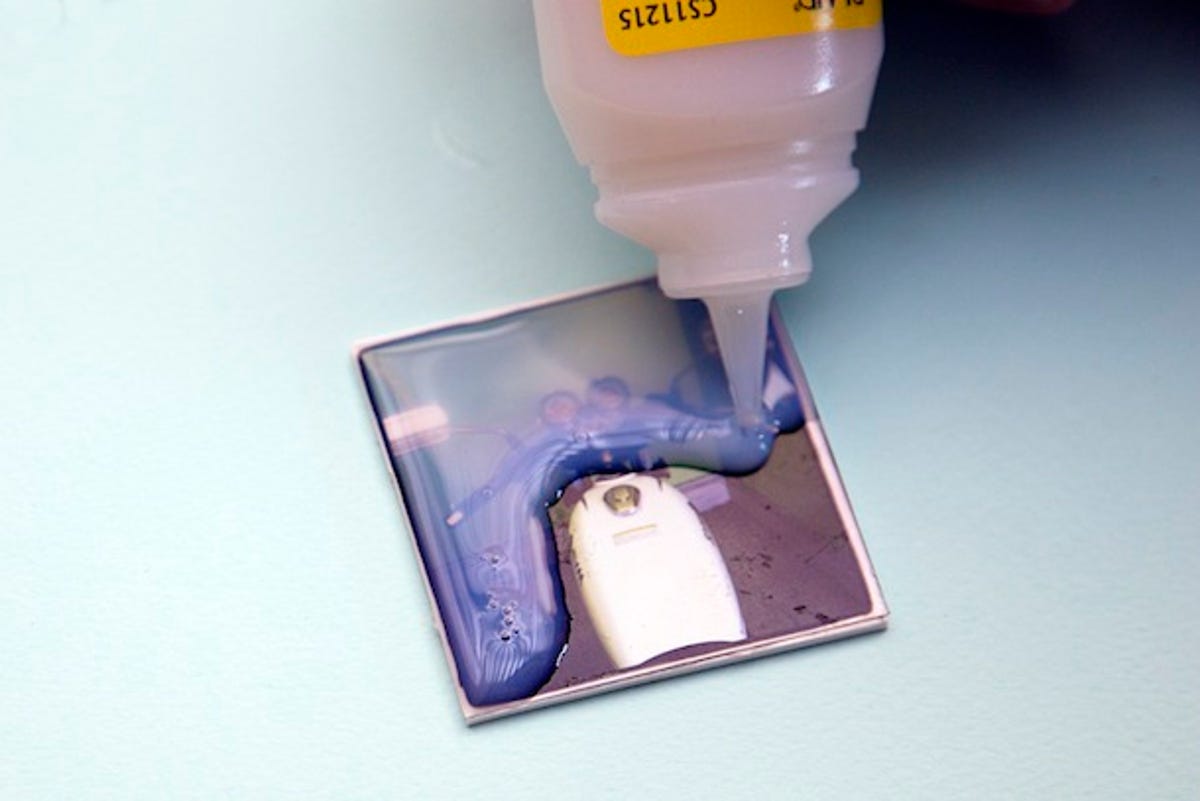
Glaze with Magic
What's this Magic Glaze, you say?
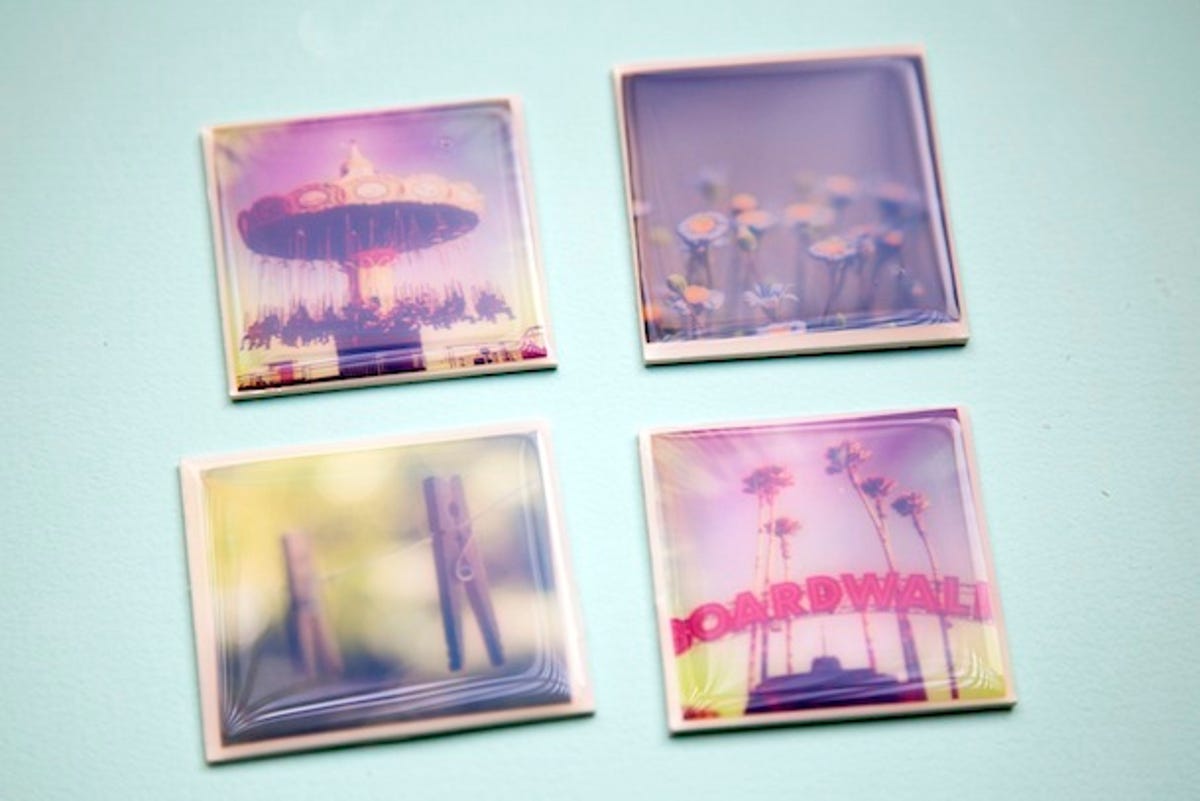
The Mod Podge Dimensional Magic Glaze creates a thick, shiny coat atop your photo, so it looks like a real-deal magnet like you've see in the store.
It works by simply squeezing the glaze directly onto your photo, coating it as you squeeze. No need to brush or touch it. Just let it smoothly goop on top.
Try squeezing it around the edges of your photo and working your way to the center.
Let them dry
Now let it dry. This'll take about 24 hours.
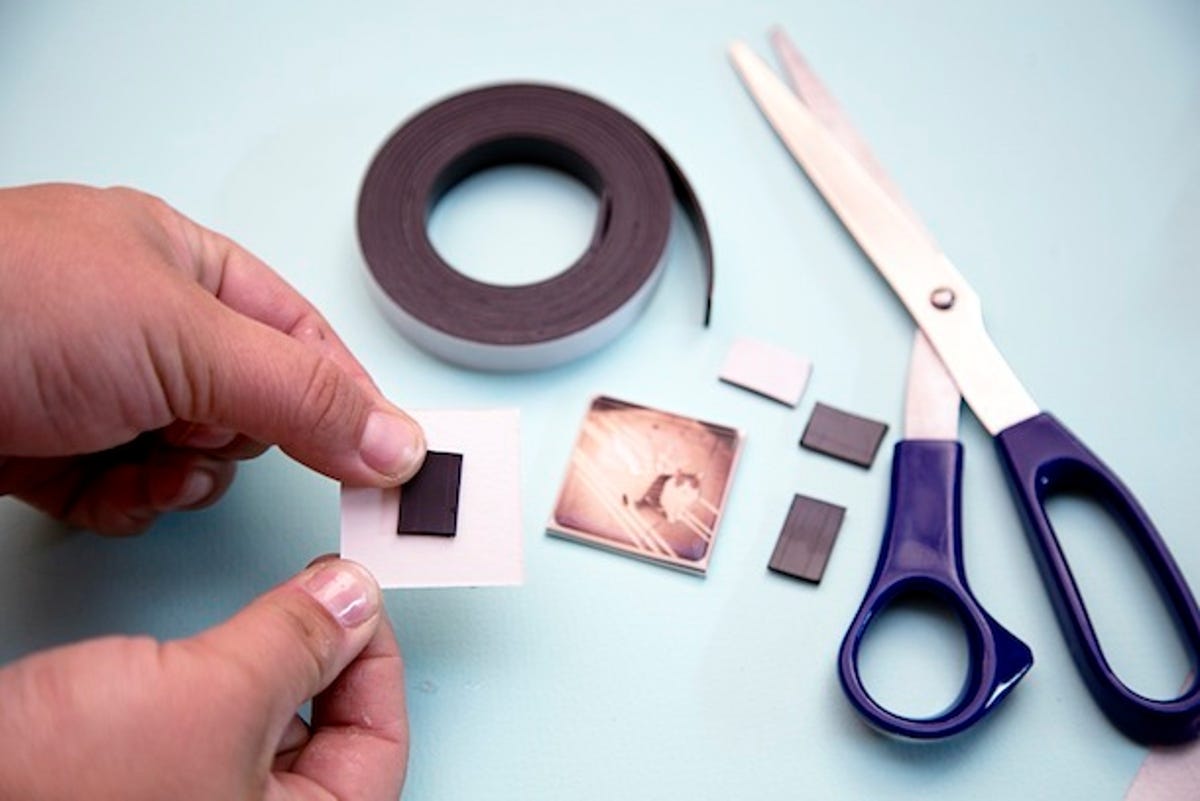
Add the magnetic strips, admire your work
Cut small strips of magnetic tape and adhere them to the back of your magnets.
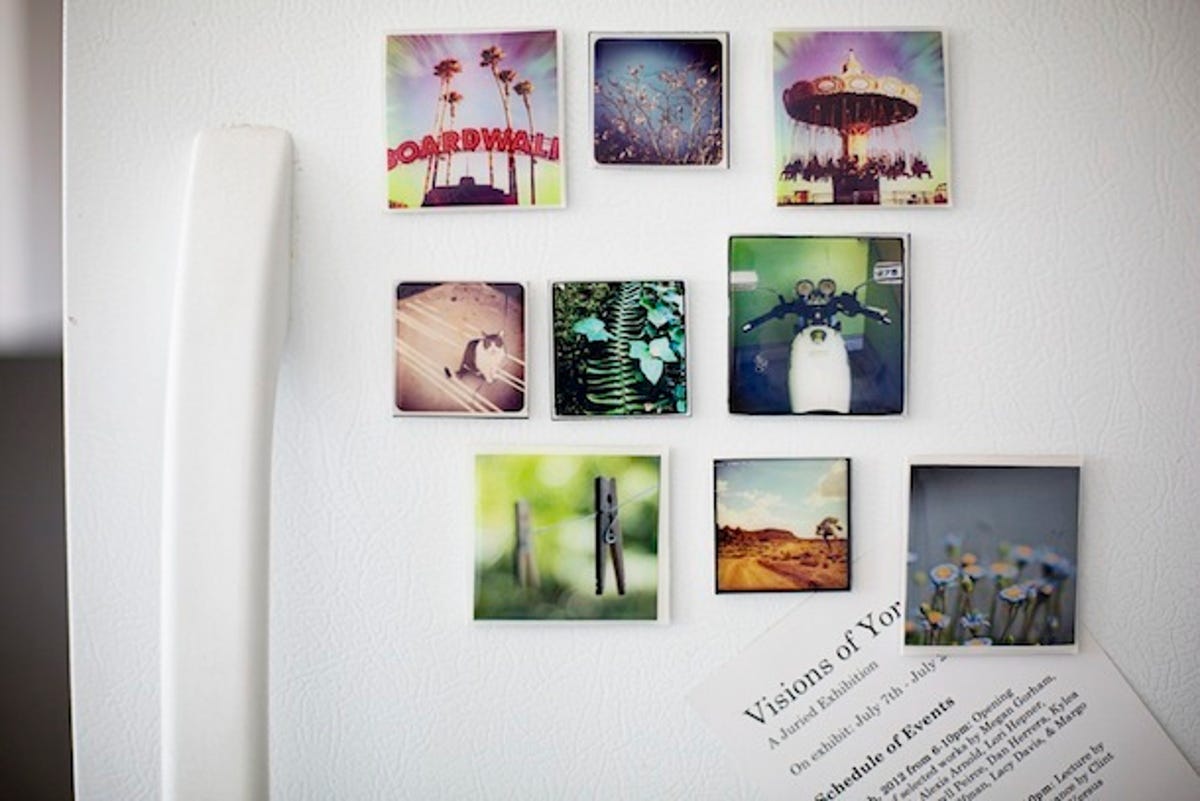
Now you're ready to turn your fridge into a Instagram art gallery. This might just merit some wine and cheese.
More Galleries

My Favorite Shots From the Galaxy S24 Ultra's Camera
20 Photos
Honor's Magic V2 Foldable Is Lighter Than Samsung's Galaxy S24 Ultra
10 Photos
The Samsung Galaxy S24 and S24 Plus Looks Sweet in Aluminum
23 Photos
Samsung's Galaxy S24 Ultra Now Has a Titanium Design
23 Photos
I Took 600+ Photos With the iPhone 15 Pro and Pro Max. Look at My Favorites
34 Photos
