10 tips to make your Mac feel like new
Breathe new life into your old, sluggish Mac.


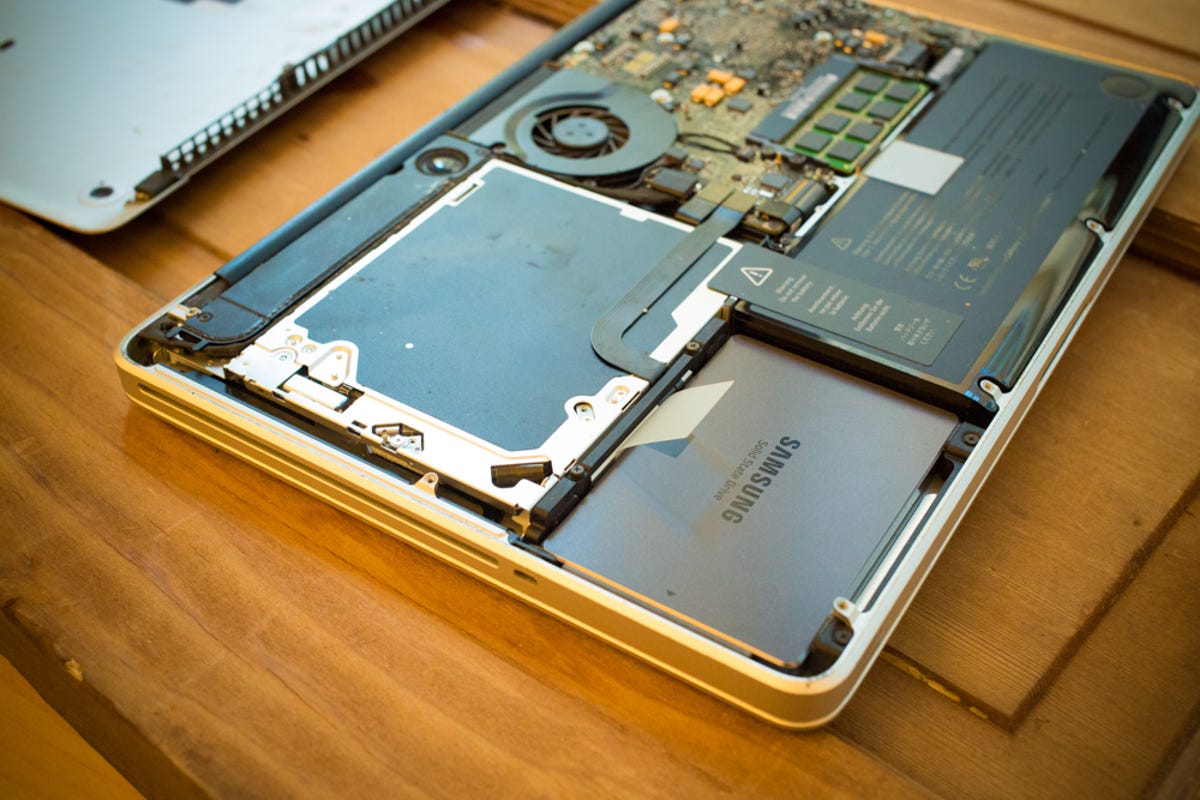
Upgrade to an SSD
The single biggest improvement you can make to an old MacBook is to upgrade its traditional spinning hard drive to a solid-state drive. You'll be shocked at not only how easy it is to swap in an SSD but also at the huge impact it has on performance. Follow Sharon Profis' instructions on how to upgrade your MacBook Pro with an SSD.
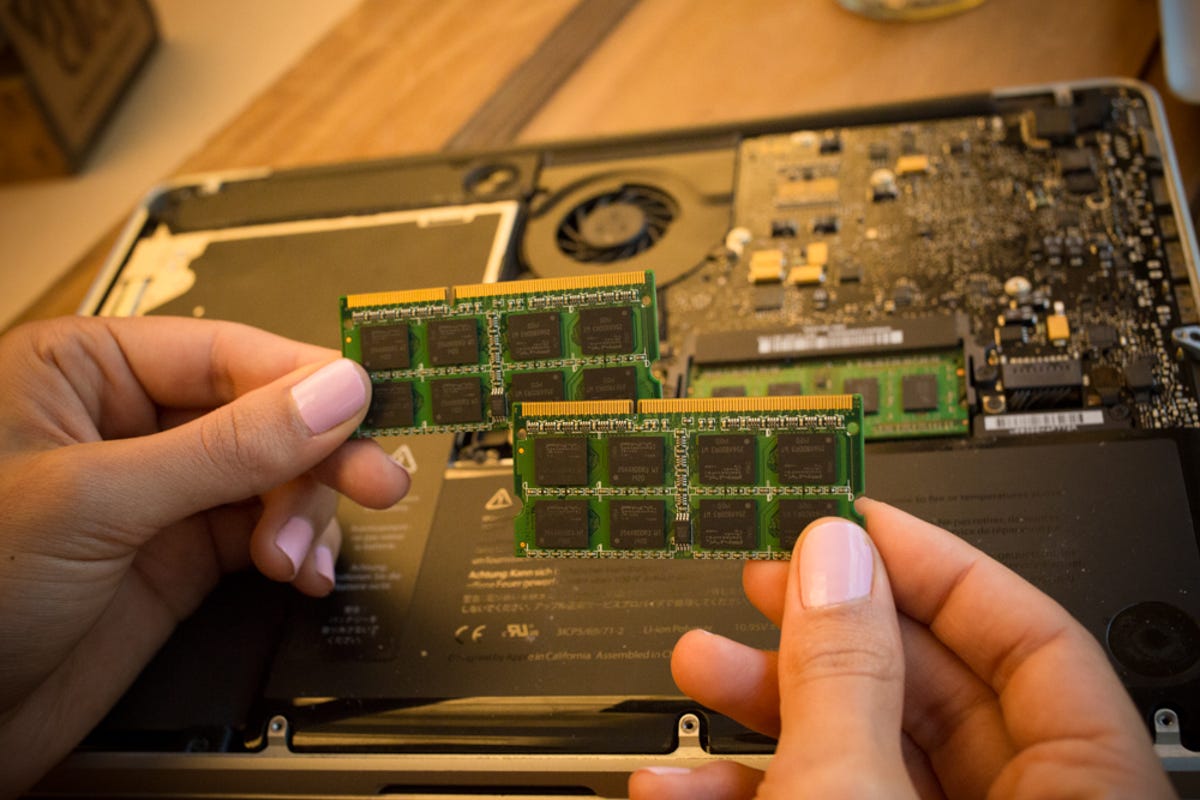
Add more RAM
While you have your MacBook opened to replace its hard drive, take the opportunity to add more memory. Like the replacing a hard drive, adding more memory is a straightforward, simple process. To start, you need to find the right type of memory for your specific MacBook model. The brand doesn't matter much, just be sure to buy the right amount, type, and speed. Apple has a handy support page that shows the memory specifications for a variety of models, along with an illustrated guide to replacing the memory. Or you can follow our step-by-step guide to add more memory to a MacBook Pro.
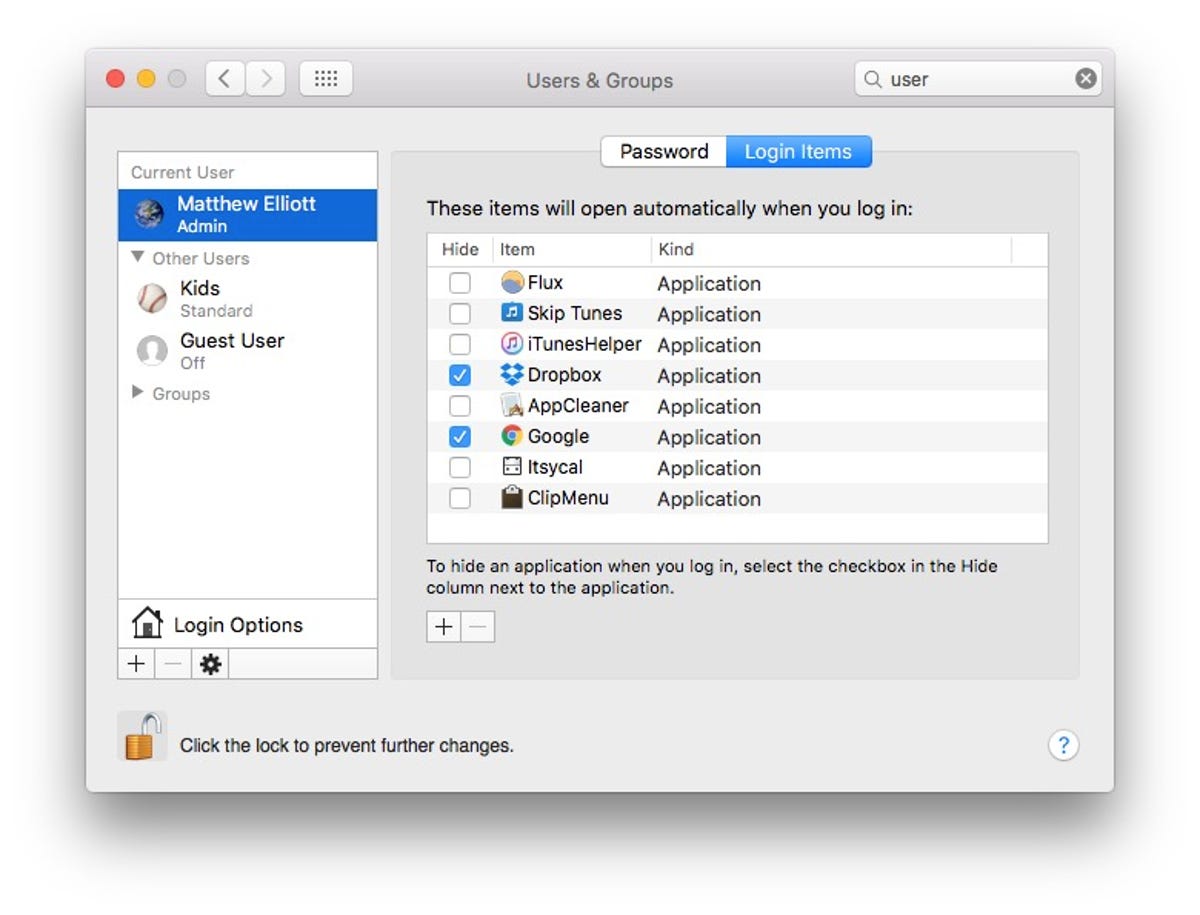
Reduce log-in items
If your Mac is slow to boot up, the problem may be that there are too many applications to open at startup. It's likely you never set them to launch at startup -- they launch by default. Go to System Preferences > Users & Groups and then click on the Login Items tab to see a list of the apps that open when you boot your Mac. Highlight the apps you don't want to open at startup and click the minus-sign button below the list of apps.
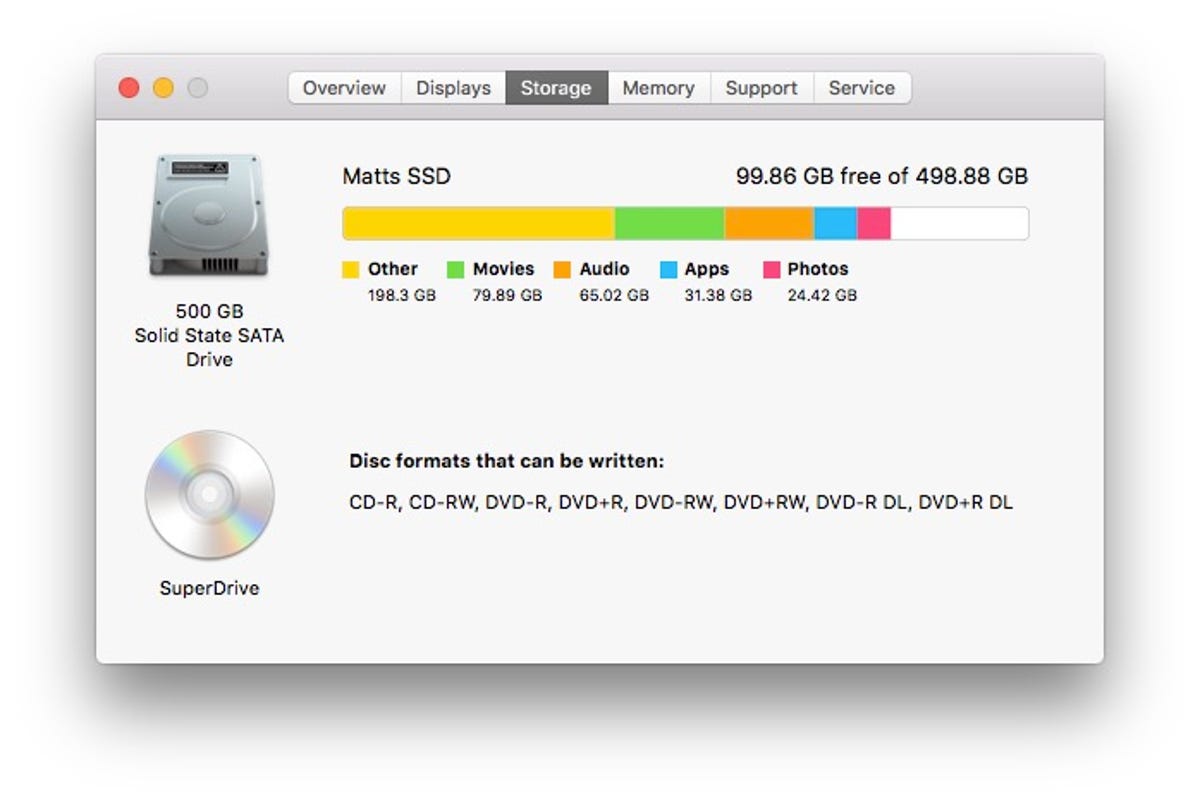
Reclaim space from crowded hard drive
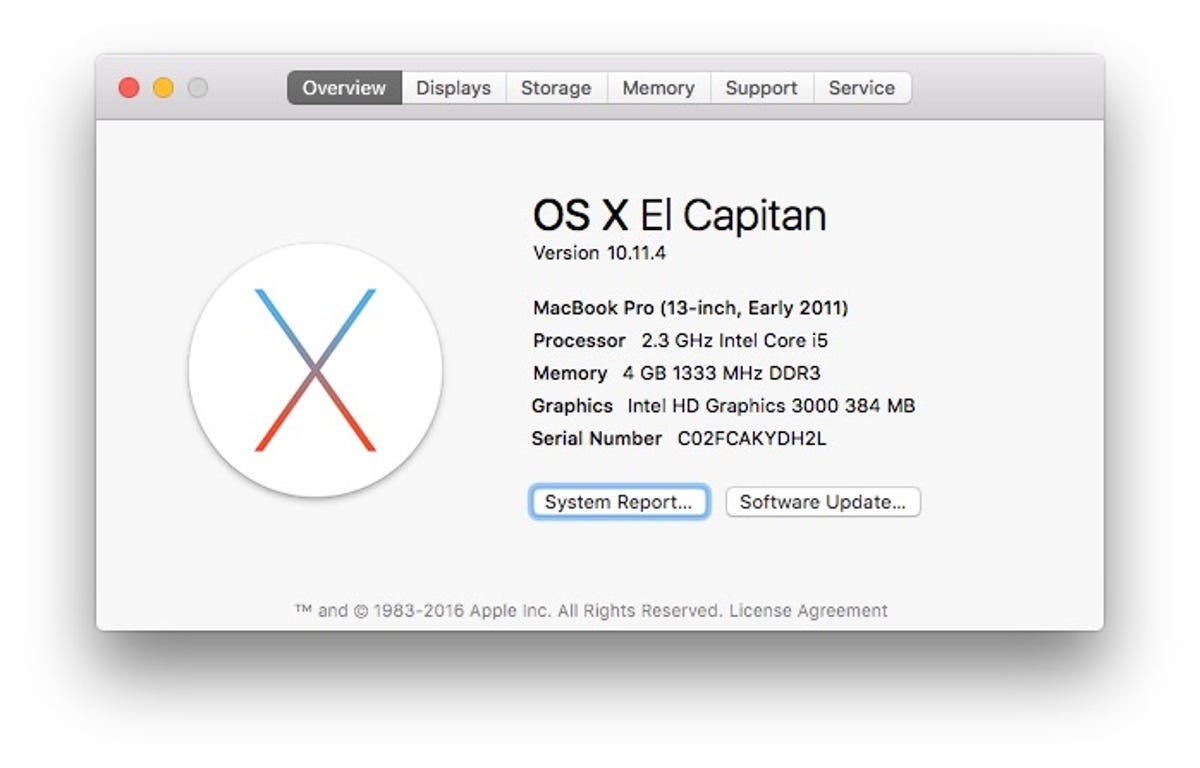
With a hard drive near full capacity, any computer will begin to slow down. To see how much space you have left on your Mac's drive, click on the Apple button in the upper-left corner and click About This Mac. Next, click on the Storage tab to view how much free space remains.
OS X lacks a an uninstall program and if you simply drag an application to the trash, you'll remove the main file for the app but will leave behind many associated files that got installed along with the app. Time for a third-party uninstaller; I like AppCleaner to completely uninstall Mac apps.
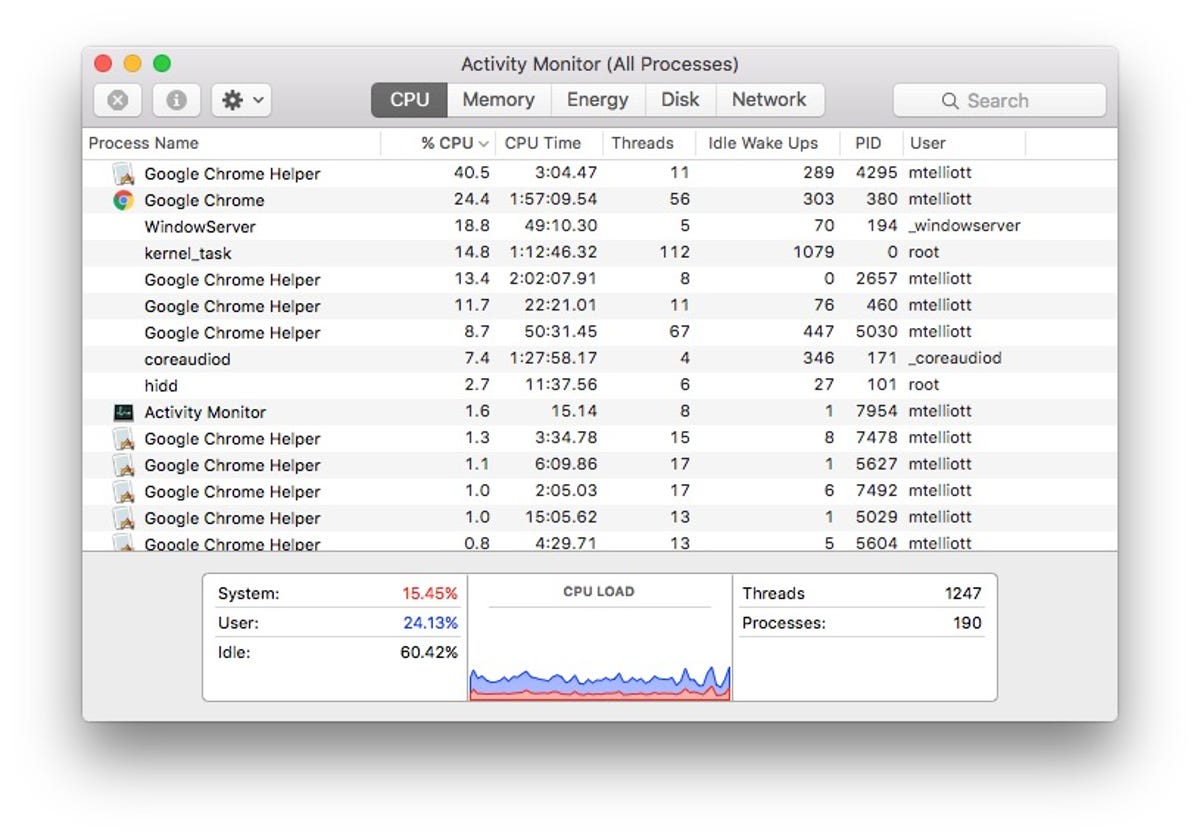
Quit apps that consume lots of resources
If your Mac acts like it needs a nap every afternoon, when you are at the height of multitasking, there is an easy way to see which of your open applications is using the most system resources. Open the Activity Monitor. Click on the CPU tab to see which apps are occupying the most system resources. If you see Chrome at the top of the list, for example, then maybe it's time to switch to Safari.
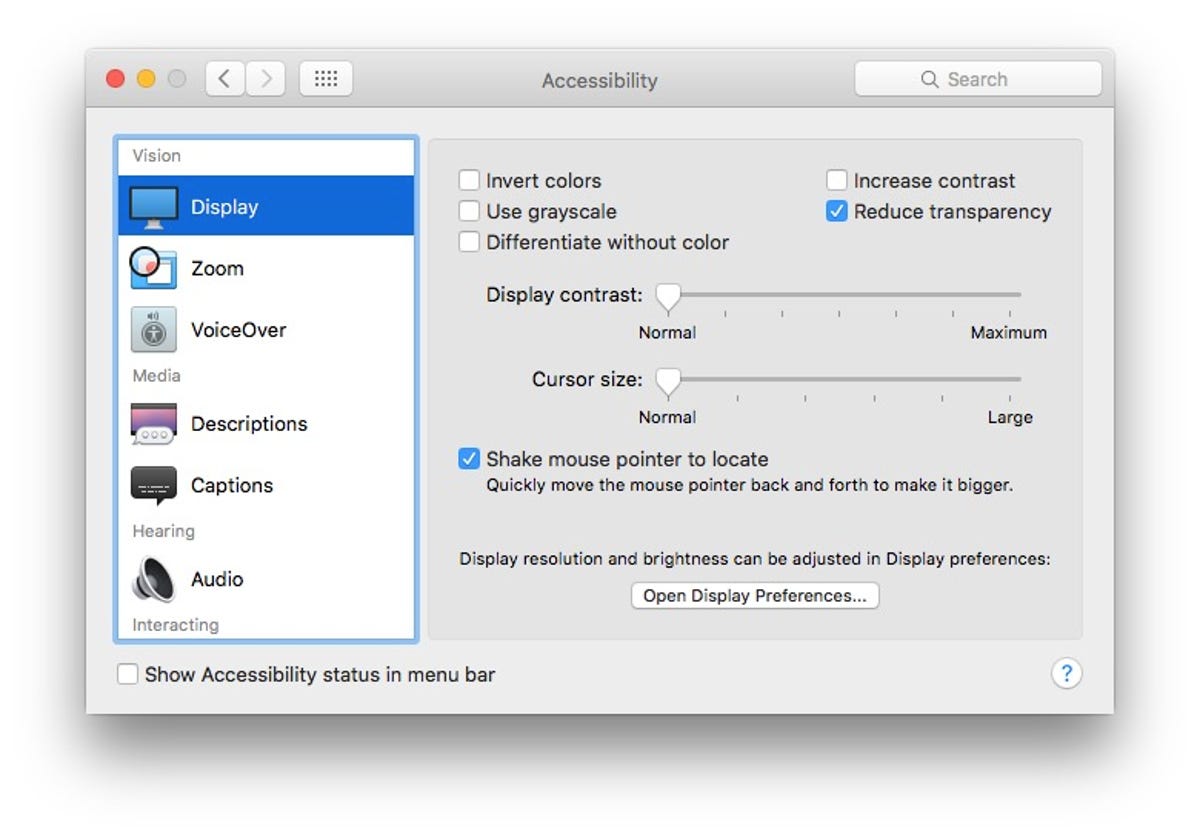
Say 'no' to animations and reduce transparency
OS X has a number of animations and transparency effects that add a bit of visual flair. This flair, however, taxes the graphics subsystem of older Macs and can adversely affect performance. You won't see much of a difference on newer Macs, but there are two settings to disable that might add a little pep in an old Mac's step.
Go to System Preferences > Accessibility and choose Display from the left panel. Check the box for Reduce transparency.
Next, go to Go to System Preferences > Dock and for Minimize windows using, choose Scale effect instead of Genie effect. Windows will now appear to open faster without the genie-springing-forth-from-a-bottle effect. You can also uncheck the box for Animate opening applications to stop app icons from bouncing in the Dock as apps open.
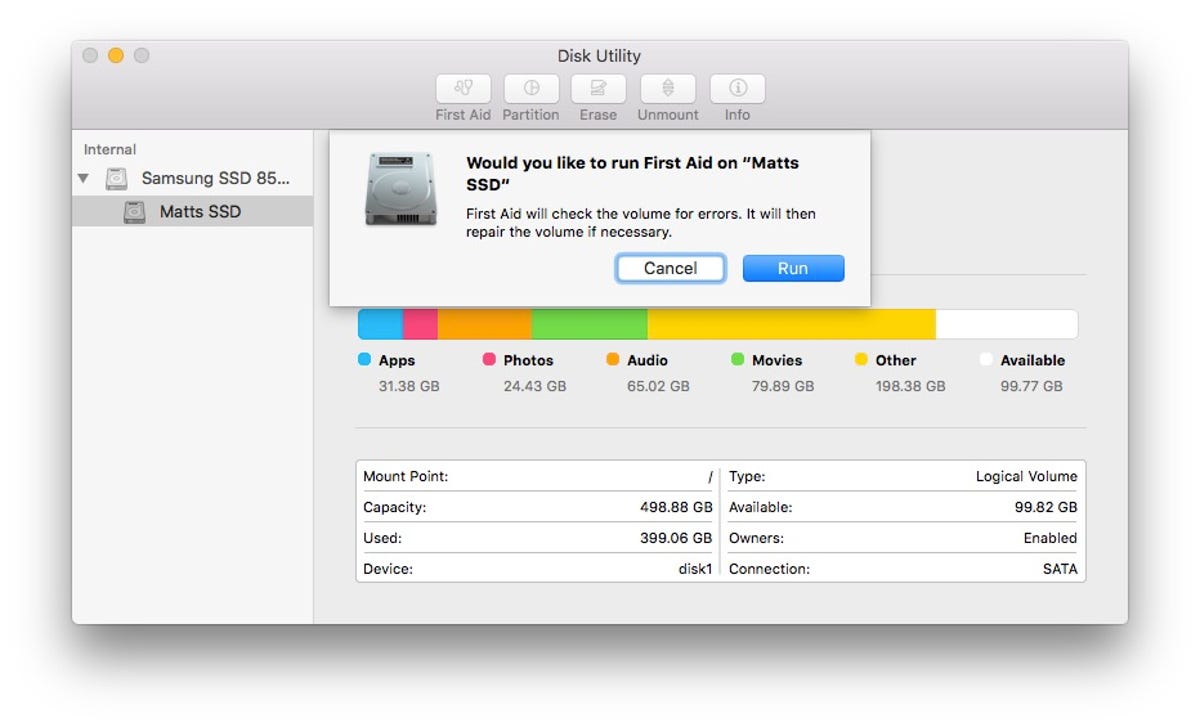
Repair permissions
When you install an app on your Mac, the piece of software arrives as part of a package of files, including permissions that tell OS X which users can do what things with specific files. Over time, these permissions can get changed, resulting in your Mac slowing down. Repairing these disk permissions, in the most basic terms, amounts to reshuffling and re-dealing these permissions so that they return to their rightful place. To address this, OS X has a built-in tool called Disk Utility that does just the trick.
Open Disk Utility, select your hard drive from the left panel, click the First Aid button and then click Run to repair your hard drive.
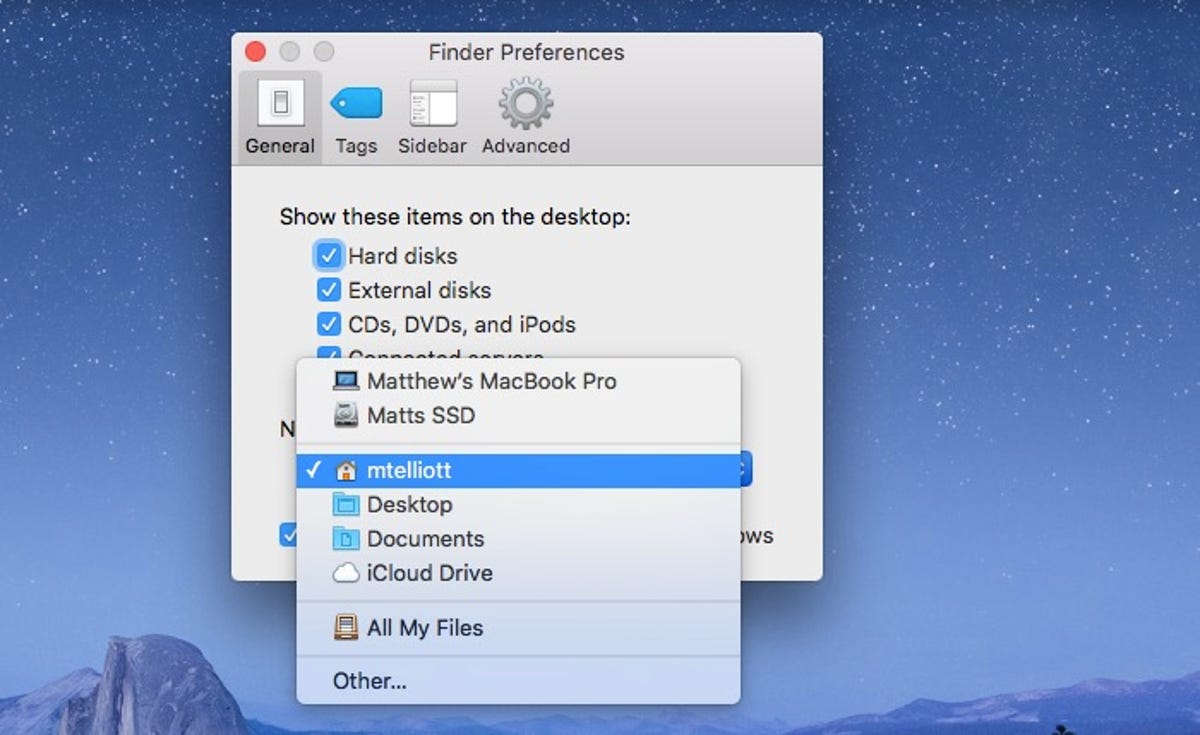
Narrow Finder's focus
By default, Finder loads the All My Files view. Finder will load faster if you let it show only a slice of your files. It'll still search all of you'll files, but the Finder window will be quicker to open if you choose a folder for it to display.
Open Finder and then go to Finder > Preferences. For New Finder windows show, choose another folder such as your home folder or the Desktop or Documents folder.
Get better battery life
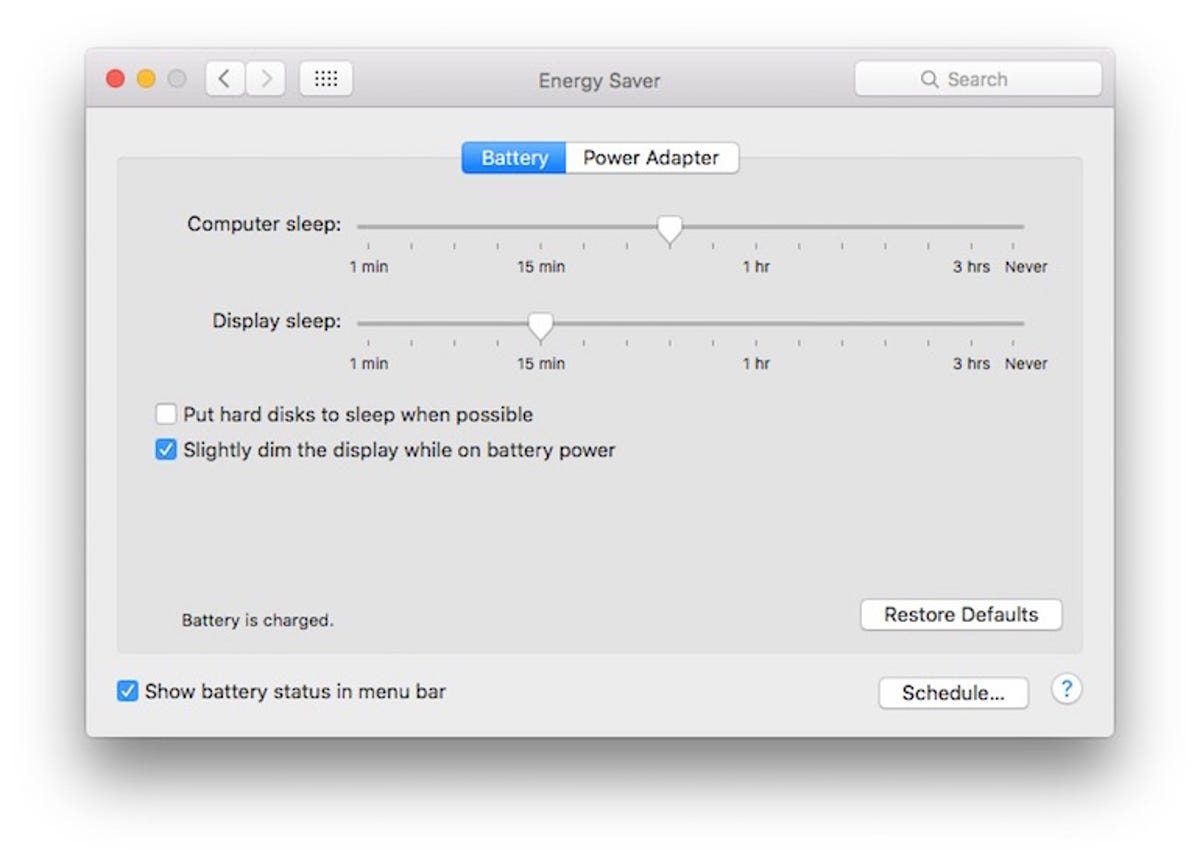
Powering your MacBook's display is the battery's biggest job. If you lower the brightness level, you'll get longer battery life. Open System Preferences and click Display. On the Display tab, you'll see a slider for Brightness. Lower it to a point between super bright and depressingly dull.
There is another display-related setting on the Energy Saver area of System Preferences. Check the box for Slightly dim the display while on battery power. Keeping your display running while your laptop sits unattended is a needless waste of battery resources. On the Energy Saver page, you can set times for Computer Sleep and Display Sleep, both of which spring into action if your MacBook sits idle for a period of time. Set as short a time as you're comfortable with for the Battery tab; it's less important for the Power Adapter tab.
Stay up to date with OS X
Apple releases new versions of OS X as free upgrades, so there is no reason not to stay current. New versions of OS X contain performance enhancements and security improvements to keep your Mac running smoothly and safely. Check in periodically with the Updates tab of the Mac App Store for OS X updates, and don't ignore notifications of updates that are ready to install.
Alternatively, click About This Mac from the Apple menu and click the Software Update button to open the Mac App Store and check for updates.
More Galleries

My Favorite Shots From the Galaxy S24 Ultra's Camera
20 Photos
Honor's Magic V2 Foldable Is Lighter Than Samsung's Galaxy S24 Ultra
10 Photos
The Samsung Galaxy S24 and S24 Plus Looks Sweet in Aluminum
23 Photos
Samsung's Galaxy S24 Ultra Now Has a Titanium Design
23 Photos
I Took 600+ Photos With the iPhone 15 Pro and Pro Max. Look at My Favorites
34 Photos
