Setting up your first network
Once you've identified your needs, it's time to take that next step: actually setting up your network. In this tutorial we'll start with a basic network: two laptops, connected by Ethernet cable to a single router.


Once you've identified your needs, it's time to take that next step: actually setting up your network. In this tutorial we'll start with a basic network: two laptops, connected by Ethernet cable to a single router.
The router
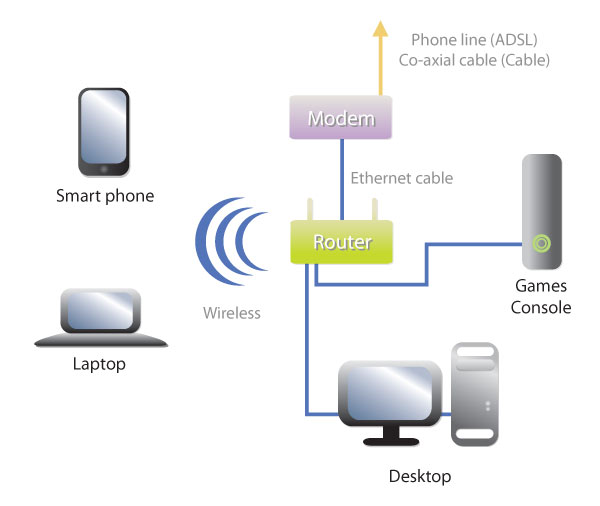
A router will likely be the centrepiece of your networking plan. It'll help share the internet across many devices, and allocate IPs to your network. A typical network might look something like this:
Locating local internet providers
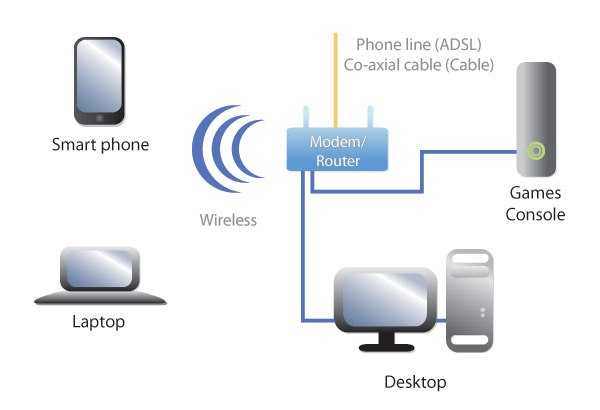
It's rare these days to find a modem separate from a router — most are sold as modem/router combined units. So the layout would look more like the diagram below, with the modem integrated into the router, the Ethernet cable eliminated between the modem and router, and the phone line leaving the router directly.
Locating local internet providers
So why illustrate a potentially obsolete set-up? Apart from the fact that there are many people still with modems who don't have a router, it's to help illustrate the concept of the Wide Area Network (WAN) port.
So many networks in the area
While there are a number of network types out there, there are three major ones the consumer needs to be aware of.
LAN: Local Area Network. A small network, often privately run. Unless you've specifically set up something to bridge two networks, this should be a distinct entity that only clients directly connected to it can see. The network in your home is a LAN.
WAN: Wide Area Network. Covers a larger area than a LAN. Often a conglomeration of LANs — this might be a global corporation's intranet connected by Virtual Private Network (VPN) over the internet, or one could even simply be the internet itself.
WWAN: Wireless Wide Area Network. Look ma, no cables! In Australia, this is almost used exclusively to describe the network through which you get mobile broadband — that is, 3G internet connections.
The WAN port (sometimes labelled as "internet") is a dedicated network port found on routers, which is used to help connect one network to another.
It's invaluable for those who only have a modem, and want to share the internet across multiple devices. By plugging an Ethernet cable from the modem into the WAN port on a router, you're essentially connecting two networks: yours to the internet. As a by-product, anything else plugged into that router also has access to the internet. This is how you can get many devices online using only the one internet connection.
A WAN port can also be used to daisy chain routers together if you find you've run out of network ports, or to segment your network; but that's for another tutorial.
Baby steps, baby steps
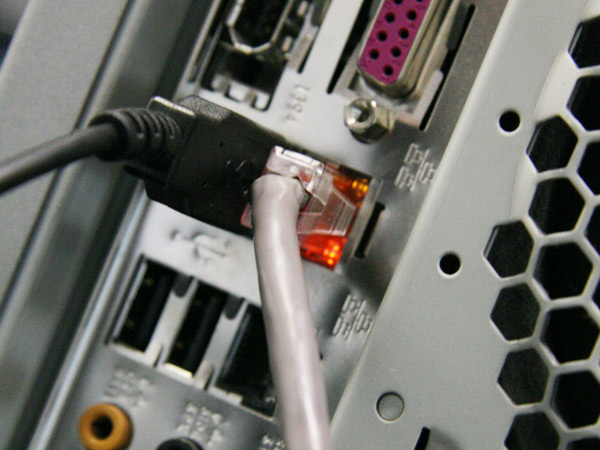
The first step is to get everything plugged up. For the router, you'll need to plug it into the wall and turn on the switch.
If none of the lights in your router turn on at this point, there's a chance the router has its own power switch, and you'll need to hit that as well. Not every router comes with such a switch, but it can be useful if it does.
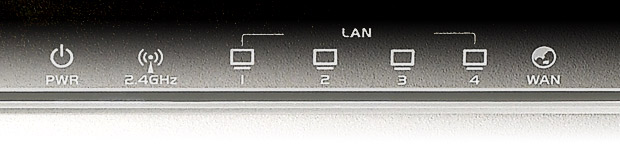
Depending on the router you've bought, you could have anywhere between one and five ports. To hook your laptops in, connect an Ethernet cable between it and any of the ports on the router, so long as they're not marked "WAN" or "internet".
If you've made a successful connection, there's a good chance you'll start seeing some lights. Most devices, routers or switches will have lights either integrated with the port or somewhere on the front of the device to illustrate that a connection has been made, and at what speed that connection is. These are often called link status lights, or simply status lights. One of these lights will often blink, to indicate that data is being sent or received. You'll need to refer to your manual to determine what lights mean what, as it changes from device to device.
Once you have a link, congratulations, you've physically set up your network! The same process can be used for game consoles, media streamers or anything with an Ethernet port. Now comes the potentially hard bit — configuration.
Configuration
"But I want wireless!" you say. Well, that requires us to set everything else up first.
Most routers have something called a web interface — that is, a configuration page that you can access using your web browser.
Just like every other device on your network, your router has an IP. Finding out this IP can be done in various ways, but the most common way would be to use a finder tool, often supplied by your vendor (Billion, D-Link, Linksys, Netgear, etc) with the device.
If you don't have a tool, there's potentially another way you can find it.
Dynamic Host Configuration Protocol (DHCP)
Routers can work in one of two ways — using static IPs or dynamically allocated ones. The former requires that the IP, subnet and DNS details be manually entered on every client in order for them to connect properly with the router — we'll come back to this later. The latter, however, waits for clients to connect, then tells them what IP they're allowed to have and automatically sends the other details. In the vast majority of cases this is the preferred method, and is done by something called Dynamic Host Configuration Protocol, or DHCP.
Most routers will come with a DHCP server enabled by default, and Windows is also set to connect to these DHCP servers by default. In a large majority of cases, simply plugging in the cables and waiting will do a lot of the network configuration for you.
If this is the case, you can find the address of your router pretty easily without having to use vendor tools. There are two ways to do this: the GUI way, and the command line way. The command line way is the faster of the two, but those not comfortable with the command line will prefer the GUI way.
Finding your router's IP in Windows 7
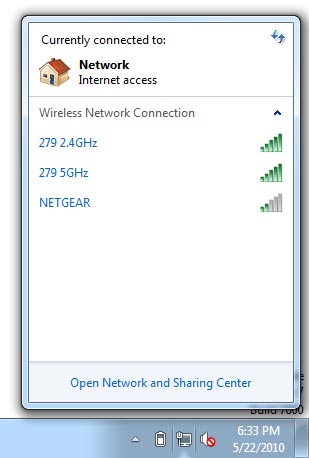
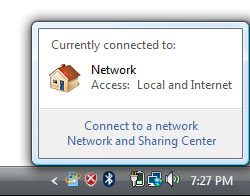
When you plug in an Ethernet cable, the following icon should appear in the system tray in the bottom right:

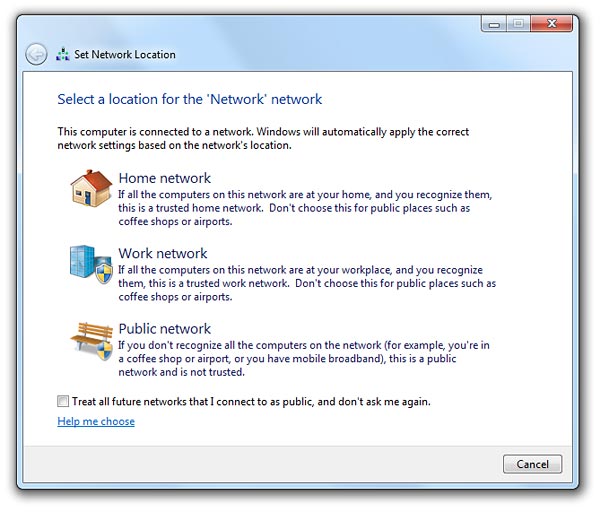
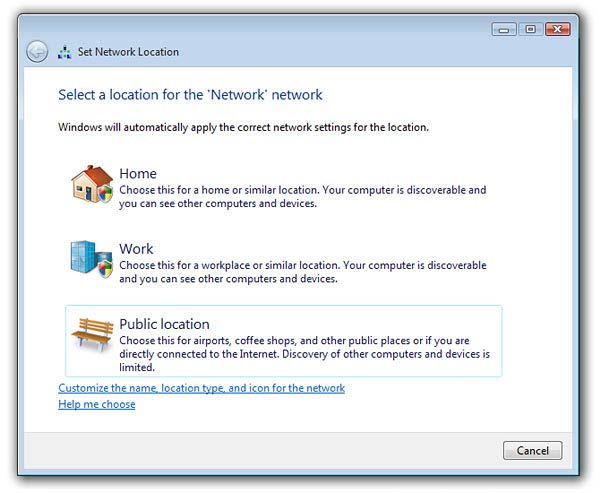
Once you've got a proper connection, Windows will ask you what sort of network you've connected to. In this case, you want to select Home network.
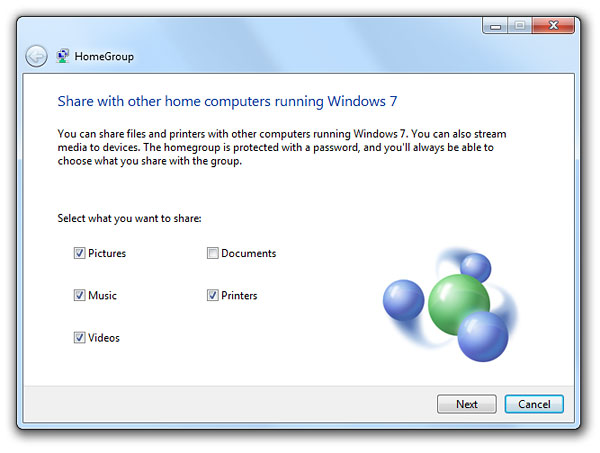
After this you'll likely be asked if you want to set up a Home Group — we're not quite ready for this yet, so press Cancel.
At this point we should be properly set up, and now we want to access the router's configuration page. Like most things in Windows though, there are a few ways to determine the IP of your router so you can do this.
Method 1
After you've plugged in the Ethernet cable, open Windows Explorer and click on the Network entry. If everything is set up correctly, the router will appear here. All you have to do is right-click on it, and select View device webpage.
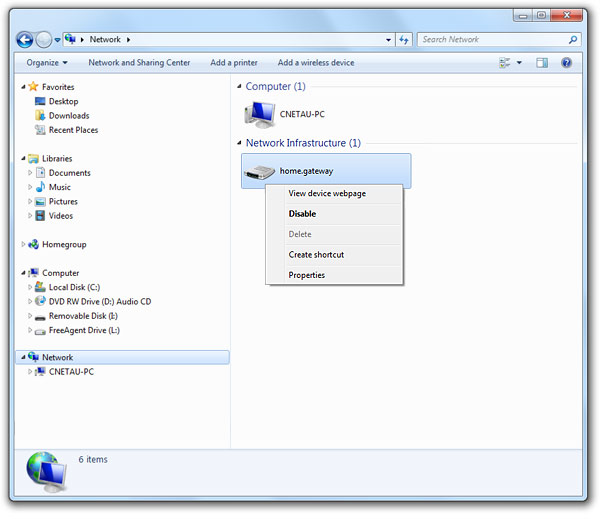
Your browser should open and you should be prompted to log in. You may wish to bookmark the address so you can load it quickly later. Congratulations, you're ready to configure your router!
Method 2
If method 1 doesn't quite work out for you, we can try method 2.
Left-click on the network icon in the system tray, and you'll get a pop up that will give you feedback about your current connections.
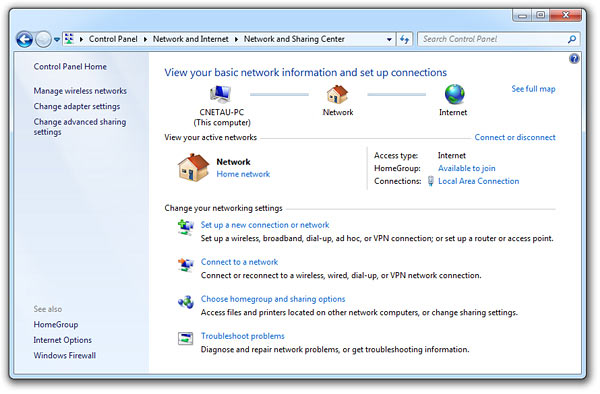
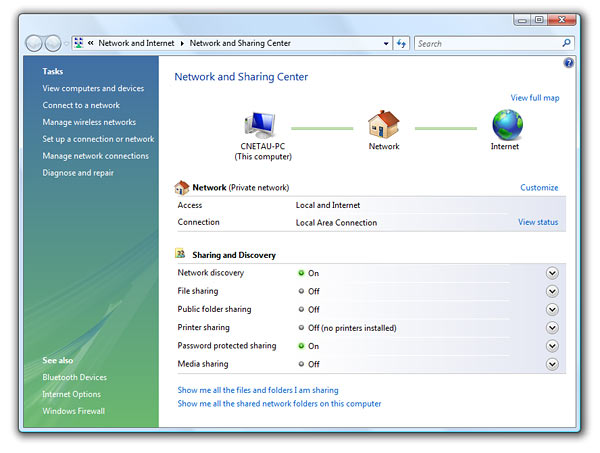
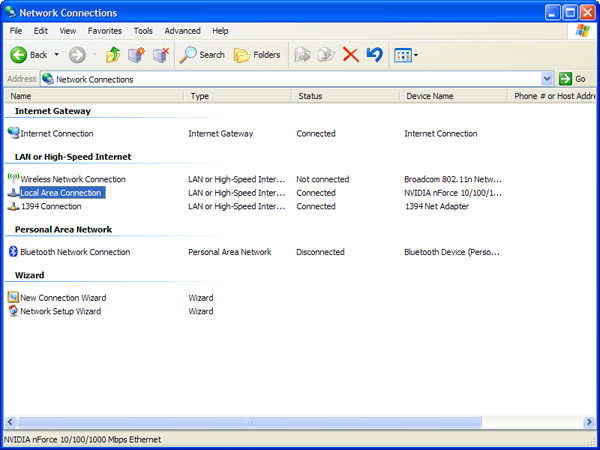
Select the Open Network and Sharing Center link. You'll get a window similar to the one below. Another way of getting here is to click the Windows orb in the bottom left, then Control Panel, then Network and Internet followed by Network and Sharing Center.
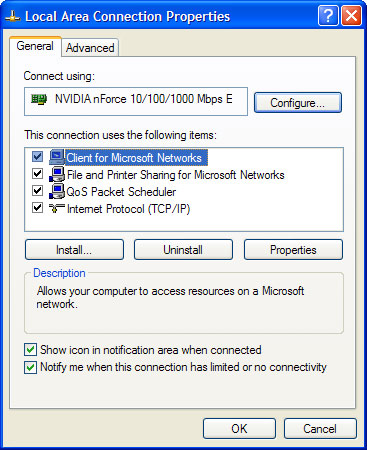
Here you'll want to click on the Local Area Connection link, which will bring up the details for that network connection. Note that this could be followed by a number, depending on how many network ports you have.
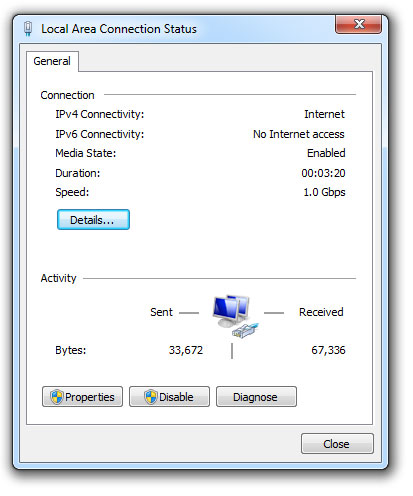
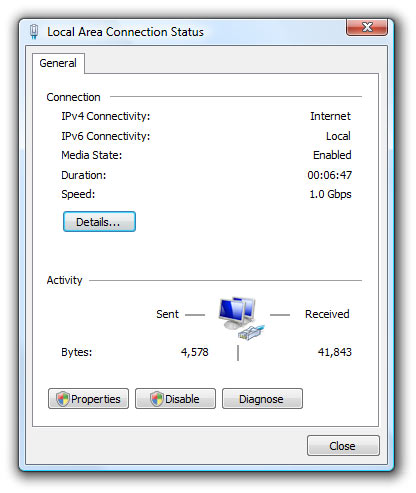
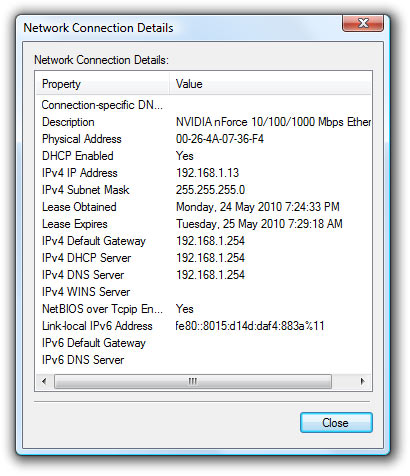
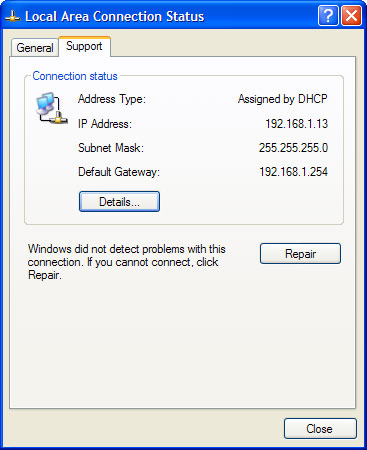
Click on the Details button, which will bring up another window.
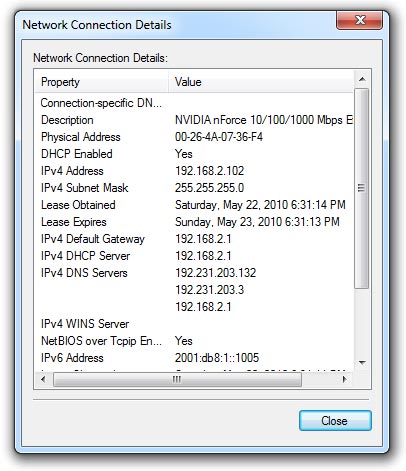
See the entry that says IPv4 Default Gateway? This should be the IP address of our router. Put it into a browser address bar, hit Enter and see if it connects. If you get prompted for a log-in and password, congratulations, you've done it! You may wish to bookmark the address for future use.
Finding your router's IP in Windows Vista
When you plug in an Ethernet cable, an icon with two monitors should appear in the system tray in the bottom right (it may already be there, with a red cross over it to indicate no connection):

Once you've got a proper connection, Windows will ask you what sort of network you've connected to. In this case, you want to select Home network.
At this point we should be properly set up, and now we want to access the router's configuration page. Like most things in Windows though, there are a few ways to determine the IP of your router so you can do this.
Method 1
Open Windows Explorer and click on the Network entry. If everything is set up correctly, the router will appear here. All you have to do is right-click on it, and select View device webpage.

Your browser should open and you should be prompted to log in. You may wish to bookmark the address so you can load it quickly later. Congratulations, you're ready to configure your router!
Method 2
If method 1 doesn't quite work out for you, we can try method 2.
Click on the network icon in the system tray, and you'll get a pop up that will give you feedback about your current connections.
Select the Network and Sharing Center link. You'll get a window similar to the one below. Another way of getting here is to click the Windows orb in the bottom left, then Control Panel, then Network and Internet followed by Network and Sharing Center.
Here you'll want to click on the View Status link under the heading Local Area Connection, which will bring up the details for that network connection. Note that "Local Area Connection" could be followed by a number, depending on how many network ports you have.
Click on the Details button, which will bring up another window.
See the entry that says IPv4 Default Gateway? This should be the IP address of our router. Put it into a browser address bar, hit Enter and see if it connects. If you get prompted for a log in and password, congratulations, you've done it! You may wish to bookmark the address for future use.
Finding your router's IP in Windows XP
Click on the Start button, then open Control Panel. Click on Network Connections.
There should be an entry called Local Area Connection (this could be followed by a number, depending on how many network ports you have). Right-click on this, and choose Properties.
At the bottom of the window that appears, check Show icon in notification area when connected, then click OK. A network icon should now appear in your system tray at the bottom right — it looks like two monitors.

Click once on this to bring up the properties for that network connection, then click the Support tab.
The entry under Default Gateway should give your router's IP. Punch the number into a browser, hit Enter, and if it's right you'll be asked to log in. You may wish to bookmark the address for future use.
Finding your router's IP in Windows Command Prompt
The quickest way to find out the IP of your router is, of course, the command line — although this is usually reserved for more advanced users.
After you've plugged in an Ethernet cable, open up a Command Prompt. You can do this as follows:
Windows 7/Vista
Hit the

cmd
And hit Enter.
Windows XP
Click Start, then All Programs, Accessories and click Command Prompt.
Alternatively, you can press
cmd
And press Enter.
Once the Command Prompt is open
When the command prompt has opened, type the following:
ipconfig /all
And press Enter.
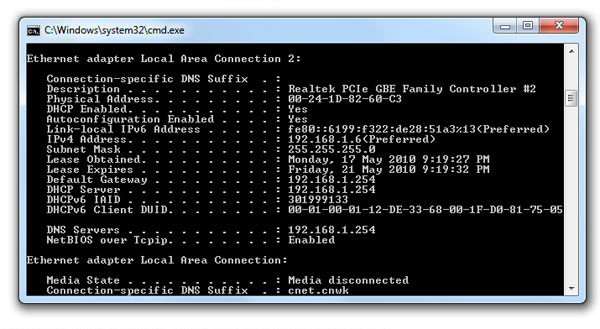
You'll get a mess of information that may scroll for a few pages; what you're looking for is a section called Ethernet adapter Local Area Connection, most likely followed by a number — there will be a few of these, depending on how many networking devices you have. Under this should be a heading called Default Gateway; this is likely the IP of your router. Punch it into the address bar of a web browser, hit Enter, and if you're right you'll be asked for the log-in details for your router.
ipconfig also tells you a lot of other information, and you'll become familiar with it the longer you play with your network.
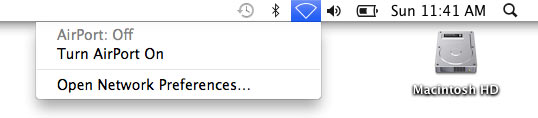
Finding your router's IP in OS X 10.6: the GUI way
There's an icon on the top right of the menu bar that looks like a section of a circle: if AirPort is on, this will be replaced with the typical Wi-Fi logo.
Click on this and select Network Preferences. Another way to reach the same preferences panel would be to click on System Preferences in the dock, and under the Internet and Network section clicking Network.
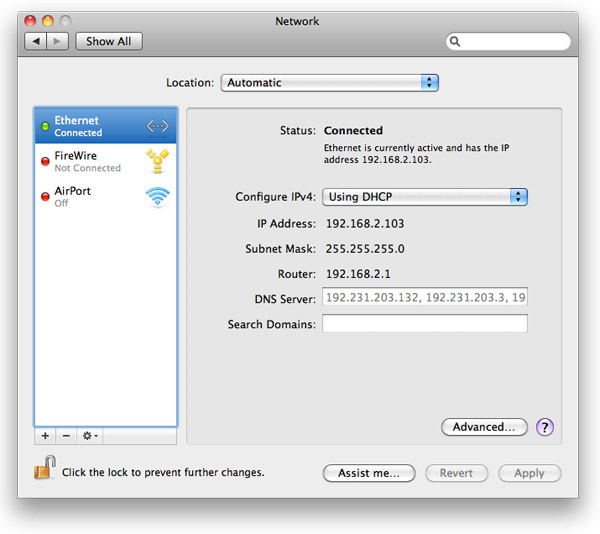
Select Ethernet, and take a look at the Router section. This is your gateway address, and likely the IP of your router, too. Type it into a browser address bar and hit enter, and with any luck the router interface will appear.
Finding your router's IP in Mac OS X: the Terminal way
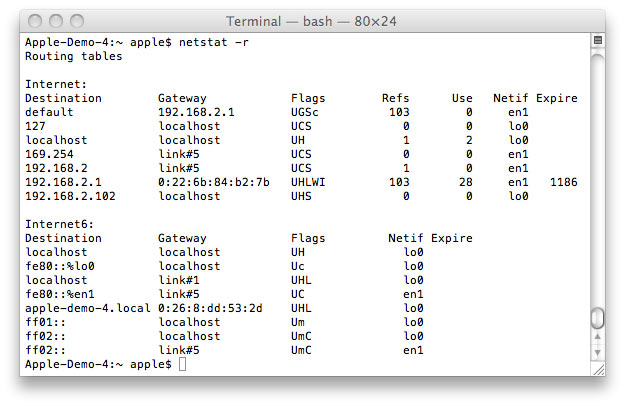
Open up a Terminal window by going to Applications (either from the dock or Macintosh HD), then Utilities and clicking Terminal. Type:
netstat -r
And hit Return. The default entry is likely the address of your router. Put it into a browser's address bar, hit Return and hopefully the web configuration page will load.
Configuration: the router
It's difficult to write a guide on a router's interface, simply because they're all different, and many vendors use different terms to describe the same thing. At this point we'll recommend you refer to your router's manual, and over the coming months we'll be adding instructions for specific models. We will, however, make some general suggestions:
- Change your router password as soon as possible. Most will have the log-in "admin" and the password will likely either be "admin", "password", "netgear1" or blank. Since these are incredibly common, it doesn't take long at all for any potential attacker to get into your router.
- If there's an option that prevents admin access to the router via Wi-Fi, do it. This way, someone will need access to your house, your router and an Ethernet cable to be able to change any router settings, rather than simply sit outside browsing for Wi-Fi connections.
- If you decide to set up wireless before we get to covering it in this extended tutorial (and it might be a while, so we don't blame you!), make sure to use WPA2 protection. All other wireless security protection has been cracked.
Feel free to play around, and we'll be back with the next instalment in the coming months.