Secure your deleted files in OS X
There are a couple of ways to ensure that file contents are irrecoverable when deleting files in OS X.


When you delete files in OS X, by default the system will simply remove the file's entry from the drive's index, which simply allocates the space used by the file as free for other uses. However, while this logically deletes the file, on conventional hard drives the data structure of the file is still intact and with special data recovery software can be read through and potentially recovered.
This means that if you store an important document on an external hard drive and then decide to delete the file, its contents will still be on the drive and may be recoverable. However, Apple does offer a few approaches for removing the residual data from a file that you are going to delete, or which has already been deleted.
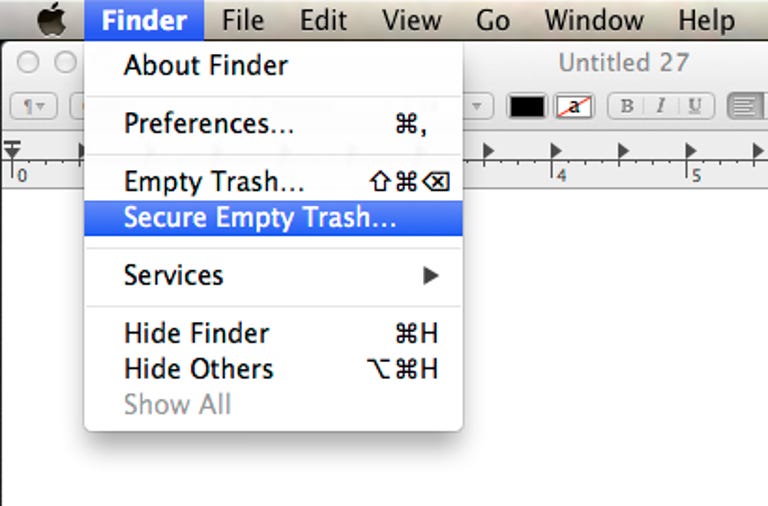
Secure Empty Trash
If your file is still available, then the first option is to secure-delete it using the Secure Empty Trash option in the Finder. This will perform a multipass overwrite of the file's contents with random data, before the system finally removes the file. Keep in mind that this process will take far longer to do than a basic deletion, and its time frame will depend on the file size. So, for example, if you secure-delete a small text document, it will take a split second, but if you do so for a 2GB movie file, it will take a number of seconds to complete.
To secure-delete a file, move it to the trash and choose Secure Empty Trash from the Finder menu. Alternatively you can make this the default action for emptying the trash, by checking the "Empty Trash securely" option in the Finder preferences.

Erase Free Space
The Secure Empty Trash option will only work on existing files; you can't use it on a file you have already deleted a file. However, Apple does have a service that can be used to ensure that deleted files are not recoverable, which is to secure-erase the entire free space on a drive.
Erasing free space will do a similar thing as securely emptying the trash; however, it will do so for the entire unused space of the hard drive, instead of just the space previously used by a specific file or two.
To erase free space, open Disk Utility and select your desired volume in the device sidebar. Then click the Erase tab, where you should see an Erase Free Space option. This will be grayed out and unavailable if you are targeting an SSD device, as erasing free space on these will cause unnecessary wear on them. In the Erase Free Space panel that shows up, you have three options for erasing the free space. The first is to write zeros to the drive, the second is to do a three-pass erase, and then final is to do a seven-pass erase. Usually nothing more than a single overwrite with zeros is necessary to secure file data from recovery, but the other options are available, if desired.
Note that as with securely emptying the trash, the more passes the system performs over the data, the longer it will take. Additionally, the more free space available (either from the relative use of the drive, or the overall size of the drive), then the longer the erase routine will take.
Questions? Comments? Have a fix? Post them below or
e-mail us!
Be sure to check us out on Twitter and the CNET Mac forums.