Making the switch: a Windows user's first MacBook (part 1)
Making the switch to Apple and OS X can be a little daunting for casual Windows users. Here's a rundown of how you can adapt to your new operating system.
Craig SimmsSpecial to CNET News
Craig was sucked into the endless vortex of tech at an early age, only to be spat back out babbling things like "phase-locked-loop crystal oscillators!". Mostly this receives a pat on the head from the listener, followed closely by a question about what laptop they should buy.
Welcome to part one of our feature for switching to Mac. Once you're done, if you'd like to further your learning we've also got a second part, and a third for getting you up to speed on all things OS X.
So, you've succumbed to the shiny and bought yourself a new MacBook — but things aren't quite as familiar as your Windows world. CNET Australia is here to help with the adjustment!
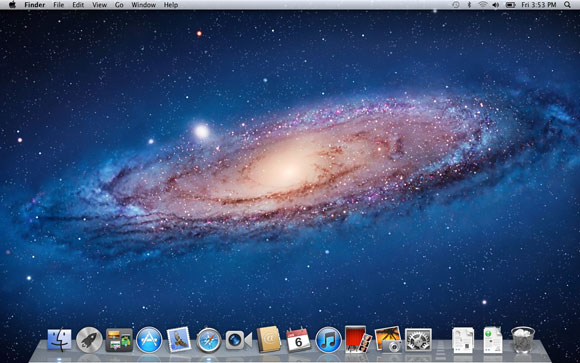
We'll tackle this from the point of view of having opened your new Mac and walked through the set-up process, and you're now looking at your first desktop.
After you've gone through the sign-up process, this will most likely be your first sight.(Screenshot by Craig Simms/CBS Interactive)
Make yourself more comfortable
For the first-time OS X user, long-time Windows user, being presented with the OS X desktop can be a little jarring. Let's change a few settings to make things more comfortable.
Icons on the desktop
OS X likes to hide elements of its file system — let's open it back up for the power user.
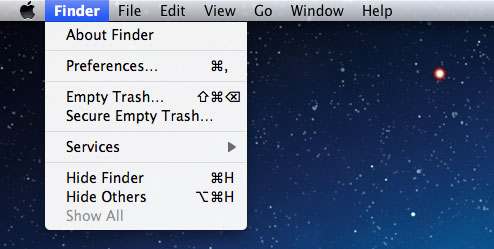
We'll want to be using Finder, OS X's version of Windows Explorer. It runs by default as a shell, in much the same manner that Explorer does. From a straight cold boot, it's the first application running; you can see this, as the word Finder should be right next to the black Apple logo at the top left.
Many application preferences are found under their self-titled menus.(Screenshot by Craig Simms/CBS Interactive)
If it's not, we'll need to make Finder the active application. There are two ways you can do this: click the blue-and-silver square smiley face in the bottom left, or go through keyboard shortcuts. As a Windows user, you're more than familiar with Alt + Tab for task switching. The same functionality exists here, too, but instead is assigned to Command + Tab.
Once Finder is active, click the word Finder at the top left of the screen and select Preferences.
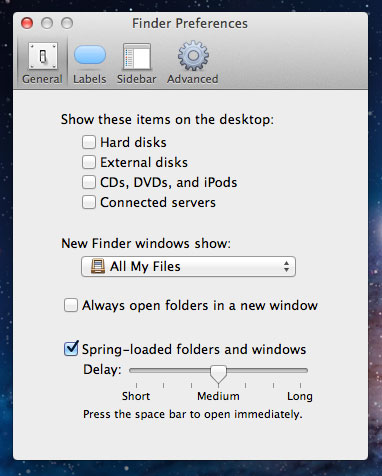
Finder's preferences window.(Screenshot by Craig Simms/CBS Interactive)
Under the General tab, there are options under Show these items on the desktop. Select them all — you'll now have a handy shortcut to your hard drive on the desktop, and whenever you insert a USB drive, it'll appear here, as well.
Saving settings
There's rarely a need to hit "apply", "save" or "OK" in OS X. Once you change a setting, in most circumstances it's instantly changed.
Let's take things one step further: we want easy access to the root of the hard drive when using Finder. Click on the Sidebar tab, and under Devices, ensure that Hard disks is a tick rather than a minus. You can also check Computer here if you want a top-down view of your system, although, at this stage, it'll have a blank name — you'll need to launch System Preferences from the dock (the gear-like icon in the bar at the bottom of the screen), then select Sharing under Internet & Wireless to change it.
Making Finder open a different folder by default
While some may find the "All My Files" view useful when opening new Finder windows, we don't. An easy way to make this more appealing to power users is to go back to the general tab of Finder preferences, find the section called New Finder windows show and set the drop down to your folder of choice. We like showing the root folder of the main hard drive, so we usually select Macintosh HD and leave it at that.
Getting the most out of the track pad
Time to address something that's likely been frustrating you: You can right click with an Apple track pad — out of the box, hold two fingers on the pad and physically click. But there's a more elegant, less effort, solution, and this involves tapping. Let's start tweaking our track-pad experience, and, while we're at it, explore why Apple really does make the best touch pad in the business.
Open up System Preferences, the gear-like icon in the dock. This is analogous to Windows' Control Panel — and, yes, just like Control Panel, not everything is stored here.
System Preferences is similar in function to Windows' Control Panel.(Screenshot by Craig Simms/CBS Interactive)
Three-finger drag
Three-finger drag has an interesting side effect — more than just moving windows, with it enabled you can also select text using a three-finger swipe, even if it isn't the most accurate of methods. We prefer the Windows method, though — double tap to drag/select, then tap once more to release/finish selection. This is available in OS X, too, but Apple's hidden the setting somewhere else.
If you prefer it to, ensure that three-finger drag is off, then head to System Preferences and click Universal Access, found under the Personal section. Select the Mouse & Trackpad option, then click Trackpad Options at the bottom. Check the Dragging check box, change the drop down to with Drag Lock. Click Done, and you'll start feeling a lot more comfortable immediately.
Under the Hardware section, click the Trackpad icon. The first thing you'll notice is that Apple includes a handy video, both demonstrating the gesture of the selected option, and what that gesture does. Let's get to customising.
Change the tab to Point & Click. Here you can enable tap to click (which automatically allows you to double finger tap for a right click, instead of physically depressing the track pad), set the bottom right or left corners to act as a right click when physically depressed and choose from several more options.
Apple includes useful videos for all of its track pad options, allowing you to customise easily.(Screenshot by Craig Simms/CBS Interactive)
Flip over to the Scroll & Zoom tab. By default, OS X Lion is set to scroll the page in the same direction as your fingers move — that is, the opposite way that Windows does it. It's a bizarre sensation, as you're likely used to manually associating the scroll bar moving with your fingers instead of the content. If it turns you off, you can turn it off: simply uncheck Scroll direction: natural. Let's head to the More Gestures tab.
This is where things get really cool, as we start to delve into window management in OS X. All we'd suggest is that you turn on everything here if it isn't already — it makes life a heck of a lot easier. To give you an idea of some of the gestures available, put the tips of all your fingers and thumb on the pad, then splay them out slightly. You should now be able to see the desktop, and manipulate things there. Put down your fingers and contract slightly to bring all of your apps back. Contract once more, and you'll be treated to Launch Pad, Apple's quick-access solution to reach your apps. Splay your fingers slightly to close it. Within time, it all becomes incredibly natural.
Window management and the track pad
This seems like the perfect time to talk about window and workflow management. Due to the way OS X is designed, there are many frustrations for the experienced Windows user, but over time you'll adjust to the specific idiosyncrasies of each operating system.
Lion brought quite a few changes to OS X window management that long-term OS X veterans grumble about (particularly the removal of system-wide Exposé), but if you use all of the new features in concert, it's quite a smooth system.
App switching
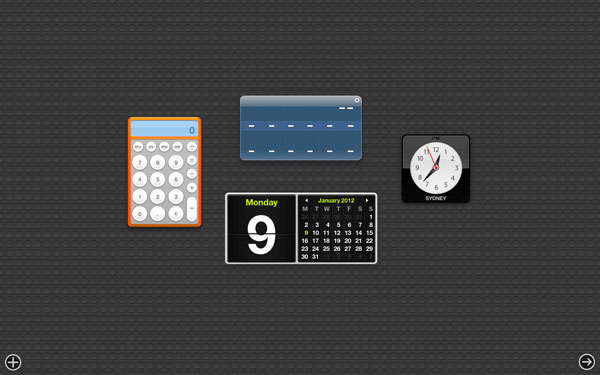
Apple's dashboard stores all of its widgets.(Screenshot by Craig Simms/CBS Interactive)
So, let's play a little. Put four of your fingers on the track pad and swipe left. Here's your Dashboard, where Apple stores widgets. You can drag them around, delete them or even add more by pressing the plus symbol in the bottom left.
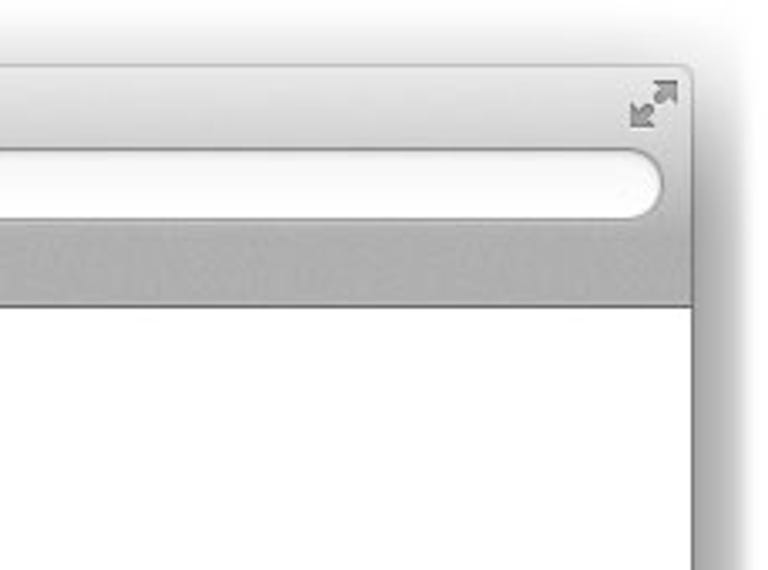
Not all apps can go full screen, but, if they can, these arrows will be in the window's top right.(Screenshot by Craig Simms/CBS Interactive)
Swipe right to get back to your desktop. Nifty, but perhaps not the most useful thing — but wait, there's more. Open Safari, OS X's web browser. See the diagonal arrows in the top right of the application window? Click them.
You've now made Safari a full-screen app, taking up its own dedicated virtual desktop. While Unix and Linux have used virtual desktops for years, and there's plenty of Windows programs that do the same thing, Apple calls them "Spaces". Same thing, slightly slicker execution.
You can flick between Spaces (and therefore full-screen apps) by doing the very same gesture you just learned — the four-finger horizontal swipe. It's a rather elegant workflow. If you're old school, you can use Command + Tab to cycle through your apps, too, regardless of what Space they reside in.
Corralling the apps
OK, but what if you want to keep track of what's in all of your spaces, and the currently running programs? It's time to visit Mission Control.
Mission Control helps you switch between apps.(Screenshot by Craig Simms/CBS Interactive)
Swipe four fingers up. You'll now have a graphical representation of everything on your desktop, along with any full-screen apps you have running, lined along the top. Let's turn Safari back into a normal application. Click on it to switch to it, and then move your mouse cursor to the top of the screen to bring down your menu and options. Click the blue icon in the far right with the diagonal arrows. Safari will now become a normal app, and return to your desktop Space.
But what if we have multiple windows open of the same app? Let's see. Open up a Finder window, then press Command + n a couple of times to open up multiple windows. Swipe four fingers up to enter Mission Control (alternately, you can hit the F3 key).
Your collection of Finder windows will be grouped together (as pictured above in the bottom-left corner), which obscures your view of each window. To make things friendlier, move the mouse over them so that one of the windows has a blue outline around it, then use two fingers to swipe up to expand the collection to give yourself a better view. Click on the window that you wish to switch to.
If you need to see more details again, you can use application Exposé. Exit Mission Control by swiping four fingers down, and make sure Finder is the active application, then swipe four fingers down again. All of your open Finder windows will be laid out spatially for you to select from.
App Exposé let's you find the window you want within a specific application group. Here we can see the three Finder windows that we have open.(Screenshot by Craig Simms/CBS Interactive)
Dealing with OS X apps
Titlebars
Unlike Windows, the title bars and menus for OS X applications are usually kept in a persistent bar across the top of the screen. Switch to a different application, and that application's menu and settings will appear at the top, adjusting depending on context. It's easy to tell which application is active, because its name is next to the black Apple logo.
The title bar along the top is persistent. It'll let you know what application is currently running, and provide context-sensitive menus for that application.(Screenshot by Craig Simms/CBS Interactive)
This isn't just for show; it's a menu item, too, and often where preferences and the about dialog are placed for programs.
The top right of the bar is like Windows' system tray, where you have drop downs for Time Machine, Bluetooth, wireless, volume, battery and date.
Shortcuts to OS X functions and programs running in the background appear in the top right of the title bar.(Screenshot by Craig Simms/CBS Interactive)
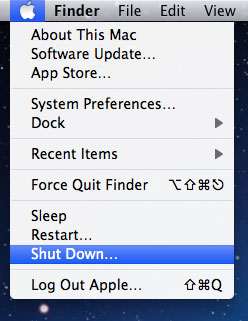
The Apple menu
One thing that's constant in the menu bar is the Apple logo in the top left; from here, you can update Apple software, including the OS, force quit programs, restart, shutdown, send the computer to sleep or log off.
This is also where the OS X equivalent of Device Manager is hidden: choose About This Mac, and, in the dialog that appears, click More Info. You'll get another Window with some simplified information (one of the new Lion frustrations), but simply click System Report, and you'll get all of the gory details.
(Screenshot by Craig Simms/CBS Interactive)
Closing, minimising, maximising applications
Get used to these being on the left, and the green + button doing completely inconsistent things.(Screenshot by Craig Simms/CBS Interactive)
At this stage, you're probably tearing your hair out over two things — that your window-resizing buttons are on the left, and that applications don't like to "maximise" in the sense that Windows applications do. The first you should adjust to reasonably quickly, but the latter can be truly vexatious.
It doesn't help that the little green plus, meant to maximise, isn't consistent in behaviour. Press it on a Finder window, and it'll expand to the full screen. Do it on iTunes, however, and it'll switch between compact and windowed mode. Do it on Safari, and it'll expand the window to the maximum height, ignoring the width altogether. It flies smack in the face of Apple's own "consistency" design ethos, but there it is. Trust us on this one — breathe and let the concept of maximised apps go, and learn to use applications in windowed or full-screen mode while in OS X. There's not much else you can do.
The orange button with the minus is thankfully more predictable, and minimises any application that you're running into the dock, represented by an icon on the right-hand side, past the dashed white line. You can, of course, restore the application by clicking on it in the dock.
Another common Windows user frustration: pressing the red button with the X in it will rarely quit the application, instead closing that particular window. That's right; it's entirely possible to have an application still running even if there are no active windows around. If you truly want to quit a program, you're best off using the Command + Q keyboard shortcut.
Managing the dock
The bar along the bottom of the screen, the dock, is an incredibly useful tool, but a few tips can help you tweak it to your liking.
The dock acts as a quick launcher and window-management tool.(Screenshot by Craig Simms/CBS Interactive)
There are two areas to the dock, bifurcated by a white dashed line; your aliases to commonly used programs on the left, and special items such as stacks, folders, the trash can and currently running programs on the right.
Don't want an app in there? Easy enough; just drag it off the dock onto the desktop, and a cloud overlay will appear above the icon. Let go of your mouse click, and it'll be removed. Want an app there? Just as easy: find it in Finder, then drag it to the dock. When the icons move to make a space, release your mouse click and it'll be set in place.
You can resize the icons and dock fairly easily, too. Move your mouse cursor over the dashed white line until it changes to two arrows with a line in the middle, then click and drag up or down to resize. You can get more options here by right clicking on the white line and choosing Dock Preferences, and we encourage you to play around until you find the settings you like.
Stacks and folders
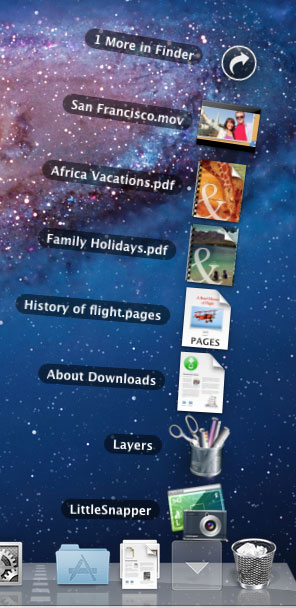
There's a special type of dock entry that you can create, which involves dragging folders to the right-hand side of the dock instead of applications. By default, Lion already shows a Download stack in the dock's right. By default, this is where Lion saves all of your downloads, making sure they're always handy.
Stacks can make finding specific types of files quick and easy.(Screenshot by Craig Simms/CBS Interactive)
Click the Downloads icon, and icons will fan out, with an option to open the folder in Finder. You can change how these contents are displayed by right clicking on the entry and changing the View content as setting. If you don't like that it shows previews of the file type as the icon, then you can show the folder icon instead, by changing Display as to Folder.
You can drag any folder to the right of the dock and treat it as a stack or folder, and it's particularly useful for grouping collections of applications, like Adobe Creative Suite or Microsoft Office, together.
All things OS X apps
Lauching apps
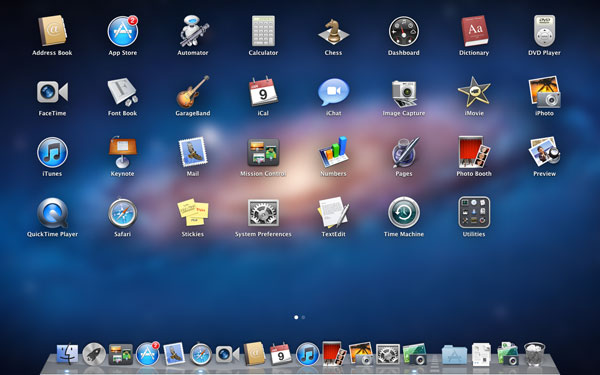
There are a few different ways that you can find your applications on OS X other than the default links on the dock. One of the quickest is to put all your fingers on the touch pad and contract, which loads Launchpad, an iOS-like launcher. Alternately, the same effect can be gained by pressing the F4 key. If you have more than one page of apps, you can switch between them by swiping two fingers left or right.
Launchpad is one of the many hints that Apple is bringing iOS and OS X closer together.(Screenshot by Craig Simms/CBS Interactive)
Using Finder's Go menu
Think of Finder's Go menu as the equivalent of Windows' Run box. If Finder is active, you'll find Go to Folder under the Go menu. Alternatively, you can press Shift + Command + G to open the dialog directly.
Since OS X is built on Unix, knowing a few Unix shortcuts can help. For instance, if you enter / in the Go to Folder dialog box and hit enter, it'll open the root folder of the hard drive. If you enter ~ and hit enter, it'll load the user's folder.
This likely won't sit well with all, though, so thankfully there's at least three more ways that you can find your programs. Open up Finder. Under the Favorites section on the left, you'll find the Applications link, which you can click on to see the programs that you've installed. This is just a shortcut (or "alias", as OS X calls it) to the applications folder, found in your hard drive root folder. This is easy enough to find manually; if you added hard disks to the sidebar in the earlier step, you'll see your hard drive here (most likely called Macintosh HD). If you click on this, you'll see where the Applications folder resides.
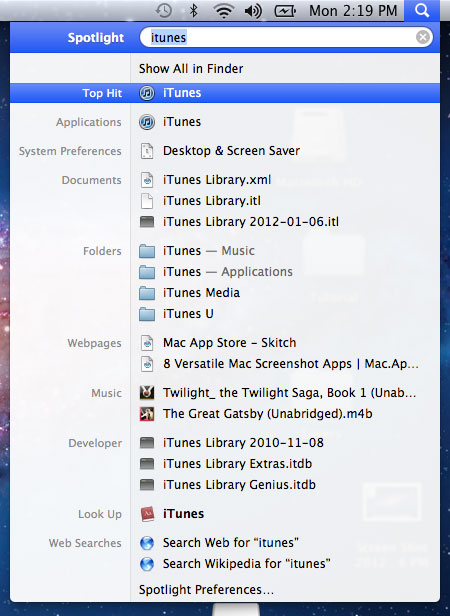
A third way is to use Spotlight. Spotlight is always available via the magnifying glass icon in the top right of the menu bar. Think of it like Windows 7's Start Menu search bar — here, you can type part of the name of the application, and likely matches will be shown. Hit Enter if what you want is highlighted, and it'll load the app. It's much faster than wasting time with the GUI. Even faster, you can summon Spotlight at any time by pressing Command + Space.
It's not just for applications — Spotlight will unearth all sorts of useful things.(Screenshot by Craig Simms/CBS Interactive)
Another way is how OS X used to do things before Lion. Open up Finder, and drag Applications down to the right-hand side of the dock (the other side of the white dashed line) and release. Right click on the newly created alias and select Folder under the Display As section from the pop-up that appears. Now, when you click on it, you'll have easy access to all your apps, in the closest thing to Windows' current Start Menu.
Using the dock to its potential.(Screenshot by Craig Simms/CBS Interactive)
Safely ejecting a USB drive
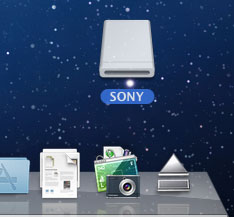
Before you physically yank a USB drive from your Mac, you'll want to eject it safely to ensure that any potential writes complete first. There are a few ways to do so: if you've allowed external disks to appear on the desktop, you can simply drag and drop the icon to the trash (which will turn into an eject icon once you start dragging). When they disappear from the desktop, they're safe to remove.
If you have a Finder window open, your USB drives will also appear on the left, under Devices, with an eject icon next to them. Press the eject icon, and OS X will safely disconnect the volume. When it disappears, you can physically remove the drive.
Finally, you can press Control + click or right click on the drive icon, and choose to eject from the context menu.
Ejecting an external drive.(Screenshot by Craig Simms/CBS Interactive)
Installing and uninstalling apps
Another Windows frustration will be the lack of uninstallers in OS X, excepting Adobe's Creative Suite and Microsoft's Office. See, they're simply not needed.
OS X apps are self contained, stored in a system folder that has a .app extension, which is hidden from the user. This makes app management, for the most part, quite trivial.
Want to install an app? Drag it to the applications folder. Uninstall it? Just drag it to the trash. There are exceptions to the rule, but by and large things are kept this simple.
DMG files
DMG files are image files, just like .ISO or .BIN on Windows, and are mostly used to distribute OS X applications. Inside the file is contained an entire folder and file structure, which you can access by mounting the file. Double clicking a DMG will do so, just like a flash drive, making it appear as another volume in Finder, or on the desktop. As a note, if you download a DMG file, it will be auto-mounted by OS X.
If you want to delete a DMG file, you'll need to dismount its mounted volume first by dragging it to the trash, ejecting it as you would an external hard drive.
Coming up in future installments: keyboard shortcuts, editing and navigating text, file management, getting your Mac to write to NTFS, using the network, making a Lion back-up, running Windows through BootCamp and more.
Found something that made your life easier as a Windows switcher? Let us know in the comments below.