iPhone 4 and iPad micro SIM DIY: Trim your SIM
Got yourself an iPhone 4 and iPad? You'll need a SIM card -- but not just any SIM. Fortunately, transforming your standard SIM is a simple hack -- literally. Wielding scissors and SIMs, we show you how


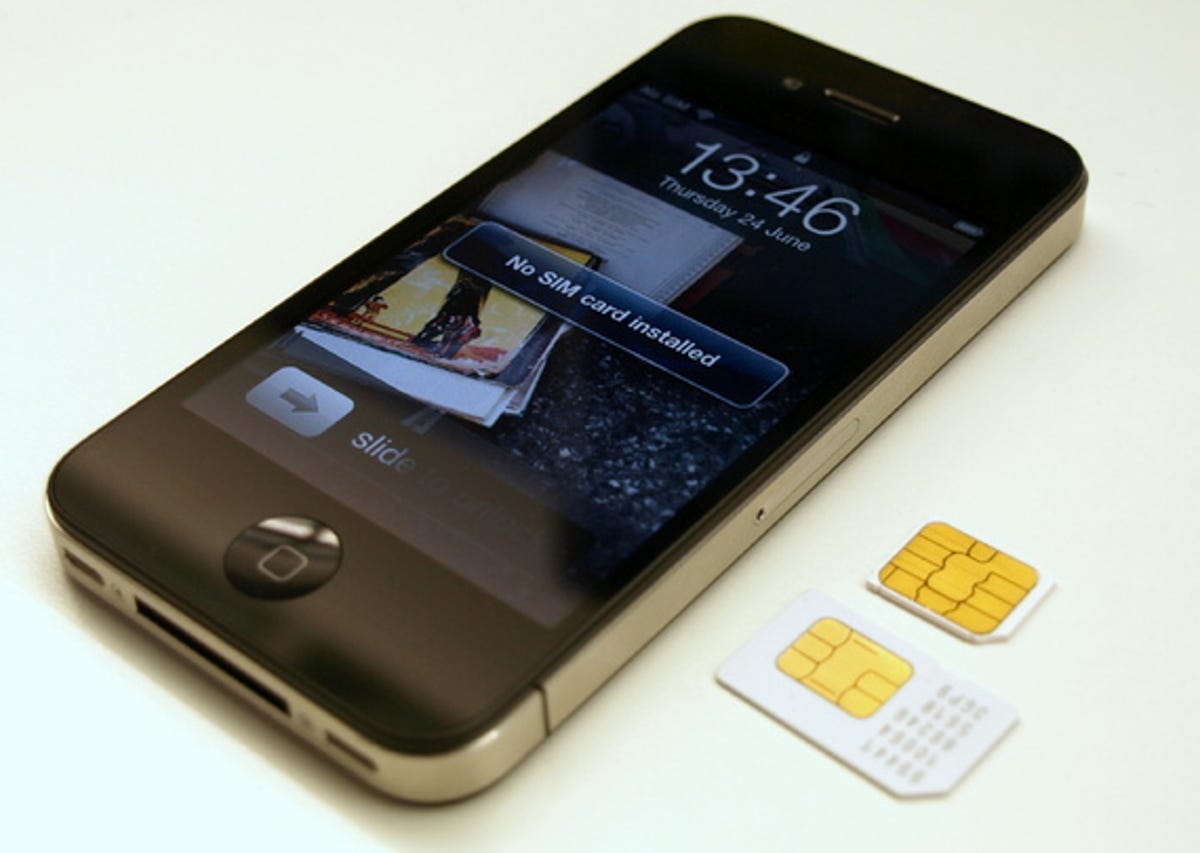
Got yourself an iPhone 4 and iPad and ready for some wondrous Web surfing? You'll need a SIM card -- but hang about; that SIM card slot looks a bit different to anything we've ever seen before...
The new iPhone and iPad require a 3FF subscriber identity module, or micro SIM. A micro SIM is like a standard SIM, only with less plastic around the chip, so turning one into t'other is a simple hack -- literally. Wielding scissors and SIMs, we show you how.
Before we start, we should point out that you trim your SIM at your own risk. We offer no guarantee that your cut-down SIM will work, or that your network will be particularly pleased about it. Right, scissor SIMsters -- enough talking, more hacking.
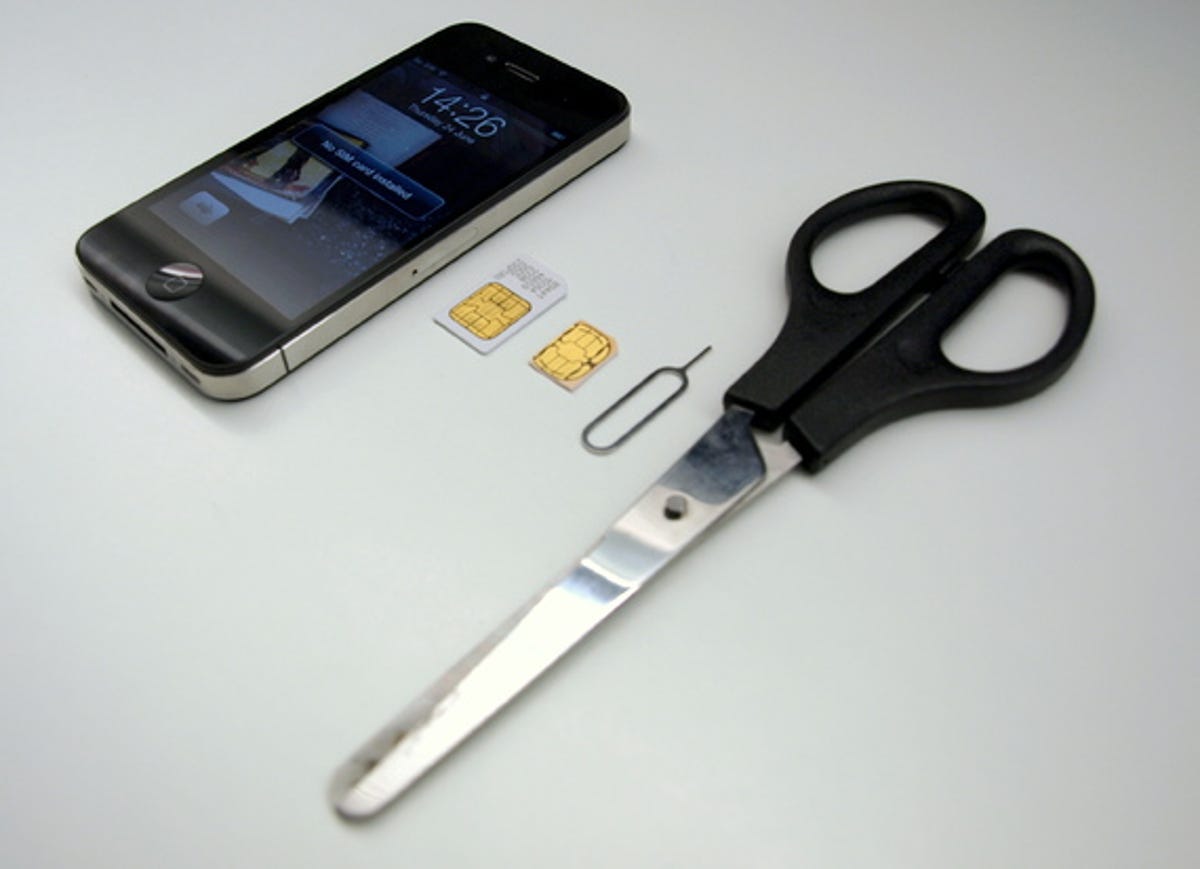
You will need:
-
1x iPhone 4 (unlocked)
- 1x standard SIM card
- 1x pokey-pokey device
- 1x scissors
Step 1: SIMvestigate your iPhone
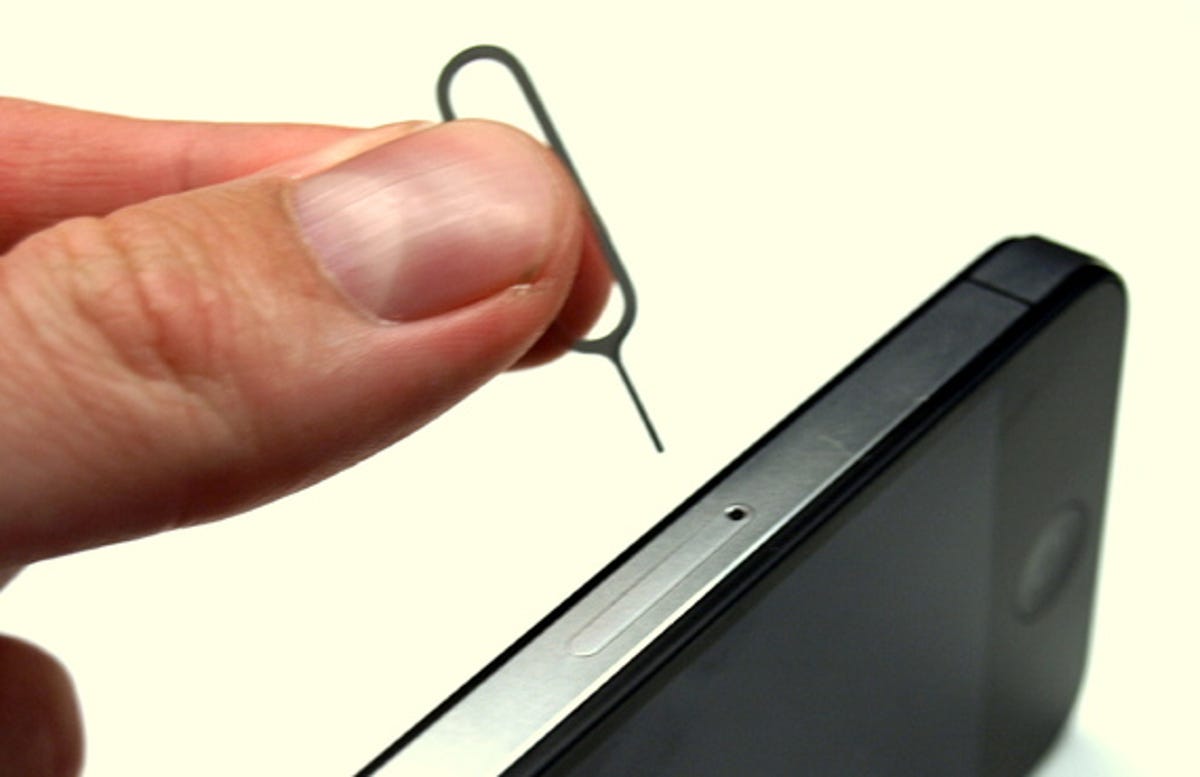
To see where the SIM will live, open up the SIM tray located in the middle of the phone with the pokey-pokey device provided by Apple. A paperclip will do the job when you inevitably lose said pokey-pokey device within a week.

The micro SIM fits in the caddy with the gold chip facing downwards. Note the chamfered corner to make sure the card is inserted the right way round.
Step 2: Compare and contrast
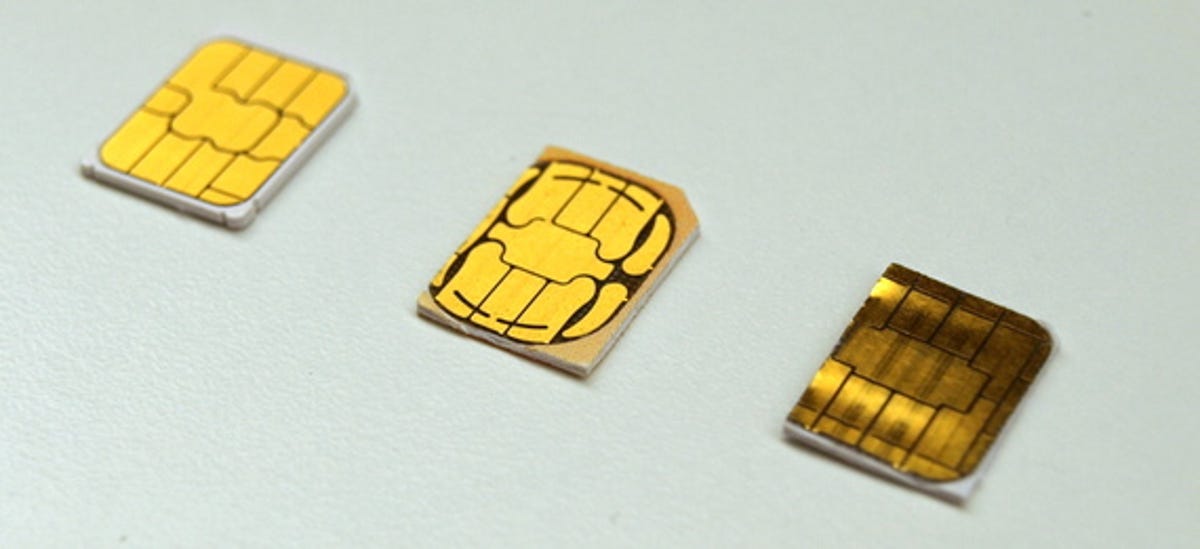
On the left is a kosher micro SIM, in this case provided by Vodafone. The card in the middle is our first go at creating a micro SIM. It's a little small, but works fine. The SIM on the right doesn't work at all, because we cut closely around the chip and it's too small.
Remember: don't just cut away all the plastic, as the chips are different sizes and you need some plastic left or the chip will rattle around in the caddy, and won't work.
Step 3: Hack the SIM

SIM cards aren't hard to cut, so you won't need a Stanley knife, scalpel or chainsaw; a simple pair of scissors will do the job. Your micro SIM should measure 15 by 12mm. Don't wade in and hack too much off at first -- you can always trim the card later, but if it's too small you're in trouble.
Step 4: The result

Ta-dah: one micro SIM. As you can see, we went a bit mad with the scissors and trimmed way too much off. But does it work?
Step 5: The moment of truth
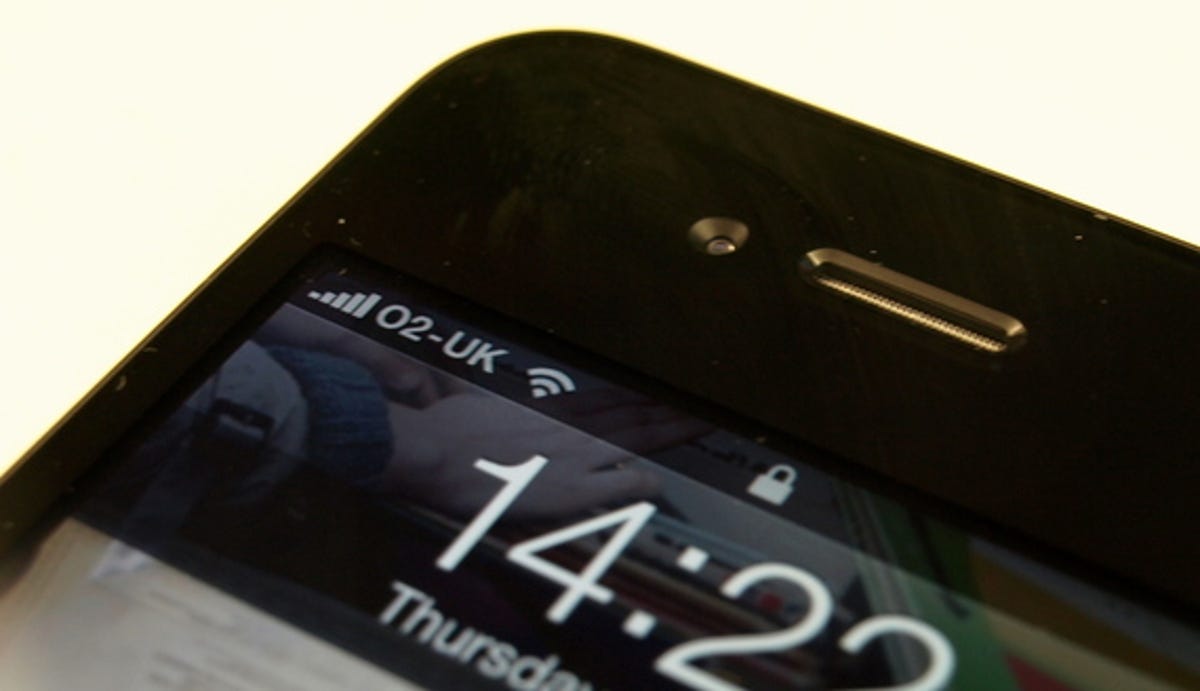
It certainly does! Simply pop your sawn-off SIM into your iPhone and check the top left of the screen. It will either show the network name or you'll get an error message reading "No SIM installed". After making such a ham-fisted mess of our SIM, we were surprised and delighted to discover we now held in our hands one pay as you go iPhone 4.
Remember: measure twice, cut once; always hand over scissors handle first; many a mickle makes a muckle; and don't be scared to ask a responsible adult for help if you're not sure. For more iPhone 4 bodgery-pokery, check out our easy-build signal strength booster. If you go in for a bit of SIM DIY, let us know how you get on in the comments.