How We Test Grills
Testing outdoor grills takes a lot of effort -- but the result is tasty science.


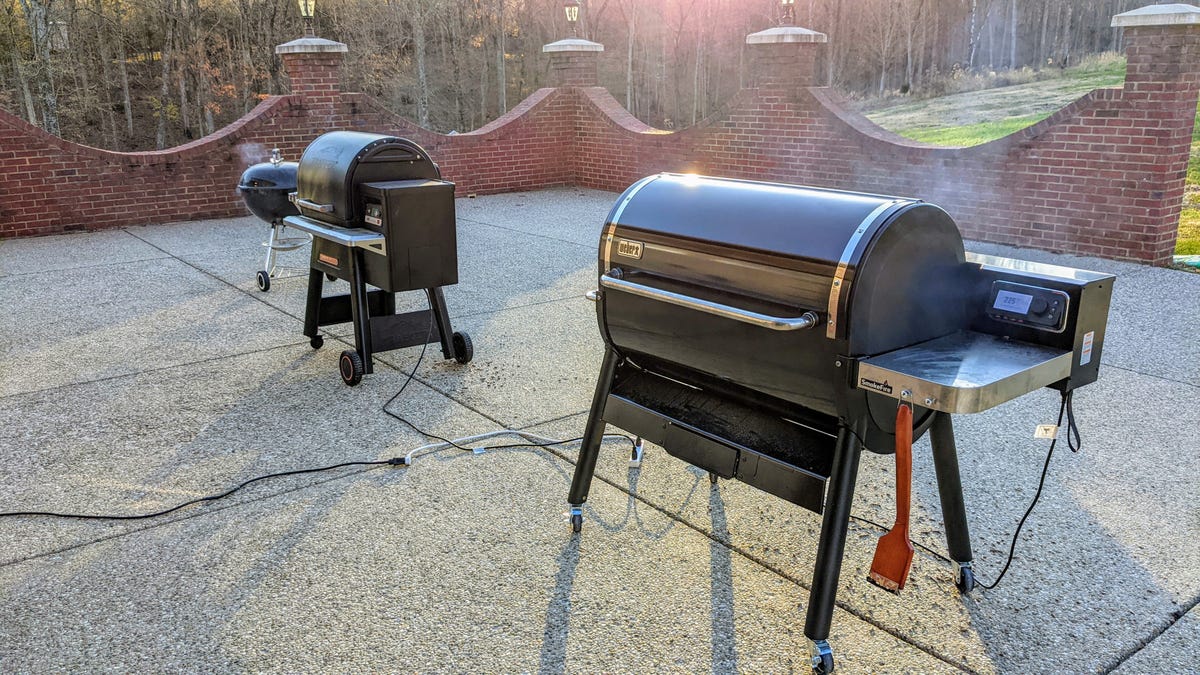

It doesn't take rocket science to figure out just how good (or bad) an outdoor grill is. The process does, however, take effort. For starters, we perform multiple cooking tasks on each grill we get our hands on, and we also conduct these tests at various heat levels. It adds up to hours and hours of cooking (and, yep, lots and lots of blissful taste tests), but in the end, it gives us a great look at the best grills money can buy.
All of that takes a lot of work, but if you're wondering how exactly we test grills here at CNET, the short answer is that we use sensitive thermocouple thermometers linked to a laptop computer running special data-logging software to confirm the temperatures inside as they cook. That approach allows us to record temperature readings in real time -- and the way those temperatures fluctuate is key to understanding how consistently a given grill will produce outstanding results.
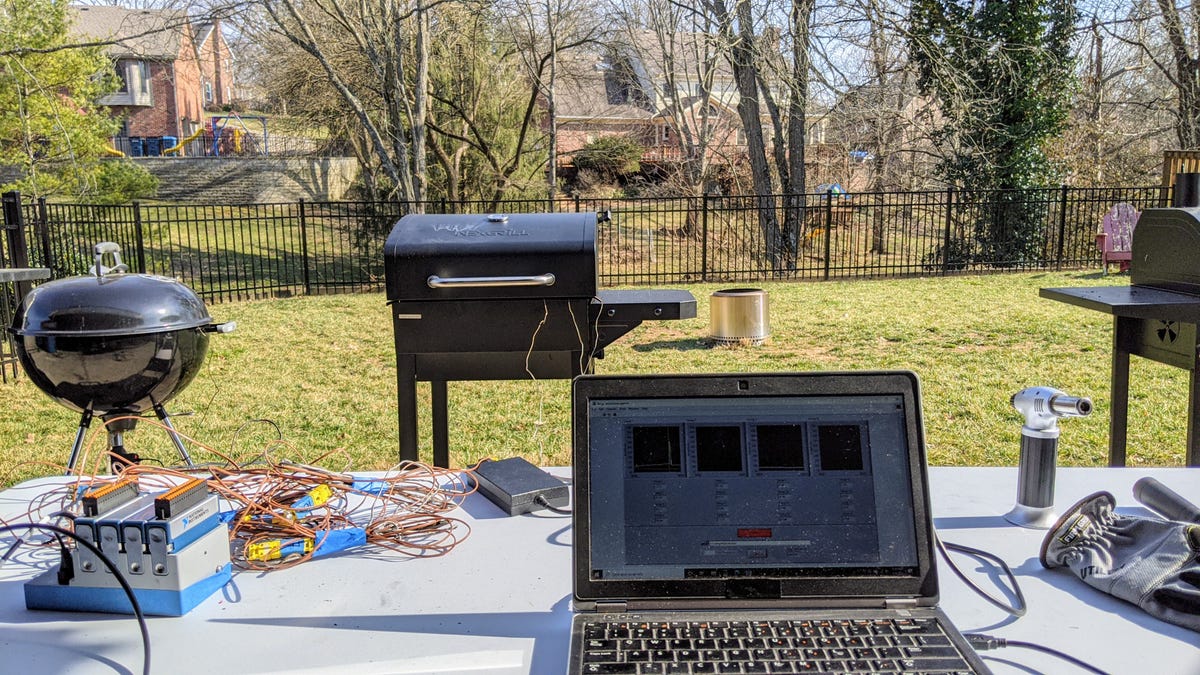

We use thermocouples linked to computer software to measure internal grill temperatures.
We test the grills with different types of food, too. And we adjust the test procedure to match the type of fuel a grill burns. After all's said and done, we have a solid assessment of how well a grill performs under a wide range of conditions, and that's where our buying recommendations come from.
Hungry for more details? Keep reading and I'll walk you through the sweet, smoky specifics.
Ribs
Cooking low and slow at precise temperatures is critical to good barbecue. And pork ribs are classic barbecue fare. So we crank through an awful lot of test ribs whenever we've got new grills to review.
Ideally, a grill will easily hum along at 225 Fahrenheit (or as close to it as possible) for hours on end. Wood pellet grills typically have digital displays and can be set to run at specific temperatures. For these cookers we just select the grill temp and observe what happens -- the best of the bunch stay true to target and produce outstanding, mouthwatering results.
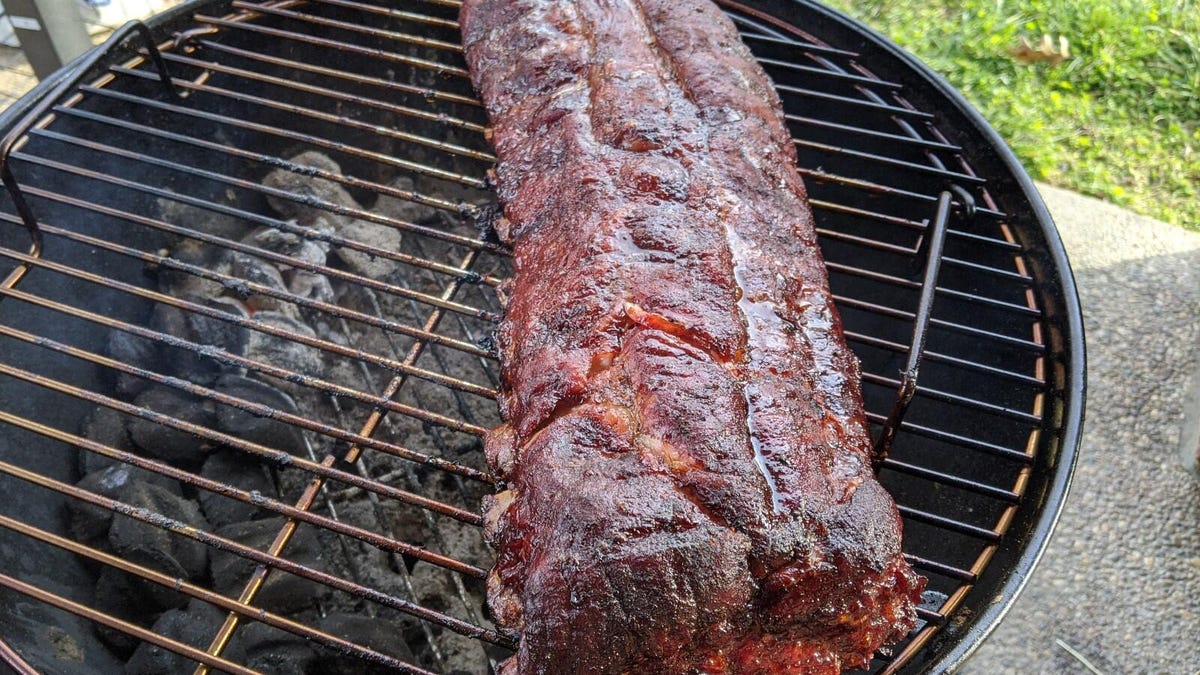

Cooking pork ribs low and slow is perfect way to measure a grill's temperature control.
However, most gas grills don't regulate their cooking temperatures automatically. Instead, you have to do it manually by operating multiple burner dials. For these grills, we ignite burners on one side of the grill only. Depending on the grill size, that could mean leaving one or two burners off completely.
Next we dial the lit burners down to their low heat setting. From there, we preheat the grill for 10 minutes and measure how long it takes to reach 225 F.

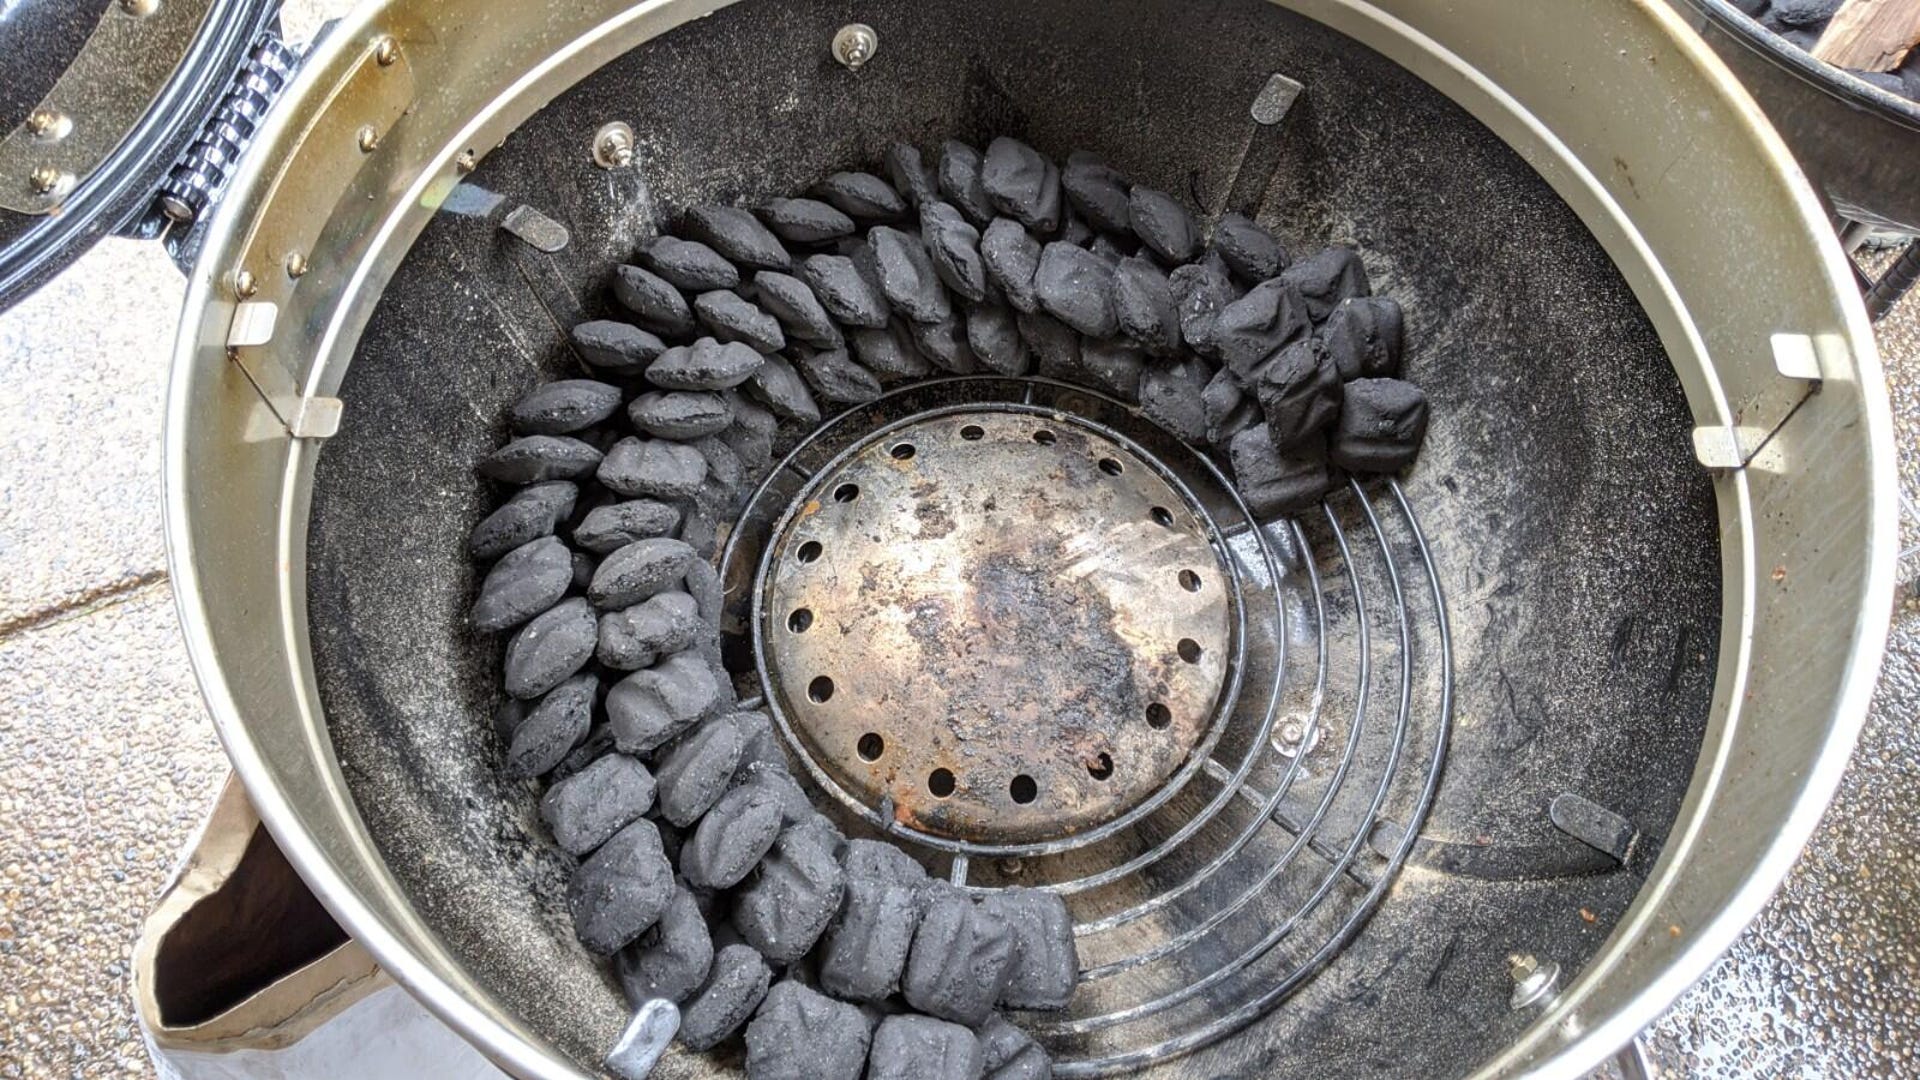
This is the arrangement of coals for the charcoal snake method.
For charcoal grills we use the tried-and-true charcoal snake method. This calls for arranging coals in a semicircle around the grill's inner wall. The charcoal briquettes (Kingsford Blue) form a line two coals wide and two coals deep. We also drop a few chunks of smokewood on top of the snake (aka fuse). On cart-style grills, we modify the snake to run in right angles to match their rectangular-shaped fireboxes.

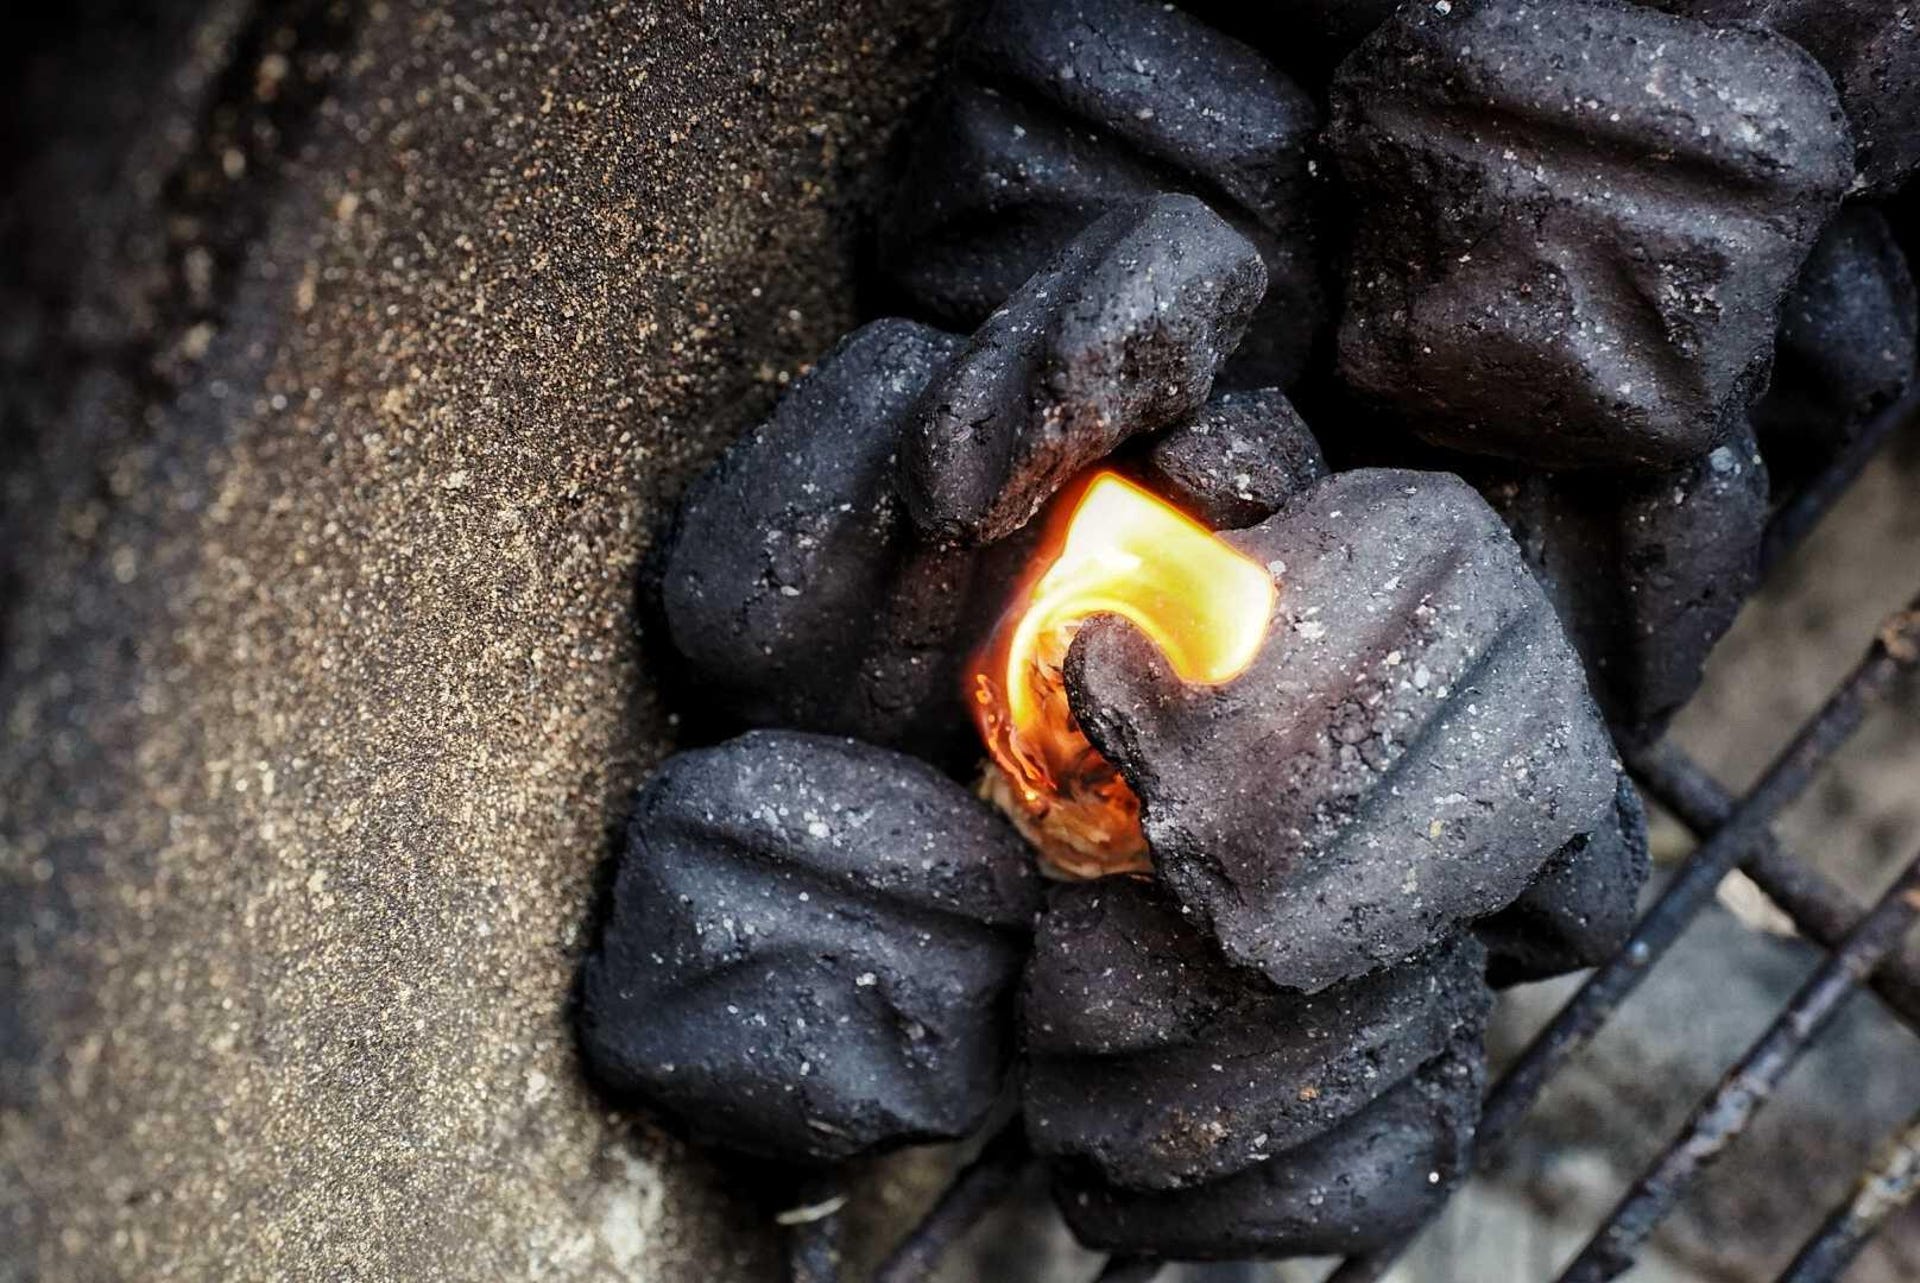
Light one end of the snake so it'll burn like a fuse, low and slow.
Next, we light each grill's snake at one end of the chain with five lit briquettes (tumbleweed fire starters work, too). We set all air vents on each grill (top and bottom) to the halfway-open position.
Lastly, we remove the outer membrane on a rack of pork back ribs and season it with an all-purpose rub we use for ribs and chicken. Then, the ribs are placed on the grates for indirect cooking, which means not right over burning coals or a lit gas burner. There our rack will sit for at least 3 hours with the lid closed the entire time.

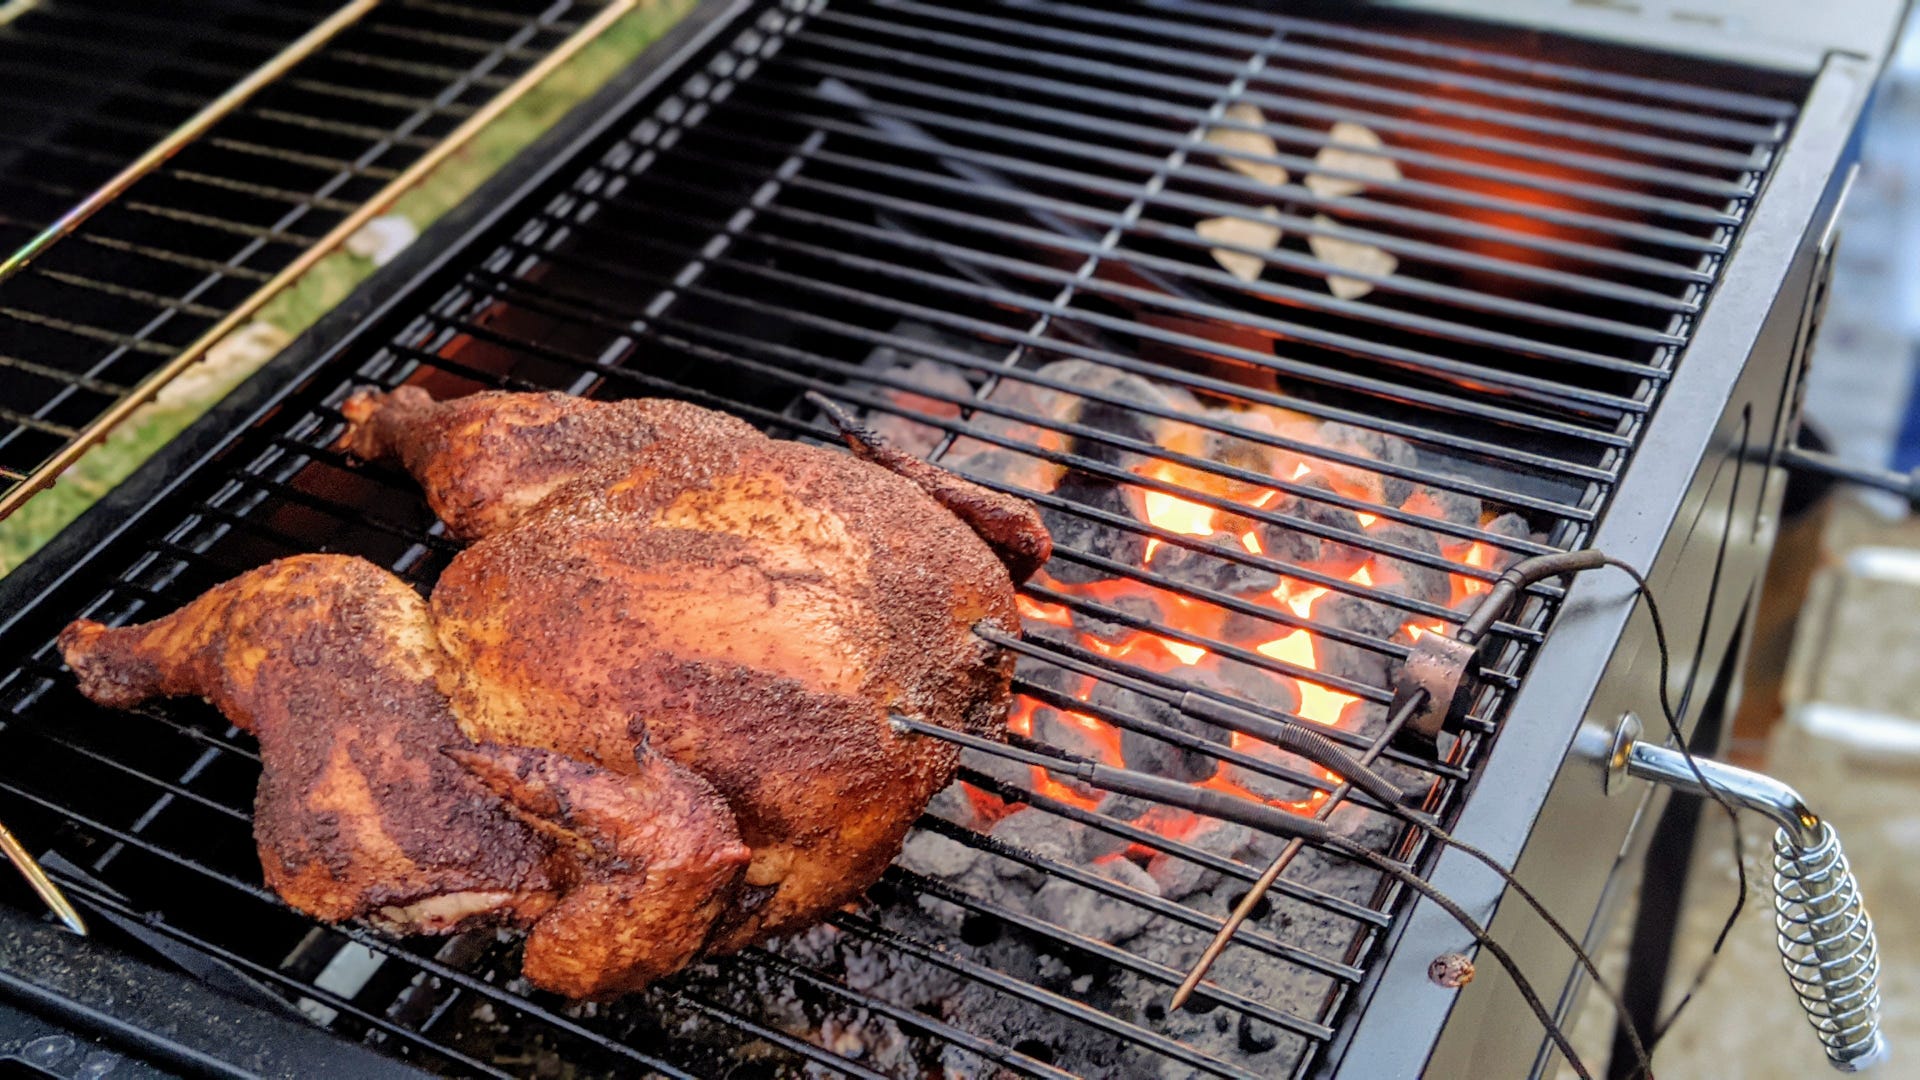
For our chicken grill test we roast a whole chicken using indirect heat.
Chicken
Roasting a whole chicken is an excellent way to see how a grill handles medium, indirect heat. For pellet grills we punch in a temperature of 400 degrees Fahrenheit and allow a preheating time of 10 minutes. When we set this test up on a basic gas grill, the procedure is slightly different.
As when we test ribs, the first step is to ignite burners on only one side of the grill. Next we dial the lit burners to medium and preheat for 10 minutes. Again, the ideal temperature to aim for is 400 F.
For charcoal grills, we begin by filling a standard chimney starter with charcoal briquettes. That's about 100 coals. Next we place the chimney over a lit fire starter. After 15 minutes or so, the coals in the chimney starter should be fully ignited. Then we pour the hot briquettes into the grill and push them to one side. This will leave the opposite side of the grill coal-free.
Unless we're dealing with a pellet grill, we make sure to cook our chicken in indirect heat. Again, that means that the food isn't sitting directly over the charcoal or the lit gas burner. With pellet grills, the cooking is indirect by design. That's because they burn their pellets inside metal, heat-shielded fire boxes.
Now that's a lovely-looking roast chicken.
To keep things fair, we strive to use chickens in the 5.5- to 6-pound range. A quality grill usually completes cooking a chicken this size in 1 hour and 30 minutes or less. We consider a chicken done when both right and left sides of the breast hit 160 F.
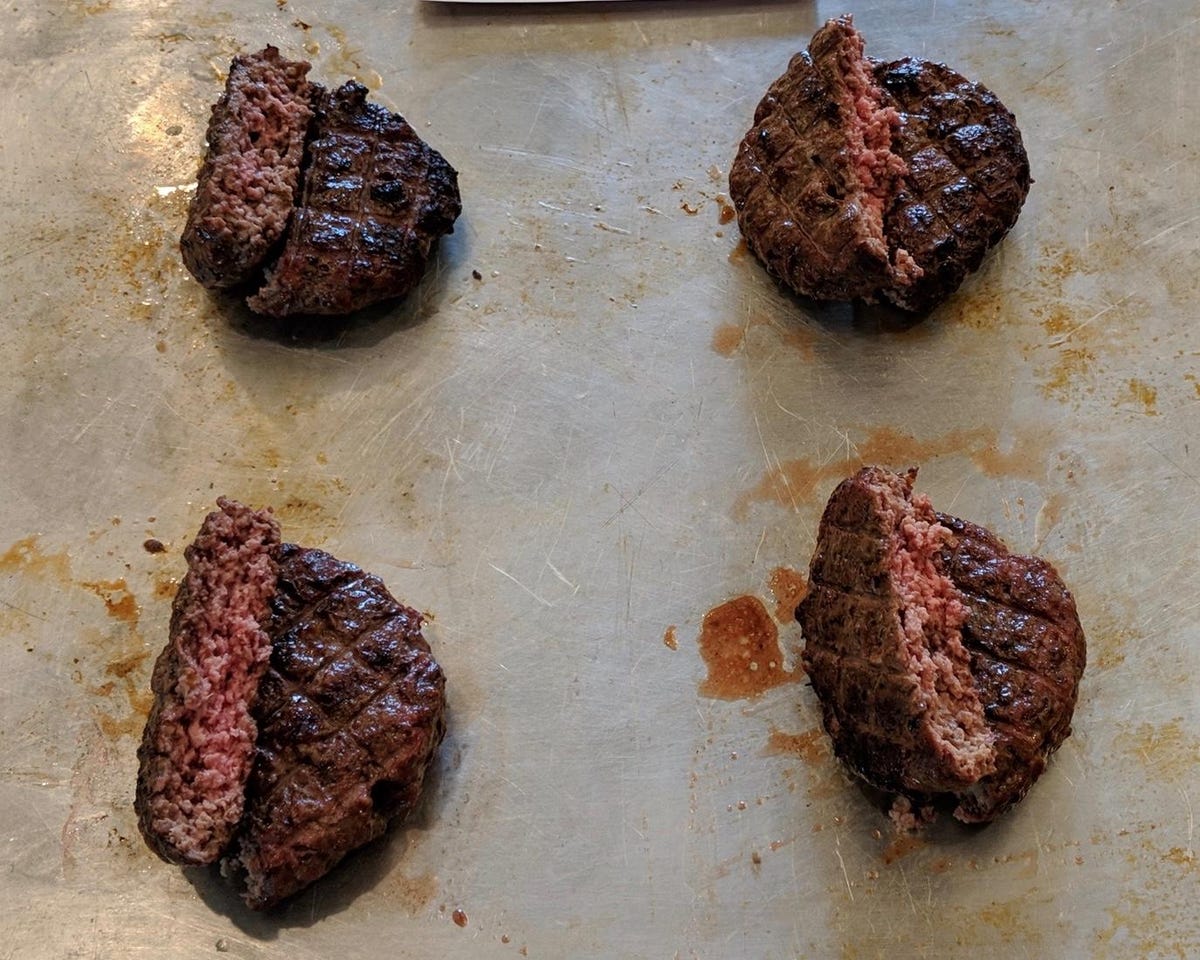

We sear meat in our high-heat grill tests.
Burgers and steak
Our high-heat grill test is all about searing meat fast. For this test we either use hamburger patties or rib-eye beef steaks. Some gas grills, like some Weber models for instance, have special sear areas designed for maximum heat output. Regardless, when testing gas models we ignite all burners on high and preheat the grill for 10 minutes.
Next we measure out 5.3-ounce portions of 80/20 ground beef and form them into patties. Then we insert thermocouple probes into the center of each patty. One the grill is hot, we cook the patties (lid closed) for 6 minutes, then flip them over. The burgers continue cooking until their internal temperatures hit 145 F.
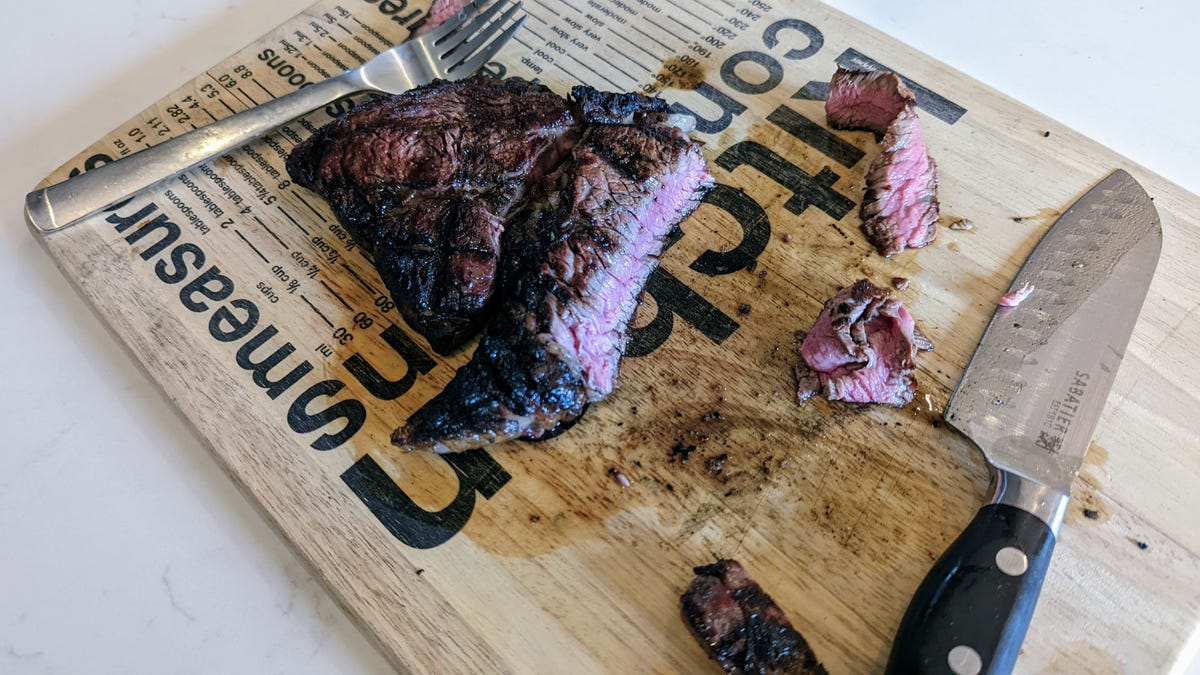

A nicely grilled steak should have a noticeable sear outside and a lovely pink interior.
The procedure for pellet grills is the same. The only difference is that we set them at the highest available temperature.
A little more thought goes into sear-testing with charcoal grills. Essentially, we do a little math and use an exact number of briquettes proportional to each grill's unique cooking area. We also cook our test rib-eyes for 5 minutes per side.
At the end of the day, though, we're looking for the same thing from both tests: a nicely seared outside crust and a juicy pinkish interior.
Be wary of hood thermometers
Here's a quick last note about hood and lid thermometers. In our experience, most are inaccurate -- some wildly so. That's why we take note of any discrepancies between what a grill's thermometer says and what our thermocouples at grill height report.
We also use each grill's built-in thermometer (if available) to regulate heat levels, as home cooks would. This way, if something goes wrong, like extra-long cooking times or burnt burgers, we'll know why.
All of that work gives us a great look at which grills are most worth the money, and plenty of meaty insights to share throughout grilling season and beyond. You'll find all of that advice curated on our regularly updated list of the best grills we've tested, so make sure to give it a read the next time you're thinking of buying a new grill.