How to use iPhoto to share on Facebook
iPhoto '11 features tight integration with Facebook. This tutorial explains how to use iPhoto's Facebook features.


iPhoto '11 introduced more tightly integrated Facebook features. No longer do you need to export photos from iPhoto to your desktop, and then go to your Facebook page to upload them. Directly from iPhoto '11, you can publish photos or videos to your wall, as an album on Facebook, or as your profile picture. And from iPhoto, not only can you easily see which photos you've shared on Facebook, but you can also edit how they are shared or delete them.

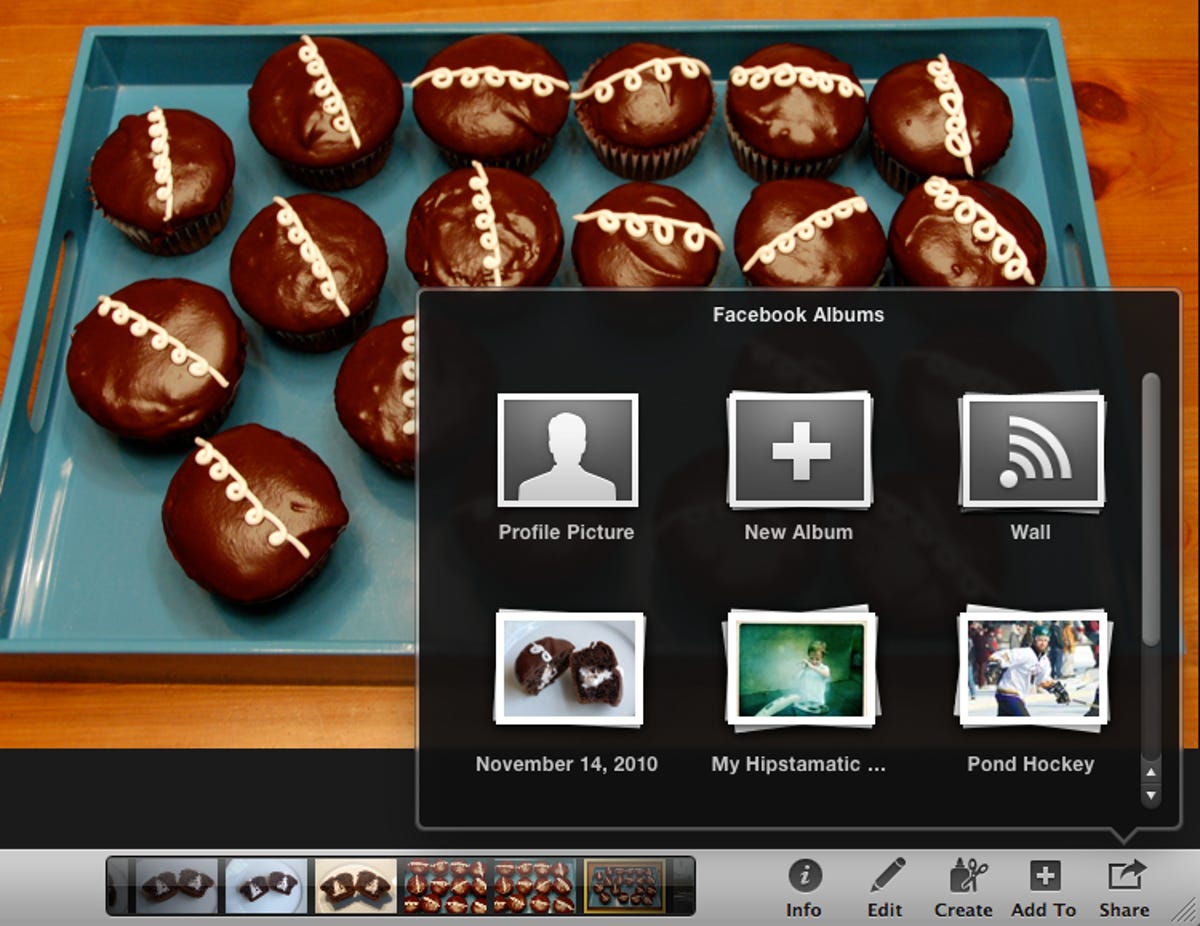
To share photos or videos on Facebook directly from iPhoto, first highlight the files you'd like to share. Then from the top menu or from the row of icons in the lower-right corner of iPhoto, choose Share and Facebook. The first time you attempt to upload a photo to Facebook, you will be asked for your log-in info.
You can then choose to create a new album or add the photo(s) to an existing Facebook album, just post it on your wall and not as part of an album, or make it your profile picture. If you add photos to a new or existing album, the photo will show up on your wall and your news feed (without the existing images in the album). And if you post to your wall without creating or adding to an album, you can add a comment to the photo before publishing.
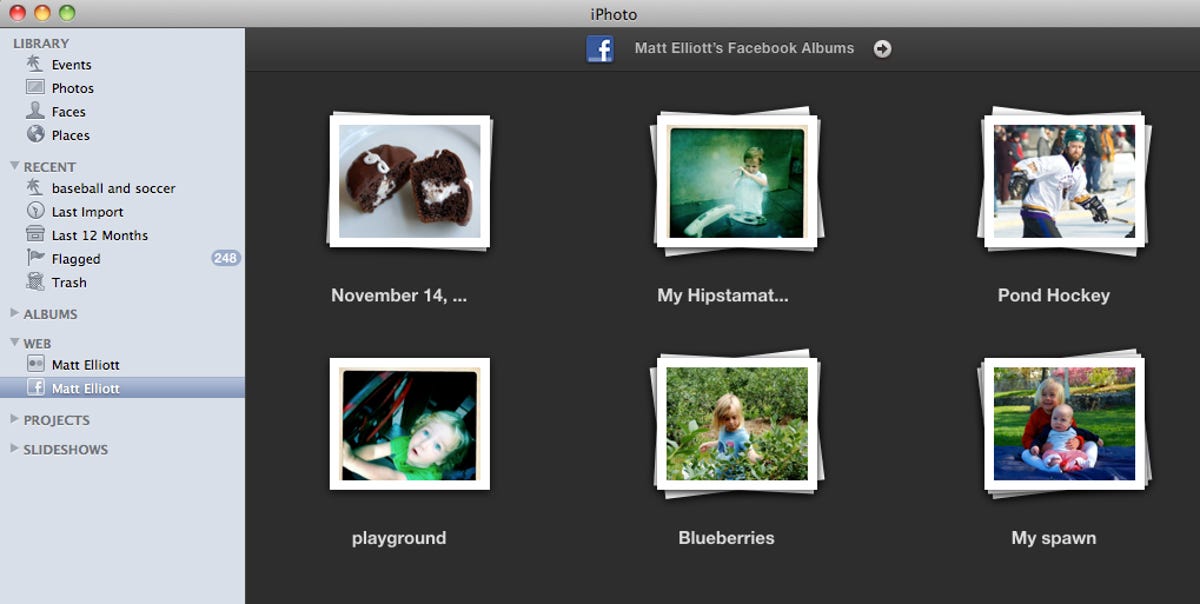
You can keep track of which photos and videos you've shared on Facebook right in iPhoto. In the left-hand column, under the header titled Web, you'll see icons for online albums for such sites as MobileMe, Facebook, and Flickr (depending on which you've set up). Click on Facebook, and iPhoto will display a thumbnail for each of your Facebook albums. This page, however, does not show your profile pictures, photos you posted on your wall that aren't in an album, or any photos uploaded from a mobile device.
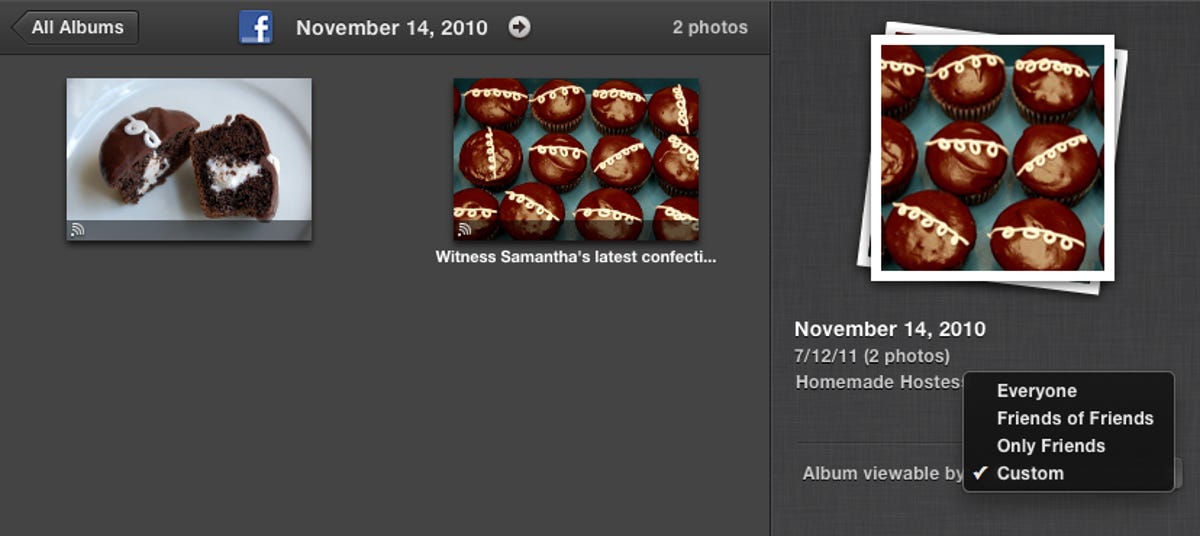
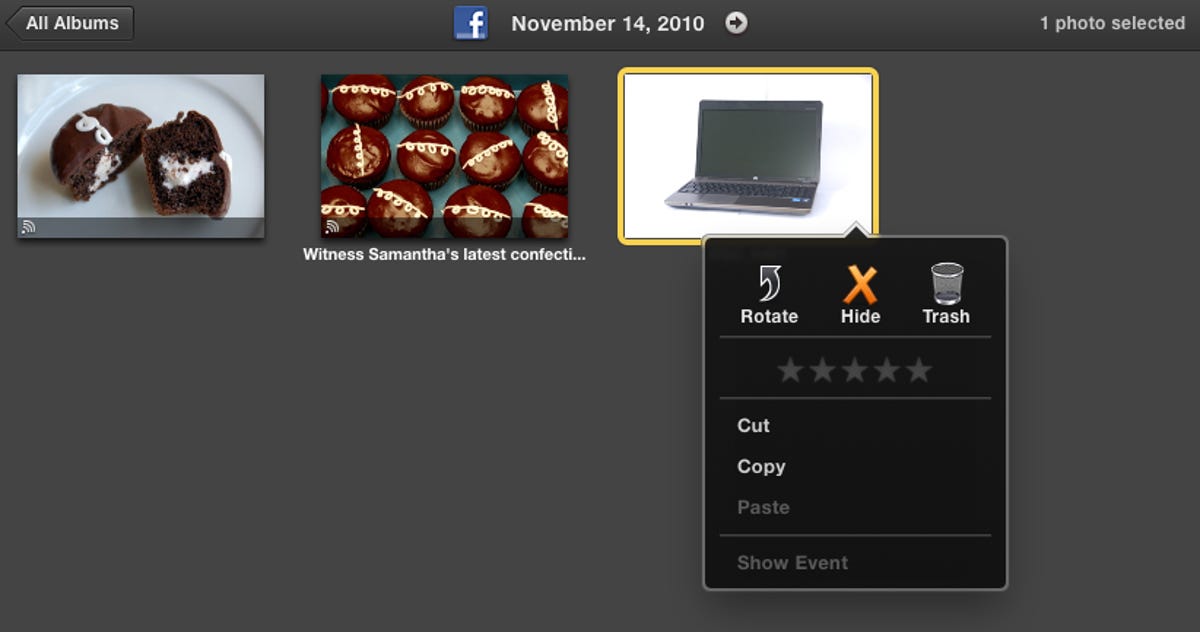
From this list of Facebook albums in iPhoto, you can choose how a photo is shared on Facebook, or you can delete a photo or an entire album from Facebook. Photos you delete from Facebook will remain in your iPhoto library if they've already been imported. For other photos on Facebook, you can choose to import them to iPhoto before deleting them from Facebook, otherwise they will be placed in iPhoto's trash. To delete a photo, click on the arrow in the lower-right corner of the thumbnail and choose Trash (or use the keyboard shortcut command-delete). To delete an entire album, right click on the album and choose Trash (or highlight the album and hit command-delete).
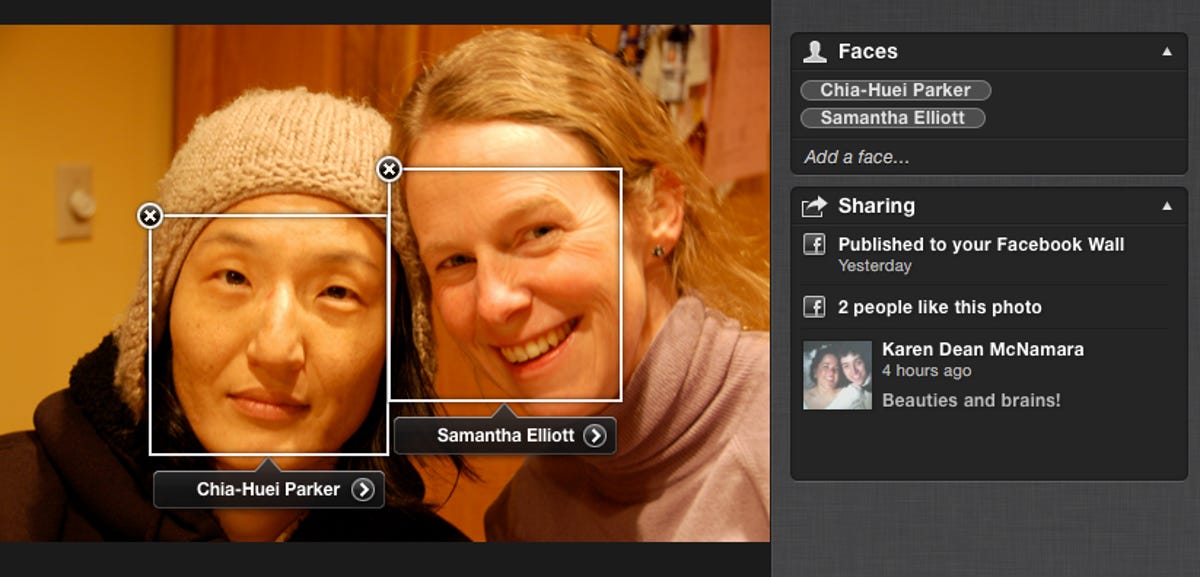
If you click on a photo in iPhoto that you've shared on Facebook and hit the Info button in the lower-right corner of iPhoto, you'll see a section titled Sharing. It displays the date you posted the photo and any likes or comments it received on Facebook.
Lastly, iPhoto's Faces feature syncs with Facebook's tagging feature. If you add names to a photo in iPhoto and upload it to Facebook, the photo will be uploaded with tags in Facebook. After you set up your Facebook account in iPhoto, when you go to name a face in a photo, names of your Facebook friends will appear as suggestions as you type.