How to set up two-step verification for your Apple ID
Enabling two-step authentication for an Apple ID is something everyone should do. Right now.


Your Apple ID holds payment details and personal information in the form of photos and iMessages, so it only makes sense you secure it using two-step authentication.
Two-step verification (or authentication as it's commonly referred to) adds an additional barrier of security between would-be hackers and your account. The extra barrier comes in the form of a four-digit code, which will be sent to a device of your choosing, after you've entered your password.

Step one: To add the extra layer of security to your account you'll need to visit the Apple ID settings page on your computer and click on "Manage your Apple ID." Log in to the account for which you wish to enable two-step verification.

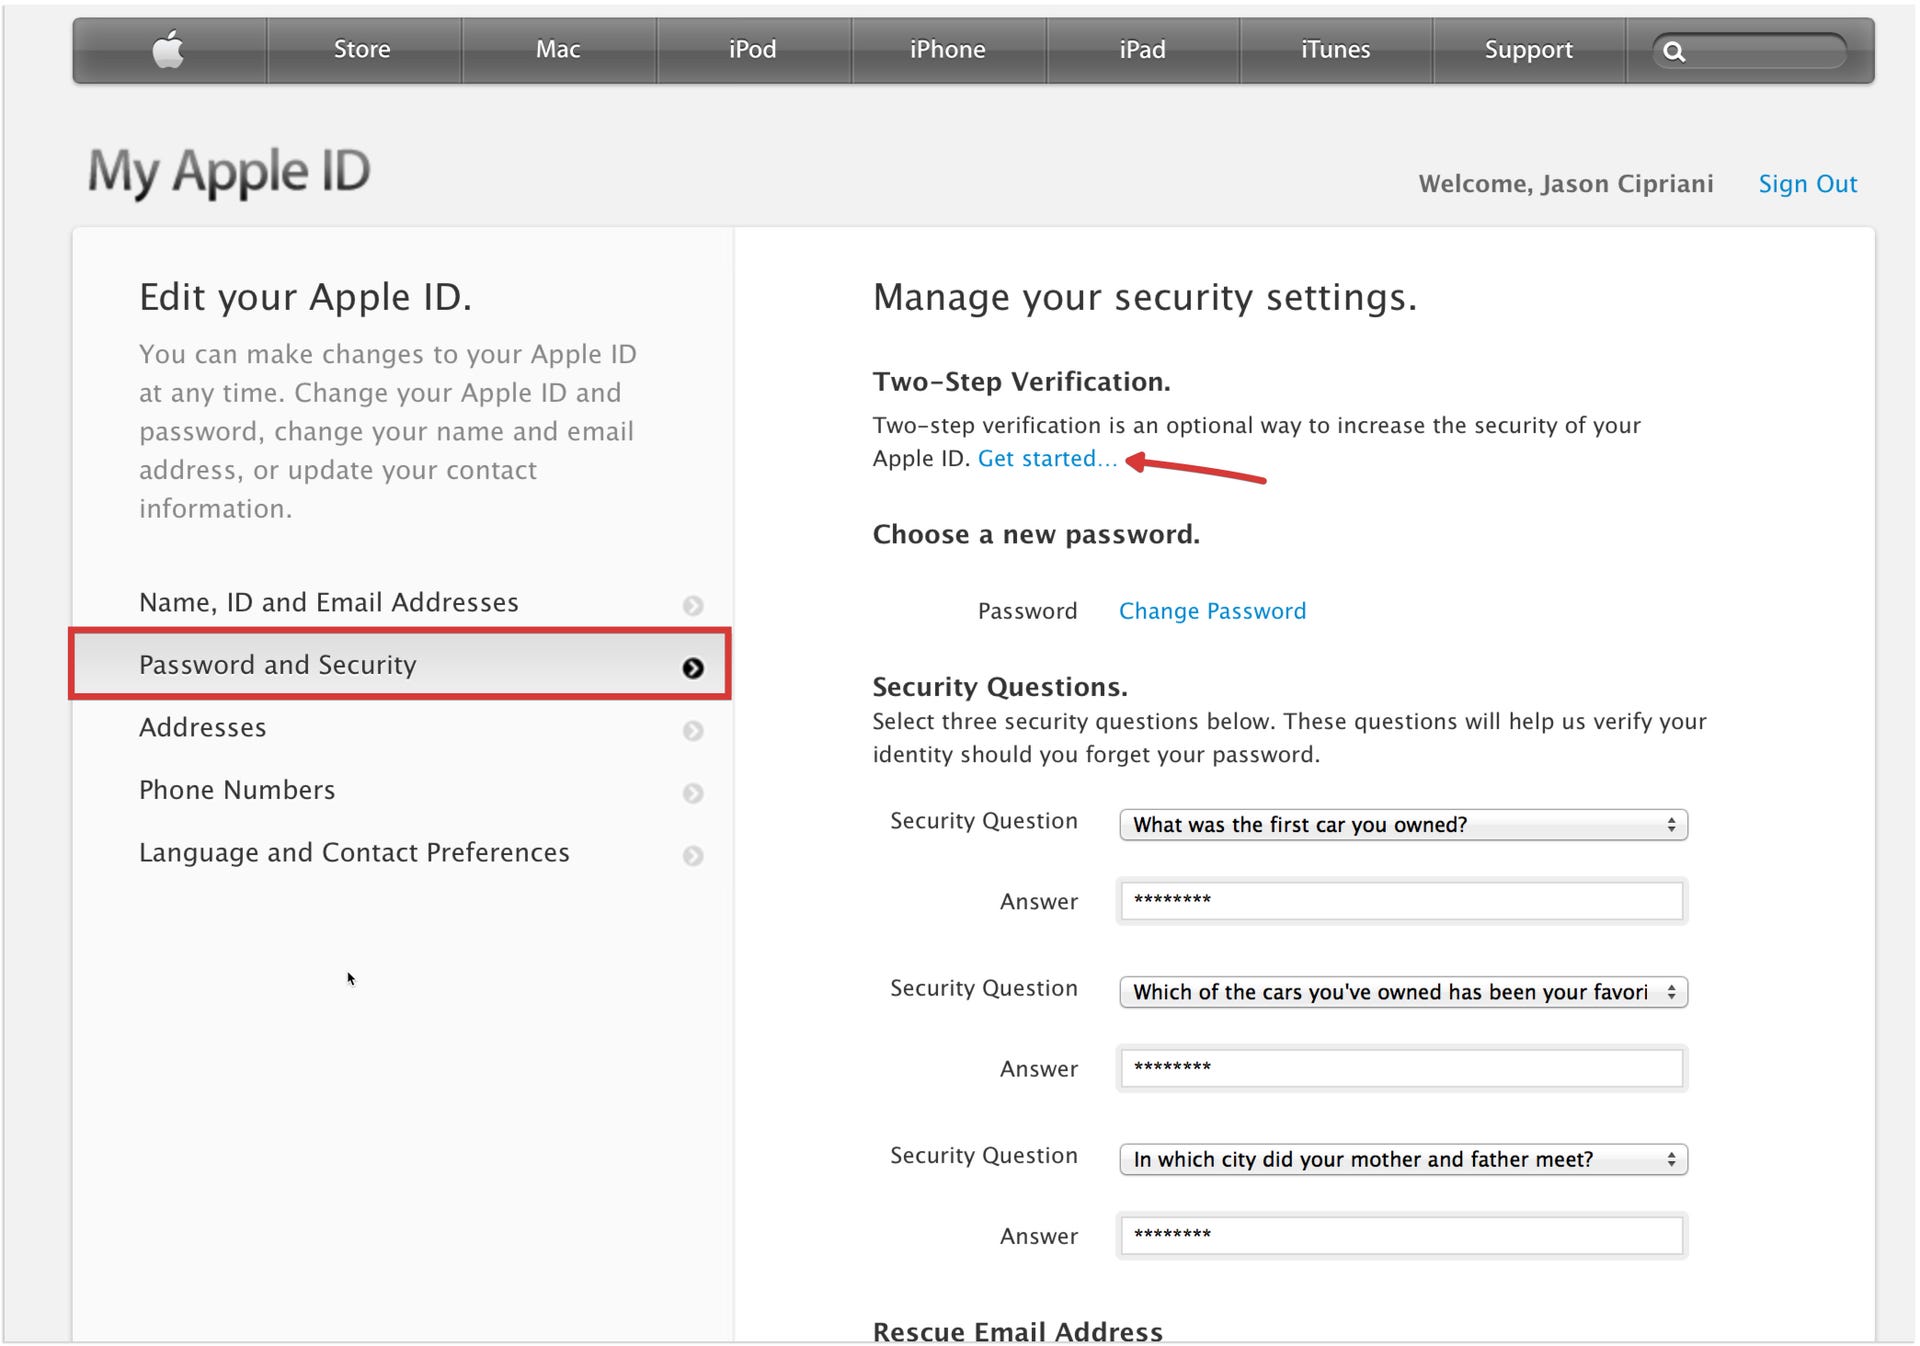
Step two: Click on the "Password and Security" option on the left side of the screen. Then you should see a "get started" link to enable two-step verification for your account. You've probably already clicked on the link, but just in case you haven't, go ahead -- click on it.

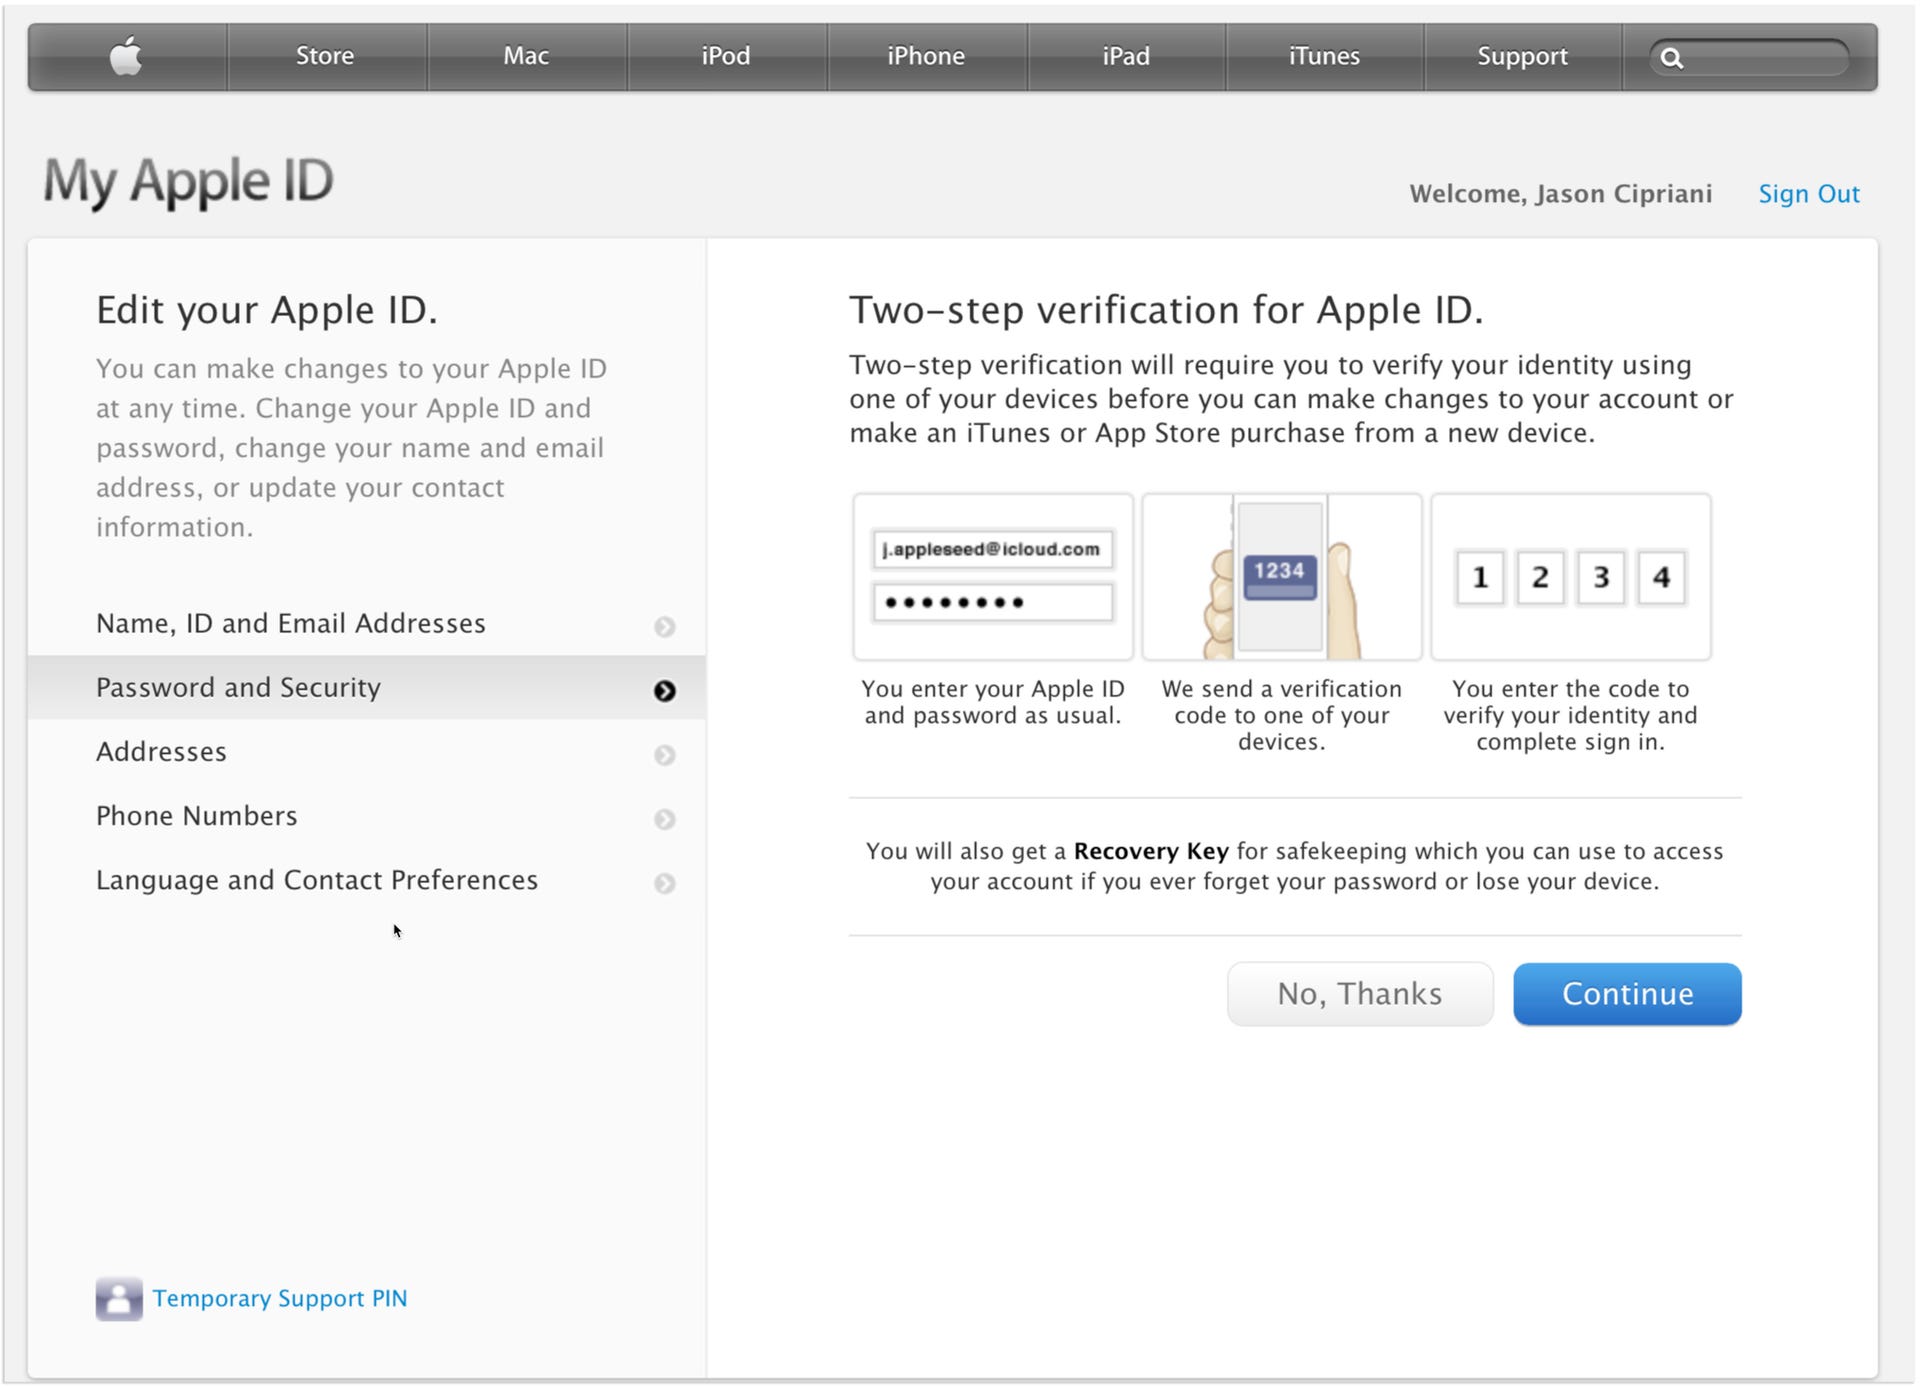
Step three: After clicking on the link, Apple will take you through a couple of pages explaining exactly what two-step verification means to you and your account. Some things to note:
- Your security questions will no longer exist.
- You will be the only person able to request a password reset.
- You need to keep your Recovery Key in a safe place.
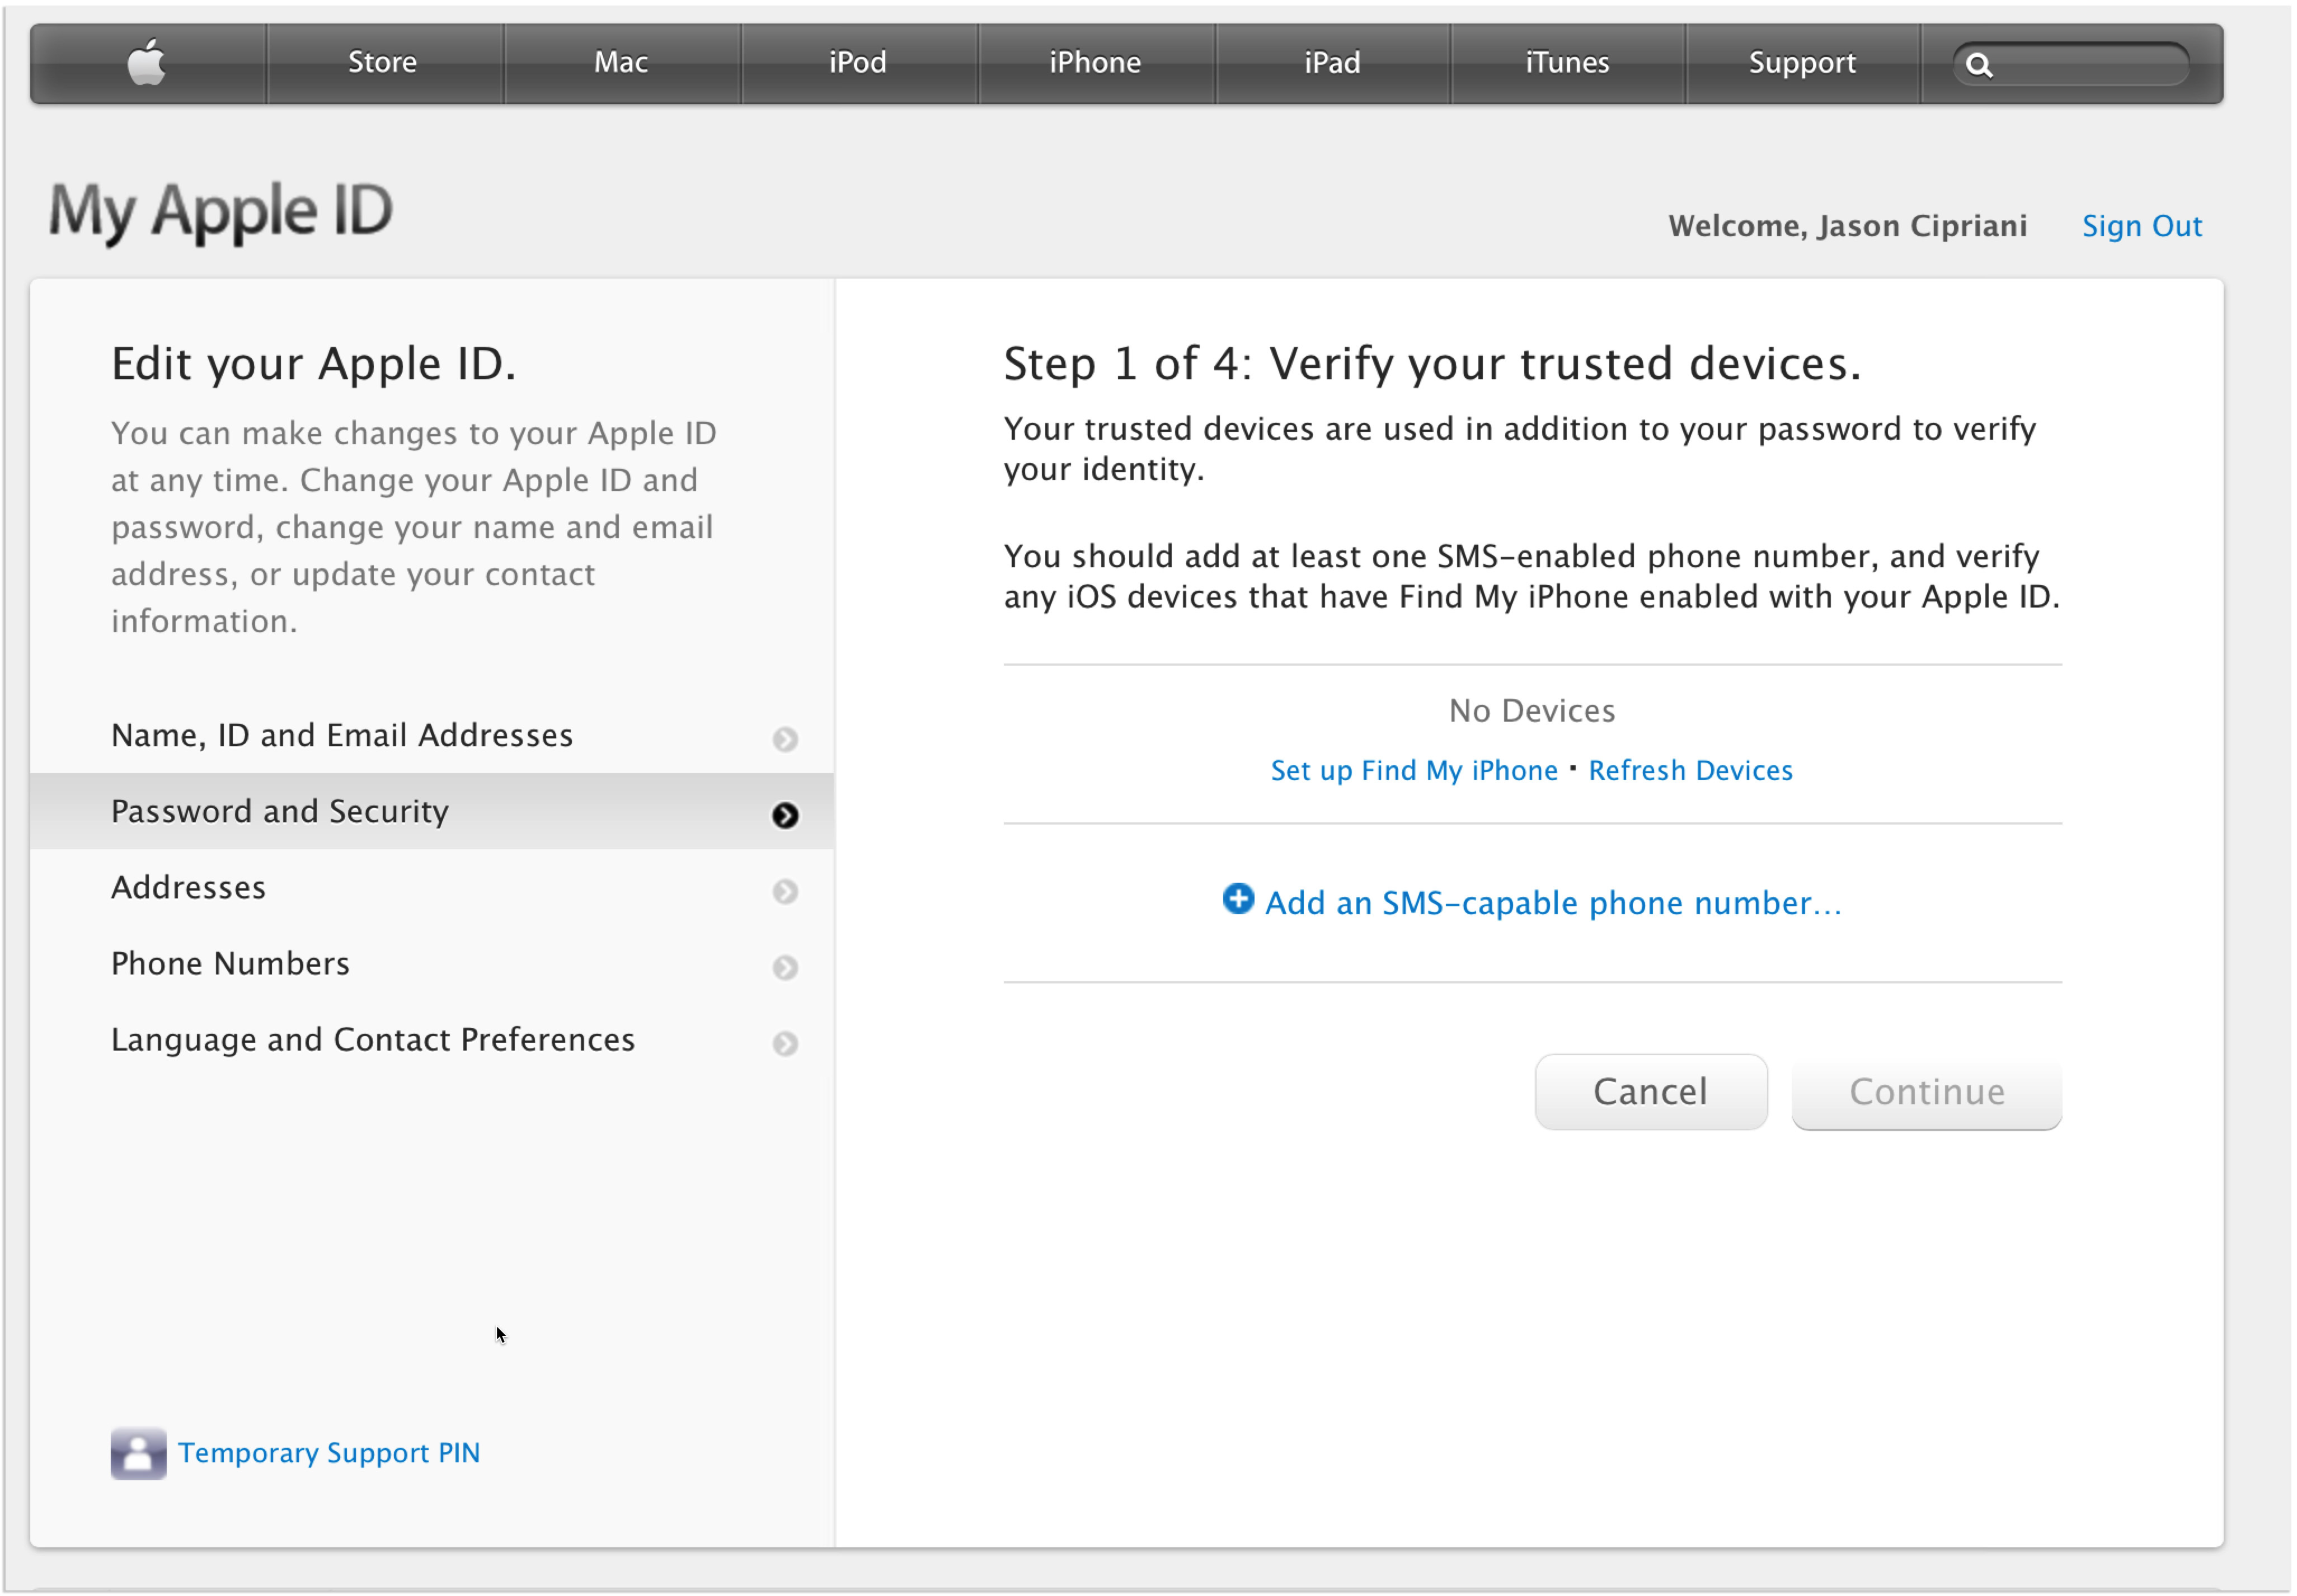

Step four: Once you acknowledge you've read through the guidelines, you'll need to add a device (or devices) to your account, granting permission to receive the four-digit code required to gain access to your account. If you use one Apple ID for App Store purchases, and another to access iCloud services, you'll need to set up the App Store account to be SMS only. The iCloud-only account will be able to use both Find My iPhone and SMS to receive the four-digit code. Thankfully, you can link the same phone number to more than one Apple ID.
Step five: You'll then be given your Recovery Key. This is a key piece of information when it comes to keeping your account secure. Write it down, print it out, and take a screenshot of it to ensure you don't misplace it. Should you ever forget your password, or lose a registered device, your Recovery Key will grant you access to your account.
To drive home how important it is you write the key down and store it somewhere safe, after showing you your Recovery Key, Apple makes you type it in to verify you have the right key recorded. And no, you can't copy and paste the key from the previous step.


Step six: The final step of the process is once again agreeing to the implications of enabling two-step verification on your account.
Should you ever sell, replace, or lose one of your registered devices, make sure to visit this page to remove it as soon as possible.
The process only takes a few minutes of your time and is worth setting up. The additional layer of security all but eliminates any risk you have of your account being compromised. Should you have any questions about Apple's two-step verification, be sure to look over its FAQ page. Or if you're looking to enable the same service on your Google account, you can follow the step in Matt Elliot's post here.
This post was originally published March 21, 2013, and has been updated.